


Nytro
-
Posts
18795 -
Joined
-
Last visited
-
Days Won
743
Everything posted by Nytro
-
Facui update si la IPBoard si la tema dar se pare ca problemele persista, nu am idee de ce si nici nu am timp sa investighez
-
Noroc si bine ai revenit, desi nu mai suntem foarte activi suntem inca aici la datorie.
-
 35,000 code repos not hacked—but clones flood GitHub to serve malware By Ax Sharma August 3, 2022 Thousands of GitHub repositories were forked (copied) with their clones altered to include malware, a software engineer discovered today. While cloning open source repositories is a common development practice and even encouraged among developers, this case involves threat actors creating copies of legitimate projects but tainting these with malicious code to target unsuspecting developers with their malicious clones. GitHub has purged most of the malicious repositories after receiving the engineer's report. 35,000 GitHub projects not hijacked Today, software developer Stephen Lacy left everyone baffled when he claimed having discovered a "widespread malware attack" on GitHub affecting some 35,000 software repositories. Contrary to what the original tweet seems to suggest, however, "35,000 projects" on GitHub have not been affected or compromised in any manner. Rather, the thousands of backdoored projects are copies (forks or clones) of legitimate projects purportedly made by threat actors to push malware. Official projects like crypto, golang, python, js, bash, docker, k8s, remain unaffected. But, that is not to say, the finding is unimportant, as explained in the following sections. Software engineer Stephen Lacy first publicized the finding (Twitter) While reviewing an open source project Lacy had "found off a google search," the engineer noticed the following URL in the code that he shared on Twitter: hxxp://ovz1.j19544519.pr46m.vps.myjino[.]ru BleepingComputer, like many, observed that when searching GitHub for this URL, there were 35,000+ search results showing files containing the malicious URL. Therefore, the figure represents the number of suspicious files rather than infected repositories: GitHub search results for malicious URL reveal over 35,000 files (BleepingComputer) We further discovered, out of the 35,788 code results, more than 13,000 search results were from a single repository called 'redhat-operator-ecosystem.' This repository, seen by BleepingComputer this morning, appears to have now been removed from GitHub, and shows a 404 (Not Found) error. The engineer has since issued corrections and clarifications [1, 2] to his original tweet. Malicious clones equip attackers with remote access Developer James Tucker pointed out that cloned repositories containing the malicious URL not only exfiltrated a user's environment variables but additionally contained a one-line backdoor. Cloned repositories altered with malware contain backdoor (BleepingComputer) Exfiltration of environment variables by itself can provide threat actors with vital secrets such as your API keys, tokens, Amazon AWS credentials, and crypto keys, where applicable. But, the single-line instruction (line 241 above) further allows remote attackers to execute arbitrary code on systems of all those who install and run these malicious clones. Unclear timeline As far as the timeline of this activity goes, we observed deviating results. The vast majority of forked repositories were altered with the malicious code sometime within the last month—with results ranging from six to thirteen days to twenty days ago. However, we did observe some repositories with malicious commits dated as far back as 2015. Malicious commit made 13 days ago in one of the clones (BleepingComputer) The most recent commits containing the malicious URL made to GitHub today are mostly from defenders, including threat intel analyst Florian Roth who has provided Sigma rules for detecting the malicious code in your environment. Ironically, some GitHub users began erroneously reporting Sigma's GitHub repo, maintained by Roth, as malicious on seeing the presence of malicious strings (for use by defenders) inside Sigma rules. GitHub has removed the malicious clones from its platform as of a few hours ago, BleepingComputer can observe. As a best practice, remember to consume software from the official project repos and watch out for potential typosquats or repository forks/clones that may appear identical to the original project but hide malware. This can become more difficult to spot as cloned repositories may continue to retain code commits with usernames and email addresses of the original authors, giving off a misleading impression that even newer commits were made by the original project authors. Open source code commits signed with GPG keys of authentic project authors are one way of verifying the authenticity of code. Sursa: https://www.bleepingcomputer.com/news/security/35-000-code-repos-not-hacked-but-clones-flood-github-to-serve-malware/
- 1 reply
-
- 3
-

-
Cine de pe aici vine la locatie?
-
Surely you’ve been expecting our email about the DefCamp conference, right? We are happy to officially announce that we’re back with DefCamp - the offline edition, this fall, as we've become accustomed to over the last 10 years. Registrations are NOW OPEN, which means you can book your early bird ticket right now! Ready, steady, gooooo pack your bags and cyber knowledge for #DefCamp12! https://def.camp/tickets/ WHEN: 10th-11th November, 2022 WHERE: Bucharest, Romania Call for papers: https://def.camp/call-for-papers/ Call for contsts: https://def.camp/call-for-contests/ Become a volunteer: https://def.camp/become-a-volunteer/ Website: https://def.camp/
-
Salut, la noi din cate stiu nu e legal si probabil nici in alte tari. O solutie ar fi sa ii dai in judecata dar costa timp, bani si nu merita. Daca erai in SUA merita, acolo se poate da in judecata pentru orice si se pot scoate salarii pe ani de zile din ele. Cea mai simpla idee ar fi sa discuti cu manager-ul sau cu cineva mai sus de acolo, sa mentionezi ca tu nu esti de acord si ca nu vrei sa se intample asta. Daca nu se poate, sugestia mea sincera e sa pleci de acolo ca nu merita sa lucrezi pentru astfel de specimene. Cat despre monitorizare nu e nevoie de cine stie ce solutii, monitorizarea ecranului e o mizerie, exista insa solutii de interceptare trafic (root CA pe PC-uri), se verifica DNS-urile, DLP si multe altele printre care Microsoft Defender (cu care cineva poate lua shell la tine). Dar in principiu nu se stie ce faci decat daca faci lucruri suspecte. Putin pe langa subiect, se pare ca si oamenii de acolo sunt putin cam "sclavi" si nu iti recomand sa lucrezi cu persoane care si-ar vinde familia pentru o firma (si un salariu) de cacat. Extra: Daca iti cauti altceva, cauta pana nu se afunda SUA si ulterior alte state in recesiune. In mare ar fi de preferat companii mari care au sanse mici sa crape in conditii economice dificile, dar si acestea pot da oameni afara si pe principiul LIFO, bobocii sunt primii care dispar.
-
Un bot mi-a laudat articolul, tot o lauda este, me happy si nu sterg spamu ❤️
-
Pff, cere IP si port si nu le pune in codul generat
-
Mai aveți la dispoziție exact două săptămâni pentru a vă înscrie la Campionatul Național de Securitate Cibernetică - #RoCSC22
-
In 2022 va avea loc a treia ediție a Romanian Cyber Security Challenge - RoCSC, un eveniment anual de tip CTF ce urmărește să descopere tinere talente în domeniul securității cibernetice. La competiție pot participa tineri dornici să își demonstreze abilitățile, ce se pot înscrie online până în ziua concursului. Participanții se vor întrece pe 3 categorii de concurs: Juniori (16-20 de ani), Seniori (21-25 de ani) și Open (disponibil indiferent de vârstă). Participarea este gratuită. Tinerii vor trebui să-și demonstreze abilitățile în domenii precum mobile & web security, crypto, reverse engineering și forensics. Primii clasați la RoCSC22 vor avea oportunitatea de a reprezenta România la Campionatul European de Securitate Cibernetică - ECSC22. Calendarul ROCSC22: Etapa de calificare: 22.07 ora 16:00 - 23.07 ora 22:00 Finala ROCSC22: 06.08 Bootcamp pentru selectia echipei pentru competitia ECSC22: 17.08 - 21.08 Premii: Categoria Juniori: Locul I: 2000 euro Locul II: 1000 euro Locul III: 500 euro Locurile 4-10: premii speciale Categoria Seniori: Locul I: 2000 euro Locul II: 1000 euro Locul III: 500 euro Locurile 4-10: premii speciale Pentru a fi eligibili pentru premii, jucătorii trebuie să trimită prezentarea soluțiilor la contact@cyberedu.ro. Jucătorii care participă la categoria Open vor primi doar puncte pe platforma CyberEDU și nu sunt eligibili pentru premii. Competiția este organizată de Centrul Național Cyberint din cadrul Serviciului Român de Informații, Directoratul National de Securitate Cibernetica și Asociația Națională pentru Securitatea Sistemelor Informatice - ANSSI, alături de partenerii Orange România, Bit Sentinel, CertSIGN, Cisco, UIPath, KPMG, Clico, PaloAlto Networks. Programul ROCSC 2022 Inscrierile se fac pana la data de 22 Iulie 2022: Etapa de calificare: 22.07 ora 16:00 - 23.07 ora 22:00 Finala ROCSC22: 06.08 Bootcamp pentru selectia echipei pentru competitia ECSC22: 17.08 - 21.08 Pentru înscriere, apăsați aici. https://www.rocsc.ro/
- 1 reply
-
- 3
-
-

-

-
How we managed to hack the biggest Southeast Europe hackathon
Nytro replied to YKelyan's topic in Stiri securitate
Frumos! -
Ce fel de encoding e asta? bxor?
Nytro replied to WarLord's topic in Reverse engineering & exploit development
Da, e XOR cu cheia de acolo de jos. Il poti pune aici: https://gchq.github.io/CyberChef/#recipe=From_Decimal('Comma',false)XOR({'option':'Latin1','string':'euzF8}gfab'},'Standard',false) Doar ca mai e ulterior obfuscat. -
Ce fel de encoding e asta? bxor?
Nytro replied to WarLord's topic in Reverse engineering & exploit development
Conteaza cum e prelucrat acel payload, cel mai probabil e modificat (criptat, encodat, xorat orice) insa pentru a face ceva util trebuie reconstruit. Mai exact, trebuie sa vezi ce face binarul/exploitul cu acest payload inainte de a-l folosi. Shellcode nu pare sa fie. -
Ce fel de encoding e asta? bxor?
Nytro replied to WarLord's topic in Reverse engineering & exploit development
Noroc, asta e partea de inceput? Nu pare sa fie ceva comun. -
Blocare inregistrare dupa adresa IP pe IPS Community Suite
Nytro replied to CD-RAY's topic in Discutii incepatori
Dap Se poate inregistra de x ori, dar e rapid sa scapi de cineva asa.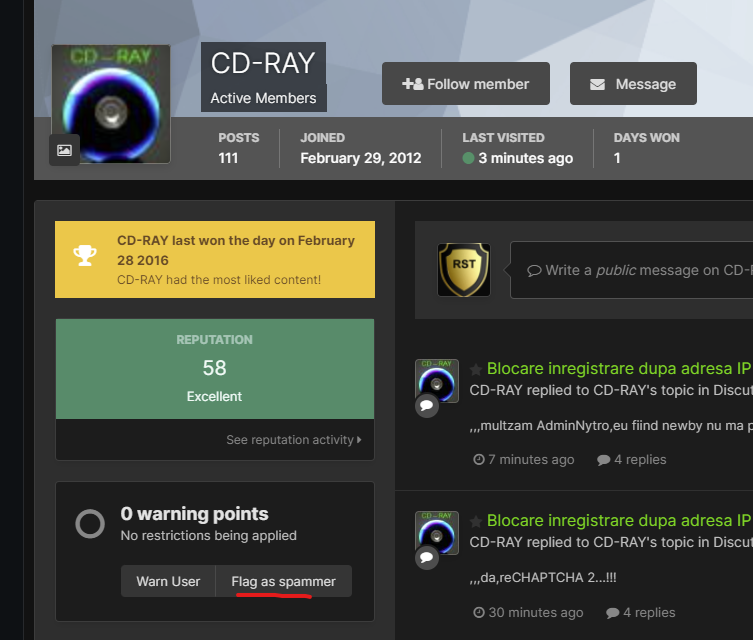
-
Blocare inregistrare dupa adresa IP pe IPS Community Suite
Nytro replied to CD-RAY's topic in Discutii incepatori
Si la noi intra mereu boti si posteaza porcarii, click pe profi, Flag as Spammer, problem solved. -
Adevarat, intr-o zi erau 3000+ in alta 11.000+. Cred ca RST a avut "atacuri mult mai grele" si cu iptables -j DROP s-au rezolvat instant. Sa vorbeasca cu cei care se ocupa de hosting-ul emag si alte servicii de Black Friday
-
Wed, May 25, 2022, 3:00 PM - 6:00 PM (your local time) To our dearest community: We are very happy to announce that we are restarting our meetup series. As you know, our team cares deeply about sharing information, tooling and knowledge as openly as possible. Therefore, we are proud to be able to have these specialists in cybersecurity share what they have learned on the frontlines: 18:00 - 18:45 Tiberiu Boros, Andrei Cotaie - Living off the land In security, "Living off the Land" (LotL or LOTL)-type attacks are not new. Bad actors have been using legitimate software and functions to target systems and carry out malicious attacks for many years. And although it's not novel, LotL is still one of the preferred approaches even for highly skilled attackers. Why? Because hackers tend not to reinvent the wheel and prefer to keep a low profile, i.e., leave no "footprints," such as random binaries or scripts on the system. Interestingly, these stealthy moves are exactly why it's often very difficult to determine which of these actions are a valid system administrator and which are an attacker. It's also why static rules can trigger so many false positives and why compromises can go undetected. Most antivirus vendors do not treat executed commands (from a syntax and vocabulary perspective) as an attack vector, and most of the log-based alerts are static, limited in scope, and hard to update. Furthermore, classic LotL detection mechanisms are noisy and somewhat unreliable, generating a high number of false positives, and because typical rules grow organically, it becomes easier to retire and rewrite the rules rather than maintain and update them. The Threat Hunting team at Adobe set out to help fix this problem. Using open source and other representative incident data, we developed a dynamic and high-confidence program, called LotL Classifier, and we have recently open sourced it to the broader security community. In this webcast you will learn about the LotL Classifier, intended usage and best practices, and how you can obtain and contribute to the project. 18:50 - 19:35 Ciprian Bejean - Lessons learned when playing with file infectors Linkedin: https://www.linkedin.com/events/bsidesbucharestonlinemeetup6927924413371678720/ Zoom: https://us05web.zoom.us/j/83643751520?pwd=UDU0RVE0UmZjWHN2UnJPR095SUxpQT09
-
Ne-or invadat site-urile
-
Justiţia britanică a decis extrădarea lui Julian Assange în SUA, unde va fi judecat pentru spionaj 20.04.2022 14:28 Julian Assange, în 2017, pe vremea când încă se afla în ambasada Ecuadorului la Londra. Foto: Getty Images Justiţia britanică a autorizat în mod oficial extrădarea în SUA a lui Julian Assange, fondatorul WikiLeaks. Autorităţile americane vor să-l judece pe Assange pentru spionaj, informează AFP. Tribunalul Westminster Magistrates de la Londra a emis în mod oficial o ordonanţă de extrădare a lui Assange şi revine acum ministrului de interne Priti Patel să o aprobe, deşi avocaţii apărării mai pot încă să facă apel la Înalta Curte. Prins într-o îndelungată saga judiciară, australianul este căutat de justiţia americană care vrea să-l judece pentru difuzarea, începând din 2010, a peste 700.000 de documente clasificate cu privire la activităţile militare şi diplomatice ale Statelor Unite, mai ales în Irak şi Afganistan, conform Agerpres. În 2010 și 2011, WikiLeaks a publicat mii de documente militare și diplomatice clasificate despre războaiele din Afganistan și Irak. Procurorii americani au spus că dezvăluirile au pus în pericol viețile a sute de oameni și că Assange era conștient de acest lucru. Urmărit în temeiul unei legi împotriva spionajului, el riscă 175 de ani de închisoare, într-un caz denunţat de organizaţii de apărare a drepturilor omului drept un grav atac împotriva libertăţii presei. Pe 14 martie, Julian Assange a văzut dispărând una din ultimele sale speranţe de a evita extrădarea, odată cu refuzul Curţii Supreme britanice de a-i examina recursul. Editor : M.L. Sursa: https://www.digi24.ro/stiri/externe/justitia-britanica-a-decis-extradarea-lui-julian-assange-in-sua-unde-va-fi-judecat-pentru-spionaj-1912295
-
- 1
-
-
RaidForums hacking forum seized by police, owner arrested By Ionut Ilascu April 12, 2022 The RaidForums hacker forum, used mainly for trading and selling stolen databases, has been shut down and its domain seized by U.S. law enforcement during Operation TOURNIQUET, an action coordinated by Europol that involved law enforcement agencies in several countries. RaidForum’s administrator and two of his accomplices have been arrested, and the infrastructure of the illegal marketplace is now under the control of law enforcement. 14-year old started RaidForums The administrator and founder of RaidForums, Diogo Santos Coelho of Portugal, aka Omnipotent, has been arrested on January 31 in the United Kingdom and is facing criminal charges. He has been in custody since the arrest, pending the resolution of his extradition proceedings. The U.S. Department of Justice today says that Coelho is 21 years old, which means that he was just 14 when he launched RaidForums in 2015. Three domains hosting RaidForums have been seized: “raidforums.com,” “Rf.ws,” and “Raid.Lol.” According to the DoJ, the marketplace offered for sale more than 10 billion unique records from hundreds of stolen databases that impacted people residing in the U.S. In a separate announcement today, Europol says that RaidForums had more than 500,000 users and “was considered one of the world’s biggest hacking forums”. “This marketplace had made a name for itself by selling access to high-profile database leaks belonging to a number of US corporations across different industries. These contained information for millions of credit cards, bank account numbers and routing information, and the usernames and associated passwords needed to access online accounts” - Europol Taking down the forum and its infrastructure is the result of one year of planning between law enforcement authorities in the United States, the United Kingdom, Sweden, Portugal, and Romania. It is unclear how long the investigation took but the collaboration between law enforcement agencies allowed authorities to paint a clear picture of the roles different individuals had within RaidForums. The European law enforcement agency shared few details in its press release but notes that the people that kept RaidForums running worked as administrators, money launderers, stole and uploaded data, and bought the stolen information. Coelho allegedly controlled RaidForums since January 1, 2015, the indictment reveals, and he operated the site with the help of a few administrators, organizing its structure to promote buying and selling stolen goods. To make a profit, the forum charged fees for various membership tiers and sold credits that allowed members to access privileged areas of the site or stolen data dumped on the forum. Coelho also acted as a trusted middleman between parties making a transaction, to provide confidence that buyers and sellers would honor their agreement. Members become suspicious in February Threat actors and security researchers first suspected that RaidForums was seized by law enforcement in February when the site began showing a login form on every page. However, when attempting to log into the site, it simply showed the login page again. This led researchers and forums members to believe that the site was seized and that the login prompt was a phishing attempt by law enforcement to gather threat actors' credentials. On February 27th, 2022, the DNS servers for raidforums.com was suddenly changed to the following servers: jocelyn.ns.cloudflare.com plato.ns.cloudflare.com As these DNS servers were previously used with other sites seized by law enforcement, including weleakinfo.com and doublevpn.com, researchers believed that this added further support that the domain was seized. Before becoming the hackers’ favorite place to sell stolen data, RaidForums had a more humble beginning and was used for organizing various types of electronic harassment, which included swatting targets (making false reports leading to armed law enforcement intervention) and "raiding," which the DoJ describes as "posting or sending an overwhelming volume of contact to a victim’s online communications medium." The site became well-known over the past couple of years and it was frequently used by ransomware gangs and data extortionists to leak data as a way to pressure victims into paying a ransom, and was used by both the Babuk ransomware gang and the Lapsus$ extortion group in the past. The marketplace has been active since 2015 and it was for a long time the shortest route for hackers to sell stolen databases or share them with members of the forum. Sensitive data traded on the forum included personal and financial information such as bank routing and account numbers, credit cards, login information, and social security numbers. While many cybercrime forums catered to Russian-speaking threat actors, RaidForums stood out as being the most popular English-speaking hacking forum. After Russia invaded Ukraine, and many threat actors began taking sides, RaidForums announced that they were banning any member who was known to be associated with Russia. Sursa: https://www.bleepingcomputer.com/news/security/raidforums-hacking-forum-seized-by-police-owner-arrested/
- 1 reply
-
- 2
-
-
-
The Role... Individual with background in development, capable of driving the security engineering needs of the application security aspects of products built in-house and/or integrated from 3rd parties and ensuring alignment with the PPB technology strategy. Work closely with the other Security Engineering areas (Testing & Cloud), wider Security team and project teams throughout the organization to ensure the adoption of best of breed Security Engineering practices, so that security vulnerabilities are detected and acted upon as early as possible in the project lifecycle. In addition to ensuring a continuous and reliable availability and performance of the existing security tools (both commercial and internally developed), the role also involves its continuous improvement (namely to cover emerging technologies/frameworks) and the coordination and hands-on development of the internally developed tools to meet new business and governance needs. What you´ll be doing... Liaise with business stakeholders to ensure all business projects are assessed from a security point of view and input is provided in order to have security requirements implemented before project is delivered; Develop and maintain engineering components autonomously (Python) that enable the Application Security team to ensure internally developed code is following security best practices; Research and evaluate emerging technologies to detect, mitigate, triage, and remediate application security defects across the enterprise; Understand the architecture of production systems including identifying the security controls in place and how they are used; Act as part of the InfoSec Engineering team, coordinating and actively participating in the timely delivery of agreed pieces of work. Ensure a continuous and reliable availability and performance of the existing security tools (both commercial and internally developed); Support the engineering needs of the InfoSec Engineering and wider Security function. Build strong business relationships with partners inside and outside PPB to understand mutual goals, requirements, options and solutions to complex or intangible application security issues; Lead and coach junior team members supporting them technically in their development; Incident response (Security related), capable to perform triage and with support from other business functions provide mitigation advise. Capable of suggest and implement security controls for both public & private clouds Maintain and develop components to support application security requirements in to Continuous Delivery methodologies; Research maintain and integrate Static Code Analysis tools (SAST) according companies' requirements; Plan and develop deliverables according SCRUM. What We're Looking For... Good written and verbal communication skills; A team player, who strives to maximize team and departmental performance; Resolves and/or escalates issues in a timely fashion; Knowledge sharing and interest to grow other team members; Effectively manages stakeholder interaction and expectations; Develops lasting relationships with stakeholders and key personnel across security; Influences business stakeholders to develop a secure mindset; Interact with development teams to influence and expand their secure mindset; Aplicare: https://apply.betfairromania.ro/vacancy/senior-infosec-engineer-6056-porto/6068/description/ Daca sunteti interesati, astept un PM si va pun in legatura cu "cine trebuie"
-
- 3
-

-
-
ÎNREGISTRARE Calendar activități Înregistrare concurs: Începând cu 01/03/2022 Etapa de pregătire: Începând cu 04/04/2022 Concurs individual: 06/05/2022 - 08/05/2022 (și finalul înregistrărilor) Concurs pe echipe: 20/05/2022 - 22/05/2022 Raport individual de performanță: 31/05/2022 Mai multe detalii despre calendarul de activități, aici. Premii premii în bani sau gadget-uri diplome de participare sau pentru poziția în clasamentul general rezultatele tale contribuie la clasamentul #ROEduCyberSkills raport individual de performanță recunoscut de companii si alte organizații - detalii, aici Cum mă pot înscrie? Înregistrarea este gratuită. Pentru a fi eligibil pentru premii și în clasamentul #ROEduCyberSkills, trebuie să fii înscris până la finalul probei individuale. ÎNREGISTREAZĂ-TE ACUM! Vei avea nevoie de această parolă la înregistrare: parola-unr22-812412412 Unde pot discuta cu ceilalți participanți? Pentru a intra în grupul de Discord - unde vom publica anunțuri și vei putea interacționa cu mentorii, trebuie să: folosești această invitație pentru a primi drepturi la secțiunea - "UNR22" trimiti un mesaj botului @JDB "/ticket 8xu4tR7jGN", dacă ești deja membru pe canalul de Discord oficial al CyberEDU.ro, ca în aceasta fotografie Detalii: https://unbreakable.ro/inregistrare
-
- 1
-